LabKey SQL Tutorial |
2024-04-16 |
SQL queries are a powerful way to customize how you view and use data. In LabKey Server, queries are the main way to surface data from the database: using a query, you pick the columns you want to retrieve, and optionally apply any filters and sorts. SQL Queries are added to the database schema alongside the original, core tables. You can query one table at a time, or create a query that combines data from multiple tables. This topic describes how to create and modify queries using the user interface:
Queries also provide staging for reports: start with a base query and build a report on top of that query. Queries can be created through the graphical user interface (as shown in this topic) or through a file-based module.
 Now that you have a SQL query, you can display it directly by using a query web part, or use it as the basis for a report, such as an R report or a visualization. It's important to note that nothing has changed about the underlying query (core.Users) on which your user-defined one (core.UsersQuery) is based. You could further define a new query based on the user-defined one as well. Each layer of query provides a new way to customize how your data is presented for different needs.
SQL Resources
LabKey Server provides a number of mechanisms to simplify SQL syntax, covered in the topics linked here:- LabKey SQL: LabKey SQL is a SQL dialect that translates your queries into the native syntax of the SQL database underlying your server, whether it is PostgreSQL or Microsoft SQL Server. This lets you write in one SQL dialect but communicate with many SQL database implementations.
- Lookups: Lookups join tables together using an intuitive syntax.
- Query Metadata: Add additional properties to a query using metadata xml files, such as: column captions, relationships to other tables or queries, data formatting, and links.
Permissions: To create SQL queries within the user interface, you must have both the "Editor" role (or higher) and one of the developer roles "Platform Developer" or "Trusted Analyst".
Create a SQL Query
In this example, we will create a query based on the Users table in the core schema.- Select (Admin) > Go To Module > Query.
- Learn more about using the query schema browser here: SQL Query Browser.
- Open the core schema in the left hand pane and select the Users table.
- Click the button Create New Query (in the top menu bar). This tells LabKey Server to create a query, and when you have selected a table first, by default it will be based on that table.
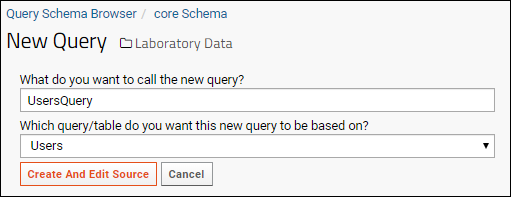
- On the New Query page:
- Provide a name for the query (in the field "What do you want to call the new query?"). Here we use "UsersQuery" though if that name is taken, you can use something else.
- Confirm that the Users table is selected (in the field "Which query/table do you want this new query to be based on?")
- Click Create and Edit Source.

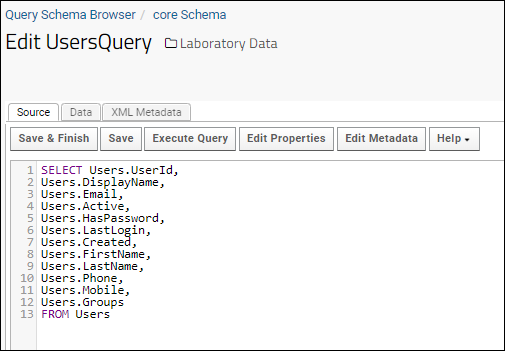
- LabKey Server will provide a "starter query" of the Users table: a basic SELECT statement for all of the fields in the table; essentially a duplicate of the original table, but giving you more editability. Typically, you would modify this "starter query" to fit your needs, changing the columns selected, adding WHERE clauses, JOINs to other tables, or substituting an entirely new SQL statement. For now, save the "starter query" unchanged.
- Click Save & Finish.
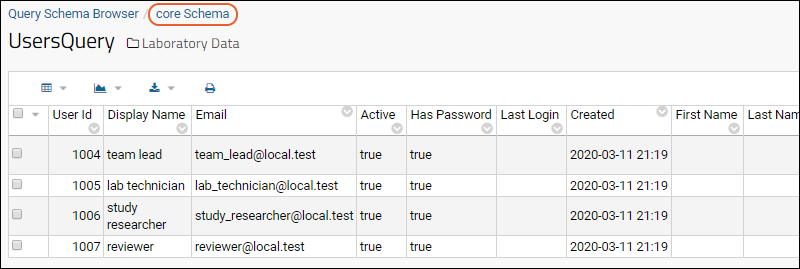
- The results of the query are displayed in a data grid, similar to the below, showing the users in your system.
- Click core Schema to return to the query browser view of this schema.
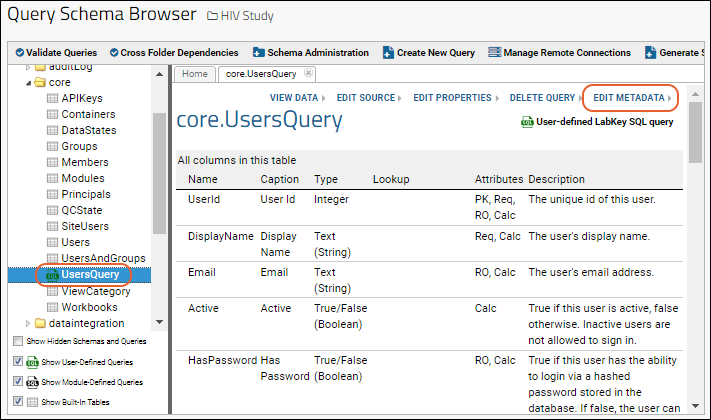
- Notice that your new query appears on the list alphabetically with an icon indicating it is a user-defined query.
Query Metadata
Like the original table, each query has accompanying XML that defines properties, or metadata, for the query. In this step we will add properties to the query by editing the accompanying XML. In particular we will:- Change the data type of the UserId column, making it a lookup into the Users table. By showing a clickable name instead of an integer value, we can make this column more human-readable and simultaneously connect it to more useful information.
- Modify the way it is displayed in the grid. We will accomplish this by editing the XML directly.
- Click Edit Metadata.
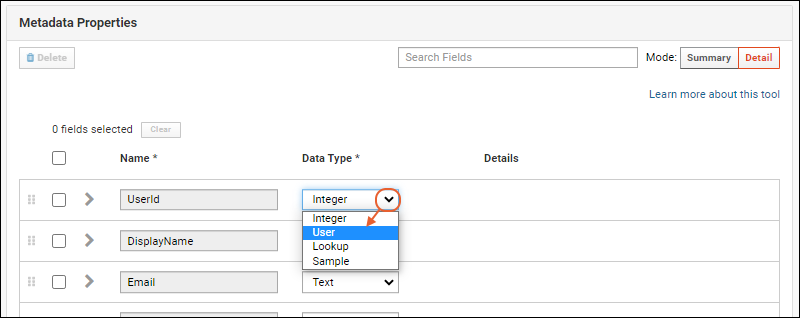
- On the UserId row, click in the Data Type column where it shows the value Integer
- From the dropdown, select User. This will create a lookup between your query and the Users table.
- Click Apply.
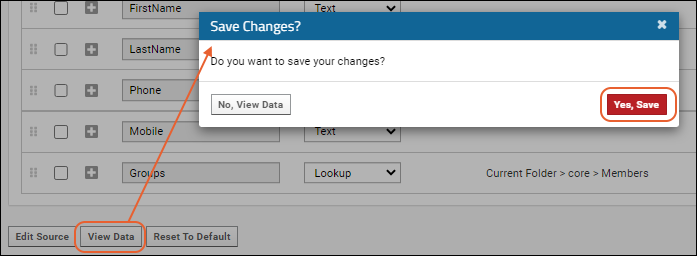
- Scroll down, click View Data, and click Yes, Save in the popup to confirm your changes.

- Notice that the values in the User Id column are no longer integers, but text links with the user's display name shown instead of the previous integer value.
- This reflects the fact that User Id is now a lookup into the Users table.
- The display column for a lookup is (by default) the first text value in the target table. The actual integer value is unchanged. If you wish, you can expose the "User Id" column to check (use the grid customizer).
- Click a value in the User Id column to see the corresponding record in the Users table.
- Click core Schema to return to the Query Browser.
- Click Edit Source and then select the XML Metadata tab.
- The XML metadata will appear in a text editor. Notice the XML between the <fk>...</fk> tags. This tells LabKey Server to create a lookup (aka, a "foreign key") to the Users table in the core schema.
- Next we will modify the XML directly to hide the "Display Name" column in our query. We don't need this column any longer because the User Id column already displays this information.
- Add the following XML to the document, directly after the </column> tag (i.e directly before the ending </columns> tag). Each <column> tag in this section can customize a different column.
<column columnName="DisplayName">
  <isHidden>true</isHidden>
</column>
- Click the Data tab to see the results without leaving the query editor (or saving the change you made).
- Notice that the Display Name column is no longer shown.
- Click the XML Metadata tab and now add the following XML immediately after the column section for hiding the display name. This section will display the Email column values in red.
<column columnName="Email">
  <conditionalFormats>
    <conditionalFormat>
      <filters>
        <filter operator="isnonblank"/>
      </filters>
      <textColor>FF0000</textColor>
    </conditionalFormat>
  </conditionalFormats>
</column>
- Click the Data tab to see the change.
- Return to the Source tab to click Save & Finish.