Table of Contents |
guest 2024-04-19 |
Get Started with Sample Manager
Tutorial: Learn Sample Manager
Tutorial: Add Samples
Tutorial: Define Assays
Tutorial: Add Users and Assign Roles
Tutorial: Outline Workflow
Tutorial: Track Sample Sources
Release Notes - Sample Manager
Sample Manager Dashboard
My Account
Apply Naming Prefix
Sample Manager - FAQ
Samples
Create a Sample Type
Create or Import Samples
Create Samples from Grid
Import Samples from File
Sample ID Naming
Sample Lineage / Parentage
Aliquots, Derivatives, and Sample Pooling
Sample Timeline
Manage Samples
Manage Sample Status
Edit Selected Samples
Sample Finder
Sample Search
Integrate with BarTender
Barcode Fields
Sample Picklists
Sources
Create Sources
Associate Samples with Sources
Manage Sources
Experiment / Assay Data
Describe Assay Data Structure
Import Assay Data
Manage Assay Designs
Manage Assay Data
Workflow
Start a New Job
Manage Job Queue
Complete Tasks
Manage Notifications
Edit Jobs and Tasks
Manage Users
Permission Roles
Create a Job Template
Manage Jobs and Templates
Freezer Management
Create a Freezer
Store Samples in Freezers
Manage Freezers
Manage Storage Unit Types
View Freezer Details
Edit Freezer Definition
Manage Freezer Locations
Move Stored Samples
Manage Stored Samples
Check Out and Check In
View Storage Activity
Migrate Storage Data into Freezer Management
Data Resources
Data Grid Basics
Data Import Guidelines
Audit History
Search
Field Editor
Field Properties Reference
Attach Images and Other Files
URL Field Property
Date and Number Formats Reference
String Expression Format Functions
Explore Sample Manager
Help Links
Click to Explore
Sample Manager Overview
LabKey Sample Manager helps you efficiently manage your laboratory workflows. The intuitive interface makes it easy to:

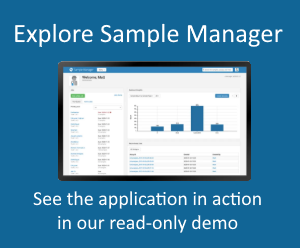
Explore LabKey Sample Manager. See what a working system looks like in our read-only example project: You can take a guided tour through this Sample Manager example project by following this topic:
- Store and manage sample inventories
- Link to associated assay and experiment result data
- Track laboratory workflows and sample processing
- Use Freezer Management tools to track samples in storage. (Learn more in the documentation.)
Explore LabKey Sample Manager. See what a working system looks like in our read-only example project: You can take a guided tour through this Sample Manager example project by following this topic:
Topics
- Tutorial: Learn Sample Manager: Step by step instructions to start using Sample Manager
- Get Started with Sample Manager
- Sample Manager Dashboard
- My Account
- Search
More Answers
- Release Notes - Sample Manager: What has changed in Sample Manager
- Sample Manager - FAQ
Get Started with Sample Manager
Welcome to LabKey Sample Manager
This topic will help you get started as an administrator using LabKey Sample Manager for sample tracking. First, complete the tutorial to learn to add sample information, define assays, and create the workflow processes you will follow. When you first create a LabKey Sample Manager project, it will be empty, so these topics are designed to populate each area of the application with tutorial examples.Tutorial
After completing the tutorial, you can return to this page to follow this sequence to start adding your own data.Configure Freezers
Matching your physical storage to virtual storage locations in the app can make it easy to know where to find the samples you need.Add Sample Inventories
Getting your sample information loaded is the heart of using Sample Manager. Define the structure of the data to describe each "type" of sample in your system. Once the types are defined, the samples can be created within the application or via spreadsheet import.Associate Sources
If your samples have physical or biological sources that you want to track, you can learn about adding them and associating them with samples in these topics:Define Assays
The data you obtain from running instrument tests on your samples will be uploaded as an assay to LabKey Sample Manager. These topics will guide you in designing assays and uploading your data.Outline Workflow
Your laboratory workflow can be managed by creating workflow jobs for the sequences of tasks your team performs. Add your users, set permissions, and organize your jobs and templates following these topics:Explore More
Now that you understand the basics, you can learn more about real use cases by exploring our read-only example of a LabKey Sample Manager application in active use.Tutorial: Learn Sample Manager
This tutorial will help an administrator get started with a new, empty Sample Manager project. Users of the system may also find it helpful to read along to understand how the underlying structures are created.
Administrator Tutorial
Learn the tasks of an administrator by adding a few "Tutorial" samples, defining an assay, and creating simple workflow jobs. Define sources for the samples and see how lineage and timeline features will help users manage their data.These topics will give you a quick introduction to the tools and process before you load your real data.Topics
- Step 1: Tutorial: Add Samples
- Step 2: Define Assays
- Step 3: Add Users and Assign Roles
- Step 4: Outline Workflow
- Step 5: Track Sample Sources
User Tutorial Sections
Users of the Sample Manager application without administrative permissions but with the "Editor" role will perform the following tasks. Portions of the tutorial that are common user tasks are: Users with the "Reader" role (or higher) will be able to:Tutorial: Add Samples
Sample Types help you organize samples in your lab and allow you to add fields that help you describe attributes of those samples for easy tracking of data. Each individual Sample has a unique ID and is a member of one Sample Type. This topic assumes you are starting from an "empty" application and walks you through creating a "Tutorial Samples" type and populating it with a set of samples to use in the next steps.
 Once one or more Sample Types have been created on your server, you will click the Sample Types heading from the main menu, then select Create > Sample Type.


 You will now see the details page for this new Sample Type and are ready to create your first samples in the system.


 Learn more about importing samples from a file in this topic: Import Samples from File
Create a New Sample Type
Create the first Sample Type in the system by clicking the linked word here in the empty Dashboard Insights panel or by selecting Create a sample type from the main menu under Sample Types.Once one or more Sample Types have been created on your server, you will click the Sample Types heading from the main menu, then select Create > Sample Type.
Define Sample Type Properties
- Enter the Name: "Tutorial Samples"
- Replace the default contents of the Naming Pattern box with the following, so that samples of this type will be clearly identified as part of this tutorial:
Tutorial-${genId:number('000')} - Click Add Parent Alias to tell the system the name of the column where we will include information about parent samples with our data.
- Enter "ParentSample" as one word to match our spreadsheet.
- Select "(Current Sample Type)"
- If you also see a button for Add Source Alias you can ignore it for now.
- Click the Label Color selector to choose a color to associate with samples of this type. Our images show orange, but you can select any color you like by clicking, entering a hex value, or individual RGB values.
- Display stored amount in: Select "mL (milliliters)". Notice that a variety of built-in solid and liquid unit measurements are available, as well as "unit" for cases where each sample is tracked independent of volume.
- Barcodes: Ignore this setting for this tutorial. Learn more about barcodes in this topic: Barcode Fields
Define Sample Fields
- Click the Fields section to open it.
- The default panel lets you either import or infer fields from file.
- For this tutorial, click Manually Define Fields.
- In the field editor:
- For this tutorial, disregard the blue banner about adding a Unique ID field for barcodes.
- Enter the name "Project" and leave the default type "Text" selected.
- Click Add Field to add another row, enter then name "Concentration" and select "Decimal (floating point)" as the data type.
- Click Finish Creating Sample Type.
Import Samples from File
Once you have defined the Sample Type for your samples, you can import them by typing directly into a grid, bulk entering values, or by importing a spreadsheet of sample information, as used in this tutorial.- Download this spreadsheet to use:
- The "Tutorial Samples" Sample Type is now available on the main menu. Click to open it.
- Select Create > Tutorial Samples.
- Click Import Samples from File.
- Confirm that "Tutorial Samples" is selected as the Sample Type.
- Drag and drop the "TutorialSamples.xlsx" file into the target area.
- You will see a preview of the data file as it will populate rows in the type. A unique "Sample ID" will be generated for each line based on the naming pattern we provided.
- Click Import.
- When complete, you will see the samples listed.
- The generated Sample IDs for each row may vary if other samples have already been created on your system.
- There are a number of additional built-in columns created for you, including but not shown below, the creation date and user.
Other Ways to Import and Create Samples
You can also add samples in a grid or using bulk insert methods. Learn more in this topic:View Sample Details
You can view details about your samples by clicking the Sample ID. For example, scroll down and click Tutorial-018.On the details page, you have several tabs with information:- Overview: basic details including the values of all sample properties and fields as well as the storage location (if any).
- Lineage: parentage and source information (Tutorial-018 has both parent and child sample linkages provided in our example file)
- Aliquots: any aliquots created from this sample
- Assays: all data about this sample
- Jobs: all jobs that involve this sample
- Timeline: a history of events for this sample (so far only registration has occurred)
Related Topics
- Create a Sample Type: More details about creating sample types.
- Create or Import Samples: More ways to create and import samples.
- Sample ID Naming: Sample ID naming
Start Over | Next Step (2 of 5)
Tutorial: Define Assays
Assay Designs describe the structure of assay data you will gather for your samples. Similar to sample types, you define the properties and fields of your experiment data. Assay data will also be mapped to the sample that it is about. In this topic, we define a "Tutorial Assay" and import an example run of data for the "Tutorial Samples" we created in the previous step.


 Now that your assay design has been created, you can use it to import the data from the same example spreadsheet.


 You will see the grid of results. This grid allows you to filter, search, and sort the result data.
Create Assay Design
- From the main menu, select Assays > Create an assay design.
- If any assay designs have already been created, you will not see this link. In that case, click Assays and then select Create > Assay Design.
Define Assay Properties
Assay properties are elements that apply to all runs that use this assay design, i.e. one value is set for all runs.- Enter:
- Name: Tutorial Assay
- Description: Complete blood count
- Active: Leave this box checked; unchecking it will archive the assay design.
- Check both boxes for Editable Runs and Editable Results to give you the most options to explore with this tutorial assay design.
Add Run Fields
Assay run fields are set once for each run that uses this assay design, i.e. one value is set for each run.- Click the Run Fields section to open it.
- Click Manually Define Fields.
- Click Add Field to add each of the fields shown below and select the Data Type shown:
- "Date" of type "Date Time"
- "Instrument" of type "Text"
Add Results Fields
You could also manually add results fields, which will be different for each row of data within a given run, but in this tutorial, we will infer them from an example spreadsheet.- Download: TutorialAssay_Run1.xlsx
- Click the Results Fields section to open it.
- Drag and drop the "TutorialAssay_Run1.xlsx" into the target area.
- The results fields will be inferred from your upload and shown in the panel. You could make adjustments if needed, but for this tutorial just accept all defaults.
- Notice that the SampleID field from the example spreadsheet has been inferred to be of type "Sample" automatically. All assay results must map to samples, so if the system could not infer which field contained that mapping, you would have had to assign it yourself.
- By default samples of any sample type (i.e. "All Samples") could be uploaded for this assay. If needed you could constrain the lookup to a specific sample type for this specific assay design.
- For this tutorial accept the defaults.
- Click Finish Creating Assay Design.
Import Assay Data
The "TutorialAssay_Run1.xlsx" spreadsheet you already downloaded contains some "Tutorial Assay" data for some of the samples we created in the previous tutorial step.You can confirm that the expected set of samples already exists by selecting Menu > Tutorial Samples and seeing that "Tutorial-003 through Tutorial-012" already exist. (Hint: Sort by Sample ID or use the to see the second page of samples.)- If you navigated away to check samples, reopen your Assay Design page by selecting Tutorial Assay from the main menu.
- Click Import Data.
- Enter Run Details:
- Assay Id: Enter "Run1". If you leave this blank, a run name will be generated for you based on the assay design name and current day and time.
- Comments are optional.
- Date: Enter "2019-10-01" or click the field to use the day/time date picker.
- Instrument: Enter "INS-01"
Upload Results from File
- In the Results panel, the Upload Files tab is selected by default.
- Drag and drop the "TutorialAssay_Run1.xlsx" file into the target area.
- You will see the first three rows of the data file in the preview section.
- Click Import.
Other Ways to Enter Results
The other tabs in the Import Data interface allow you to copy and paste data from a spreadsheet or enter values directly in a grid, individually or in bulk. Learn more in this topic:Related Topics
Previous Step | Next Step (3 of 5)
Tutorial: Add Users and Assign Roles
Now that we have created some Samples and learned how to describe and import assay data, it's time to add some other users so we can understand how the workflow management tools work in Sample Manager. To do this, we will add a few fake users and assign them different roles. You must have administrator permissions yourself to complete the tasks in this step.

In the popup:


Add Users
- To add one or more new users, select Administration from the user menu.
- You'll start on the User Management page, i.e. the Users tab.
- Click Create.
In the popup:
- Enter one or more email addresses, each on it's own line for each user you want to create.
- For this tutorial, create users for
team_lead@local.test
lab_technician@local.test
reviewer@local.test - Select the desired Role(s) for the users you are creating. For the tutorial, leave only the default Reader for now.
- Uncheck the box to Send notification emails to all new users since these are not real email addresses.
- Click Create Users.
Assign Roles
Once users have been defined, an administrator can assign them one of the three available permission levels:- Readers: Have a read-only view of the application.
- Editors: Have the Readers' access, and can also add new information or edit data related to samples, assays, and jobs.
- Administrators: Have full control over the application, with the exception of the storage editor role below. This includes user management, permission assignments, and creating and editing sample types, assays, and job templates.
- Storage Editors: Storage Editors may read, add, edit, and delete data related to items in storage, picklists, and jobs.
- Storage Designers: Storage Designers may read, add, edit, and delete data related to storage locations.
- Reopen user management if you closed it by selecting Administration from the user menu. Click the Permissions section.
- All our fake users are currently in the Reader role.
- Click the for the Editors role to open it.
- Click the Add member dropdown and select "team_lead".
- Selected users will be shown in the panel for the role as you go.
- Click Add member again and select "lab_technician".
- Each time you select a user, the details for that user will be shown on the right.
- In the image below, the Editor role is being granted to the team lead and lab technician; all three fake users we added are still also members of the Reader role.
- You may also want to confirm that your own user account is assigned the Storage Editor role to explore freezer management features later.
View Audit History
This is a good time to mention that all actions in Sample Manager are logged for later use in an audit. The audit logs can be viewed from any tab within the Administration dashboard, and from many other places in the application. Select > View Audit History. The log opens to the section most relevant to where you were when you opened it.Learn more in this topic: Audit HistoryRelated Topics
Previous Step | Next Step (4 of 5)
Tutorial: Outline Workflow
In this step of the tutorial, you will create a simple job and template, helping you understand how to use jobs, tasks, and templates to represent an efficient sample management workflow. Jobs can include a set of samples, direct links to the necessary assays, and notification mechanisms to ensure the right people know about actions that impact their work.


 In the popup, you will name the template and provide an optional description. For this tutorial, name the template "Tutorial Job Template 1."

 Click the name of the job to open it. On the Overview page, you'll see summary information, including the list of tasks. The current task is assigned to you.
In the Status column, you'll now see that the second task, "Run Tutorial Assay" is now "In Progress".The assay task is assigned to the "lab technician" but as an administrator you have the ability to complete any task in the system. Let's use that power here to illustrate assay data import from within the workflow system.
Click the name of the job to open it. On the Overview page, you'll see summary information, including the list of tasks. The current task is assigned to you.
In the Status column, you'll now see that the second task, "Run Tutorial Assay" is now "In Progress".The assay task is assigned to the "lab technician" but as an administrator you have the ability to complete any task in the system. Let's use that power here to illustrate assay data import from within the workflow system.

Create a Job with Selected Samples
- Select "Tutorial Samples" from the Sample Types section of the main menu.
- Check the boxes to select "Tutorial-018", "Tutorial-019" and "Tutorial-020".
- We're including some assay data for these specific samples below.
- Select Jobs > Start a Job with Selected Samples from the menu above the grid.
Job Details and Priority
On the Details tab of the job creation wizard, enter general properties, assignments, priority, and upload any attachments needed:
- Job Name: "Tutorial Workflow Job"
- Description: "This is an example job with three tasks"
- Job owner: Select "team lead" for this tutorial. This is the user who "owns" the overall job completion, not necessarily owns the tasks. Note that if you did not create the fake "team lead" user and assign them the role of "Editor" in the previous step, you won't be able to select them here and can just select yourself.
- Notify these users: Add users who should get notifications as this job progresses. Select yourself here.
- Job start and due dates: Use the date picker to select any begin and end dates you like for the job as a whole. Each task can have an individual due date as well.
- Priority level: Use the pulldown menu to select "Medium".
- Attachments: For this tutorial, you can ignore this field. In practice, you could upload a protocol document, detailed instructions, label image file, or any other file attachment required for the job.
Define Job Tasks
Click the Tasks tab to define the tasks for this job.Any job can be composed of several tasks to complete in sequence. You'll see an empty task when you first open the wizard. Click Add Task to add additional tasks.For each task in your job, enter the necessary details:- Name
- Description
- Assign to: Select a user from the dropdown
- Assays to perform: Select one or more assay here
- Due date: For this specific task
| Task Name | Assign to | Assays to Perform (if any) |
|---|---|---|
| Prepare Samples | Yourself | |
| Run Tutorial Assay | lab technician | Tutorial Assay |
| Review Results | team lead |
Assign Samples
Click the Input Samples tab to open it. You will see the samples you selected listed on the Included Samples tab.
Finish Creating Job and Template
Before finishing job creation, consider whether you want to make this job available as a template for creating similar future jobs. Creating a template from a job is offered only during initial job creation.- Use the dropdown menu option Save as Template and Start Job to create a template and start this job.
In the popup, you will name the template and provide an optional description. For this tutorial, name the template "Tutorial Job Template 1."
- Click Save Template.
Complete Job Tasks
Click the Sample Manager logo to return to the home page of the application. You will now see that the Jobs section has begun to grow. Your Queue includes the job you just created (because the first task is assigned to you).Click the name of the job to open it. On the Overview page, you'll see summary information, including the list of tasks. The current task is assigned to you.- Click Complete Current Task to mark it as complete.
- Click the Tasks tab to see more detail about the task. In this view, you have an Import Data button since the task involves importing data to the "Tutorial Assay".
- Click Import Data.
- Enter:
- Assay Id: "Run2"
- Date: Today's date (click the entry field to use the date picker)
- Instrument: INS-01
- Download this example data sheet: TutorialAssay_Run2.xlsx, then drop it into the upload window.
- You'll see the data preview.
- Click Import.
- When complete, you'll see the imported data.
- To return to the job details page, you can click the bolded word "here" in the green "Successfully created assay run" banner. For this tutorial, navigate as follows to see how task assignment changes your task queue.
- Click the Sample Manager logo to return to the home page.
- In the Jobs section, notice that the job is no longer shown in Your Queue because the current task is not assigned to you. To find the job, click Active Jobs.
- Click the name Tutorial Workflow Job.
- Click the Assays tab to see the data you just uploaded.
- Click the Tasks tab to return to task details.
- You can now click Complete Task to mark the lab technician's task complete.
View Timeline
Each sample has a record of all activities that happen for it within the system. To see a timeline, select Sample Types > Tutorial Samples from the main menu and locate "Tutorial-020". Click the name to open details about that sample.Click the Timeline tab to see the event timeline for this sample.- You'll see when it was created (registered), when it was added to the job, and when assay data was uploaded for it.
- You're also shown the current status of the sample on the right, including who last handled it.
- If you click an event, such as "Assay Data Loaded" you'll see an additional panel on the right which includes details including a link to the run of data you uploaded.
Related Topics
Previous Step | Next Step (5 of 5)
Tutorial: Track Sample Sources
Sources help you track where your samples came from and trace common attributes across sets of samples from the same source. Sources can be:

 You can now select your new source from the Source Types section of the main menu.
 Now you have two Source Types and we can mark the Samples as having come from one or both types of source.
 We now will update the samples we created earlier.
 The existing samples have now been updated with source information.

 Learn more about the timeline here: Sample Timeline
- Physical like labs, vendors, locations, studies, etc.
- Biological like patients, mice, trees, cell lines, etc.
- Create a Source Type
- Create Sources (Populate a Source Type)
- Create and Populate a Second Source Type
- Associate Samples with Sources
- View Lineage
- View Timeline
Create a Source Type
Creating source types is very similar to the creation of sample types covered in the first step of this tutorial.- From the main menu, look under Source Types and click Create a source type.
- Once source types have been created, click Source Types, then select Create > Source Type.
- Enter:
- Name: Tutorial Labs
- Delete the default Naming Pattern that is provided (and ignore the placeholder text). We will provide unique source names when we create them.
- Click the Fields section to open it.
- Download this spreadsheet and drop it in the upload area: TutorialLabSources.xlsx
- You will see the inferred fields.
- Notice the blue banner informing you that reserved fields were found and are not shown. This refers to the "SourceId" field that is present in the data file and cannot be "defined again."
- Click Finish Creating Source Type.
Create Sources (Populate a Source Type)
- Select your Tutorial Labs Source Type from the main menu, if you navigated away.
- Select Create > Tutorial Labs.
- Click Import Sources from File.
- Drag and drop the same "TutorialLabSources.xlsx" spreadsheet into the target area.
- You'll see a preview of the first three lines.
- Click Import to import the file and create these sources.
Create and Populate a Second Source Type
Follow the two sections above to create another source type to use for our tutorial samples, in this case a biological one.- From the page for the "Tutorial Labs" you just imported, select Create > Source Type.
- Name this type "Creatures".
- Delete the Naming Pattern.
- Download and use this file for inferring the Fields: TutorialCreatures.xlsx
- Click Finish Creating Source Type.
- Select Create > Creatures.
- Click Import Sources From File.
- Drag and drop the same "TutorialCreatures.xlsx" spreadsheet into the target area.
- Click Import.
Associate Samples with Sources
When we originally created the "Tutorial Samples" type, we had not defined these sources, and did not include a way to reference them in the Sample Type definition.We can now use these new sources when using the Create Samples from Grid entry method for new samples, or by directly editing each individual Sample. Learn more in this topic: Associate Samples with Sources.For this tutorial, we want to add Source information to our existing Samples. To do so, we must modify the Sample Type design to identify the columns where we will import source information, i.e. the source aliases.- From the main menu, select the Tutorial Samples Sample Type.
- Select > Edit Sample Type Design.
- Click Add Source Alias.
- Enter the Source Alias "Lab", and select the Tutorial Labs Source Type.
- Click Add Source Alias again.
- Enter the Source Alias "Creature" and select the Creatures Source Type.
- Click Finish Updating Sample Type.
- If any samples are currently selected, click Clear All.
- Select Create > Tutorial Samples.
- Click Import Samples from File.
- Check the box to Update data for existing samples during this file import.
- Download this file: TutorialSamplesWithSources.xlsx then drop it into the target area.
- You'll see a preview:
- Click Import.
View Lineage
As an example, click the Tutorial-020 sample. Click the Lineage tab. You'll see a graphical representation of the creature and lab sources for this sample, as well as child samples 'derived' from it. Click the icon for either source to see more details about it in the panel to the right.
View Timeline
In the previous step, we saw how assay data import is included in the timeline for a sample, open the Timeline tab for the "Tutorial-020" sample to see that the update we just completed was also recorded for this sample. Clicking the timeline event populates the Event Details panel.Learn more about the timeline here: Sample Timeline
Congratulations!
Now that you have learned to use Sample Manager with our tutorial content, you are ready to start loading your own data into the system. Learn more in the documentation for each area:Previous Step
Release Notes - Sample Manager
LabKey Sample Manager makes it easy to manage samples, storage, data collection, and workflows in a small or medium size lab environment. Learn more about the features and capabilities of Sample Manager on our website.This topic details changes and enhancements in each release as a guide to help users track changes.
Release 22.3, March 2022
- Sample Finder: Find samples based on source and parent properties, giving users the flexibility to locate samples based on relationships and lineage details. (docs)
- Redesigned main dashboard featuring storage information and prioritizing what users use most. (docs)
- Updated freezer overview panel and dashboards present storage summary details. (docs)
- Available freezer capacity is shown when navigating freezer hierarchies to store, move, and manage samples. (docs | docs)
- Storage labels and descriptions give users more ways to identify their samples and storage units. (docs)
Release 22.2, February 2022
- New Storage Editor and Storage Designer roles, allowing admins to assign different users the ability to manage freezer storage and manage sample and assay definitions. (docs)
- Note that users with the "Administrator" and "Editor" role no longer have the ability to edit storage information unless they are granted one of these new storage roles.
- Multiple permission roles can be assigned to a new user at once. (docs)
- Sample Type Insights panel summarizes storage, status, etc. for all samples of a type. (docs)
- Sample Status options are shown in a hover legend for easy reference. (docs)
- When a sample is marked as "Consumed", the user will be prompted to also change it's storage status to "Discarded" (and vice versa). (docs | docs)
- User-defined barcodes in integer fields can also be included in sample definitions and search-by-barcode results. (docs)
- Search menu includes quick links to search by barcode or sample ID. (docs)
Release 22.1, January 2022
- A new Text Choice data type lets admins define a set of expected text values for a field. (docs)
- Naming patterns will be validated during sample type definition. (docs)
- Editable grids include visual indication when a field offers dropdown choices. (docs)
- Add freezer storage units in bulk. (docs)
- User-defined barcodes can be included in Sample Type definitions as text fields and are scanned when searching samples by barcode. (docs | docs)
- If any of your Sample Types include samples with only strings of digits as names, these could have overlapped with the "rowIDs" of other samples, producing unintended results or lineages. With this release, such ambiguities will be resolved by assuming that a sample name has been provided. (docs)
Release 21.12, December 2021
- The Sample Count by Status graph on the main dashboard now shows samples by type (in bars) and status (using color coding). Click through to a grid of the samples represented by each block. (docs)
- Grids that may display multiple Sample Types, such as picklists, workflow tasks, etc. offer tabs per sample type, plus a consolidated list of all samples. This enables actions such as bulk sample editing from mixed sample-type grids. (picklists | tasks | sources)
- Improved display of color coded sample status values. (docs)
- Include a comment when updating storage amounts or freeze/thaw counts. (docs)
- Workflow tasks involving assays will prepopulate a grid with the samples assigned to the job, simplifying assay data entry. (docs)
Release 21.11, November 2021
- Archive an assay design so that new data is disallowed, but historic data can be viewed. (docs)
- Manage sample status, including but not limited to: available, consumed, locked. (docs)
- An additional reserved field "SampleState" has been added to support this feature. If your existing Sample Types use user defined fields for recording sample status, you will want to migrate to using the new method.
- Incorporate lineage lookups into sample naming patterns (docs)
- Assign a prefix to be included in the names of all Samples and Sources created in a given project (docs)
- Prevent users from creating their own IDs/Names in order to maintain consistency using defined naming patterns (docs)
Release 21.10, October 2021
- Customize the aliquot naming pattern. (docs)
- Record the physical location of freezers you manage, making it easier to find samples across distributed sites. (docs)
- Manage all samples and aliquots created from a source more easily. (docs)
- Comments on workflow job tasks can be formatted in markdown and multithreaded. (docs)
- Redesigned job tasks page. (docs)
Release 21.9, September 2021
- Edit sources and parents of samples in bulk
- View all samples (and aliquots) created from a given Source
- Lineage graphs changed to show up to 5 generations instead of 3
- Redesigned job overview page
Release 21.8, August 2021
- Aliquot views available at the parent sample level. See aggregate volume and count of aliquots and sub-aliquots.
- Find Samples using barcodes or sample IDs
- Import aliases for sample Sources and Parents are shown in the Sample Type details and included in downloaded templates.
- Improved interface for managing workflow jobs and templates.
Release 21.7, July 2021
- Sample actions can be initiated from Freezer views
- Sample actions can be initiated from Source detail views
Release 21.6, June 2021
- Create Aliquots of samples singly or in bulk
- Create and manage Picklists of samples to simplify operations on groups of samples
- Track movement of storage units within a freezer, or to another freezer
- Minor change in freezer editing behavior that the hierarchy is initially collapsed.
Release 21.5, May 2021
- Copy a Freezer definition
- Samples and Sources can include images and other file attachments
Release 21.4, April 2021
- Barcode generation for Samples
- When inferring fields to create Sources, Sample Types, and Assay Designs from a spreadsheet, any "reserved" fields present will not be shown in the inferral, simplifying the creation process
- When importing data, any unrecognized fields will be ignored and a banner will be shown
- On the main menu, "My Assigned Work" has been renamed "My Queue"
Release 21.3, March 2021
- A new Tube Rack type of freezer storage unit has been added
- Derive samples from one or more parent samples
- Pool multiple samples into a set of new samples
- The field editor offers a new "Summary" view
Release 21.2, February 2021
- The field editor now includes checkboxes to enable deletion of multiple fields and export of subsets of fields.
- Background Import:
- Removal of previous size limits on data import
- Progress reporting for asynchronous imports
- In-app Notifications when background imports are complete
Release 21.1, January 2021
- Freezer Management
- Match your digital storage to your physical storage
- Store and locate samples with ease
- Monitor usage and capacity in graphical dashboards
- Track volume, freeze/thaw counts, and comments during check in/out events
Release 20.12, December 2020
- Detailed audit logging now shows only what has changed when data is updated.
Release 20.11, November 2020
- Batching of creating samples and sources, enabling selection of "just created" items.
Release 20.10, October 2020
- Integration with BarTender to print labels.
Release 20.9, September 2020
- A new tutorial is available to help you get started with a new/empty instance of sample manager. Try it here: Tutorial: Learn Sample Manager
- Label colors are shown in the samples section of the main dashboard.
- In anticipation of future support for Freezer Management, underlying functionality like the ability to access storage locations from the main menu have been added.
Release 20.8, August 2020
- Sample Types can have custom Label Color assignments to help users differentiate them. (docs)
- In anticipation of future support for Freezer Management, underlying functionality like the ability to see the storage location of a sample has been added. These facilities are not yet visible in the application interface.
Release 20.7, July 2020
- Improved search experience. Filter and refine search results. (docs)
Release 20.6, June 2020
- Bug fixes and small improvements
Release 20.5, May 2020
- Use Sample Timelines to track all events involving a given sample.
- Detailed audit logging has been improved for samples, under the new heading "Sample Timeline Events."
- Sample Types can be created by inferring fields from a file, or by defining fields manually. Source types offer the same convenience.
- Editing of sample parents is now available.
- The definition of Sample Types can now include "Source Alias" columns, similar to parent aliases already available.
Release 20.4, April 2020
- The creation interface for Sample Types has been merged to a single page showing both properties and fields. This makes it easier to create naming expressions that use fields in your Sample Type.
- Define Sources for your samples. The source of a sample could be an individual or a cell line or a lab. Tracking metadata about the source of samples, both biological and physical, can unlock new insights.
Release 20.3, March 2020
- Samples can be added to a workflow job during job creation. You no longer need to start a job after selecting samples of interest, but can add or update the samples directly within the job editing interface.
- Removing unnecessary fields is easier with an icon shown in the collapsed field view.
February 2020
- LabKey Sample Manager is Launched!
Sample Manager Dashboard
The home page of the Sample Manager application offers a summary dashboard for getting a quick overview of your project.
Return to this dashboard at any time by clicking the LabKey Sample Manager logo in the upper left corner of the page. Note that on narrower screens, the panels of the dashboard will be stacked vertically in the following order instead of being arranged as shown above.

 The next menu lets you control subcategories for the insights you are viewing.
Note that on narrower screens, the panels of the dashboard will be stacked vertically in the following order instead of being arranged as shown above.
Sample Finder
Click Go to Sample Finder in the center of the dashboard to search for samples by properties of their parents and sources. Learn more in this topic:Dashboard Insights
See the current status of the system, with several display options. By default, you see the total count of samples of each Sample Type, shaded by the label color you assign.Select from the leftmost dropdown to show:- Sample Count by Status (Default)
- Sample Count by Sample Type
- Assay Run Count by Assay.
The next menu lets you control subcategories for the insights you are viewing.
- Sample Count by Status offers:
- All Statuses
- With a Status
- No Status
- Sample Count by Sample Type -or- Assay run Count by Assay offer the timeframe over which the count of samples or assays is determined. Options:
- All
- In the Last Year
- In the Last Month
- In the Last Week
- Today
Jobs List
At a glance, see the jobs and tasks assigned to you in Your Queue. A second tab will show you other Active Jobs. Learn more about jobs and workflow in this section:Freezer List
The freezer list presents a quick summary of your freezers, showing details, available capacity, and a color-coded bar indicating the types of samples in each freezer.- Hover over the Legend to see which colors are associated with which sample types.
- Hover over any bar segment for details about what it represents, and click to jump to the storage view of those samples in that freezer.
Related Topics
My Account
Sign In and Out
From within the LabKey Sample Manager application, you can log in and out via the user menu in the upper right. To sign in, enter your email address and password on the next page, then click Sign In.
 When you are logged in, there will be a Sign Out link on the user menu where Sign In was before.When you are signed out, you will be able to view the contents as a guest user would - you can read but not edit or create anything.
If you are using a hosted trial version of Sample Manager, CAS authentication provides single sign on and will automatically log you back in. Choosing Sign Out will sign you out of the application and you can click Return to Application to log back in.
Session Expiration
If your session expires while you are using LabKey Sample Manager, you will see a notification popup with a button to Reload Page. You will be asked to log in again before completing the action. The default timeout is 30 minutes of idle time in the browser. Session expiration can also occur if the server restarts in the background.Similarly, if you log out of LabKey Sample Manager in another browser window, you will be notified of the need to log back in to proceed.
Edit Your Profile
Once logged in, you can manage your account information by selecting Profile from the user menu in the upper right.
Edit User Details
On your profile page, you can edit your display name, as well as your first and last name and description. You cannot edit your email address here; contact your administrator if you need to change your email address.
Upload Avatar
Drag and drop an image into the drop area to use a custom avatar on your profile. The avatar image must have a height and width of at least 256 px. If you upload a rectangular image, it will be cropped to fit the square.Once you have uploaded an avatar, you can reedit your profile and click Delete Current Avatar to revert to the default.Change Password
To change your password, click Change Password in the upper right. In the popup, enter your old password, and the new password you want to use twice. Passwords must be at least six characters cannot contain spaces or match your email address. Click Submit to save the new password.Related Topics
Administrators can manage user accounts and permissions as described in this topic:Apply Naming Prefix
You can apply a naming prefix that will be added to all Sample and Source naming patterns to assist integration of data from multiple locations by maintaining a clear association with the original source of that data.
Apply Naming Prefix
This prefix is typically short, must be unique site-wide, and should be recognizable to your users. Before setting one, make sure you understand what will happen to the naming patterns and names of existing entities in your project.- All Naming Patterns for Sample Types and Source Types will be updated to include the new prefix.
- New samples and sources created after the addition of the prefix will have names that include the prefix.
- Existing samples and sources created prior to the addition of the prefix will not be renamed and thus will not have the prefix (or might have a different previously-applied prefix).
- Sample aliquots are typically created and named including the name of the sample they are aliquoted from. This could mean that after the prefix is applied, new aliquots may or may not include the prefix, depending on whether the originating sample was created before or after the prefix was applied. Learn more about aliquot naming here: Aliquot Naming.
To set a prefix:

- Select Administration from the user avatar menu.
- Click the Settings tab.
- Scroll down to the ID/Name Settings section.
- Enter the prefix to use. You will see a preview of what a naming expression with the prefix applied might look like using a representative pattern, Blood-${GenId}, as an example.
- Click Apply Prefix to apply it.
- This action will change the Naming Pattern for all new and existing Sample Types and Source Types. No existing IDs/Names will be affected. Are you sure you want to apply the prefix?
- Click Yes, Save and Apply Prefix to continue.
Force Usage of Naming Patterns for Consistency
To maintain consistent naming, particularly when using container-specific naming prefixes, you may want to restrict users from entering their own names for samples and sources. This requires that all types have a naming pattern that can be used to generate unique names for them.When users are not permitted to create their own IDs/Names, the ID/Name field will be hidden during creation and update of rows, and when accessing the design of a new or existing Sample Type or Source Type.Additionally:- Attempting to import new data will fail if an ID/Name is encountered.
- Attempting to update existing rows during file import will also fail if an unrecognized/new ID/Name is encountered.
To disallow User-defined IDs/Names:

- Select Administration from the user avatar menu.
- Click the Settings tab.
- Scroll down to ID/Name Settings.
- Uncheck the box Allow users to create/import their own IDs/Names.
- Note that to complete this change, all entities in the system must have a valid naming pattern. You will see a warning if any need to be added.
Related Topics
Sample Manager - FAQ
You can read a detailed overview of Sample Manager, LabKey's sample management software on our website. Other documentation here will help you better understand specific features and options.This topic provides answers to some commonly asked questions about LabKey Sample Manager.
- Data Ownership and Audit
- Sample Identification
- Freezer Management
- Data Structures for Assays and Samples
- Jobs, Tasks, and Templates
- Sample Manager and LabKey Server
- Future Plans
Data Ownership and Audit
If I store my data in hosted LabKey Sample Manager do I still own the data? If I choose to end my subscription later, will I be able to get it back?
Absolutely. Whether hosted or on premise, you always own your own data. If you stop using Sample Manager, you will receive a full export of all your data.Will privacy be maintained if I use a hosted Sample Manager application?
Absolutely, the LabKey security model guarantees privacy and security using our role based access model.However, if you need to store PHI and/or are interested in HIPAA compliant protection of your data, contact us to discuss whether another LabKey product might better meet your compliance needs.Do samples have an audit trail for chain of custody tracking?
Yes! Every action is tracked in a set of audit logs on a row by row level. Enhanced chain of custody tracking features are available in a Timeline for samples. Learn more in this topic:Sample Identification
Is the sample ID assigned by the system unique to just one lab? Can they be shared?
Yes, right now because there is a single Sample Manager application serving each lab, if you ask the application to generate sample IDs for you, they will be unique within that single lab. However, letting the system assign sample IDs is not the only option.If you wanted to share sample information across multiple labs, you could override the automatic assignment option by providing your own unique sample IDs, such as by using a sample manifest. The distinct Sample Manager applications at many lab sites could accept and use these sample IDs that are drawn from a master assignment list ensuring that they are both unique within a single application and unique across multiple locations.Does Sample Manager handle replicates?
Yes, sample replicates can be identified using custom naming conventions, i.e. S101-1 and S101-2 are replicates of one original sample.Does Sample Manager track the subject of study, i.e the source of the sample.
Yes, you can identify and track many types of sample Sources within the application. Learn more in this section:Does Sample Manager support using a barcoding system?
Yes, you can create your own field (either text or integer) to hold your own barcode values. Or, with the addition of a "UniqueID" column, Sample Manager will generate unique barcodes for samples for you. These barcodes are read-only, simple, and easy to use. Learn more in this topic: Sample Manager also supports integration with BarTender for groups to use for printing labels with sample details. Learn more in this topic:Freezer Management
Does Sample Manager provide a freezer management solution?
Yes! LabKey Sample Manager includes a robust and flexible freezer management solution. Design virtual storage to match your physical storage. Easily find samples, or empty space for storing new samples. Track volume and check-in and check-out to support your workflow. Control access with specific storage roles. Learn more in this section:Data Structures for Assays and Samples
How do I get my existing sample data into the system?
LabKey Sample Manager is specifically designed to make data import easy. Design the structure of existing data and drag and drop to upload it simply and efficiently. Note that very large uploads may need to be split into batches to upload successfully.Are the Assays customizable? Can I create my own assays?
Absolutely. Our demos and example project include some possible ways to structure typical assays, but when you define your own, you have complete control over the fields and types of data collected. The only requirement is that assay data needs to provide a column linking to the sample.Are there predefined templates for data in Sample Manager?
There are no predefined templates. Users have full control of creating data templates for your own needs. During the definition of assays, users have the option to let the application infer fields in the data structure from the columns in a spreadsheet.What happens if you import assay data but it has a column name that doesn't match?
The assay data import process will read only the "expected" columns from your data. If you have additional columns, they will be ignored. If you have a difference in column naming, you may be able to make use of column aliases to import data from a column of a mismatched name.When importing data, you will see a preview of the first few rows to aid you in correcting issues or adding aliases.How does a user know what columns are expected?
The handy Download Template feature gives the user a blank template for what columns are expected. The user can either add their data to this template or simply confirm that they have the correct columns prior to import.Can I build in customized data integrity checks?
Absolutely. Every field can have data validation performed, such as ensuring correct formats, valid ranges, and other such measures. You can also use controlled vocabularies for text fields, i.e. presenting uploading users with pulldown menus of options instead of free text entry fields.Do you have support for tracking study visits, where multiple samples of different types are collected from one subject at once?
We don't have a built-in mechanism for tracking study visits at this time, but by defining additional custom columns for your sample types, you can track the individual and date of collection for matching. For example, using a required column for study visit, you would capture this information.What export types are supported?
Currently you can export data as CSV, TSV, and Excel.Jobs, Tasks, and Templates
Does each workflow job depend on the completion of the previous job? Or can you have multiple jobs underway simultaneously? Can you configure which job is dependent on which other job?
Each workflow job can begin/proceed independently of all other jobs. You can have as many jobs underway simultaneously as you like. If you want to have actions that proceed in a sequence, consider whether these should be defined as tasks within a single larger job, rather than separate jobs.In the future, we hope to add an administrative option to make a job dependent upon completion of another job, but at present this is not supported. In the meantime, you could also consider having a 'check for previous job completion' task at the start of the job you want to happen 'next'.Sample Manager and LabKey Server
Can assay results loaded via Sample Manager be linked to LabKey Studies?
Yes, if you are using Sample Manager as part of a Premium Edition of LabKey Server, your application will be running on the same server as your other LabKey projects. After loading assay data into Sample Manager, you can access it via traditional LabKey Server folder management tools and link that data into your study on the same server.Can Sample Manager make use of assays already defined in my LabKey Server?
Yes, if you have defined Standard Assays in the scope available to your integrated Sample Manager application, you will see them in the list of assay designs. You may need to map one of the columns to your sample information before you can use them.Future Plans
We are very interested in hearing your feedback about what is important to you. Future development of new features for LabKey Sample Manager is already underway.Do you need other software to do data analysis and generate reports?
Yes, at this time, users of the hosted Sample Manager application will export the managed sample data for analysis and reporting. In the future, analysis and reporting will be added within the application.Note that LabKey Server itself is a candidate for such analysis and reporting, and in fact, users of Premium Editions of LabKey Server can access data from Sample Manager directly from the traditional LabKey user interface.Does Sample Manager track reagents, vendor batch number, etc.?
Not explicitly at this time. You can use custom columns to track this information yourself. One option is to use a controlled vocabulary text field to track information and let users select from lists instead of free entering values.Related Topics
More Questions?
Have more questions or need additional information? Please get in touch with us:Samples
For each different kind of sample you manage, you will create a Sample Type, which functions as a framework for representing the data describing that kind of sample. All Samples of that type can then be entered into the system for tracking and data analysis. This section covers the creation and management of sample types and samples.
This section covers the creation and management of sample types and samples.
Topics
- Create a Sample Type
- Create or Import Samples:
- Sample ID Naming
- Sample Lineage / Parentage
- Aliquots, Derivatives, and Sample Pooling
- Sample Timeline
- Manage Samples
- Manage Sample Status
- Edit Selected Samples
- Sample Finder
- Sample Search
- Integrate with BarTender
- Barcode Fields
- Sample Picklists
Tutorial
Get started with samples in the Sample Manager tutorial step: Tutorial: Add Samples.Related Topics
- Sources: Sources can be physical, biological, or a combination of both.
- Freezer Management
Create a Sample Type
Sample Types help you organize samples in your lab and allow you to add fields that help you describe attributes of those samples for easy tracking of data. For example, "Blood" samples might have some different properties than "Serum" samples, so could be defined as two different types with different sets of fields.This topic covers the details of creating and configuring sample types. For a tutorial to help you learn this process, see Tutorial: Add Samples.

 For example, if the original sample is S1, aliquots of that sample will be named S1-1, S1-2, etc.If instead you wanted to use a dot between the sample name and aliquot number (S1.1, S1.2, etc.) you'd use the pattern: Learn about more options for aliquot naming patterns in the core LabKey Server documentation. Aliquot naming patterns will be validated during sample type creation.
 Clicking Yes, Add Unique ID Field will add a new field named "Barcode". Every new sample of this type will have a new barcode generated for it.You'll be able to search for samples by these generated barcodes, as well as by any fields you specifically designate as containing barcode values.Learn more about creating and using barcodes in this topic: Barcode Fields
There are several methods available when adding the first custom fields.
Learn more about defining fields and their properties in this topic: Field Editor.After creating a new Sample Type, you will see it listed on the main header menu and be able to begin creating samples of this type.
Clicking Yes, Add Unique ID Field will add a new field named "Barcode". Every new sample of this type will have a new barcode generated for it.You'll be able to search for samples by these generated barcodes, as well as by any fields you specifically designate as containing barcode values.Learn more about creating and using barcodes in this topic: Barcode Fields
There are several methods available when adding the first custom fields.
Learn more about defining fields and their properties in this topic: Field Editor.After creating a new Sample Type, you will see it listed on the main header menu and be able to begin creating samples of this type.
 You cannot change the name of the Sample Type, and should use caution if changing the naming pattern to ensure SampleIDs remain unique.After completing edits, click Finish Updating Sample Type in the lower right.

Learn more about building naming patterns in this topic: Sample ID Naming
- Create a New Sample Type
- Define Sample Type Properties
- Define Sample Type Fields
- Edit Sample Type Design
- Label Colors
- Resource: Sample Naming Pattern Examples
Create a New Sample Type
Create a new Sample Type by clicking Sample Types on the main header menu, then selecting Create > Sample Type.
Before any Sample Types have been created, you can also use two quicker pathways: clicking the linked word here in the empty Dashboard Insights panel, or selecting Create a sample type from the main menu under Sample Types.
Define Sample Type Properties
- The Name of the Sample Type is required, must be unique, and cannot be changed later.
- Entering a Description is optional. A description can help others understand the usage.
- Naming Pattern: Every sample must have a unique name or identifier, known as a "Sample Id". For each Sample Type, determine whether you will provide these sample IDs or whether you want the system to generate them for you.
- Hover over the to see an example name using the current pattern.
- Details about customizing naming patterns are below.
- Aliquot Naming Pattern: For aliquots created from samples of this type, you can leave this blank to accept the default naming pattern, or customize it if desired.
- To declare a field that will identify a parent sample, click Add Parent Alias. Enter the field name and select the Sample Type where the parent information will be found. It can be the current type or a different one.
- If there are Sources defined in the system, you will have a similar option to Add Source Alias here.
- Set Storage Settings
- Define a Barcodes field if desired.
- Before you click Finish Creating Sample Type, determine whether you need to add Fields.
Naming Pattern
Every sample must have a unique name or identifier, known as a "Sample Id". For each Sample Type, determine whether you will provide these sample IDs or whether you want the system to generate them for you. This decision determines what, if anything, you will enter in the Naming Pattern field. Learn more in this topic: Sample ID Naming.- If you will provide the sample IDs, and they are in your data in a column named "SampleID", delete the default naming pattern (and ignore the grayed out placeholder text).
- If you will provide the sample IDs, but they are in a column named something other than "SampleID", you provide a naming pattern like this pattern ${COLUMN_NAME}. See below.
- If you want sample identifiers generated for you by the system, provide a naming pattern using the guidance in this topic: Sample ID Naming. A few examples are at the bottom of this page.
- The default naming pattern is "S-${genId}", meaning the letter S followed by an incrementing counter.
Aliquot Naming Pattern
By default, the name of the aliquot will use the name of its parent followed by a dash and a counter for that parent's aliquots.${${AliquotedFrom}-:withCounter}${${AliquotedFrom}.:withCounter}Storage Settings
- Label Color: You can assign a color to this type of sample to help make quick visual identification easier in various application views.
- Display stored amount in (Required): Select the units in which you want stored amounts of this sample to be displayed. Options:
- g (grams)
- mg (milligrams)
- kg (kilograms)
- mL (milliliters)
- uL (microliters)
- l (liters)
- unit (for cases where none of the other options are appropriate and each sample is a unit)
Barcodes
If a field of type Unique ID is included in your Sample Type, the system will generate barcode values for you.When you are defining a new sample type, you will see in the initial setting of the Barcodes property that no Unique ID field exists. You will be prompted to include one after inferring or manually creating other fields.Clicking Yes, Add Unique ID Field will add a new field named "Barcode". Every new sample of this type will have a new barcode generated for it.You'll be able to search for samples by these generated barcodes, as well as by any fields you specifically designate as containing barcode values.Learn more about creating and using barcodes in this topic: Barcode Fields
Define Sample Type Fields
Built-In (Reserved) Fields
Every Sample Type is created with several default fields (columns) built in. You do not add and cannot change these fields; these are "reserved fields" and are always created in a new Sample Type:- SampleID: The name of the sample.
- Description: This is a description field for an individual sample, not the description of the Sample Type as a whole that is shown in the properties section.
- SampleState: Tracks the status of the sample.
- Created & CreatedBy: These are populated with the userID and time of creation.
- Modified & ModifiedBy: These are populated with the userID and time of modification.
- Stored Amount
- Freeze/Thaw Count
- Storage Status
- Checked Out By & Checked Out: These are populated with the userID and time of checkout.
Add New Sample Type Fields
Add any additional fields that you want in your Sample Type definition as follows:- Click the Fields section to open it.
- If you left the editor, you can return via the Sample Type menu on the right, choosing Edit Sample Type Design.
Import or Infer Fields from File
The panel opens showing Import or infer fields from file by default:You can select or drag a spreadsheet containing your data into the upload panel.
After importing or inferring fields from a file, you can adjust them or add additional fields using the manual field editor described below.
- This will populate the fields section based on inferrals from the data.
- Note: If your spreadsheet contains rows for built-in fields, such as "SampleID" and "Description", they will not be shown, but will be created as are all built-in fields.
- You can also import field definitions from a prepared JSON file if you have one.
Manually Define Fields
Instead of using a file, click the text Manually Define Fields and continue.

- For each additional field in your sample data, click Add Field:
- Enter the Name. Names should not contain spaces or special characters. Learn more in this topic.
- Select the Data Type. Learn more about types and their properties here.
- Check the box if the field is required.
- Click the (expansion) icon to define more properties of your new field as needed.
- You can reorder the fields by dragging and dropping with the six-block handle.
- Add all the fields you need. If you add an extra and need to delete it, click the on the right.
Learn about attaching images and other files using a File field in this topic: Attach Images and Other Files.
Finish Creating Sample Type
- Click Finish Creating Sample Type when finished.
Edit Sample Type Design
If necessary, you can return to edit properties or fields/columns later via the menu. Reopen the Sample Type design for editing by choosing Edit Sample Type Details from the menu.You cannot change the name of the Sample Type, and should use caution if changing the naming pattern to ensure SampleIDs remain unique.After completing edits, click Finish Updating Sample Type in the lower right.
Label Color
To assign a Label Color when you are creating or editing your sample type, click the selection area to open a color picker:
- Click a block of color to select it.
- Type a hex code next to the # sign or individual RGB values into the panel for more color control.
Resource: Sample Naming Pattern Examples
A few examples of how you might choose to name your samples and how to design a naming expression. You can use values from your data, dates, and counters to ensure that every sample name is unique. Separators like '-' and '_' are commonly used but optional.| Description | Example SampleIDs | Naming Pattern |
|---|---|---|
| The character 'S' followed by a counter (Default) (always unique within this type of sample) | S-1 S-2 S-3 | S-${genId} |
| The word 'Blood' followed by a 2 digit counter | Blood-01 Blood-02 Blood-03 | Blood-${genId:number('00')} |
| The value of the "Lab" column + '_' + a counter | LabA_1 LabB_2 LabC_3 | ${Lab}_${genId} |
| Use a default value if the "Lab" column is empty (+ '_' + a counter) | LabA_1 LabB_2 LabUnknown_3 | ${Lab:defaultValue('LabUnknown')}_${genId} |
| 'S' plus current date followed by a counter that resets daily (always unique; tracks date of entry into system) | S-20200204-1 S-20200204-2 S-20200205-1 | S-${now:date}-${dailySampleCount} |
| 'S' plus values from two columns in my data: the Project and ParticipantID (only unique if one sample per participant) | S-Study101-pt231 S-Study101-pt232 S-Study101-pt233 | S-${Project}-${ParticipantId} |
| Values of "ParticipantID" and "Draw Date" columns, then a counter (always unique and tracks draw date, not date of entry into system) | pt231-20191203-1 pt231-20191214-2 pt231-20191214-3 | ${ParticipantID}-${DrawDate}-${genId} |
| The values already present in the "SampleID" column in my data | unique values provided | No naming pattern required |
| The values already present in the "Identifier" column in my data | unique values provided | ${Identifier} |
Related Topics
Create or Import Samples
Once you have created the Sample Type, you can create the samples themselves in several ways. Import an existing inventory spreadsheet, create the samples individually, or enter information in bulk (and then refine it). The Sample Type acts like a table and each individual sample of that type will be a row in the table.For a tutorial walkthrough of adding samples to the system, see this topic: Tutorial: Add Samples

 You will now be creating samples of that type and the creation interface will reflect your method.
 If your creation did not already set the status of these samples, you could select them all in the grid, then use Manage > Edit Selected Samples in Bulk to set it. Learn more about sample status here: Manage Sample Status
- Choose Desired Sample Type and Import Method
- Work with New Samples
- Create Derivatives, Pooled Samples, and Aliquots
Note: Once you have added some samples, you can select one or more before clicking Create and then create new derivatives, pooled samples, or aliquots from them. Learn about these options in the topic: Aliquots, Derivatives, and Sample Pooling.
Choose Desired Sample Type and Import Method
To create new samples, you specify the type of sample you are creating. Most Create menus give you a Samples option where you can choose the type of sample to create by selecting Create > [Sample Type].- The most general method is to go to the home page dashboard and click Create Samples. (On narrow browser windows you may need to scroll down to find the Dashboard Insights panel.)
- Click the tab for your import method:
- Select the Sample Type you are creating using the dropdown. You can type ahead in the box to narrow the selections when the list is long.
You will now be creating samples of that type and the creation interface will reflect your method.
Note that fields of type File are not included in either import method. Values must be individually added as described in this topic: Attach Images and Other Files.
Create Samples From Grid
Using the Create Samples From Grid tab gives you several options for entering sample information in the application directly, as opposed to uploading a file of data. You can manually enter values for the fields in a grid format, or use bulk insert and bulk update to streamline entry of similar values.Learn more in this topic: Create Samples from GridImport Samples From File
The other method for entering samples, particularly useful for a large group or when sample information is available in a spreadsheet already, you can import them directly from a file.Learn more in this topic: Import Samples from FileWork with New Samples
After creating samples, the banner message shows the number newly imported and offers the options to click to either add them to storage now or select them in the grid.If your creation did not already set the status of these samples, you could select them all in the grid, then use Manage > Edit Selected Samples in Bulk to set it. Learn more about sample status here: Manage Sample Status
Create Derivatives, Pooled Samples and Aliquots
Once you have created the Samples you want to use as parents, you can also create new samples as derivatives, pooled samples, and aliquots. Learn more in these topics:Related Topics
- Create a Sample Type
- Manage Sample Status
- Attach Images and Other Files
- Sample Lineage / Parentage
- Associate Samples with Sources: Create new samples from Sources of those samples.
- Aliquots, Derivatives, and Sample Pooling
- Data Import Guidelines
- Store Samples in Freezers
- Migrate Storage Data into Freezer Management
Create Samples from Grid
When creating new Samples, the Create Samples From Grid tab gives you several options for entering sample information in the application directly, as opposed to uploading a file of data. You can manually enter values for the fields in a grid format, or use bulk insert and bulk update to streamline entry of similar values. If you add but then want to remove a parent linkage, you can delete it by clicking the X next to "Remove Parent #" on the right.
 If you add but then want to remove a source linkage, you can delete it by clicking the X next to "Remove Source #" on the right.
 A grid with the requested number of rows will be created, with a Status column plus a column for each field included in your Sample Type (not including any "File" fields).
 Reopen to add more samples by selecting Create > [Sample Type].


Note that fields of type File are not included in grid import methods. Values must be individually added as described in this topic: Attach Images and Other Files.
- Create Samples from Grid
- Add Parent (Optional)
- Add Source (Optional)
- Add Samples Individually
- Bulk Insert
- Bulk Insert with Parent(s)
- Bulk Update
Create Samples From Grid
Open the grid method for creating new Samples from the home dashboard by clicking Create Samples, choosing the desired Sample Type, then stay on the default Create Samples from Grid tab.Add Parent (Optional)
If the samples you are adding have one or more Parent samples, click Add Parent to add parentage information. Select the Sample Type of the parent(s). If you will have parents of different types, add one for each type of parent. Learn more about including parentage information in this topic: Sample Lineage / ParentageIf you add but then want to remove a parent linkage, you can delete it by clicking the X next to "Remove Parent #" on the right.
Add Source (Optional)
If the samples you are adding have one or more Sources, click Add Source to add a column for each Source Type you will associate with samples of this type. Select the Source Type from the dropdown.If you add but then want to remove a source linkage, you can delete it by clicking the X next to "Remove Source #" on the right.
Add Samples Individually
To directly create samples in a grid, start by adding a blank row for the samples you want to create. Enter the number of samples you want to add and click Add Samples.A grid with the requested number of rows will be created, with a Status column plus a column for each field included in your Sample Type (not including any "File" fields).
- Sample ID:
- If you provided a Naming Pattern with the Sample Type, the Sample ID can be generated, and this will be noted in the grid. Hover over the to see an example of a generated name.
- You could override this value by manually typing in the box, but remember that all sample IDs must be unique.
- Enter values for remaining fields.
- Fields that offer user dropdowns (such as Sample Status, list lookups, and Text Choice fields) will show an indicator to guide the user to open the selection menu.
- Hover over the for the Status column to see a legend of available statuses.
Reopen to add more samples by selecting Create > [Sample Type].
Bulk Insert
Instead of directly populating a grid, you can click Bulk Insert to create many samples at once. This is particularly convenient when samples share the same settings for some or all columns.
- Specify the number of New Samples.
- Note that if you have included a parent field, you will have additional options here.
- Enter values for any or all of the properties listed.
- Click Add Samples To Grid.
Bulk Insert with Parent(s)
If you added one or more parent fields before clicking Bulk Insert, you will have an additional selection to make in the bulk creation popup. Choose whether you want to use the parent sample(s) to create:- Derivatives, specifying the number of derivatives per parent.
- Pooled Samples, specifying the number of new samples to create for the parent(s).
- Aliquots, specifying the number of aliquot copies per parent.
- Provide values for properties that will be shared by the newly created samples. Including 'parents' as applicable.
- Hover over the for the Status field to see a legend of available statuses.
- Click Add Samples to Grid and continue to complete the grid with any properties not shared by all the new samples.
- Click Finish Creating ## Samples when done.
Bulk Update
While creating new samples in the grid, you can use the Bulk Update option to assign a common value to a selected set of rows. As for bulk update of assay data rows, you control which fields are Enabled for update to a new common value you provide. The disabled fields will retain their original values.Related Topics
Import Samples from File
When creating new Samples, the Import Samples From File tab lets you upload a spreadsheet of Sample data, streamlining the process over entering data into a grid. You can also update data for existing samples via file upload.


Note that fields of type File are not included in file import methods. Values must be individually added as described in this topic: Attach Images and Other Files.
Import Samples From File
Open the grid method for creating new Samples from the home dashboard by clicking Create Samples, then click the Import Samples from File tab.
- Set the Sample Type for the Samples you will import.
- Use the Template button to download a template file showing the expected data structure for the type.
- Use this template as a guide for ensuring your data matches the expected columns.
- Note that any "File" fields will be omitted from the downloaded template.
- When populating the template, you may not need to include all columns. For example, if you have defined import aliases for sources or parents, all possible columns will be included in the template, but only the one you want to use needs to be populated.
- A checkbox is provided to Update data for existing samples during this file import. Learn more below.
- Drag and Drop the file directly into the window to upload it.
- You will see the sample information obtained from the file in the panel.
- Only fields included in the definition of the Sample Type will be imported. In this example, the Sample ID will be generated for you, so is not included in the imported file or shown here. If any fields are unrecognized, they will be ignored and a banner will be shown.
- Note that you cannot edit the values here. If you see an error, you can use the X to delete the loaded file, make changes offline, and reselect the revised file.
- Click Import to create the samples from the data in the file.
Update Existing Samples
During file import, a checkbox is provided to Update data for existing samples during this file import.- When checked, you can include data for samples that already exist in the system.
- Any data you provide for the rows representing samples that already exist will replace the previous values.
- When updating, you only need to provide the columns you wish to update. Existing data for other columns will be left as is.
- Note that you cannot update an existing sample to make it an aliquot of another sample.
- If you don't check this box, the upload will be "insert only" and will fail if you attempt to import data for existing sample IDs.
Related Topics
Sample ID Naming
Each sample in the system must have a unique name/id within it's Sample Type. The unique sample names can be provided by the user, or can be generated by the system. When you ask the system to generate names, you specify a naming pattern to use. For each type of sample, you will choose one of these two options. If you already use a unique naming structure outside the system, you will want to ensure those names are carried in to LabKey Sample Manager.
Note that while this is entered as a naming pattern, it does not generate any portion to make the sample names unique, so you are responsible for ensuring uniqueness.
The first few samples would be:
 If desired, click Edit genId to set it to a higher value than it currently is. This action will reset the container counter and cannot be undone.
 This three-part pattern will generate an incrementing series of samples for each day.
Multiple column names and other substitutions can be included in a naming pattern, for example:
You can use the qualifier :first to select the first of a given set of inputs when there might be several.If there might be multiple parent samples, you could choose the first one in a naming pattern like this:
This three-part pattern will generate an incrementing series of samples for each day.
Multiple column names and other substitutions can be included in a naming pattern, for example:
You can use the qualifier :first to select the first of a given set of inputs when there might be several.If there might be multiple parent samples, you could choose the first one in a naming pattern like this:
Learn more about formatting numbers and date/time values in this topic: Date and Number Formats ReferenceAdditional string modifiers are available. Find a list in this topic: String Expression Format Functions
You could also use this modifier with another column name as well as strings in the inner expression. Given the example shown for an XML counter in the next section, names like Blood-A-1, Blood-A-2, etc would be generated with this expression: Learn more about using this syntax in naming patterns for aliquots in the LabKey documentation here:
You can use a starting value and number formats with this modifier. For example, to have a three digit counter starting at 42, (i.e. S-1-042, S-1-043, etc.) use:
 When you click Finish Creating/Updating Sample Type, you will see a banner about any syntax errors and have the opportunity to correct them.
 Errors reported include:

- Unique Sample Names are Provided: Unique sample names are provided to the system
- Generate Names with Naming Patterns: Generate unique names within the system
- Default Naming Pattern
- See and Set genId
- Date Based Naming
- Incorporate Column Values
- Incorporate Lineage Lookups
- Naming Pattern Elements/Tokens
- Naming Pattern Validation
- Examples
Use caution when including commas (,) in sample names, whether LabKey generated or user-provided. Commas are used as separators for lists of parent fields, so names containing them create ambiguities.
Unique Sample Names are Provided
If your data already includes the unique sample names to use, identify the column name that contains them.Naming Column is "SampleID" or "Name"
If the name of this column is "SampleID" or "Name", these default column names are automatically recognized as containing sample names. To confirm that they are used, be sure to Delete the default naming pattern that is provided in the user interface (and ignore the grayed out placeholder text that remains).Naming Column is Something Else
If the column containing unique sample names is named something else, you provide that column name using a simple naming pattern expression that specifies the name of the column to use, rather than an expression to generate one.For example, if the sample names are in a column named "Identifier", you would enter the naming pattern:${Identifier}Generate Names with Naming Patterns
If your data does not already contain unique names, the system can generate them upon import using a naming pattern that contains tokens, including counters to ensure names are unique. The system can build a unique name from syntax elements, such as:- String constants
- Incrementing numbers
- Dates and partial dates
- Values from columns in the imported data, such as tissue types, lab names, subject ids, etc.
- Separators such as '_' underscores and '-' hyphens
- Note that if you use a hyphen '-', you will want to use double quotes when you later search for your samples. An unquoted search for Sample-11 would interpret the hyphen as a minus sign and seek pages with "Sample" without "11".
Default Naming Pattern
The default naming pattern in Sample Manager generates names from two elements: the prefix "S-" plus an incrementing integer.S-${genId}S-1
S-2
S-3
and so on...
See and Set genId
genId is an incrementing counter which starts from 1 by default, and is maintained internally for each container. When you include ${genId} in a naming pattern, you will see a blue banner indicating the current value of genId.If desired, click Edit genId to set it to a higher value than it currently is. This action will reset the container counter and cannot be undone.
Date Based Naming
Another possible naming pattern for samples is to incorporate the date of creation. For example:S-${now:date}-${dailySampleCount}- The S- prefix is simply a string constant with a separator dash. Using separators like "-" and "_" is optional but will help users parse sample names.
- The now:date token will be replaced by the date of sample creation.
- The dailySampleCount token will be replaced by an incrementing counter that resets daily.
Incorporate Column Values
If you want to use a column from your data as part of the name, but it does not contain unique values for all samples, you can incorporate it in the pattern by using the column name in token brackets and also including an additional uniqueness element like a counter. For example, if you want to name many samples for each participant, and the participant identifier is in a "ParticipantID" column, you could use the pattern:${ParticipantID}-${genId}${ParticipantID}-${CollectionDate}-${LabName}-${now:date}-${genId}Incorporate Lineage Lookups
To include properties of sample sources or parents in sample names, use lookups into the lineage of the sample.- Specific data type inputs: MaterialInputs/SampleType1/propertyA, DataInputs/DataClass2/propertyA, etc.
- Import alias references: parentSampleA/propertyA, parentSourceA/propertyA, etc.
- In some scenarios, you may be able to use a shortened syntax referring to an unambiguous parent property: Inputs/propertyA, MaterialInputs/propertyA, DataInputs/propertyA
- This option is not recommended and can only be used when 'propertyA' only exists for a single type of parent. Using a property common to many parents, such as 'Name' will produce unexpected results.
Blood-${DataInputs/Mouse/Strain}-${genId}Blood-${parentBlood/SampleID:first}-${genId}Naming Pattern Elements/Tokens
The following elements, or "tokens" are available for building naming patterns.| Name Element | Description | Scope0000000000000000000000000 |
|---|---|---|
| genId | An incrementing number starting from 1. This counter is specific to the individual Sample Type. | Current Sample Type |
| dailySampleCount | An incrementing counter, starting with the integer '1', that resets each day. | All Sample Types in the current folder |
| weeklySampleCount | An incrementing counter, starting with the integer '1', that resets each week. | All Sample Types in the current folder |
| monthlySampleCount | An incrementing counter, starting with the integer '1', that resets each month. | All Sample Types in the current folder |
| yearlySampleCount | An incrementing counter, starting with the integer '1', that resets each year. | All Sample Types in the current folder |
| randomId | A four digit random number for each sample row. Note that these random numbers are not guaranteed to be unique. | Current Sample Type |
| batchRandomId | A four digit random number applied to the entire set of incoming sample records. On each import event, this random batch number will be regenerated. | Current Sample Type |
| now | The current date, which you can format using string formatters. | Current Sample Type |
| Inputs | A collection of all DataInputs and MaterialInputs for the current sample. You can concatenate using one or more value from the collection. | Current Sample Type |
| DataInputs | A collection of all DataInputs for the current sample. You can concatenate using one or more value from the collection. | Current Sample Type |
| MaterialInputs | A collection of all MaterialInputs for the current sample. You can concatenate using one or more value from the collection. | Current Sample Type |
| <SomeDataColumn> | Loads data from some field in the data being imported. For example, if the data being imported has a column named "ParticipantID", use the element/token "${ParticipantID}" | Current Sample Type |
Formatting Values
You can use formatting syntax to control how the tokens are added. For example, "${genId}" generates an incrementing counter 1, 2, 3. If you use a format like the following, the incrementing counter will have three digits: 001, 002, 003.${genId:number('000')}Default Values
When you are using a data column in your string expression, you can specify a default to use if no value is provided. Use the defaultValue modifier with the following syntax. The 'value' argument provided must be a String in ' single quotes.${ColumnName:defaultValue('value')}Incrementing Sample Counters
The sample counters are incremented for the date when the sample is inserted, but can use a different date by attaching the counter to a date column. For example, ${SampleDate:dailySampleCount} will use the date found in the row's "SampleDate" column or today's date if the column has no value.Some auto-incrementing counters calculate the next value based on all samples in a given container, while others calculate based on only the current Sample Type. See the Scope column for the specific incrementing behavior. When the scope is container-based, within a given Sample Type, values will be sequential but not necessarily contiguous.:withCounter Modifier
Another alternative for adding a counter to a field is to use :withCounter, a nested substitution syntax allowing you to add a counter specific to any column value when you create new samples. This modifier is particularly useful when naming aliquots which incorporate the name of the parent sample, and the desire is to provide a counter for only the aliquots of that particular sample. Using :withCounter will guarantee unique values, meaning that if a name with counter would match an existing sample, that counter will be skipped.The syntax for using :withCounter is to prefix it with an expression that will be evaluated first, then surround the outer modified expression in ${ } brackets so that it too will be evaluated at creation time. The default naming pattern for creating aliquots combines the value in the AliquotedFrom column (the originating Sample ID), a dash, and a counter specific to that Sample ID:${${AliquotedFrom}-:withCounter}${Blood-${Lot}-:withCounter}${${AliquotedFrom}-:withCounter(42,'000')}Naming Pattern Validation
During creation of a Sample Type, both sample and aliquot naming patterns will be validated. While developing your naming pattern, the admin can hover over the for a tooltip containing either an example name or an indication of a problem.When you click Finish Creating/Updating Sample Type, you will see a banner about any syntax errors and have the opportunity to correct them.Errors reported include:
- Invalid substitution tokens (i.e. columns that do not exist or misspellings in syntax like ":withCounter").
- Keywords like genId, dailySampleCount, now, etc. included without being enclosed in braces.
- Mismatched or missing quotes, curly braces, and/or parentheses in patterns and formatting.
- Use of curly quotes, when straight quotes are required. This can happen when patterns are pasted from some other applications.
Caution: Using Numbers-Only as Sample IDs
Note that while you could create or use sample names that are just strings of digits, you may run into issues if those "number-names" overlap with row numbers of other samples. In such a situation, when there is ambiguity between sample name and row ID, the system will presume that the user intends to use the value as the name.Examples
| Naming Pattern | Example Output | Description |
|---|---|---|
| S-${genId} | S-101 S-102 S-103 S-104 | S- + a simple sequence |
| ${Lab:defaultValue('Unknown')}_${genId} | Hanson_1 Hanson_2 Krouse_3 Unknown_4 | The originating Lab + a simple sequence. If the Lab value is null, then use the string 'Unknown'. |
| S-${now:date}-${dailySampleCount} | S-20170202-1 S-20170202-2 S-20170202-3 S-20170202-4 | S- + the current date + "-" + daily resetting incrementing integer |
| S-${Column1}-${Column2} | S-Plasma-P1 S-Plasma-P2 | Create an id from the letter 'S' and two values from the current row of data, separated by dashes. |
Example String Modifiers
The following naming patterns show usage of string modifiers.| Naming Pattern00000000000000000000000000000000000000000000000 | Example Output000000000000000000 | Description |
|---|---|---|
| S-${Column1}-${now:date}-${batchRandomId} | S-Blood-20170103-9001 | |
| S-${Column1:suffix('-')}${Column2:suffix('-')}${batchRandomId} | S-Blood-PT101-5862 | |
| ${Column1:defaultValue('S')}-${now:date('yy-MM-dd')}-${randomId} | Blood-17-01-03-2370 S-17-01-03-1166 | ${Column1:defaultValue('S')} means 'Use the value of Column1, but if that is null, then use the default: the letter S' |
| ${DataInputs:first:defaultValue('S')}-${Column1} | Nucleotide1-5 S-6 | ${DataInputs:first:defaultValue('S')} means 'Use the first DataInput value, but if that is null, use the default: the letter S' |
| ${DataInputs:join('_'):defaultValue('S')}-${Column1} | Nucleotide1_Nucleotide2-1 | ${DataInputs:join('_'):defaultValue('S')} means 'Join together all of the DataInputs separated by undescores, but if that is null, then use the default: the letter S' |
Related Topics
Sample Lineage / Parentage
This topic describes how to define and explore sample lineage and parentage among samples.
...you could indicate the parent column alias "MyParent" as part of the definition of this Sample Type, so that these relationships would be represented in lineage immediately upon import.

 You will see the Parent Import Aliases listed on the overview tab for the Sample Type.When importing samples of this type, include parent information in one of the aliased columns. As shown below, the "MyParent" column contains the parent identifier.
 The system will capture and generate lineage for the parent(s) of the samples you have created. Learn more about using the Lineage tab in sample details below.
 You will see the Source Import Aliases listed on the overview tab for the Sample Type.Give the name of the source alias column and select the source type from the dropdown, as for parent samples. You can include multiple source aliases as needed.Learn more about sources in this section: Sources
 Learn more about providing the required information to Finish Creating the selected type of child sample in this topic:
 Learn more about the specific fields to populate in this topic: Aliquots, Derivatives, and Sample Pooling
 The lineage graph lets you explore a visual representation of the parentage of samples.

 Note that only five generations will display on the lineage graph. To see additional generations, walk the tree up or down to see more levels in either direction.You can switch to the grid view of the lineage by clicking the green Go To Lineage Grid button.Explore a more complex lineage example in our "Explore Sample Manager" demo project.
 If this sample has parents, the Show Parents button will be enabled and you can click it to see them. If the sample has children that are not shown, the Show Children button will be enabled and you can click it to see them.Entries in the Names column are clickable and connect to the overview page for the sample.The Distance column specifies the number of generations between each row and the selected seed sample.Use the arrow buttons in the Change Seed column to change the focus of the grid, expanding and collapsing lineage hierarchies to focus on a different seed.
- Add Parent Alias
- Add Source Alias
- Create Aliquots, Derivatives, and Pooled Samples
- Explore Sample Lineage Graph
- Explore Sample Lineage Grid
Add Parent Alias
Within the definition of a Sample Type, you can indicate one or more columns that will generate a parentage relationship with the samples being created. The parent(s) can exist in the same or different Sample Type than the one you are creating. Setting a parent alias in the definition of a Sample Type creates the linkage to parent samples during import, but note that the column aliased is not actually added to the Sample Type, instead the system pulls data from it to determine parentage relationships.For example, if you have a group of samples like the following, where v1 has two 'children', v1.1 and v1.2:| SampleID | MyParent |
|---|---|
| v1 | |
| v1.1 | v1 |
| v1.2 | v1 |
- You can add the parent alias:
- During initial Sample Type creation.
- After creation by reopening the type for editing via > Edit Sample Type Details.
- Click Add Parent Alias.
- Enter an alias for import: Name the column containing parentage information that will be in the file. The column name is case sensitive.
- Select a sample type...: Select the Sample Type where the parent resides. This may be in the "(Current Sample Type)" or another one that has been defined.
- You can add additional parentage columns if applicable by clicking Add Parent Alias and repeating the process.
- Click Save.
The system will capture and generate lineage for the parent(s) of the samples you have created. Learn more about using the Lineage tab in sample details below.
Add Source Alias
Within the definition of a Sample Type, you can indicate one or more columns that will indicate a Source of the samples being created. Setting a source alias in the definition of a Sample Type creates the linkage to sources during import, rather than requiring sources be added later.You will see the Source Import Aliases listed on the overview tab for the Sample Type.Give the name of the source alias column and select the source type from the dropdown, as for parent samples. You can include multiple source aliases as needed.Learn more about sources in this section: Sources
Create Aliquots, Derivatives, and Pooled Samples
Once you have created the parent samples in the system and want to create new samples with specific parents (i.e. aliquot, pool, or derive new samples), you can do so from the Samples grid or by importing from a file referencing the parent sample IDs.Create from Samples Grid
Within the application, you can create new samples from any grid of parent samples. Note that if you select more than 1000 rows, the option to create samples with those parents is disabled.- Select the Sample Type of interest from the main menu.
- Select the parent sample(s) using the checkbox(es).
- Select Create > [Name of Sample Type].
- In the popup, specify whether you want to create:
- Derivatives: Create multiple output samples per parent.
- Pooled Samples: Put multiple samples into pooled outputs.
- Aliquots: Create aliquot copies from each parent sample.
- Add the desired number of new samples and click Go to Sample Creation Grid.
Learn more about providing the required information to Finish Creating the selected type of child sample in this topic:
Create from Selected Sources
If you have already created the Sources in the system and want to create new samples from specific sources, you can do so from the Sources grid.- Select the Source Type of interest from the main menu.
- Select the desired source(s) using the checkbox(es).
- Select Create > Samples > [Name of Sample Type].
- Add the desired number of samples by entering the number and clicking Go To Sample Creation Grid.
- You will see the selected Sources prepopulated in the column for that type of source in the grid.
- Enter remaining sample information before clicking to Finish Creating the samples.
Import from File
After creating the parent samples, you can create new derivatives, pooled samples, and aliquots by importing from a file, referencing the parent samples you already created. Obtain the expected import format template, then populate it to indicate the relationships.- Select the Sample Type of interest from the main menu.
- Select Create > [Name of Sample Type].
- Click Import Samples from File.
- Click Template to download the template of fields.
- Populate the spreadsheet as needed to indicate the intended relationships, then import it to create the new samples.
Explore Sample Lineage Graph
Viewing any sample detail page, you will see a tab for Lineage in the header bar. For example:
The lineage graph lets you explore a visual representation of the parentage of samples.
- Click anywhere in the graph and drag to reposition it in the panel.
- Click any node to see details in the panel to the right.
- Double-click any node to shift focus to that node, which will also adjust to show up to 5 generations from that node.
- This allows you to view the "siblings" of a sample of interest by first double-clicking the common "parent", and then single clicking each sibling node for details.
- Zoom out and in with the and buttons in the lower left.
- Step up/down/left and right within the graph using the arrow buttons.
- Refresh the image using the button. There are two options:
- Reset view and select seed
- Reset view
- On the right of the graph, a side panel lists the children as links.
- Click any sample to reset the graph focus in the left hand panel.
- Hover over a link to reveal direct links to the overview page or lineage view for that child. A tooltip will also show the Sample Type name.
Note that only five generations will display on the lineage graph. To see additional generations, walk the tree up or down to see more levels in either direction.You can switch to the grid view of the lineage by clicking the green Go To Lineage Grid button.Explore a more complex lineage example in our "Explore Sample Manager" demo project.
Lineage Grid
The lineage grid can be especially helpful when viewing lengthy lineages or derivation histories. By default, the children of the currently selected sample, aka the "seed", are shown.If this sample has parents, the Show Parents button will be enabled and you can click it to see them. If the sample has children that are not shown, the Show Children button will be enabled and you can click it to see them.Entries in the Names column are clickable and connect to the overview page for the sample.The Distance column specifies the number of generations between each row and the selected seed sample.Use the arrow buttons in the Change Seed column to change the focus of the grid, expanding and collapsing lineage hierarchies to focus on a different seed.
Troubleshooting
In situations where sample names are only strings of digits, you may see unexpected lineage results if those "number-names" overlap with row numbers of other samples. In such a situation, when there is ambiguity between sample name and row ID, the system will presume that the user intends to use the value as the name.Related Topics
Aliquots, Derivatives, and Sample Pooling
New samples can be created from existing samples in three distinct ways:


 When the aliquot creation is complete, as with any other you will have a banner message telling you how many were created. They are not selected by default (the original 'parent' samples remain selected) but the banner offers you quick links to add them to storage or select them in the grid. Learn more here.
Using this default as an example, if you create 5 aliquots of the sample "Tutorial-30", then "Tutorial-30-5" is the 5th aliquot. If you create a new set of aliquots later, the incrementing numbers will continue to help you clearly track the total number of aliquots of your sample. When you are creating aliquots, you can see an example of the name that will be generated in a tooltip.
When the aliquot creation is complete, as with any other you will have a banner message telling you how many were created. They are not selected by default (the original 'parent' samples remain selected) but the banner offers you quick links to add them to storage or select them in the grid. Learn more here.
Using this default as an example, if you create 5 aliquots of the sample "Tutorial-30", then "Tutorial-30-5" is the 5th aliquot. If you create a new set of aliquots later, the incrementing numbers will continue to help you clearly track the total number of aliquots of your sample. When you are creating aliquots, you can see an example of the name that will be generated in a tooltip. If instead you wanted to use a dot between the sample name and aliquot number ("Tutorial-30.5") you'd use the pattern:
Learn about more options for aliquot naming patterns in the core LabKey Server documentation.
If instead you wanted to use a dot between the sample name and aliquot number ("Tutorial-30.5") you'd use the pattern:
Learn about more options for aliquot naming patterns in the core LabKey Server documentation.
 The name of this menu will reflect the current selections, and the filter will be shown if applicable. For example, Aliquots Only would filter to "Is Aliquot = true" and look like:
When importing a mixed set of new samples, where some are aliquots and others are not, whether there is a value in this column will determine whether "isAliquot" is set to true, and whether the aliquot suffix pattern is used (i.e. S-001-1, S-001-2, S-001-3 in the above).
 On the Aliquots tab for the originating sample, you'll see a grid showing all the aliquots of that sample, making it easy to track and perform storage operations on the group.
 The Aliquots panel and tab in this case would show any subaliquots of this aliquoted sample.
 Note that only 5 generations will display on the lineage graph. To see additional generations, walk the tree up or down to see more levels in either direction.
- Derivatives: Derive new samples from one or more existing samples, possibly with new properties or treatments.
- Samples may also be derived from Sources in the system.
- Pooled Samples: Group together existing samples to make a combined pool sample for actions on the aggregate.
- Aliquots: Split a sample into identical aliquots which retain the properties of the parent sample.
- You may also split an aliquot into a next generation of "subaliquots" by the same process.
- Derive Samples from Selected Parents
- Pool Samples
- Create Aliquots
- Import Aliquots, Derivatives, and Pooled Samples from File
- Work with Aliquots
Derive Samples from Selected Parents
If you have already created the parent samples in the system and want to create new samples with specific parents (i.e. derive new samples), you can do so from the Samples grid. (Note that if you select more than 1000 rows, the option to create samples with those parents is disabled.)- Select the Sample Type of interest from the main menu.
- Select the parent sample(s) using the checkbox(es).
- Select Create > [Name of Sample Type].
- In the popup, if you selected multiple parent samples, specify whether you want to create:
- Derivatives: Create multiple output samples per parent.
- Pooled Samples: Put multiple samples into pooled outputs. Covered in the next section.
- Add the desired number of "Derivatives per parent" by entering the number and clicking Go to Sample Creation Grid.
- You will see the Samples you had selected prepopulated as parents in the grid, with as many rows per parent as you specified.
- Enter remaining sample information before clicking to Finish Creating the samples.
Pool Samples
To pool a set of samples into pooled outputs, such as for testing on an aggregate of many samples, follow these steps:- Select the Sample Type of interest from the main menu.
- Select the 'parent' samples using the checkboxes.
- If you only select one parent sample, the pooling option will not be shown.
- Select Create > [Name of Sample Type].
- In the popup, select Pooled Samples: Put multiple samples into pooled outputs.
- Add the desired number of New samples per parent group by entering the number and clicking Go to Sample Creation Grid.
- You will see the Samples you had selected prepopulated as parents in every row of the grid.
- Enter remaining sample information before clicking to Finish Creating the samples.
Create Aliquots
To create aliquot portions of samples, each with copied properties from the parent sample, follow the same initial process. If you select several samples first, each one will be aliquoted individually, i.e. you will see the desired number of rows per 'parent' with each only having the single parent.- Select the Sample Type of interest from the main menu.
- Select the 'parent' sample(s) using the checkbox(es).
- Select Create > [Name of Sample Type].
- In the popup, select Aliquots: Create aliquot copies from each parent sample.
- Add the desired number of Aliquots per parent by entering the number and clicking Go to Sample Creation Grid.
- You will see the Samples you had selected prepopulated as parents in every row of the grid.
- You cannot change parent or source types when creating aliquots.
- Each aliquot row will have the AliquotedFrom field set to the selected 'parent' (which may itself have additional parent and source information in the system.
- Enter any remaining sample information before clicking to Finish Creating the aliquots.
Aliquot Naming
Like any other sample, aliquots must each have a unique name within the sample type. It is best practice for aliquots to include the name of the 'parent' sample, i.e. the value from the ${AliquotedFrom} column. You can accept the default naming pattern for aliquots or include a custom pattern in the sample type definition.The default aliquot naming pattern is the parent sample name followed by a dash and incrementing counter:${${AliquotedFrom}-:withCounter}If instead you wanted to use a dot between the sample name and aliquot number ("Tutorial-30.5") you'd use the pattern: ${${AliquotedFrom}.:withCounter}Aliquot Information in Grids
When viewing a grid of samples, you will see the following columns related to aliquots. Both of these columns are populated only for the original samples; they are set to null for aliquots themselves.- Aliquot Total Volume: Aggregates the total available volume of all aliquots and subaliquots of this sample which are both in storage and not checked out.
- Aliquots Created Count: The total number of aliquots and subaliquots of this sample.
- This column is populated only for samples, and set to zero for samples with no aliquots.
Show Samples, Aliquots, or Both in Grids
To make it easier to work with aliquots, all sample grids include an "Is Aliquot" column, showing 'true' for aliquots. You can use grid filtering on this column in the omnibox, or use the checkboxes on the Show Samples menu above the grid to control whether to see:- Samples and Aliquots
- Samples Only
- Aliquots Only
The name of this menu will reflect the current selections, and the filter will be shown if applicable. For example, Aliquots Only would filter to "Is Aliquot = true" and look like:
Import Aliquots, Derivatives, and Pooled Samples from File
After creating the parent samples, you can create new derivatives, pooled samples, and aliquots by importing from a file, referencing the parent samples you already created. Obtain the expected import format template, then populate it to indicate the relationships.- Select the Sample Type of interest from the main menu.
- Select Create > [Name of Sample Type].
- Click Import Samples from File.
- Click Template to download the template of fields.
- Populate the spreadsheet as needed to indicate the intended relationships. Key details follow.
- Drop the completed spreadsheet into the upload window, then click Import.
Aliquots
Populate the AliquotedFrom column with the Sample ID of the parent Sample. To create 3 aliquots of sample "S-001" for example:| SampleID | ...Other columns... | AliquotedFrom |
|---|---|---|
| [generated ID] | ...Other values... | S-001 |
| [generated ID] | ...Other values... | S-001 |
| [generated ID] | ...Other values... | S-001 |
Derivatives
Populate the columns defined as parent aliases with the Sample IDs of the parent(s). For example, to create two derivatives of two parent samples, where IDs will be generated and the parent alias column is named "ParentSample":| SampleID | ...Other columns... | ParentSample |
|---|---|---|
| [generated ID] | ...Other values... | S-001 |
| [generated ID] | ...Other values... | S-001 |
| [generated ID] | ...Other values... | S-002 |
| [generated ID] | ...Other values... | S-002 |
Pooled Samples
Similar to the above, populate the columns defined as parent aliases with the Sample IDs of the parents. For example, to create two pooled samples from two parent samples:| SampleID | ...Other columns... | ParentSample |
|---|---|---|
| [generated ID] | ...Other values... | S-001, S-002 |
| [generated ID] | ...Other values... | S-001, S-002 |
Work with Aliquots
View Aliquots of a Sample
When viewing sample details (click the name of the sample on the grid) you will see a panel showing Aliquot Details, if any aliquots of this sample exist.- Total aliquots created, including subaliquots.
- Available vials: Availability means that an aliquot is currently in storage (a location is assigned and it is not checked out).
- Current amount available: based on the combined stored amounts for all available aliquots. Shown here, 5 aliquots have been created but not yet added to storage.
- Jobs with aliquots: Count will link to a grid filtered to show the set of jobs.
- Assay data with aliquots: Count will link to a grid filtered to show the set of runs.
On the Aliquots tab for the originating sample, you'll see a grid showing all the aliquots of that sample, making it easy to track and perform storage operations on the group.
Find Original Sample Details for an Aliquot
When you are viewing sample details for an aliquot it will look like any sample, with Aliquot Data on the Overview panel, as well as Original Sample Data for the sample it was aliquoted from. A link to the details page for that originating sample is included.The Aliquots panel and tab in this case would show any subaliquots of this aliquoted sample.
Aliquots in Lineage
The Lineage tab for a sample that has aliquots will show them as 'children' in the graph. Use the Filter menu to select whether to include Derivatives, Sample Parents, and Aliquots in the display.Note that only 5 generations will display on the lineage graph. To see additional generations, walk the tree up or down to see more levels in either direction.
Related Topics
- Sample Lineage / Parentage
- Manage Samples: Edit lineage for a single sample.
- Edit Selected Samples: Edit parents and sources for multiple selected samples.
- Manage Sample Status
Sample Timeline
Events that happen to individual samples are available on the Sample Timeline. You can view them in a graphical format which records the full history for an individual sample in your system.The sample timeline can play an important role in tracking chain of custody for samples and complying with good laboratory practices. A sample timeline can help you answer questions like:
 Shown here, a sample was created (registered), it was added to a job, assay data was loaded for it, and then it was updated. The update Event Details show that there were changes to two Sources for the sample.

 Use checkboxes to filter events to show any combination of:

- Where is my sample located right now?
- Who has it now and when did they take possession of it?
- What has been done to my sample before I received it?
View Sample Timeline
To see the sample timeline, click the name of the sample in any grid where it is listed. You can find it on the grid for the Sample Type, access it from any assay data uploaded for it, or find it listed for a workflow job.Click the Timeline tab along the top row. You will see all events for that specific sample.Shown here, a sample was created (registered), it was added to a job, assay data was loaded for it, and then it was updated. The update Event Details show that there were changes to two Sources for the sample.
Current Status
The Current Status section in the upper right includes summary details like where the sample is now, who was the last to handle it (and when) and active status values.Sample status, storage status, and job status of samples are highlighted with color coded indicators:- Available (green)/Consumed (yellow)/Locked (red)
- Not in storage/in storage
- No job assigned/Assigned to job
Event Details
Click any event on the timeline to see the Event Details in a panel on the lower right. For example, when the event is "Sample was updated," the details section will say when and by whom.Listing Order
By default, the timeline will Show Oldest first. Use the dropdown at the top to switch to Recent first instead.
Filter Timeline
When the list of timeline events is long, it can be helpful to filter for events of interest. Click Show filters above the listing to open the filters panel (the link will now read "Hide filters").Use checkboxes to filter events to show any combination of:
- Sample Events
- Assay Events
- Job Events
- Storage Events
Export Timeline
Click the (Export) button to download the timeline as an Excel file. The exported file will include:- Date
- Type of event
- Event name
- User
- Old Event Details
- New Event Details
Related Topics
- Audit Log: View all events for all samples.
- Storage Events Timeline for a Sample
- Manage Sample Status
Manage Samples
This topic covers the management of samples and types of samples within the Sample Manager application.
 You can select between several ways to view all the samples in the system.
 Click the name to open the set of individual samples of that type.
 Click a square to open a grid view of data filtered for that month and Sample Type.
 Click a card to see the grid of data for that Sample Type.
 Sample Type Details are shown in the left hand panel, including the Description, Naming Pattern, Metric Unit, Parent Import Alias(es), and Source Import Alias(es). The right hand panel shows sample type insights
 Below the details and insights, the grid of Samples can be filtered, sorted, and searched using the omnibox selection field. You'll see the Status of each sample with color coding of different types of status.
 When several sample Status values have the same base type, such as "Received" and "Available" both being "Available" samples, you can hover over portions of the bar for details of that specific sample status. Click any bar segment to filter the samples grid to show only those samples.

 Panels on the Overview tab include:
 You can also delete one or more samples from the grid view for the Sample Type. Note that you can only delete up to 10,000 samples at one time, so if you need to delete more than that, perform the deletion in batches.
 If any of the samples you attempt to delete were used to derive other samples (i.e. are parent samples) or are associated with assay runs (i.e. linked as lookups from data you have imported) you will not be able to delete them. The popup will give you more details and ask you to confirm or cancel the partial deletion of any samples without dependencies.
 When you delete samples, they will be automatically removed from any picklists to which they had been added. On affected picklists, users will see a blank row where the deleted sample used to be.
- View All Sample Types
- View Samples of One Type
- Sample Type Details
- Sample Insights Panel
- Menu
- Manage Menu
- Jobs Menu
- Storage Menu (Available to users with the Storage Editor role.)
- View Individual Sample Details
- Delete Samples
Freezer Management AvailableYou can track the storage and usage of samples through the Freezer Management feature. Learn about storing samples in freezers here:
View All Sample Types
To view all the Sample Types defined in LabKey Sample Manager, click Sample Types on the main menu.You can select between several ways to view all the samples in the system.
Grid
The grid view of all Sample Types lists the name, description, and other details about each type of sample in the system.Click the name to open the set of individual samples of that type.
Heatmap
The heatmap shows a 12 box row for each type, representing 12 months of sample collection. Darker shades are used for months where more samples were collected. Hover over any square for more details.Click a square to open a grid view of data filtered for that month and Sample Type.
Cards
The card view of all samples indicates the total number of samples for that type.Click a card to see the grid of data for that Sample Type.
View Samples of One Type
You can open the grid of all samples of a specific type in several ways:- Click the type name in one of the ways to view all Sample Types listed above
- Click the graph bar for that Sample Type on the main dashboard
- Clicking the sample name directly from the top level menu from anywhere in the application.
Sample Type Details are shown in the left hand panel, including the Description, Naming Pattern, Metric Unit, Parent Import Alias(es), and Source Import Alias(es). The right hand panel shows sample type insightsBelow the details and insights, the grid of Samples can be filtered, sorted, and searched using the omnibox selection field. You'll see the Status of each sample with color coding of different types of status.
Sample Type Insights
The panel of Insights gives a quick visual summary of Storage Status, Sample Status, and Aliquots. Color coded bars show the relative prevalence of each state. Hover for details, shown here, how many samples are checked out. Click any bar segment to filter the samples grid to show only those samples.When several sample Status values have the same base type, such as "Received" and "Available" both being "Available" samples, you can hover over portions of the bar for details of that specific sample status. Click any bar segment to filter the samples grid to show only those samples.
Menu
The menu in the upper right (expanded above) offers these options:- Edit Sample Type Design: Reopen the existing details and fields; edit using the same interface as you used to create the Sample Type. Note that you cannot edit the Name of the type, and use caution if you change the naming pattern that you will maintain unique names for each sample.
- Delete Sample Type: Note this will delete all sample data as well
- View Audit History: Administrators can view the audit history for this Sample Type from this link.
Manage Menu
Actions on the Manage menu for a Sample Type include:- Import Samples
- Delete Samples
- Edit Selected Samples in Grid: Edit the selected rows in a grid.
- Edit Selected Samples in Bulk: Assign the same value to one or more fields of a batch of selected rows.
- Edit Sources for Selected Samples in Bulk
- Edit Parents for Selected Samples in Bulk
- Add to Picklist
Jobs Menu
The Jobs menu offers the following options. Learn more at the links:Storage Menu
The Storage menu offers users with the Storage Editor role the following options. Learn more at the links:View Individual Sample Details
Click the Sample ID for any sample to view the details entered about it. Panels for Storage Location, Aliquots, and Details give you the specifics for this sample. From the (bars) menu you can create new samples of any type, delete this sample, add it to a picklist, or upload assay data for this sample. Storage editors can check it out or discard it. You can also view the audit history for this specific sample.
Panels on the Overview tab include:
- Storage Location: Shows the current location, checkout status, and storage details.
- Aliquots: Details about any aliquots created of this sample.
- Details: Details about this sample.
- For an aliquot, this panel will include details about the aliquot and about the original sample.
- Source Details: Information about sources of this sample.
- Parent Details: Information about parents of this sample.
- Lineage: View a lineage graph or grid.
- Aliquots: See aliquots and subaliquots of this sample.
- Assays: All assay data available for this sample (and any aliquots).
- Jobs: Find all jobs involving this sample (and any aliquots).
- Timeline: See a detailed timeline of all events involving this sample.
Edit Sample Details
To edit the details for this sample, including the description, click the (Edit) icon for that section. Make changes using dropdowns and selectors similar to when you originally assigned the values. Remember to click to Save your changes.Edit Sample Lineage
You can edit the source and parent information (i.e. the lineage) for a sample directly from the sample details page. Use the (Edit) icon for the Source Details or Parent Details section as needed. Make changes using dropdowns and selectors similar to when you originally assigned the values. Remember to click to Save your changes.More Sample Editing
Learn more about editing samples in this topic:Delete Samples
Deletion of samples may be necessary for a variety of reasons, and once completed, deletion cannot be undone. You can delete a single sample while viewing it's details page.- From the detail page for the sample to delete, open the (bars) menu on the right.
- Select Delete Sample.
- You will be asked to confirm the deletion.
- From the grid view for the type of sample to delete, select one or more checkboxes for the sample(s) you wish to delete. To select all samples, use the checkbox at the top of the column.
- Select Manage > Delete Samples.
- You will be asked to confirm the deletion.
When you delete samples, they will be automatically removed from any picklists to which they had been added. On affected picklists, users will see a blank row where the deleted sample used to be.
Related Topics
Manage Sample Status
Samples often get categorized as scientists are tracking them. By defining and using Sample Status values, your users can easily tell whether samples are available, consumed, or locked (unavailable). Aliquots have status values separate from their parent sample.Sample Manager supplies basic built in status values, Available, Consumed, and Locked, and an administrator can add additional statuses in any of these categories to match their workflows. For example, custom status values could be used to track which samples have been shipped, received, are in use, are offsite, etc.
 Scroll down to find the current set of defined statuses. A lock icon indicates that there are currently samples "using" that status value so that it may not be deleted and its type cannot be changed. Additional status values can be defined that mean the same things. For example, "Received" might be an interim internal status on they way to full availability. The sample is neither consumed, nor locked, but might still need a step like assignment to a storage location before it will be switched to full "Available" status.Samples in certain statuses will be prevented from certain actions, both in the UI and enforced by the server. For example, a Locked sample can't be deleted or checked out of storage, a consumed sample can't be aliquoted, etc. An administrator may, however, update the status of a sample if a mistake was made or conditions have changed.

 For example, you might add a new status named "Received" which is another form of the "Available" type of status, representing newly arrived samples which may need an additional step performed before they are officially "Available" to your users.
 The status of a sample can later be changed by editing in a grid or in bulk for a set of samples at once.
 When editing in bulk, saving will open a popup where you can check Yes, discard the sample(s) and optionally enter a comment:


 Hover over any bar segment for more details and click for the filtered set of samples of that type in that status; shown above, you'd see 260 "Available" Plasma samples.Use the refinement menu, select All Statuses, With a Status, or No Status to control which sample statuses are displayed. For instance, using the No Status option, you can easily see and click through to the subset of samples that still need to have a status assigned, in this case in two sample types.
- Manage Sample Statuses
- Assign Sample Status
- Sample Status Legend
- View Sample Status
- Sample Count by Status Dashboard
Manage Sample Statuses
The Sample Manager application has 3 built-in statuses, also representing three main types of status:- Available: Can be used.
- Consumed: Used up, and no longer can be aliquoted or checked out, but remains in the system for analysis and tracking.
- Locked: Not currently available, but may later become available.
Scroll down to find the current set of defined statuses. A lock icon indicates that there are currently samples "using" that status value so that it may not be deleted and its type cannot be changed. Additional status values can be defined that mean the same things. For example, "Received" might be an interim internal status on they way to full availability. The sample is neither consumed, nor locked, but might still need a step like assignment to a storage location before it will be switched to full "Available" status.Samples in certain statuses will be prevented from certain actions, both in the UI and enforced by the server. For example, a Locked sample can't be deleted or checked out of storage, a consumed sample can't be aliquoted, etc. An administrator may, however, update the status of a sample if a mistake was made or conditions have changed.
View or Edit Status Details
Click the name of a status to see details on the right. Here you may edit the Label, Description, and for statuses not currently in use, you can change the Status Type.
Add New Status
The three main statuses correspond to the three main "status types" with different actions allowed for each type. Adding additional custom status settings can support your lab's procedures and user expectations. Click Add New Status and populate the fields on the right.For example, you might add a new status named "Received" which is another form of the "Available" type of status, representing newly arrived samples which may need an additional step performed before they are officially "Available" to your users.
Assign Sample Status
Users can assign statuses to their samples throughout the system:- At sample creation
- During file import of new or updated samples
- When updating a single sample's details
- In a bulk sample update
The status of a sample can later be changed by editing in a grid or in bulk for a set of samples at once.
Change Status to Consumed
When you change the status of a sample to "Consumed" (i.e. to any named status of the "Consumed" type), this typically means that there is no more of the sample to be used. If the sample is in storage, the user will also be prompted to set the storage status to "Discarded".When editing a single sample's details, use the checkbox to also Discard sample, optionally adding a comment:When editing in bulk, saving will open a popup where you can check Yes, discard the sample(s) and optionally enter a comment:
Sample Status Legend
To see the set of available status values, hover over the for the Status column or field to see a legend listing all the available status values and their color coding.
View a Sample's Status
Sample status information will be displayed in sample grids and on the sample overview and storage sample details pages. Color-coded blocks and the legend make it easy to see status at a glance. The name of the specific status will be shown, with the color applied based on the type of status it is:- Available: green
- Consumed: yellow
- Locked: red
Status of Samples in Storage
These color codes are also used in storage views to indicate status. Hovering will give you more detail, as shown below for a locked sample.
Note that Sample Status of a sample in storage is not the same as the Storage Status (In Storage, Checked Out, etc), though they may be related. Learn more about storage status in this section: Freezer Management
Status of Samples on Picklists
Note that picklists created prior to the addition of the Sample Status feature will not include the Status column. Those created later will include it.If you are using Sample Manager within a Premium Edition of LabKey Server, you can update older picklists to add this column. Learn more in this topic: Customize Sample Manager Grids.
Sample Count by Status Dashboard
On the main dashboard, you can see an overall picture of the status of your samples using the Sample Count by Status chart. A bar for each Sample Type is color coded to show how many samples of that type in each status. Sample statuses of the same main type (such as "Available" and "Received" in this image) will share the same color (in this case, green).Hover over any bar segment for more details and click for the filtered set of samples of that type in that status; shown above, you'd see 260 "Available" Plasma samples.Use the refinement menu, select All Statuses, With a Status, or No Status to control which sample statuses are displayed. For instance, using the No Status option, you can easily see and click through to the subset of samples that still need to have a status assigned, in this case in two sample types.
Related Topics
Edit Selected Samples
This topic describes how to simultaneously edit the details and lineage for multiple samples either in a grid or with bulk setting of chosen fields.To edit selected samples, select them on a grid or picklist using the checkboxes. If you are viewing a grid that contains samples of several types, you will first need to switch to the tab for the specific sample type before you can edit properties. Once you've selected the samples to edit, use the Manage menu to select one of the options:

 Storage Details: Storage Editors can edit the storage information for the selected samples.
 Lineage Details: Edit the sources and parent samples for the selected samples.

 Click Edit with Grid to make further adjustments to details or storage information in the grid editor.Click Update Samples when finished editing.
 To provide a new value for another type of source, click Add Source and repeat the selection process for Source Type 2.Click Update Sources when finished.
 To provide a new value for another Parent Type, click Add Parent and repeat the selection process for Parent Type 2Click Update Parents when finished.
- Edit Selected Samples in Grid
- Sample Data
- Storage Details (Available to users with the Storage Editor role)
- Lineage Details
- Edit Selected Samples in Bulk
- Edit Sources for Selected Samples in Bulk
- Edit Parents for Selected Samples in Bulk
Edit Selected Samples in Grid
When using the grid editor, there are three tabs available with grids of details.- Any field that offers a selection menu (Sample Status, Text Choice, list lookups), will be shown with a .
- Type ahead to narrow the choices and click or tab to select the highlighted value.
- For example, the Status field in the first image below shows an open menu.
- Fields that support multi-select, like sources and parents, will show any existing selection as well as allow you to select more from the dropdown.
- For example, the Tutorial Labs field in the third image below already contains one value, and you can add an additional value as appropriate.
- Hover over the for the Status field to see a legend of available statuses.
Storage Details: Storage Editors can edit the storage information for the selected samples.Lineage Details: Edit the sources and parent samples for the selected samples.
- To edit or add a selection to an existing column, click the or start typing, you will see a dropdown of matching options to choose from.
- Note that lineage for aliquots cannot be changed after they are created. Rows for any selected aliquots will be grayed out here.
- To add a new parent or source association for these samples, click Add Parent or Add Source, select the desired type for the new association, then select values for the rows in the grid.
Edit Selected Samples in Bulk
Sample details can be edited in bulk. If any Aliquots are selected when you edit samples in bulk, only the aliquot-editable fields will be shown in the modal and available for bulk editing. To bulk edit sample fields that are not aliquot-editable, be sure to only select non-aliquot samples before selecting this option.In the update panel, click the slider to Enable the fields that you want to assign the same value for all the selected samples. Hovering over the will give you more detail about any field, such as for the Status field, you'll see a legend of available statuses. Shown below, the "Project" will be changed but the other fields will be left unchanged.Click Edit with Grid to make further adjustments to details or storage information in the grid editor.Click Update Samples when finished editing.
Edit Sources for Selected Samples in Bulk
When you Edit Sources for Selected Samples in Bulk, any values provided will replace the existing sources of the chosen type(s) for the selected samples. Do not provide values for any source type that you want to remain unchanged for the selected samples.In this action you will not see the current source values for the selected samples; use the grid editor to see those details as you edit.- Select the Source Type 1 that you want to replace for the selected samples.
- Select the Source ID to assign to the selected samples.
- Note that if you leave this selection blank, it will remove any current values for that type of source.
To provide a new value for another type of source, click Add Source and repeat the selection process for Source Type 2.Click Update Sources when finished.
Note that lineage for Aliquots cannot be changed. If any aliquots are selected for a bulk edit of Sources, they will be ignored.
Edit Parents for Selected Samples in Bulk
When you Edit Parents for Selected Samples in Bulk, any values provided will replace the existing parents of the chosen type(s) for the selected samples. Do not provide values for any parent type that you want to remain unchanged for the selected samples.In this action you will not see the current parent values for the selected samples; use the grid editor to see those details as you edit.- Select the Parent Type 1 that you want to replace for the selected samples.
- Select the Parent ID to assign to the selected samples.
- Note that if you leave this selection blank, it will remove any current values for that type of parent.
- To choose multiple parents of the same type, select one, then click elsewhere in the entry box to reopen the selection menu.
To provide a new value for another Parent Type, click Add Parent and repeat the selection process for Parent Type 2Click Update Parents when finished.
Note that lineage for Aliquots cannot be changed. If any aliquots are selected for a bulk edit of Parents, they will be ignored.
Related Topics
Sample Finder
This topic describes how to find samples in bulk using properties of their sources or parents. The Sample Finder helps you build a set of criteria to find samples of interest. For example, you might want to find all samples of different types from a specific source or lab, or see if you have enough samples in the system from male, BALB/c mice to perform a given experiment.The criteria you define will persist for the next time you visit the Sample Finder making it easy to focus on what you need regularly.
If instead you want to search for samples in bulk by barcode or sample ID, follow the instructions in this topic: Sample Search.
 Click to find samples by either:
 Click either the Source or Parent tile to add a new sample filter.In the popup, choose the specific type (of source or parent), and field on which you want to filter. You can filter some fields by values and any field using filtering expressions.
 Click Find Samples to add your filter.


 The data grid will show the parent and source columns included in your criteria, as well as common properties of the samples themselves, such as status and creation date. You can use these results to refine the sample finder criteria tiles.Like with other sample grids, you can also use the omnibox to add further filters and sorts on the columns displayed until your grid shows the samples you want. You can view All Samples or just samples or aliquots.Actions available on the Sample Finder results vary based on user permissions, but include actions available on other kinds of sample grids for the same user, such as:
Sample Finder
To open the Sample Finder, select it from the search menu anywhere in the application. You can also click Go to Sample Finder from the main dashboard.Click to find samples by either:
- Source Properties
- Parent Properties
Click either the Source or Parent tile to add a new sample filter.In the popup, choose the specific type (of source or parent), and field on which you want to filter. You can filter some fields by values and any field using filtering expressions.Click Find Samples to add your filter.
Choose Values
For some fields with a limited set of value options, you can use a checkbox interface to select one or more values to include. For example, to choose only samples with a Blood parent where the Project is either A or W:
Filter
You can also use the Filter tab to specify a filtering expression and enter a value.
Edit Criteria
Once you've defined any sample finding criteria, you can use the Source Properties and Parent Properties} buttons in the upper right to add more filters on other columns.Each parent or source type will have a tile, listing the active filters on columns in that type.You can use the for any tile to edit the criteria it will use to find samples. For example, you could add an additional filter on a different field of any parent or source filter you already created.To delete all criteria associated with a given source or parent, click the for that tile.Search Results
As you build your set of criteria, you will see the results grid below the tiles. There is a tab for All Samples as well as individual tabs for all defined sample types. Each shows the count of samples of that type that were found using your criteria.The data grid will show the parent and source columns included in your criteria, as well as common properties of the samples themselves, such as status and creation date. You can use these results to refine the sample finder criteria tiles.Like with other sample grids, you can also use the omnibox to add further filters and sorts on the columns displayed until your grid shows the samples you want. You can view All Samples or just samples or aliquots.Actions available on the Sample Finder results vary based on user permissions, but include actions available on other kinds of sample grids for the same user, such as:
- Creating new derivatives or aliquots
- Adding to picklists or workflow jobs
- Storage Editors can manage storage status, including checking out the found samples
Related Topics
Sample Search
This topic describes how to search for Samples in bulk using either:
 Depending on which selection you made, one of the following will be selected in the popup. (You can change to the other method if desired.)
 List the Barcodes or Sample IDs, then click Find samples.All the samples located will be listed in a grid, where you can immediately work with them or add more to the list.
 If any samples you requested were not found, you will see a notification message. Click Show all to see the IDs that were not found. In the case of a typo or incorrect type of search, you can use Add More Samples to find additional samples to add to the list.
 Click Find Samples to search for these new IDs and add them Samples to your list if found.

- Sample ID
- Barcode: Barcodes include both:
- Find Samples in Bulk
- Find Samples by Barcode
- Find Samples by ID
- Add More Samples
- Clear Search Results
- Work with Found Samples
Find Samples in Bulk
Click the right edge of the search bar or the icon on narrower browsers and select:- Find Samples by Barcode
- Find Samples by ID
Depending on which selection you made, one of the following will be selected in the popup. (You can change to the other method if desired.)
- Barcodes: Search for values in all fields designated as "Barcode Fields" across all Sample Types. This includes:
- All fields of type Unique ID.
- Any text fields designated as Barcode Fields; i.e. those which have the box "Search this field when scanning samples" checked.
- Sample IDs: Search all fields of type Sample.
List the Barcodes or Sample IDs, then click Find samples.All the samples located will be listed in a grid, where you can immediately work with them or add more to the list.If any samples you requested were not found, you will see a notification message. Click Show all to see the IDs that were not found. In the case of a typo or incorrect type of search, you can use Add More Samples to find additional samples to add to the list.
Add More Samples
Once you have found some Samples, you can click Add More Samples to add to the list. As in the original search, you can input either Barcodes or Sample IDs. This allows you to create a set of results that blend the two search methods.Click Find Samples to search for these new IDs and add them Samples to your list if found.
Clear Search Results
To clear the set of search results in the grid, click Reset. This may be a useful option in the case of entering a large number of incorrect samples or other issues.Work with Found Samples
Once you've built your list of Samples in the grid on the search page, you can use the menus for the following actions. All search result Samples are selected by default.- Picklists:
- Jobs:
- Storage:
- (Export): Export the grid to a CSV, TSV, or Excel file.
Related Topics
Integrate with BarTender
This topic describes how to integrate Sample Manager with BarTender for printing labels for your samples. Note that an administrator must complete the one-time steps to configure BarTender before use. Once configured any user may send labels to the web service for printing.
 In the popup, specify (or accept the defaults):

 In the popup, you have the following options:

 Begin in the BarTender application where you will identify the web service URL and create the label file(s) for printing. The label file has the extension .btw. Sample Manager accepts a site-wide default label file, but also allows the user to specify a different variant at the time of printing.
For versions prior to Bartender2021, use this URL:
Begin in the BarTender application where you will identify the web service URL and create the label file(s) for printing. The label file has the extension .btw. Sample Manager accepts a site-wide default label file, but also allows the user to specify a different variant at the time of printing.
For versions prior to Bartender2021, use this URL:
 In the BarTender Web Service Configuration panel, enter:


Print BarTender Labels for Samples
Before you can print labels, an administrator must have completed the one-time setup steps detailed below. The admin will have identified a site wide default label file, when printing, the user can specify a different variant to use.After configuring BarTender, all users will see the options to print labels in the user interface.Print Single Sample Label
Open the Sample Type from the main menu, then open details for a sample by clicking the SampleID.Select Print Labels from the menu.In the popup, specify (or accept the defaults):
- Number of copies: Default is 1.
- Label template: If you want to specify a different template for printing this label, enter it here. The path you provide should be relative to the default folder configured for the web service. Default is the label template file configured above.
- Click Yes, Print to send the print request to BarTender.
Print Multiple Sample Labels
From the Sample Type listing, use checkboxes to select the desired samples, then select Label from the (Export) menu.In the popup, you have the following options:
- Number of copies: Specify the number of labels you want for each sample. Default is 1.
- Selected samples to print: Review the samples you selected; you can use the Xs to delete one or more of your selections or open the dropdown menu to add more samples to your selection here.
- Label template: If you want to specify a different template for printing this label, enter it here. The path you provide should be relative to the default folder configured for the web service. Default is the label template file configured above.
- Click Yes, Print to send the print request to BarTender.
Configure BarTender Integration
Note that these docs were written for BarTender 2019, which contains Print Portal by default. If you are using BarTender 2021, the Print Portal is not installed by default. To add Print Portal to an existing installation of BarTender, re-open the original installer file, select Modify, and select BarTender with Print Portal.Begin in the BarTender application where you will identify the web service URL and create the label file(s) for printing. The label file has the extension .btw. Sample Manager accepts a site-wide default label file, but also allows the user to specify a different variant at the time of printing.
Enable HTTPS Endpoint for BarTender
Current versions of BarTender do not natively support the Https secure endpoint. Until BarTender is able to provide this support, you must use a self-signed certificate and complete these additional steps in your BarTender installation:- Install and set up BarTender Print Portal web application from the exe/msi installer.
- Setup the BarTender Print Portal with HTTPS in IIS 7. This guide provides step-by-step instructions on how to do this, including obtaining the certificate and configuring the SSL port:
- (Optional) Enable HTTPS in Print Portal under the administrative setup->security->enable authentication over HTTPS
- This just verifies that SSL is setup, but is otherwise optional since we aren't doing any auth.
- Setup your web service integration in Integration Builder and deploy it as usual.
- Key step: Deploy the Integration service on port 80, instead of a custom port.
- This is a stock file that just needs deployment via the BarTender tooling
- Setup the Label template folder location(s) in the Administration console
- The BarTender portal service URL is then:
https://<your host>/Integration/<integration service name>/Execute - For versions prior to BarTender 2021, use this URL:
https://<your host>/BarTender/API/Integration/<integration service name>/execute
Example BarTender Configuration File
Download this example to help you get started: For versions prior to Bartender2021, use this example: Once deployed using the BarTender deployment wizard, Sample Manager would access at the following location (unless you edit the service name):https://localhost/Integration/LabKeyBarTenderService/Execute
https://localhost/BarTender/API/Integration/LabKeyBarTenderService/Execute
Configure Sample Manager to Print BarTender Labels
Return to Sample Manager and select the Administration option from the user menu, then click the Settings tab.In the BarTender Web Service Configuration panel, enter:
- BarTender Web Service URL: This is the URL of the web service to use when printing BarTender labels.
- Label Template File: Specify the label file to use when printing labels with BarTender. The path should be relative to the default folder configured for the BarTender web service specified above.
- Use Test Connection to test your configuration.
- Click Save to save it.
Error Reporting
If there is a problem with your configuration or template, you will see a message in the popup interface allowing you a chance to verify or change the label template you've selected. If a change needs to be made to the underlying URL configuration, contact an administrator to retry the configuration process.
Related Topics
Barcode Fields
This topic covers options for using barcode values with your samples. Existing barcode values in your data can be represented in a text or integer field, or you can have Sample Manager generate unique barcode identifiers by using a UniqueID field. LabKey-generated barcodes are read-only and unique across your Sample Manager application.Once a sample has either type of Barcode Field, you'll be able to search for it using these values.
 By default, it will be named Barcode. If you wish, you can click the Fields section to open it and edit the field name.
 Click Finish Updating Sample Type. Barcodes will be automatically generated for any existing samples of this type, as described in the next section.
 Click Finish Updating Sample Type to confirm, then view the grid of samples to see the generated barcode values.In addition, when any new samples are added to this Sample Type, barcodes will be generated for them. You cannot provide values for a UniqueID field, or edit them.
 UniqueID generated barcodes are 9+ digit text strings with leading zeros ending in an incrementing integer value. Ex: 000000001, 000000002, etc. When more than a billion samples are defined, the barcode will continue to increment to 10 digits without leading zeros.
 Once generated by the system, barcodes in a UniqueID field cannot be edited and if data is imported into one of these fields, it will be ignored and an automatic barcode will be generated. If you need to provide your own barcode values or require the ability to edit them, do not use a UniqueID field.
 This field may be named "Barcode" if you like, but will not be managed by LabKey, or shown as the Barcode property of the Sample Type.Users can locate samples using the barcode values in this column, but must manage uniqueness and generate new barcode values for new samples outside of the application.
 Enter values by typing or using a scanner, then click Find Samples to search for them.Learn more in this topic:
- Add UniqueID Field for LabKey-Managed Barcodes
- Generate UniqueID Barcodes
- Use Existing Barcode Values
- Search by Barcode
Add UniqueID Field for LabKey-Managed Barcodes
To support barcodes generated and managed by Sample Manager, you will need a field of type "UniqueID" in your Sample Type. When you create a new Sample Type, you will be prompted to include such a barcode field.To add a "Unique ID" field to an existing sample type, open it for editing. In the Sample Type Properties section, you will see under Barcodes, a blue banner inviting you to create the field necessary. Click Yes, Add Unique ID Field.By default, it will be named Barcode. If you wish, you can click the Fields section to open it and edit the field name.Click Finish Updating Sample Type. Barcodes will be automatically generated for any existing samples of this type, as described in the next section.
Generate UniqueID Barcodes
When you add a UniqueID field to a Sample Type that already contains samples, as you finish updating the sample type, you will be prompted to confirm that adding this field will generate barcodes for existing samples.Click Finish Updating Sample Type to confirm, then view the grid of samples to see the generated barcode values.In addition, when any new samples are added to this Sample Type, barcodes will be generated for them. You cannot provide values for a UniqueID field, or edit them.UniqueID generated barcodes are 9+ digit text strings with leading zeros ending in an incrementing integer value. Ex: 000000001, 000000002, etc. When more than a billion samples are defined, the barcode will continue to increment to 10 digits without leading zeros.Once generated by the system, barcodes in a UniqueID field cannot be edited and if data is imported into one of these fields, it will be ignored and an automatic barcode will be generated. If you need to provide your own barcode values or require the ability to edit them, do not use a UniqueID field.
Use Existing Barcode Values
If you have barcodes in your Sample data already, and do not want them generated or managed by LabKey, you can include a field of type "Text" or "Integer" in your Sample Type, and check the Barcode Field box for "Search this field when scanning samples".This field may be named "Barcode" if you like, but will not be managed by LabKey, or shown as the Barcode property of the Sample Type.Users can locate samples using the barcode values in this column, but must manage uniqueness and generate new barcode values for new samples outside of the application.
Search by Barcode
Once your samples have a barcode column of either type, you can search for the value(s) to locate the sample(s). To find by a single barcode, you can use the omnibox to search or filter a grid of samples, or use the global search option in the header throughout the application to find a single barcode value.To more easily find samples by barcode value, you can use the Find Samples option.Enter values by typing or using a scanner, then click Find Samples to search for them.Learn more in this topic:
Related Topics
Sample Picklists
Samples may be added to user-defined Picklists that facilitate operations on groups of samples such as adding or removing from a freezer, adding to a workflow job, or performing bulk operations. You can add samples to picklists from many places in the application, and create new ones as needed on the fly. Team Picklists can be shared with others.A user can build a picklist privately, adding and removing samples until the correct set are defined. Samples of different types can be included on the same picklist. The completed list may be kept private or shared with other team members for use when performing other tasks.
 Give it a name, optional description, check the box if you want to immediately share it with team members, then click Create Picklist. The selected samples will be added to the new picklist.
 You will return to the sample grid, with a banner available if you want to navigate to the new picklist.


 Use the menu on the right to show "All Samples, Samples Only, Aliquots Only" in the grid.In the next section, learn about the various menus of actions available.
 Export formats include:
- Create New Picklist from Samples
- Create Empty Picklist
- Add Samples to Picklist
- Manage Picklists
- View a Picklist
- Refine and Use a Picklist
- Export Picklist
- Team Picklists and Permissions
Note that picklists are intended as a temporary grouping to support actions like including in a more persistent workflow job or freezer storage. Addition to picklists is not tracked as a timeline action for a sample.
Create New Picklist from Samples
Select the desired samples on a grid and select Create > Picklist.Give it a name, optional description, check the box if you want to immediately share it with team members, then click Create Picklist. The selected samples will be added to the new picklist.You will return to the sample grid, with a banner available if you want to navigate to the new picklist.
Create Empty Picklist
You can also create a new picklist from most places in the application. Select Create > Picklist to see the same popup as if you were creating one while adding samples to it. If you access this option from a grid of samples with samples selected, they will be added to your new picklist as described above. If you access this option without samples selected, you will create an empty picklist, which will be available for adding samples later.
Add Samples to Picklist
When you select samples and choose Manage > Add to Picklist, you will see all the Picklists available. If no picklists exist yet, you will be able to click create a new one here. When the number of picklists is long, you can use the search bar to narrow the list. Click to select the desired picklist. You'll see the existing number of samples already on the list.
Manage Picklists
Select Picklists from the user menu (or from the main menu under Your Items) to manage, add, and edit Picklists.
- Select Create > Picklist to create a new empty one.
- The primary My Picklists tab shows the picklists you have created but not shared with your team.
- Click Team Picklists to see shared ones created by you or other team members.
- Click the Name of a picklist to open it for review or editing. Learn more about using picklists below.
View a Picklist
From the Picklists dashboard, click the name of a picklist to open it in grid form. You will see the samples on the list, available on a series of tabs. Each sample type present in the list can be seen on an individual named tab (DNA and Tutorial Samples below), with detailed properties for that sample type. The All Samples tab shows the built in common properties, including the Sample ID, Status, and Storage information.Use the menu on the right to show "All Samples, Samples Only, Aliquots Only" in the grid.In the next section, learn about the various menus of actions available.
Refine and Use a Picklist
Actions available for picklists include:- menu
- Edit Picklist: Change the name, sharing, and description of the list in a popup.
- Delete Picklist: This removes the picklist, but does not delete any sample data.
- Check the box above the menus to Share this picklist with team members. When the box is not checked, the list is private to you.
- Manage: Select one or more samples to:
- Remove from Picklist
- On the tabs for individual samples, you can also use bulk editing actions on selected samples.
- Jobs:
- Start a Job: This option will not include any samples from the picklist automatically.
- Start a Job with Selected Samples
- Add Samples to Existing Job
- Storage: Select one or more samples to:
Export Picklists
To export a picklist, such as to use as a guide for physically removing samples from the freezer, click the icon above the list of samples in the picklist. If any sample rows are selected, only selected rows will be exported. If no rows (or all rows) are selected, the entire picklist will be exported.Export formats include:
- CSV
- Excel
- TSV
Note that if you are using Sample Manager within a Premium Edition of LabKey Server, you can export most Sample Manager resources as part of a folder export, but picklists are not included in these folder archive exports.
Team Picklists and Permissions
When the Share this picklist with team members box is checked for a picklist, it will appear for all team members on the Team Picklists tab of the Picklist dashboard.- Only the creator of a picklist may edit the name, description, and whether the list is shared with the team.
- All users with the Reader role in Sample Manager can read a team picklist and export the data for completing tasks.
- Any user with Editor or Admin permissions may also add or remove samples from team picklists, add picklists to jobs, and use picklists for adding and managing freezer storage of samples.
Related Topics
Sources
A sample can be mapped to one or more Sources, for example:
- Physical Sources like labs, vendors, locations, studies, etc.
- Biological Sources like patients, mice, trees, cell lines, etc.
Topics
Tutorial
Get started with sources in the Sample Manager tutorial step: Tutorial: Track Sample Sources.Create Sources
This topic covers the creation of Source Types that describe the kinds of entities from which your samples are derived. It also covers import of data to these types, i.e. creation of the individual Sources.
Creating and populating Source Types is very similar to the process used for sample types and samples, with the exception that sources do not have the option to include parent sources. If you would like a tutorial walkthrough of this process, complete the last step of the Tutorial.


 You can change the string in this default pattern to disambiguate the sources and make their types more clear to users; for example, a 'Creature' source could use the pattern "Creature-${genId}" and have names like "Creature-1, Creature-2, etc."
 Click Finish Creating # Sources when ready (the number will appear on the button).You will see a banner message with the number of new sources created and the option to click to select them in the grid.
 These sources are now available for associating with samples.
 When this box is checked, data for any Source IDs which have already been created within the system will be merged. Only the fields that are changing in the existing Source IDs need to be included in the upload. Data for new Source IDs will be used to create new IDs.
Create Source Type
Describe the type of source. Within the system, you might have several different types of source from which samples are taken, such as biological sources like animals or cell lines and physical sources like labs or vendors.From the main menu, select Source Types. When you create your first source type, there is a shortcut to Create a source type on the main menu. Any time, you can select Create > Source Type.
- Enter a Name (Required) for this Source Type, shown here 'Creature'.
- Enter an optional Description.
- Like with samples, all individual sources must have a unique name. You can either:
- Provide these with your data in a column named "SourceId" or
- Ask the system to generate them using a Naming Pattern.
- The default pattern is the word 'Source' followed by an incrementing number:
Source-${genId} - Either accept this default, specify another pattern, or delete it (and ignore the placeholder text) if you plan to supply source names.
- As for sample types, define the Fields for this Source Type. You can Import or infer fields from file or manually define fields yourself. Details are found in the topic for creating fields in sample types.
- Every Source Type includes built-in fields "SourceId", "Description", "Created/CreatedBy", and "Modified/ModifiedBy". You do not add these reserved fields and will not see them in the wizard. Find a full list of reserved and internal field names in this topic: Data Import Guidelines
- If you infer from a file that contains the built-in fields, they will not be shown as they will always be created for you.
- Note that you can create fields of the same data types as you can for sample types and assays, with the exception that you do not include fields of type "Sample". Associations of samples with sources are made from the sample definition to it's source, not the other way around.
- Click Finish Creating Source Type when finished.
Source Naming Patterns
When you create a Source Type, you decide how unique names for all the sources will be generated. You can provide them yourself or have them automatically generated with a naming pattern, similar to how samples are named.The default pattern is the word 'Source' followed by an incrementing number:Source-${genId}Create (or Import) Sources
Once you have created the Source Type, populate it with the individual sources. This process is very similar to the process of creating samples.
Note that fields of type Attachment are not included in any grid or file import methods. Values must be individually added for each Source as described in this topic: Attach Images and Other Files.
First, open the desired Source Type by clicking it's name on the main menu or Source Types page. Select Create > [Name of Source Type] to open the creation wizard.Confirm that the correct Source Type is selected, or use the dropdown to change it. As for samples, you can Create Sources from Grid or Import Sources from File. Shown here we add 3 source 'creatures' directly in a grid.Click Finish Creating # Sources when ready (the number will appear on the button).You will see a banner message with the number of new sources created and the option to click to select them in the grid.These sources are now available for associating with samples.
Merge of Sources During Import
By default, importing from a file will create new sources using the data in the file. If there is data for any existing Source IDs, the import will fail.To merge sources, use the checkbox to Update data for existing sources during import.When this box is checked, data for any Source IDs which have already been created within the system will be merged. Only the fields that are changing in the existing Source IDs need to be included in the upload. Data for new Source IDs will be used to create new IDs.
Related Topics
Associate Samples with Sources
Once source types and sources have been created, individual samples can be associated with them. This topic describes how to make those associations. For a hands-on walkthrough of this process, complete the Tutorial: Learn Sample Manager.

 When you add a source, a new column is added for the new "parents" (i.e. Sources) of the samples you are creating.
 If more than one type of source is defined in the system, the Add Source button will remain enabled so that you can add as many types of source as needed. For example, you might have both a biological source organism, and a physical source lab.Populate the grid as when creating samples, making use of the bulk insert and update options if appropriate. When you start typing into the source parent field (labelled "Creature Parents" in the above), it will filter a listing of all sources of that type from which you can select one or more.When ready, click Finish Creating Samples as before.
 You can also go to the overview page for the specific source "parent" you want to use and select > Create Samples > [Sample Type Name].In the popup, enter the number of New samples per parent to create, then click Go to Sample Creation Grid. You'll see the grid prepopulated with rows showing the associated source(s). For each source you selected, you'll have the specified number of rows. Continue to edit sample details in the grid before finishing creation.


 This will open an editor panel similar to that in the sample creation wizard. Select the Source Type you want to associate.
 This will add an entry box for Source IDs. Click to select from the menu; type ahead to narrow the choices. You can select more than one source ID for this field.
 Note that if more than one source type is defined in the system, the Add Source button would remain activated allowing you to add sources of different types for the sample.Click Save when finished.You can now view the details and lineage for this sample and it's source(s) as described above.

- Associate Samples with Sources During Sample Creation
- Create Samples from Sources
- View Source Association
- Associate Existing Samples with Sources
- Edit/Remove Source Associations
Associate Samples with Sources During Sample Creation
When you create new samples, you will see an Add Source button in the creation wizard if any source types have been created.
Note that if no source types have been created yet, you will not see this button in the user interface.
To add a source for the samples you are creating, click Add Source. Select the source type from which the source will be selected.When you add a source, a new column is added for the new "parents" (i.e. Sources) of the samples you are creating.If more than one type of source is defined in the system, the Add Source button will remain enabled so that you can add as many types of source as needed. For example, you might have both a biological source organism, and a physical source lab.Populate the grid as when creating samples, making use of the bulk insert and update options if appropriate. When you start typing into the source parent field (labelled "Creature Parents" in the above), it will filter a listing of all sources of that type from which you can select one or more.When ready, click Finish Creating Samples as before.
Create Samples from Sources
You can also create, or derive, new samples from selected sources starting from the source grid. This process is very similar to creating new samples from other "parent" samples, and the same terminology is used in the popup panel.Open the grid listing the Sources, then select one or more to use as "parent(s)" of the new samples. Select Create > Samples > [Sample Type Name]. (Note that if you select more than 1000 rows, the option to create samples is disabled.)You can also go to the overview page for the specific source "parent" you want to use and select > Create Samples > [Sample Type Name].In the popup, enter the number of New samples per parent to create, then click Go to Sample Creation Grid. You'll see the grid prepopulated with rows showing the associated source(s). For each source you selected, you'll have the specified number of rows. Continue to edit sample details in the grid before finishing creation.
View Source Association
Click the name of one of the newly created samples to open the overview page for that sample.Scroll down and notice that the Source Details section has been populated with details about the source(s) you linked when you created it.
View Source Lineage
Click the Lineage tab to see that the source is also represented in the lineage grid. Click the node for the source to see if there are other samples derived from that specific source.
Associate Existing Samples with Sources
If you create new sources after creating samples, you can add the association from the sample details page. In the next section, see how to edit existing source associations.Open a sample type using the main menu, then an individual sample by clicking the Sample ID. You will see the Source Details (if any). Click the icon to edit the source associations for this sample.This will open an editor panel similar to that in the sample creation wizard. Select the Source Type you want to associate.This will add an entry box for Source IDs. Click to select from the menu; type ahead to narrow the choices. You can select more than one source ID for this field.Note that if more than one source type is defined in the system, the Add Source button would remain activated allowing you to add sources of different types for the sample.Click Save when finished.You can now view the details and lineage for this sample and it's source(s) as described above.
Edit/Remove Source Associations
Open a sample type using the main menu, then an individual sample by clicking the Sample ID. Use the same icon to edit existing source associations in the Source Details section.
- Use dropdowns for Source IDs to add new sources of the types that are already associated.
- Click 'X' to delete individual sources or remove all sources of a given type
- Click Add Source to add new sources of another type.
Related Topics
Manage Sources
This topic covers the administration and management of Sources you have defined.
 As with sample types and assay designs, you can select among different views of the source types: grid, card, and heatmap.You'll see the name and description of each source type, as well as the number of sources that have been created.
 From the Grid Views menu on the right, you can also select a "NameOnly" grid view which will hide the creation, modification, and number of sources information.

 You can also create new samples associated with this source directly from the overview tab by selecting > Create Samples. To associate existing samples with this source, see this topic: Associate Samples with Sources.
 Use the menu on the right to show "All Samples, Samples Only, Aliquots Only" in the grid.When viewing samples on a sample-type specific tab, all of the following menus and actions are available. When viewing the tab containing samples of all types, the Manage actions specific to a type are not available (like bulk editing properties and lineage).


 If the group of selected sources includes any that cannot be deleted, you will see a popup message clarifying that only sources without associated samples can be deleted. If some sources can be deleted, you have the option to complete the partial deletion. Deletion of sources cannot be undone.
View all Source Types
The top level menu lists the name of source types that are defined in the system. Click Source Types to see the full listing:As with sample types and assay designs, you can select among different views of the source types: grid, card, and heatmap.You'll see the name and description of each source type, as well as the number of sources that have been created.From the Grid Views menu on the right, you can also select a "NameOnly" grid view which will hide the creation, modification, and number of sources information.
Manage a Source Type
Click the name of a source to manage details of that particular source. You can use the grid view or the top menu to switch which source page you are viewing. Use the three bar menu to select:- Edit Source Type Design: Reopen the source type creation wizard to change details or fields. Note that you cannot change the name of a source type.
- Delete Source Type: Delete this type of source completely. This will delete the type, all sources of this type, and all dependencies. Deletion cannot be undone.
- View Audit History: See the history of actions on this source type.
Manage a Single Source
Click the Source ID to see details for a particular source.- In the top panel you will see all the Samples generated from this specific source of any type.
- Below, a panel lists all the details and offers authorized users an edit link.
- Tabs along the top row let you click for all the Lineage, Samples, Assays, and Jobs that involve this source.
You can also create new samples associated with this source directly from the overview tab by selecting > Create Samples. To associate existing samples with this source, see this topic: Associate Samples with Sources.
View Lineage, Samples, Assays, and Jobs
Use the Overview, Lineage, Samples, Assays, and Jobs tab for a source (circled above) to see the other information associated with this particular source.Lineage: See the lineage of samples associated with this source. Learn more about browsing lineage graphs and grids here.Samples: This tab lists the direct children, grandchildren, and further descendants from this source, including any aliquots. Learn more below.Assays: On the Assay tab, the data you see is what has been uploaded for any samples associated with this source, not for the source itself.Jobs: See workflow jobs associated with samples from this source.Samples Created from this Source
On the Samples tab for a given source, you will see all samples (up to a maximum of 5 generations) associated with this source, including any aliquots of those samples. The All Samples tab shows samples of every type, with properties common to any sample, like storage information and status. Samples of each individual type can also be viewed on a separate tab, with the properties specific to that type.Use the menu on the right to show "All Samples, Samples Only, Aliquots Only" in the grid.When viewing samples on a sample-type specific tab, all of the following menus and actions are available. When viewing the tab containing samples of all types, the Manage actions specific to a type are not available (like bulk editing properties and lineage).
- Create:
- Samples of Any Existing Sample Type
- Assay Data of Any Existing Type
- Picklist
- Sources of Any Existing Type
- Manage:
- Import Samples
- Delete Samples
- Edit Selected Samples in Grid
- Edit Selected Samples in Bulk
- Edit Sources for Selected Samples in Bulk
- Edit Parents for Selected Samples in Bulk
- Add to Picklist
- Jobs:
- Storage: Select some or all of the samples and choose among:
Edit Sources
Edit Single Source
You can edit the details of a single source by clicking the Source ID and clicking the edit icon.Edit Multiple Sources
You can bulk edit several sources at once by selecting them in the source type view and selecting either:- Manage > Edit Selected Sources in Grid: Edit values directly in a grid.
- Manage > Edit Selected Sources in Bulk: Assign the same value to one or more fields in the batch of selected rows.
Delete Sources
A Source cannot be deleted if it has descendants, i.e. any samples associated with it (or derived from it). Deleting a source cannot be undone.Delete a Single Source
You can delete a single source from it's details page by selecting > Delete Source. If the source has descendants, this menu option will not be activated, as shown below.
Delete Multiple Sources
Multiple sources that do not have descendants can be deleted directly from the source type page by selecting the desired sources and selecting Manage > Delete Sources.If the group of selected sources includes any that cannot be deleted, you will see a popup message clarifying that only sources without associated samples can be deleted. If some sources can be deleted, you have the option to complete the partial deletion. Deletion of sources cannot be undone.
Related Topics
Experiment / Assay Data
The data you obtain from running your samples through various instruments and experimental procedures can be uploaded into LabKey Sample Manager. To describe how each kind of data should be interpreted, stored, and associated with the samples themselves, you create a framework called an Assay Design. Using this framework, many runs of data can be uploaded and stored in a way that makes it easy to interpret and analyze. You can create as many different assay designs as you will need to describe the different types of data you will upload. In this section, learn about describing, importing, and updating assay data.
You can create as many different assay designs as you will need to describe the different types of data you will upload. In this section, learn about describing, importing, and updating assay data.
Topics
Tutorial
Get started with assay designs in the Sample Manager tutorial step: Tutorial: Define Assays.Describe Assay Data Structure
The results of experiments and instrument runs can be uploaded and associated with samples that are registered in the system.This topic covers how to create a "template" describing each different type of experiment data you will upload. LabKey Sample Manager calls these data descriptions Assay Designs. All assay data must be associated with a sample, via a field of type "Sample".

 If you add any extraneous fields, delete them by clicking the .
 Results fields will be inferred from your upload.
 As soon as you select it from the dropdown, the chosen field changes to be of type Sample and opens the properties panel. Select the desired Sample Type from the dropdown.
 Click Finish Creating Assay Design in the lower right when finished.The assay design describing the structure of assay data has now been created. Note that the actual data contained in the spreadsheet you used to infer fields was not imported.Now you can add experiment data that matches this structure and map it to samples and other associated data.
Create Assay Design
From the main menu, select Assays and then select Create > Assay Design. (Before any assays have been created, you will see a direct link to "Create an assay design" on the menu.)- Give the assay design a Name (Required). The name must be unique and cannot be changed after the design is created.
- Enter a Description to give more information (Optional).
- Active: Check the box for assay designs in active use. When this box is unchecked, the design is archived and hidden in certain views.
- Choose Editing Settings using the checkboxes. Either runs, results, or both can be editable.
- Add the necessary fields and sample mapping described below before clicking Finish Creating Assay Design.
Add Run Fields
Run fields represent information that will be set once per run of data, such as a spreadsheet of individual result rows uploaded together. All rows will have the same value for any run fields you define.- Click the Run Fields section to open it.
- If you have a specially prepared JSON file of field definitions, you can drop it into the Import fields from file panel.
- Otherwise, click Manually Define Fields.
- Use Add Field to add each run field you need (one is created for you).
- Enter a Name (without spaces)
- Select the Data Type.
- To set more properties of the field, click the expansion icon.
If you add any extraneous fields, delete them by clicking the .
Add Results Fields
Results Fields represent the data information in the spreadsheet. You can define results fields in several ways:- Upload a sample spreadsheet to infer all the necessary fields. Either drag and drop a file into the upload area, or click within the same area to select a file directly.
- Import a specially designed JSON file containing field definitions by dropping or selecting it in the same panel.
- Click Manually Define Fields below the panel to define fields in the editor.
Results fields will be inferred from your upload.
- Note that the data itself will not be imported at this time.
- Once fields have been inferred, you can make changes as needed.
- For example, if your results spreadsheet also includes columns for the run fields you defined, you may need to delete the duplicate fields. Click the to delete a field.
- If your result spreadsheet contains any reserved fields, they will not be shown on the inferral list, but they will always be created. You will see a blue banner indicating this reason for not seeing specific fields from your file.
Map to Samples
In order to associate all assay data with the sample it represents, every assay design must included a field which maps to samples in the system. The data type Sample is used to represent that mapping as a lookup into the Sample Type containing the samples.After you infer fields, if one of them is named "SampleID" (such as when you use a naming pattern), it will be mapped automatically. If not, you will see a blue message section asking you to map one of the fields to be the Sample Lookup. The pulldown menu will be populated with the results fields that were inferred. If you need to add a new field to provide the sample linkage, use Add new field. In this example, the SampleID field will be our lookup.As soon as you select it from the dropdown, the chosen field changes to be of type Sample and opens the properties panel. Select the desired Sample Type from the dropdown.Click Finish Creating Assay Design in the lower right when finished.The assay design describing the structure of assay data has now been created. Note that the actual data contained in the spreadsheet you used to infer fields was not imported.Now you can add experiment data that matches this structure and map it to samples and other associated data.
Related Topics
Import Assay Data
This topic describes how to import assay data about your samples. You should already have defined the assay structure of your data and how it will map to your samples.

 For the getting started tutorial, enter:
 The first three rows of data will be shown for a quick verification before you upload. If any fields are unrecognized, they will be ignored and a banner will be shown.
 If everything looks as expected, click Import to import the data. For large files (over 100kb), you may see a notice that your import will be done in the background, freeing you to continue using the app for other use. Learn more about background imports in this topic.
 Click Import to import the data. If your copy is more than 1000 rows, you may see a notice that your import will be done in the background, freeing you to continue using the app for other use. Learn more about background imports in this topic.
 Enter values directly into the grid. Note that when you begin typing into the field you have defined as mapping to samples (shown here "SampleID") it will show the set of samples available. Select the correct mapping for each row.Note that any columns that are required will be marked with an asterisk (*). Before you can import the data, these columns will need a valid value in every row.
 After bulk inserting rows, you can hand edit as needed in the grid view.

 The results grid can be searched, sorted, and filtered. Learn more in the topic: Data Grid Basics
- Import Data
- Complete Import and Review Data
Note that our assay data assumes you have followed the previous tutorial steps and already created enough samples in the "Tutorial Samples" Sample Type to have the Sample IDs "Tutorial-003" through "Tutorial-012" available to associate with our data. You can confirm this by selecting Tutorial Samples from the main menu and add more if necessary.
Import Data
Locate the correct assay design and click Import Data. You can select it by name from the assays list on the main menu or using the dropdown in the Recent Assay Data panel on the home page.
Enter Run Details
Enter the Run Details requested. Any fields that are required will be marked with an asterisk (the getting started tutorial does not include any required fields). The Assay Id field will be the name for this run of data. If you don't enter a name here, an Assay ID will be generated for you. If you upload a data file, the filename will be used. Otherwise, it will be a concatenation of the assay design name and the date and time.For the getting started tutorial, enter:
- Assay Id: "Run1"
- Date: "2019-10-01" (the time "00:00" will autopopulate if you don't select a time)
- Instrument: "INS-01"
Enter Data (Results)
You can enter the result data in one of three ways:Upload Files
Drag and drop the file(s) containing your result data into the target area or click the region to select a file. If needed, you can first download a template file of the expected format by clicking Template.The first three rows of data will be shown for a quick verification before you upload. If any fields are unrecognized, they will be ignored and a banner will be shown.If everything looks as expected, click Import to import the data. For large files (over 100kb), you may see a notice that your import will be done in the background, freeing you to continue using the app for other use. Learn more about background imports in this topic.
Copy-and-Paste Data
If drag and drop upload is not convenient, you can copy and paste a tab-separated set of values directly into the box on the Copy-and-Paste Data tab. The column headings must be included in what you paste.Click Import to import the data. If your copy is more than 1000 rows, you may see a notice that your import will be done in the background, freeing you to continue using the app for other use. Learn more about background imports in this topic.
Note that you cannot copy and paste data that uses the "Multi-line Text" data type. To import multiline text fields, use another method.
Enter Data into Grid
If neither method described above is appropriate, you can use the Enter Data Into Grid tab to type directly into the entry window. Start by adding the number of rows you want to add and clicking Add row(s).Enter values directly into the grid. Note that when you begin typing into the field you have defined as mapping to samples (shown here "SampleID") it will show the set of samples available. Select the correct mapping for each row.Note that any columns that are required will be marked with an asterisk (*). Before you can import the data, these columns will need a valid value in every row.
Bulk Insert
You can also use the Bulk Insert button to prefill the grid with many rows of data with some or all values in common. Enter the number of rows to add and provide values that those rows should share. You do not need to enter a value for every column.After bulk inserting rows, you can hand edit as needed in the grid view.
Bulk Update
Once data has been entered into the grid, either directly or using bulk insert, you can select one or more rows and click Bulk Update to assign new values to all the selected rows for one or more columns. In the popup, use the "Disabled/Enabled" slider to activate updating any row and enter the new value. Values in columns which are disabled in the update will remain unchanged.
Delete Rows
If you enter extra rows by mistake, you can select them using the checkboxes and click Delete Rows.Complete Import and Review Data
Click Import when ready to import. If there are any missing or invalid values, you will need to fix them before the import will complete.When your data has been imported, you will see the results for the specific run you just entered. Run details are at the top, results in a grid below.The results grid can be searched, sorted, and filtered. Learn more in the topic: Data Grid Basics
Related Topics
Manage Assay Designs
This topic describes how to edit and manage existing assay designs. To create new designs, see this topic: Describe Assay Data Structure
 By default, you will see the Grid listing the name and description of each defined assay. The Active tab is shown by default; click the All tab to also see archived assay designs.Select Heatmap from the View menu to see a visual representation of relative count of runs over the past 12 months for each assay. Darker blocks indicate more runs. Hover over any block for details.
 Use the (three bar) menu in the upper right to edit or delete the assay design. Administrators can also view the audit history for this assay.In addition to the overview tab, tabs for runs and results for the assay are available in the upper left. Click Runs for the grid of runs and Results for the grid of result data.From any page within the assay interface, you can click Import Data to import a new run.


View All Assay Designs
The assays defined are all listed on the main menu under Assays. To see the list of assays as a heatmap or a grid, click the heading Assays.By default, you will see the Grid listing the name and description of each defined assay. The Active tab is shown by default; click the All tab to also see archived assay designs.Select Heatmap from the View menu to see a visual representation of relative count of runs over the past 12 months for each assay. Darker blocks indicate more runs. Hover over any block for details.
Manage Assay Design
Click the name of any assay from the main menu, grid, or heatmap to open the overview page for that assay. You will see the assay description, as well as a grid of runs.Use the (three bar) menu in the upper right to edit or delete the assay design. Administrators can also view the audit history for this assay.In addition to the overview tab, tabs for runs and results for the assay are available in the upper left. Click Runs for the grid of runs and Results for the grid of result data.From any page within the assay interface, you can click Import Data to import a new run.
Edit Assay Design
Click the name of any assay from the main menu or assay grid to open the overview page.- To edit the design select > Edit Assay Design.
- The panels for editing properties and fields in your assay will open.
- Use the field editor to adjust as needed. Remember that if you delete any fields, all their data will be deleted as well.
- When finished making changes, click Save.
Note that you have the ability to edit the assay results field mapped as a sample lookup. Use caution if you change the sample lookup for this field, as it may change or remove the links in your existing assay results.For instance, if you create an assay design that maps result data to "All Samples", import some data mapped to samples of both "Blood" and "Serum" types, and then later edit this sample lookup to map results to only "Serum" samples, the existing run results linked to "Blood" samples will show only the row and not the link.You can work around this limitation by defining a copy of the assay design mapped to a narrower set of samples instead of changing the mapping lookup in the original assay design.
Delete Assay Design
Click the name of any assay from the main menu or assay grid to open the overview page.- To delete the design select > Delete Assay Design.
- Note that when you delete a design, all runs of data associated with it will also be deleted. Deletion cannot be undone.
- Confirm in the popup to complete the deletion.
- Active: When this box is unchecked, the design is archived and hidden in certain views.
Archive Assay Design
Assay Designs can be hidden from certain views by unchecking the Active checkbox in the Assay Properties panel. Archived, or inactive, designs are not shown on the main menu or available for new data entry through Sample Manager, but existing data is retained for reference.Using the archive option can be helpful when a design evolves over time. Making the older versions "inactive" will ensure that users only use the latest versions. An assay design may be reactivated at any time by returning to edit the design and checking the Active box again.When viewing all assay data for a sample, both the active and archived assays will be shown if there is any data for that sample.On the main Assays dashboard, you will be able to find inactive assays by switching to the All tab.
Related Topics
Manage Assay Data
This topic describes how to work with assay data runs and results within the Sample Manager application.

 Click Save Run Details when finished.
 You will see the interface from when you originally imported the run, including the values and datafile previously entered. Make changes as needed and click Re-Import.
 A grid will be shown, with a row for each row you selected, allowing you to edit the necessary values. Click Finish Updating # Results to save your changes.
 After entering updated values, you can leave the bulk popup using either:
 Use the sample selection menu to show data for:
Manage Runs
First open the assay design of interest, by using the main menu and clicking the assay name, then click the Runs tab in the upper left to manage runs. From this page, users with "Editor" or "Admin" access can reimport a run, and delete runs if needed.
Edit Run Details
If your assay has editable runs and you have sufficient permissions, you can edit run details.Click the name of the run, then use the (Edit) icon in the Run Details panel to open them for editing. You will see an entry panel you can use to make changes.Click Save Run Details when finished.
Re-Import Run
If you have a change of data or metadata after importing a run, and have editable runs and/or results, you may be able to make the change directly. However, if your runs/results are not editable, you can import a revised version of the run as follows. LabKey Sample Manager will track run re-imports and maintain data integrity.Opening the run details (shown above) and select > Re-Import Run.You will see the interface from when you originally imported the run, including the values and datafile previously entered. Make changes as needed and click Re-Import.
A note about event logging:
When you re-import an assay run, two new assay events are created:
- Assay Data Re-imported: This event is attached to the "old run" that is being replaced.
- Assay Data Loaded: This event is for the "new run" you import.
Delete Run
To delete a run, either:- Start from the run details page and use > Delete Run
- OR, select the checkbox for the run on either the Overview or Runs tab and select Manage > Delete Run.
Manage Results
The result data for your assay is available on the Results tab. Results are individual rows within runs. You cannot add results rows within the user interface. To do so, either import a new run containing the results, or add them to an existing run by reimporting the run after adding the additional rows to the run data file.Edit Selected Results in Grid
If your assay has editable results, and you have sufficient permissions, you can select one or more rows using checkboxes and select Manage > Edit Selected Results in Grid.A grid will be shown, with a row for each row you selected, allowing you to edit the necessary values. Click Finish Updating # Results to save your changes.
Edit Selected Results in Bulk
If you are editing a number of rows to insert shared values, select the desired rows with checkboxes and select Manage > Edit Selected Results in Bulk.An editing popup will let you select which field or fields you want to batch update. By default, all fields are disabled; choosing Enabled will let you enter a value to assign for that field in all rows. Shown here, the MCV field will be updated with a shared value, but all other fields left unchanged.After entering updated values, you can leave the bulk popup using either:
- Edit with Grid to switch to updating in a grid format (with the bulk changes you just made already applied). Use this option if you want to make individual as well as bulk row changes.
- Be sure to click Finish Updating # Results when finished with the grid update to save both the bulk changes AND individual changes you made.
- Update Results if no further editing is needed. The bulk updates will be saved.
Delete Results
To delete one or more rows of results within any run, either open the run from the Runs tab or find the desired rows on the Results tab. Use sorting and filtering to help you isolate rows of interest.Check the box(es) for the row(s) you want to delete and select Manage > Delete Results.Note that you can only delete 10,000 assay results in one operation. To delete more than that, perform the deletion in batches.View Assay Data for a Sample
On the details page for any Sample, click the Assays tab to see data about that specific sample. A tab for each assay type, showing the count of results available for that sample for that assay, let you browse the collected profile of results.Use the sample selection menu to show data for:
- Sample or Aliquots
- Sample Only
- Aliquots Only
Related Topics
Workflow
LabKey Sample Manager makes it easy to plan and track your tasks with these lab workflow features:

- Create jobs to track and prioritize sequential tasks
- Assign work to the right users
- Use workflow templates to standardize common task sequences
- Track progress toward completion
Topics
- Start a New Job
- Manage Job Queue
- Complete Tasks
- Manage Notifications
- Edit Jobs and Tasks
- Manage Users
- Permission Roles
- Create a Job Template
- Manage Jobs and Templates
Tutorial
Get started with workflow in the Sample Manager tutorial step: Tutorial: Outline Workflow.Start a New Job
Workflow jobs organize related tasks into a sequence of work to be completed. A set of samples to be worked on can be associated with the job, and it can include direct links to upload data for the necessary assay tests performed on those samples. You can start by selecting samples directly from a grid, or use a picklist as a starting place.To start a job, you can either start by selecting the samples you want worked on, or add them to the job later. It's also possible to have jobs that do not involve samples, if that supports your lab workflow.
 There are several ways to open the job creation wizard:


 For each task in your job, enter the details:


 Either of these options will turn the task sequence you just created into a template that can be used to create future similar jobs. In a popup, you will name the template and provide an optional description.
 Note that you can only create a template during initial job creation - once the job has been started, you cannot generate a template from it.Learn more about creating job templates in this topic: Create a Job Template


- Start a Job
- Start a Job with Selected Samples
- Job Details
- Tasks
- Input Samples
- Finish Creating Job
- Create Job From Template
Start a Job
There are several ways to open the job creation wizard:
- From the home page, click Start a New Job.
- From the main menu, choose Workflow, then select Create > Job.
- From most dashboards you can select Create > Job.
- You can also select Jobs > Start a Job from any Sample or Picklist grid.
- Select some samples and then use Jobs > Start a Job with Selected Samples.
Start a Job with Selected Samples
If you already know the set of samples you want to include, start from the Sample Type grid, storage view, or from a picklist containing the desired samples. This walkthrough illustrates using the Sample Type grid, but the process starting from other lists of samples is the same.- Select the sample type of interest from the Sample Types section of the main menu.
- Use filtering and checkboxes to select the Samples of interest.
- If Samples are in storage, you can use Storage Status as part of your selection criteria here. If you want to use storage location, start from the freezer where they are stored instead.
- Select Jobs > Start a Job with Selected Samples from the menu above the grid.
- Note that if you select Jobs > Start a Job, the new job will not include the selected samples.
Job Details
On the first panel of the job creation wizard, enter details about the job:
- Job Name: Provide a name for the job, or leave blank to have one generated for you.
- Description
- Job owner: This can be the user who "owns" the overall job completion, or the user to whom you assigned the first task.
- Notify these users: Add users who should get notifications as this job progresses.
- Job start and due dates: Use the date picker to select the begin and end dates.
- Priority level: Use the pulldown menu to select one of the options:
- Low
- Medium
- High
- Urgent
- Attachments: Select or drag and drop any files needed for the job. For example, an SOP document, labels, or other instructions related to the job could be included here.
- Any files you upload will be listed; if you need to delete one, click the to remove it.
Tasks
Click the Tasks section to open it.Any job can be composed of several tasks to complete in sequence. Click Add Task to add each task and click to open the details panel.For each task in your job, enter the details:
- Name
- Description
- Assign to
- Assays to Perform (select as many as required for this task)
- Due date
Once you have added tasks to a job, the button near the top to Save as Template will be activated. If you want to save the current set of tasks as a new named template, click this button. Note that this will exit the job creation editor and a new job will not be created at this time.
Input Samples
Click the Input Samples section to open it. If you created this job from a set of samples, it will open on the Included Samples tab and you will see them listed. If not, skip ahead to search for samplesIncluded Samples
- Review the listed set of included samples using the omnibox (entry box reading "Select...") to sort and filter, and if necessary select one or more rows and click Remove from Job to remove them.
- If you like, you can use the Search for Samples tab (described below) to add more samples.
- When you are satisfied with the selection of samples, skip to the Finish Creating Job section.
Search for Samples
- If you did not start creating this job from a selection of samples, when you open the Input Samples panel, click the Search for Samples tab (if it is not open by default).
- You can search for names or attributes in the search box. Click Search.
- Click Show Filters to see a set of selectors for filtering to find the samples you want. Options:
- Of Sample Type
- Created by
- From Parent
- From Source
- Date Range From/To
- Make selections for some or all filters, then click Search. This will populate the search results in a grid below the filter section.
- Scroll, or use the omnibox to sort and filter to find desired samples.
- You can also change the Filters above the grid and click Search again if you haven't found what you need.
- Check the boxes to select the samples you want to include. Once samples are selected, the "Add to Job" button will be activated.
- Click Add to Job.
Finish Creating Job
Before finishing job creation, consider whether you want to make this job available as a template for creating similar future jobs. Creating a template from a job is offered only during initial job creation.- Click Finish Creating Job to start the job without creating a template.
- Use the dropdown menu option Save as Template and Start Job to create a template and start this job.
Create Template from Job
As you finish creating a job, you could select either one of two alternate ways to save the job as a template.- Save as Template
- Save as Template and Start Job
Either of these options will turn the task sequence you just created into a template that can be used to create future similar jobs. In a popup, you will name the template and provide an optional description.Note that you can only create a template during initial job creation - once the job has been started, you cannot generate a template from it.Learn more about creating job templates in this topic: Create a Job Template
Create Job From Template
You can create a job from a template you have already saved, with or without the preselection of samples. Creating a job from a template follows the same wizard process, but the description, tasks, and other details are preconfigured.- At the top of the job creation page, click Choose Job Template.
- Find the template you want to use - typing ahead will narrow the options.
- If you have already defined any tasks, you will be warned that applying a template will override any existing information in your job. Cancel to retain your current tasks.
- Click to see details for any template, including creation details, number of tasks, and the description.
- Click Choose Template.
Add Job Details and Priority
The template does not prepopulate the Job Details and Priority panel; complete it as when you are creating a job without a template as described above.Define Job Tasks
The job tasks from the template are prepopulated in the job creation wizard. By default these tasks are locked. You can assign tasks to users and add due dates without editing tasks.If you want to make any changes in the tasks for this job, click Edit Tasks and edit using the same interface as when you create tasks without a template. Note that editing job tasks will remove the template association from the job details.
Complete Wizard
When you are defining a job starting from a template, the section for Input Samples is the same as above for creating a job that did not start from a template.When you have completed all the sections of the job creation wizard, you have the same options for finishing as described above. Your new job created from a template can be used to create a new template, just be sure to give that new template a new name.Jobs that were created from templates show the template name on the Overview tab of the job details. Click the job name to open the job details, then click the template name to open the template itself.
Related Topics
Manage Job Queue
Once jobs and tasks have been created and assigned to you, you will immediately see your own work queue from the home page in the Jobs List. You can also easily see information about jobs assigned to others.
 You can switch to Active Jobs by clicking the tab, and the view will show jobs assigned to others as well.Click the name of any job to see the job details and task list.
 By default, you'll see Your Queue sorted by due date. Like other grids, you can use filtering, sorting, searches, and custom views on the grid of jobs.The tabs each show the count of jobs in the different categories:


Jobs List Dashboard Panel
On the home page, the Jobs List shows Your Queue by default. This is the list of jobs that are either assigned to you or include tasks assigned to you. Filter your queue by Priority Level using the dropdown.You can switch to Active Jobs by clicking the tab, and the view will show jobs assigned to others as well.Click the name of any job to see the job details and task list.
Jobs Home
Click Jobs Home or select Workflow List from the main menu. There are two ways to view the job data.Job List
By default you see the Job List grid view:By default, you'll see Your Queue sorted by due date. Like other grids, you can use filtering, sorting, searches, and custom views on the grid of jobs.The tabs each show the count of jobs in the different categories:
- Your Queue: Jobs and tasks assigned to you.
- All Active Jobs: Jobs that have not been completed, including but not limited to the ones in your own queue.
- Completed Jobs: Jobs that have been completed.
- All Jobs: All of the above.
Heatmap
You can also view the workflow data as a heatmap. You will see color blocks representing the number of jobs created from each template over the past year. Jobs not created from templates are grouped together. Hover over a block for details, click to see a filtered grid.
My Queue
At any time in the application, you can select My Queue from the workflow section of the main menu to jump to a detailed view of your own work assignments.
Related Topics
Complete Tasks
This topic covers the process of marking tasks and jobs as completed. It is important to note that there is no checking that the work specified in the tasks in question was actually completed in the lab; these tools offer a tracking mechanism for humans completing their work.Open a job by clicking the job name. Find it:
 Learn about editing job details in this topic: Edit Jobs and Tasks
 Switch among tasks by clicking the task name on the left.
 Add your own comments or notes about the step in the box.
 If the 'In Progress' task is not assigned to you, the button for completing the task will be inactive so that you cannot inadvertently complete others' tasks. Administrators are exempted from this restriction and can both mark any task as completed and reassign tasks as needed.
 Use the menu on the right to select whether to show "All Samples, Samples Only, Aliquots Only" in the grid.When viewing samples on a sample-type specific tab, all of the following menus and actions are available. When viewing the tab containing samples of all types, the Manage actions specific to a type are not available (like bulk editing properties and lineage).
Actions available on the All Samples here:
Use the menu on the right to select whether to show "All Samples, Samples Only, Aliquots Only" in the grid.When viewing samples on a sample-type specific tab, all of the following menus and actions are available. When viewing the tab containing samples of all types, the Manage actions specific to a type are not available (like bulk editing properties and lineage).
Actions available on the All Samples here:


- On the Jobs panel on the home dashboard under Your Queue if it is assigned to you. You can filter by priority to find the most pressing work.
- If the job or current task is not assigned to you, you can click the Active Jobs tab on the home page, or the Jobs Home link for a grid of all jobs.
- Use the main menu from anywhere in the application. Click Workflow for the grid of all jobs.
Topics
Overview Tab
On the Overview tab, you will see the job details, assignments, and list of tasks with status of each task. Status values include:- In Progress: the current/active task to be completed
- Pending: future tasks that need to wait for the 'in progress' task
- Complete: completed tasks.
Learn about editing job details in this topic: Edit Jobs and Tasks
Tasks Tab
Switch to the Tasks tab to see a more detailed view of job progress. Each task is listed on the left, with details of the selected task on the right.Completed tasks show a green check. Tasks that involve assays include an Import Data button.Switch among tasks by clicking the task name on the left.
Comments
On the Tasks tab, you can enter Comments to accompany any task, including the ones marked completed. Click Start a thread to add a new comment.Add your own comments or notes about the step in the box.
- You can use markdown formatting, with the help of buttons for bold, italic, link, list, and numbered list formatting.
- Switch the Markdown mode dropdown to Preview to see the formatted result.
- Click the to attach files to comments.
- Click Add Comment to save.
Complete Task
If the 'In Progress' task is assigned to you, and you have performed the actual work described, you can click Complete Current Task on the Overview tab (or Complete Task on the Tasks tab) to mark it completed. The task status changes to Complete and the next task on the list is now In Progress.If the 'In Progress' task is not assigned to you, the button for completing the task will be inactive so that you cannot inadvertently complete others' tasks. Administrators are exempted from this restriction and can both mark any task as completed and reassign tasks as needed.
Complete Tasks with Samples
When your task involves samples, you can access and review them on the Samples tab. Samples of all types are shown on a shared tab, with common properties like storage information and status. The samples of an individual type are available on additional tabs ("Plasma" and "Serum" shown here), with the properties specific to that type.Use the menu on the right to select whether to show "All Samples, Samples Only, Aliquots Only" in the grid.When viewing samples on a sample-type specific tab, all of the following menus and actions are available. When viewing the tab containing samples of all types, the Manage actions specific to a type are not available (like bulk editing properties and lineage).
Actions available on the All Samples here:
- Create:
- Manage:
- Add to Picklist
- Edit Selected Samples in Grid
- Edit Selected Samples in Bulk
- Edit Sources for Selected Samples in Bulk
- Edit Parents for Selected Samples in Bulk
- Jobs:
- Storage:
Complete Tasks involving Assay Import
On the Tasks tab, select the task that involves an assay. Under Assays, you'll see a pair of links for each assay involved in this task.
- View Data: Once there has been data uploaded for this assay in this task, this link will take you to the filtered run.
- Import Run: Open the importer for the requested assay.
- By default you will see the Enter Data into Grid option, with rows prepopulated for the samples assigned to this job task, making it easy to manually enter values.
- You can use bulk insert, file upload, or copy/paste import methods if desired.
Reassign Task
From the Tasks view, users with sufficient permissions can reassign tasks that have not been completed by changing the Task Owner. Click to edit, use the dropdown to select the new task owner, then click .
Reopen Task
If you find you have closed a task by mistake, you can reopen it using the Reactivate Task button.
Related Topics
Manage Notifications
In-app Notifications
Notifications of interest to each user are shown in a menu in the header bar. If any background imports are in progress, the bell will be replaced with a . The number of waiting notices will be shown in orange, superimposed on the bell or spinner icon. Click for a listing. Each notification has a corresponding status, time of completion, and link to either the successfully imported data, or to more information about an error.
Email Notifications
Users can control whether they receive email when events occur regarding jobs or tasks assigned to them or which they are following. Email notifications allow users to learn about important events without having to manually check job status.For example, some events that trigger email notifications are:- A task assigned to me is ready to be completed
- A job that includes tasks assigned to me is initiated
- A job that I owned and completed was reactivated by another user
- A comment was added to a task assigned to me
Receive Email Notifications
By default, all users will receive email notifications about events that occur regarding jobs and tasks that they are part of, or are following.Users can choose to opt out of all email notifications by disabling this setting.Select Settings from the user menu, then check the box for Receive email notifications to receive them. Uncheck the box to disable receiving email notifications. Click Finish to save this setting.
Related Topics
Edit Jobs and Tasks
This topic covers editing and updating workflow jobs and tasks.


 Make the necessary changes and click Finish Updating Job when you are finished.
 If you attempt to add samples that are already included in the job, they will be skipped automatically and only new samples will be added.

 You will be asked to confirm the action, and when completed, the checked box icon will disappear and the task will be restored to an "In Progress" state. You may also want to leave a comment when you reactivate a task, explaining the action. Enter the comment in the box and click Comment to save it.
 Select Reactivate Job from the drop down menu. You will be asked to confirm the action.
 When you reactivate a job, the last task of the job is also automatically reactivated. If you would like to reactivate additional tasks, follow the steps above.

- Update Job Details
- Job Menu
- Edit Job Tasks: Add, Reorder, Edit, Delete
- Edit Samples Assigned to a Job
- Reactivate Closed Task
- Reactivate Completed Job
- Delete Job
Update Job Details
In the left-hand panel you can edit many common job details including Owner, Notify list, Priority Level, Start and Due Dates, and the Description. Use dropdowns or icons to edit. Click outside the selection area for an element to save changes.
Add or Delete Files from a Job
Files attached to a job are shown in the Attachments section on the Overview tab.
- Add a new file using the Select file or drag and drop here box.
- Delete a file by selecting > Remove attachment from its tile.
Job Menu
Click the next to the name for the job menu including:
Rename a Job
To change the name of the job, click the and choose Rename. Type the new name and hit return (or click away) to save.Edit Tasks: Add, Reorder, Edit, Delete
Note that you cannot edit any tasks that have been completed. You also cannot edit tasks in a job that was created from a template, or in a job from which a template was created. A banner message and icons will inform you when tasks are not editable. The process in this section applies to non-template jobs with tasks that may be edited.
To adjust the tasks involved in the job, select Edit Job Tasks from the menu next to the name.
You will see the same interface you used to define job tasks.
- Click the Tasks section.
- Any tasks that have been completed (or are part of a template) cannot be changed and will be shown with a icon.
- Add more tasks via Add Task. (You cannot add tasks to a job created from a template.)
- Reorder tasks by dragging and dropping the six-block handle on the left.
- Delete a task by clicking the icon on the right.
- Click a task panel to open the details for editing.
Make the necessary changes and click Finish Updating Job when you are finished.
Edit Samples Assigned to a Job
While editing job tasks, you can use the Input Samples section to adjust the set of samples within the job. You can also click the Samples tab from within the job and select Manage > Add More Samples to Job to open the same interface.Follow the instructions in this topic to search for samples within the job wizard. If you only need to add or remove samples, it may be easier to follow the steps below to add or delete samples from jobs.Add Samples to a Job
From the main menu, click the name of the type of samples you wish to add to open the grid of available samples. Alternatively, choose Picklists from the user menu and click the name of the curated picklist you want to use. Select the desired sample(s) using the checkboxes and select Jobs > Add Samples to Existing Job. In the popup, select the desired job by name from the dropdown. Click Add to Job.If you attempt to add samples that are already included in the job, they will be skipped automatically and only new samples will be added.
Delete Samples from a Job
Open the job and click the Samples tab. Select the sample(s) you wish to delete and select Manage > Remove Samples from Job.
Reactivate Closed Task
To reactivate a closed task, click the Tasks tab in the upper left, then click the name of the closed task to select it. It will be shown with a checked box icon, in the following image, "Prepare Samples" is in a closed state.Select Reactivate Task from the drop down menu to reactivate it.You will be asked to confirm the action, and when completed, the checked box icon will disappear and the task will be restored to an "In Progress" state. You may also want to leave a comment when you reactivate a task, explaining the action. Enter the comment in the box and click Comment to save it.
Reactivate Completed Job
If you need to reactivate a job that was marked completed, find it by opening the Workflows page from the main menu and clicking Completed Jobs. Click the desired job name to open it.Select Reactivate Job from the drop down menu. You will be asked to confirm the action.When you reactivate a job, the last task of the job is also automatically reactivated. If you would like to reactivate additional tasks, follow the steps above.
Delete Job
To delete a job that is no longer necessary, select > Delete Job in the job header.
Related Topics
Manage Users
This topic covers management of user accounts in LabKey Sample Manager. Only Administrators can perform these actions via the Administration option on the user menu. For a walkthrough of this process, follow the Sample Manager tutorial step: Tutorial: Add Users and Assign Roles.
 In the popup:
 From this panel, an administrator can click the buttons at the bottom to perform these actions on this individual user.


 You can check a box to see details for inactivated users, and buttons are offered to Reactivate and Delete a single user.On the grid of interactive users, the Manage menu actions are also slightly different. You can select one or more rows to reactivate or permanently delete users. You can also switch back to the grid of active users.
 Use Manage > View All Users from either view to see the combination of active and inactive users.
- Add Users
- Manage Users
- View User Details
- Deactivate Users
- Delete Users (Not recommended)
- View Inactive Users
Add Users
To add one or more new users, an administrator first selects Administration from the user menu, then clicks Create.In the popup:
- Enter one or more email addresses, each on it's own line for each user you want to create.
- Select the desired Roles for the users you are creating:
- You can assign multiple roles at once. Delete a role by clicking the 'X' for the item.
- Learn more about the available roles here: Permission Roles
- Note that all users added at once are assigned the set of roles you select. You can change these role assignments later.
- Leave the box checked if you want to Send notification emails to all new users. These invitation emails will include a link for the new user to create a password and log in.
- If you uncheck this box, no email will be sent.
- Optional Message: If you have checked the box to send email, you can add an optional additional message to include in the invitation email to your new users.
- Click Create Users.
Manage Users
To manage users, an administrator selects Administration from the user menu.You will see a grid of the active users already present in your Sample Manager project. You can use search, sort, and filter options on this user grid.View User Details
To view the details for any user in the grid, check the box for that user. Details including effective roles are shown in a panel to the right.From this panel, an administrator can click the buttons at the bottom to perform these actions on this individual user.
- Reset Password: Send this user an email with a link to set a new password in order to access the site.
- Deactivate
- Delete
Deactivate Users
Deactivated users may no longer log in, but their display name and group membership information will be retained for display and audit purposes. If the user is reactivated at a later time, this information will be restored. Deactivation is the recommended action for former employees, for example.To deactivate a user, an administrator has two options:- Check the box to select a single user you want to deactivate. Click Deactivate in the User Details panel on the right.
- You may also select one or more users simultaneously using the checkboxes in the grid, then select Manage > Deactivate Users.
Note that if you are using Sample Manager with a Premium Edition of LabKey Server, you may want to remove this user's access to the Sample Manager project by revoking all permission roles, instead of deactivating them completely from the system.
Delete Users
Deletion of a user is permanent and cannot be undone; it is generally not recommended. A deleted user's display name will no longer be shown with any assignments or actions taken by that user. A deleted user cannot be reactivated to restore any information.Instead of deleting, deactivation is recommended for any user who has performed any work in the system in the past.One scenario in which deletion might be appropriate is if you originally create a new user with an incorrect email address or other error.To delete a user, an administrator has the same two options as for deactivation:- Check the box to select a single user you want to delete. Click Delete in the User Details panel on the right.
- You may also select one or more users simultaneously using the checkboxes in the grid, then select Manage > Delete Users.
View Inactive Users
Notice that the grid reads Active Users by default. To view the grid of deactivated users instead, select Manage > View Inactive Users.You can check a box to see details for inactivated users, and buttons are offered to Reactivate and Delete a single user.On the grid of interactive users, the Manage menu actions are also slightly different. You can select one or more rows to reactivate or permanently delete users. You can also switch back to the grid of active users.Use Manage > View All Users from either view to see the combination of active and inactive users.
Related Topics
Permission Roles
LabKey uses a role-based permissions model. This topic covers the permission roles available in Sample Manager and the process for assigning them to the appropriate users.
 To add a user to any role:
 Click Save.

Available Roles
Once users have been defined, an administrator can assign them one (or more) of the available permission roles:- Editors: May add new information or edit data related to samples, assays, and jobs.
- Readers: Have a read-only view of the application.
- Administrators: Have full control over the application, with the exception of the storage related roles. This includes user management, permission assignments, and creating and editing sample types, assays, and job templates.
- When Sample Manager is used with a Premium Edition of LabKey Server, there are two levels: Project Administrators and Folder Administrators. Learn more in the core LabKey Server documentation.
- Storage Editors: Storage Editors may read, add, edit, and delete data related to items in storage, picklists, and jobs.
- Storage Designers: Storage Designers may read, add, edit, and delete data related to storage locations.
Assign Roles to Users
Open user management by selecting Administration from the user avatar menu. Click the Permissions tab.To add a user to any role:
- First click the role section. You'll see the current members of that role.
- Click the Add member dropdown and select each user to add by email address. Start typing to narrow the list.
- Selected users will be shown in the panel for the role as you go.
- Each time you select a user, the details for that user will be shown on the right to assist you.
- In the image below, the Editor role is being granted to users named "team lead" and "lab technician"; the Reader role is being granted to the "reviewer".
Click Save.
Assign Administrator Role
Administrators have full control over the application, with the exception of the two storage-specific roles that must be separately granted. Admins can perform user management, permission assignments, and creating and editing sample types, assays, and job templates.
Note that administrator permissions work differently when Sample Manager is used with a premium edition of LabKey Server. They are assigned on the same Permissions tab as other roles. Learn more in this topic:
The first user login created on the Sample Manager application is always an administrator. To assign the administrator role to others, any administrator can choose Administration from the user menu, then click the Settings tab.Click the Application Administrators role panel and use the Add member dropdown to select the user to assign the administrator role.
Remove Users from Roles
To remove a level of access for a given user, reopen the interface for granting that role and click the X for the user you want to delete from the role. Removing a user from a role does not deactivate or remove the user account itself.
A note about role-based permissions: Users can be assigned multiple roles in the system and each is independent. If a user is both Editor and Reader, removing them from the Reader role will not in fact remove that user's ability to read information in the system, because they also have that access via the Editor role.
Related Topics
Create a Job Template
Using job templates makes the creation of many similar workflow jobs simpler and more consistent. A template can include a common set of procedures and tasks, and new individual jobs can be created from this common template and edited or refined as needed.The job template creation wizard is very similar to the steps involved in creating a new individual job, with the exception that samples and job details will be added to an individual job separately. No work is assigned within a template. You can also create a template during the process of creating an individual job, as described in Start a New Job.

 Click each section in the wizard to define template details and job tasks.
After completing all sections, click Finish Creating Template to save.
Click each section in the wizard to define template details and job tasks.
After completing all sections, click Finish Creating Template to save.
 In the Attachments section, upload any files that should be available to any jobs created from this template.
 Click Add Task to add additional tasks, use the six-block handle to reorder them, and click to delete an unneeded task.
 Notice in the upper left that there are tabs for viewing any Files associated with the template and for viewing any Jobs created using it.
Create a Job Template
To create a new job template:- Select Job Templates from the main header menu.
- Click Create New Template. You can also select Create > Job Template from many other menus in the application.
Click each section in the wizard to define template details and job tasks.
After completing all sections, click Finish Creating Template to save.
Template Details
Enter the Template Name and Description. The name should be unique enough to help users find it on a menu.
In the Attachments section, upload any files that should be available to any jobs created from this template.
Tasks
Click the Tasks tab and define the tasks. For each, enter the Name and Description and select any Assays to Perform as part of that task.Click Add Task to add additional tasks, use the six-block handle to reorder them, and click to delete an unneeded task.
Finish Creating Template
Click Finish Creating Template when finished. You'll see the new template overview.Notice in the upper left that there are tabs for viewing any Files associated with the template and for viewing any Jobs created using it.
Related Topics
Manage Jobs and Templates
This topic covers options available for administrators to manage jobs and templates. You will find the active lists of jobs and templates and manage options in the Workflow section.
 Click All Jobs to see the full list of jobs. Other tabs provide subsets.
 You can also delete a single job by opening it and selecting Delete Job from the menu next to the name.
 Open an individual template by clicking it's Name. The template overview shows a summary of tasks and assays. In the upper left, you can click the Files tab to see files that are part of the template and on the Jobs tab you'll see a listing of jobs created from this template.
 You can edit the Name and Description, but not the tasks associated with the template.
 Editing a template does not change any jobs that have already been created from the previous version of the template.

Manage Jobs
From the home dashboard, click Jobs Home or from anywhere in the application, select Workflow List from the main menu.Click All Jobs to see the full list of jobs. Other tabs provide subsets.
Edit Jobs
To open an individual job for editing, click the Job Name. Details of editing jobs and tasks are covered in this topic: Edit Jobs and TasksDelete Jobs
To delete one or more jobs, use the checkboxes on the Job List to select jobs for deletion, then click Delete.You can also delete a single job by opening it and selecting Delete Job from the menu next to the name.
Manage Templates
Templates are managed by selecting Workflow Templates from the main menu, or by clicking Manage Workflow Options from the Jobs Home:Open an individual template by clicking it's Name. The template overview shows a summary of tasks and assays. In the upper left, you can click the Files tab to see files that are part of the template and on the Jobs tab you'll see a listing of jobs created from this template.
Edit Template
To edit a template, open it as shown above and select Edit Job Template from the menu.You can edit the Name and Description, but not the tasks associated with the template.Editing a template does not change any jobs that have already been created from the previous version of the template.
Delete Templates
To delete a single template, open the details page as shown above and select > Delete Job Template. Once a job has been created from a template, you can no longer delete it and this option will be inactive.To delete one or more templates, select them on the Manage Workflow Options page using the checkboxes, then click Delete.Workflow Heatmap
You can also view workflow jobs in a heatmap format. There is a row for tracking the count of jobs created from each template and all jobs not created from templates are grouped together in an additional row, "Jobs not from templates."
Related Topics
Freezer Management
Managing the contents of your freezers is an essential component of sample management. There are endless ways to organize your sample materials, in a wide variety of freezers on the market. With LabKey Freezer Management, create an exact virtual match of your physical storage system, and then track where each sample can be found.

- Match your digital storage to your physical storage.
- Represent your exact physical freezer system, with shelves, racks, boxes, canes, bags, etc.
- Track overall available freezer capacity helping you decide where to store new samples.
- Answer questions about overall volume of samples by type and source; i.e. is there enough blood from patient X to complete the series of assays I want to run.
- Find specific samples and know if they are available.
- Move samples as needed and track each location change, including updating freeze/thaw counts and tracking amounts used.
- Control access to physical samples using storage-specific roles.
Topics
- Freezer Storage Permission Roles
- Create a Freezer
- Store Samples in Freezers
- Manage Freezers
- Manage Storage Unit Types
- View Freezer Details
- Edit Freezer Definition
- Manage Freezer Locations
- Move Stored Samples
- Manage Stored Samples
- Check Out and Check In
- View Storage Activity
- Migrate Storage Data into Freezer Management
Create a Freezer
Create as many freezers in the application as you have physical storage locations. Customize the storage layout, aka hierarchy, within each digital freezer to match the physical storage options available to your users. This topic describes how to define a new freezer from scratch. Once you have created a freezer, you may copy it to create additional similar freezers. Users must have either the Storage Designer or Administrator role to create and edit freezer layouts.
 To create additional freezers, again click Create New Freezer from the Storage Dashboard or you may copy an existing freezer.
 Continue to define additional properties if needed and describe the structure of this freezer in the Freezer Hierarchy section before clicking Finish Creating Freezer. You can also return to edit this freezer after saving if you need to make changes to the properties later.

 The system includes several built-in types (sizes/layouts), of each kind of terminal storage unit. You can customize the selections or add new ones by clicking Manage storage unit types. Note that your work in progress creating this freezer will be lost if you click away now. Consider saving your work and returning to edit the freezer definition when you have refined the options available.Add each storage unit, customizing the default short name if you like, and optionally adding a more descriptive label.
 Start with the "large" containment in your freezer, then drop structure within that container directly on top in the panel to place it "within" the container. Drag to rearrange them to match the physical freezer. For example, in this image there are three shelves, and to describe several racks on one shelf, we drop the first rack directly "on" the shelf. If we put it "next to" the shelf, it would be added as a separate rack at the same level as that shelf instead of "within" it.
 Click the icon to collapse the display of any nested units - it will become a you can use to expand the display again. To speed creation of repetitive hierarchies, you can use either:
 Continue to add the structures and terminal storage units that will contain your samples. For each terminal storage unit, you also specify the type (size/layout) of the unit.

 You can add new labels to existing units, or edit labels to update them, either by returning to edit the freezer definition via this interface, or directly edit them in the storage view for the unit using the icon.

 As long as you have included some terminal storage units such as bags or boxes, you will see how many samples you can now store in it. If not, you will see the message "This freezer has no terminal storage units configured", with a quick link to edit the freezer to add some.
 Click Apply to complete the addition. By default, bulk units are named [unit type] #[number]. No labels are applied. You'll be able to expand and customize the new units just as if they had been added individually.
Create a Freezer
To create a new freezer, click Storage on the main menu, then click Create New Freezer. When creating your first freezer, you'll have an option to Create a freezer on the main menu.To create additional freezers, again click Create New Freezer from the Storage Dashboard or you may copy an existing freezer.
Freezer Properties
Under General Properties define the following:- Name: Any string name that will clearly identify the physical freezer; it must be unique in the system.
- Label: Optional text description that will be shown with the name to help users.
- Manufacturer: Optional string for the company name or maker of this freezer.
- Freezer Model: Optional string for the manufacturer-assigned model number or name.
- Temperature: Optionally include the set-point or consistent operating temperature of this freezer when in use. When giving a temperature, specify Celsius or Fahrenheit.
- Freezer Location: If any freezer locations have been configured, you can specify here where to find this freezer.
Continue to define additional properties if needed and describe the structure of this freezer in the Freezer Hierarchy section before clicking Finish Creating Freezer. You can also return to edit this freezer after saving if you need to make changes to the properties later.
Advanced Freezer Settings
Click Advanced Settings to set the following properties for this freezer. Click Apply to save any changes.- Serial Number: Unique identifier for this unit that can be useful for troubleshooting with the manufacturer.
- Sensor Name: If this freezer is using an alarm or monitor, you can provide the name here.
- Loss Rate: Indicates the time needed or rate at which the unit will return to an ambient temperature from its set-point.
- Status: Used to indicate if the unit is storing samples, available as a backup, or defrosting as part of a maintenance routine. Options:
- Active
- Backup
- Defrosting
Freezer Hierarchy
Click the Freezer Hierarchy section to open it. Add the specific Storage Units available in your physical freezer to the panel on the right, either by:- Individually dragging them to the proper location in the hierarchy.
- Using Bulk Add to add many storage units at once.
- Non-Terminal Storage Units : These units can be contained within each other in any combination, but cannot directly contain samples. For example, a shelf can have a rack which has 2 shelves, but there must be a bag, box, or plate on those inner shelves to contain the samples themselves.
- Shelf
- Rack
- Canister
- Terminal Storage Units: These units can directly contain samples and cannot contain other units. Note that these units will only appear in the hierarchy interface when one or more types or sizes have been defined.
- Bag
- Box
- Cane
- Plate
- Tube Rack
The system includes several built-in types (sizes/layouts), of each kind of terminal storage unit. You can customize the selections or add new ones by clicking Manage storage unit types. Note that your work in progress creating this freezer will be lost if you click away now. Consider saving your work and returning to edit the freezer definition when you have refined the options available.Add each storage unit, customizing the default short name if you like, and optionally adding a more descriptive label.Start with the "large" containment in your freezer, then drop structure within that container directly on top in the panel to place it "within" the container. Drag to rearrange them to match the physical freezer. For example, in this image there are three shelves, and to describe several racks on one shelf, we drop the first rack directly "on" the shelf. If we put it "next to" the shelf, it would be added as a separate rack at the same level as that shelf instead of "within" it.Click the icon to collapse the display of any nested units - it will become a you can use to expand the display again. To speed creation of repetitive hierarchies, you can use either:
- Bulk Add for creation of new storage units.
- Click icon to clone a unit, adding another copy of it at the same hierarchical level (including any nested storage units it contains).
Continue to add the structures and terminal storage units that will contain your samples. For each terminal storage unit, you also specify the type (size/layout) of the unit.
- Bag: Select bag type from the dropdown.
- Box: Select box type from the dropdown.
- Cane: Select cane type from the dropdown.
- Plate: Select plate type from the dropdown.
- Tube Rack: Select the type of tube rack from the dropdown.
Storage Unit Names
By default, all the storage units you add will be named in a sequential numbering scheme, including the type of storage unit in this name. You can edit these names in any way will help your users find the correct locations, such as position/color/identifying labels you have applied. Unit names must be unique at any given level in the hierarchy. It is good practice to use unique names throughout the freezer to avoid confusion, particularly where there are many similar structures within your freezer.Storage Description Labels
You can include a more verbose descriptive Label for every level of your freezer hierarchy. When present, labels will be shown in many places to help users better identify the specific storage unit. Both as additional text in hierarchy listings, and as hover text when viewing storage location 'pathways' throughout the applicationYou can add new labels to existing units, or edit labels to update them, either by returning to edit the freezer definition via this interface, or directly edit them in the storage view for the unit using the icon.
Clone Units
If you click , you can clone a unit that contains other nested units. The entire structure will be cloned at the same level as the parent. This can speed the process of describing a repetitive freezer hierarchy.Finish Describing Hierarchy
Continue to add elements and rearrange them to describe your storage. Here, there are three shelves. One of the shelves has 2 bags, another shelf has two racks, each with 2 boxes of different sizes.
- Once you have completed your storage hierarchy, click Finish Creating Freezer.
- Note that you can return to edit your freezer hierarchy later, such as after defining new storage units.
- If any storage names are duplicates within a given hierarchy, an error will be raised highlighting both of the matching names so that you can edit one or both to be unique. No error is raised for duplicate names in different parts of the hierarchy.
As long as you have included some terminal storage units such as bags or boxes, you will see how many samples you can now store in it. If not, you will see the message "This freezer has no terminal storage units configured", with a quick link to edit the freezer to add some.
Bulk Add Storage Units
Instead of adding all your storage units individually, you can click Bulk Add to add many at once, streamlining the above drag and drop/copy process. For example, in this example we're adding a shelf that contains 6 racks, each containing 12 plates.Click Apply to complete the addition. By default, bulk units are named [unit type] #[number]. No labels are applied. You'll be able to expand and customize the new units just as if they had been added individually.
Next Steps
Once you have added at least one freezer that includes some terminal storage locations, you can proceed to store samples in freezers.Related Topics
Store Samples in Freezers
Once you have configured a freezer with some terminal storage units, you can assign samples to the Freezer Management location corresponding to their physical location in the real freezer. Any protocol about where to place samples of different types can be accommodated in this system.To add samples to storage, the user must have been granted the Storage Editor role. This applies to administrators as well as other users. This topic assumes the user has this role.
 Click the name of the freezer to open the details page.
 Continue to use the to expand until you find enough capacity in terminal storage units where samples can be stored, such as bags as shown above.Click any location in the left panel to show it's summary information on the right. You can only store samples in "terminal" storage locations: bags, boxes, canes, plates, and tube racks. In this case we choose a bag on the top shelf.
 You are now on the Storage View tab for this freezer, open to the location you selected.


 Values added to the Sample ID column must already exist in the system. If you start typing you will see a narrowing list of available samples. Note that this means if you received a new set of samples, you must first add their data to a Sample Type (or create a new one) and can then assign them to locations in a freezer.
 Once a Sample Type has been selected, you can:
 See below for how to Assign Positions once you've identified the samples you want to store.

 Box, plate, or tube rack:


 If you are viewing details for an individual sample, you can also click Add to Storage from the Storage Location panel.
 You will see the same interface for assigning locations to your selected samples as if you had started from the freezer to store them .
Start from the Freezer
Start from a Picklist or Grid of Samples
Start from the Freezer
Find Available Space
Start from the Freezer List on the application home page, or the freezer dashboard. You'll see a summary of storage and how many spaces are available for samples in each freezer to guide you.Click the name of the freezer to open the details page.
- Here you'll see the top level of the storage hierarchy you defined (in this example three shelves).
- Click the to expand the nested hierarchy.
- Click any level to see the available capacity in the panel on the right.
Continue to use the to expand until you find enough capacity in terminal storage units where samples can be stored, such as bags as shown above.Click any location in the left panel to show it's summary information on the right. You can only store samples in "terminal" storage locations: bags, boxes, canes, plates, and tube racks. In this case we choose a bag on the top shelf.
- Click Go to Storage View to open it, shown here "Go to Bag #1 - Left".
- You can also click the location name in the 'breadcrumb' trail along the top of the panel.
You are now on the Storage View tab for this freezer, open to the location you selected.
Select Space to Fill
There are two categories of terminal storage units to which you can add samples.- 1. Bags and Canes use a simple numbering scheme for positions.
- For bags and canes, you don't need to do anything except click Add Samples to activate the sample panel on the right.
- 2. Boxes, Plates, and Tube Racks have a 2D layout of row and column positions (aka cells, spaces, wells, etc.) within the unit. You have two choices here:
- Click cells or drag within the layout to select a range of positions, as shown below, then click Add Samples. The selected positions will be eligible for placing samples.
- OR, click Add Samples without making any selection. All available positions will be eligible for placing samples.
Position Already Occupied
If you select a range of cells and one (or more) are already occupied by samples, you will still see the relevant rows in the Add Samples grid, but the occupied rows are shaded red and cannot be edited or used to place new samples.
Identify Samples to Store
Once you have clicked Add Samples, the right side of the panel becomes your sample identification region.Paste into Grid
You can Paste into Grid from a spreadsheet or by typing directly into the grid shown:Values added to the Sample ID column must already exist in the system. If you start typing you will see a narrowing list of available samples. Note that this means if you received a new set of samples, you must first add their data to a Sample Type (or create a new one) and can then assign them to locations in a freezer.
Search for Samples
Click the Search for Samples tab to get more assistance with finding specific samples.First, select the desired Sample Type from the dropdown.Once a Sample Type has been selected, you can:
- Use the omnibox for filtering, sorting and searching to find the samples you want.
- Click More Filters to flip to a filters panel, described below.
See below for how to Assign Positions once you've identified the samples you want to store.
More Filters
Click More Filters on the Search for Samples tab to select on or more of the filter options:- From Source: Select a specific source to see samples derived from it.
- From Parent: Select a sample to show all its child samples.
- Created By: Find samples added by a specific user.
- From/To: Find samples created in a specified date range.
- Click Show Results to see the samples that match your filters.
- Use checkboxes to select the samples of interest, then click Assign Positions, or return for More Filters.
- Once some filters are applied, you'll be able to click Clear all filters to clear them.
- Use Back to Grid to return to the previous set of selected samples.
Assign Positions
Once you've filtered to find the samples you want, use checkboxes to select the ones you will be adding to this storage unit.- Note: If you select more samples than there are spaces available, you will see an error message telling you to reduce the number of selected samples before proceeding.
- Position:
- In the case of a bag, the numbered position is not meaningful.
- For a cane, it could be numbered from top to bottom (or bottom to top) as your convention dictates.
- For boxes, plates, and tube racks, the Position column shows row/column position numbers corresponding to the layout on the left. By default the samples will be placed in the first available layout positions (using left to right, top to bottom sequencing). You can adjust these default assignments by moving the row in the grid to the row for another available position in the layout.
- Sample ID: the selected samples are listed, but you can add more rows directly. Sample IDs must already exist in the system.
- Amount: Volume
- Units: Units for that volume (mL, mg, etc.)
- Freeze/Thaw Count: The default is zero. If you know the sample has been thawed and frozen before, you can edit this value.
Box, plate, or tube rack:
Add to Storage
Click Add to [Storage Type] to complete the position assignments.After assignment is complete, you will see the Storage View for the location.- The newly-added samples will be selected in the grid.
- In the case of a box, plate, or tube rack, the cells containing the newly placed samples will also be highlighted.
Start from a Picklist or Grid of Samples
Instead of starting from the Freezer, as described above, you can add Samples to freezer storage starting from the sample grid, either while viewing the Sample Type as a whole, or starting from a curated picklist.Select Samples to Store
Open the grid of Samples of interest. Either select the Sample Type from the main menu, or choose Picklists from the user menu and click the name of the picklist you want. On the grid, identify the Samples you want to store. Only Samples with a Storage Status of "Not in storage" can be added to a freezerUse checkboxes to select the Samples, then select Storage > Add to storage above the grid.If you are viewing details for an individual sample, you can also click Add to Storage from the Storage Location panel.
Find Storage Location for Samples
In the Assign Samples to Storage popup, you will see freezers with available storage space. The number of spaces available at each level will help you see easily where there is room for your new samples. Any locations without sufficient capacity to hold the samples you selected will show a red icon.Use the icons to expand the hierarchy of the freezer of your choice, seeing available spaces at each level. When you find the desired terminal storage unit, click Select.You will see the same interface for assigning locations to your selected samples as if you had started from the freezer to store them .
- Populate the grid.
- For boxes, plates, and tube racks, the samples will default to the first available slots in the structured layout.
- Move the rows to other grid positions to change where in the unit you will store them.
- Click Add to [Storage Type] to complete the position assignments.
Related Topics
Manage Freezers
Once one or more freezers have been configured in your system, you will see them in the Freezer List on the main dashboard. View the overall Freezer Management dashboard from the Storage option on the main menu. Note that some freezer management and sample storage actions require the user to have the Storage Editor and/or Storage Designer roles. This topic assumes the user has both. From this Storage Dashboard, you can see an overview and manage your sample storage.

 The Sample Activity panel shows the number of samples checked out by all users. When non-zero, this is a clickable link taking you to the Stored items page filtered to show "Storage Status = Checked out". Learn more in the topic: View Storage ActivityYou will also see a grid of details about recent activity for the current user, showing up to 10 recent actions. Included here:
 Use the dropdown to select one:
 In the section for each freezer you have defined, the panel includes:
From this Storage Dashboard, you can see an overview and manage your sample storage.
Sample Activity
The Sample Activity panel shows the number of samples checked out by all users. When non-zero, this is a clickable link taking you to the Stored items page filtered to show "Storage Status = Checked out". Learn more in the topic: View Storage ActivityYou will also see a grid of details about recent activity for the current user, showing up to 10 recent actions. Included here:
- Adding samples to storage
- Checking samples in or out
- Discarding samples from storage
Storage Overview
The Storage Overview panel includes a graphical, color-coded representation of the current storage of samples in your freezers. The color you assign to each Sample Type is used to represent those samples in a variety of charts.Use the dropdown to select one:
- Samples Stored By Sample Type: A bar chart with the total count of each sample in all freezers shown.
- Samples Checked Out By Sample Type: A bar chart representing the types of samples currently checked out to all users.
- Samples Checked Out By User: A bar chart showing the total samples checked out to each user, regardless of Sample Type. Color coding is not used on this chart to represent Sample Type, but if you click the bar for a user, you will see a grid of the samples that user has checked out.
Freezer List
The freezer list offers administrators two action buttons, above the list of freezers:- Manage Storage Units: Define the "terminal" storage units in which samples are stored. Boxes, bags, canes, plates, and tube racks can be of different sizes and storage layouts.
- Create New Freezer: Add another freezer.
In the section for each freezer you have defined, the panel includes:
- On the left:
- Freezer Name: Click the name to open the details for this freezer.
- Above the name, you'll see this freezer's location, if any has been defined.
- If set, the Status will be displayed.
- Below the name, the label (description) may also give more identifying information to users.
- Configured set-point temperature.
- On the right:
- Color coded bars represent the number of samples currently stored in that freezer, scaled to give a visual indication of overall capacity free.
- The capacity of the freezer is below the bars. You'll see the number of samples stored, the total number of spaces available in that freezer, and the percent of spaces available.
- Click the or the freezer name to go to the freezer overview page.
Related Topics
Manage Storage Unit Types
Your physical storage can be duplicated within the Freezer Management tools by customizing the storage units that can hold samples in your freezer, known as terminal storage units. They can be of different sizes, and in the case of boxes and plates, you can also configure the labeling pattern to match existing conventions, making it easy for your users to find the correct positions within these structured layouts.An administrator can define the storage unit sizes, layouts, and labelling systems that will be available when creating a freezer in the system.
To manage storage units, select Storage from the main menu and click Manage Storage Units in the Freezer List panel. Note that you do not need to have created any freezers to manage the storage units that they will be able to contain. After editing storage units, click Finish Editing Units to save your changes.
 Enter the Name and Capacity for the new bag. While it is good practice to use the capacity in the name of the bag, the system does not require it.To delete a bag type, click the . You may delete the built-in types if desired.To expand the details for a bag type, click the icon to expand it. You can add a Storage unit description to assist your users.
 To expand the details for a box type, click the icon to expand it.
 To delete a box type, click the . If a given type is in use anywhere in the freezer system, you cannot delete the type. You may delete the built-in types as well, if they are not in use.
 To delete a type of cane, click the . If a given type is in use anywhere in the freezer system, you cannot delete the type. You may delete the built-in types as well if they are not in use.To expand the details for a cane type, click the icon to expand it.

 To expand the details for a plate type, click the icon to expand it.
 To delete a plate type, click the . If a given type is in use anywhere in the freezer system, you cannot delete the type. You may delete the built-in types as well if they are not in use.
 To expand the details for a tube rack type, click the icon to expand it.
 To delete a tube rack type, click the . If a given type is in use anywhere in the freezer system, you cannot delete the type. You may delete the built-in types as well if they are not in use.
After editing storage units, click Finish Editing Units to save your changes.
Bags
Bags are a flexible way to store samples. Default bag sizes created in the system can hold 10, 100, 200, or 500 samples.If you want to add an additional size bag, select the Bags tab and click Add a New Bag. There is no internal limit to the number of samples a bag can hold.Enter the Name and Capacity for the new bag. While it is good practice to use the capacity in the name of the bag, the system does not require it.To delete a bag type, click the . You may delete the built-in types if desired.To expand the details for a bag type, click the icon to expand it. You can add a Storage unit description to assist your users.
Boxes
Boxes can be of different sizes and layouts, accommodating many types of sample storage. Click the Boxes tab to manage box types. Some common sizes are built in to the system:- 10x10
- 10x5 (10 columns, 5 rows)
- 5x5
- 9x9
To expand the details for a box type, click the icon to expand it.
- You can add a Storage unit description to assist your users.
- Under Display Options you will see a preview of how the spaces in your box will be labeled (shown here "A-1").
- Select either Show columns first or Show rows first. The default is to show rows first.
- Specify for Column labels whether they are alphabetic or numeric. The default is numeric.
- Specify for Row labels whether they are alphabetic or numeric. The default is alphabetic.
To delete a box type, click the . If a given type is in use anywhere in the freezer system, you cannot delete the type. You may delete the built-in types as well, if they are not in use.
Canes
Canes hold a number of samples typically in a vertical alignment. Click the Canes tab to see and add cane sizes. Built-in cane types are named for the sample capacity in the cane:- 4 Cane
- 5 Cane
- 6 Cane
To delete a type of cane, click the . If a given type is in use anywhere in the freezer system, you cannot delete the type. You may delete the built-in types as well if they are not in use.To expand the details for a cane type, click the icon to expand it.
- You can add a Storage unit description to assist your users.
Plates
Plates can be of different sizes and layouts, accommodating many types of instrument. Click the Plates tab to see and add plate types. Built-in plate types are:- 24 Well Plate (6x4)
- 384 Well Plate (24x16)
- 48 Well Plate (8x6)
- 96 Well Plate (12x8)
To expand the details for a plate type, click the icon to expand it.
- You can add a Storage unit description to assist your users.
- Under Display Options you will see a preview of how the spaces in your plate will be labeled (shown here "A-1").
- Select either Show columns first or Show rows first. The default is to show rows first.
- Specify for Column labels whether they are alphabetic or numeric. The default is numeric.
- Specify for Row labels whether they are alphabetic or numeric. The default is alphabetic.
To delete a plate type, click the . If a given type is in use anywhere in the freezer system, you cannot delete the type. You may delete the built-in types as well if they are not in use.
Tube Racks
Tube racks can vary greatly in size and layout. Click the Tube Racks tab to see and add the types you need. Built-in types are:- 4x5 Tube Rack
- 4x6 Tube Rack
- 6x12 Tube Rack
- 6x6 Tube Rack
To expand the details for a tube rack type, click the icon to expand it.
- You can add a Storage unit description to assist your users.
- Under Display Options you will see a preview of how the spaces in your rack will be labeled (shown here "A-1").
- Select either Show columns first or Show rows first. The default is to show rows first.
- Specify for Column labels whether they are alphabetic or numeric. The default is numeric.
- Specify for Row labels whether they are alphabetic or numeric. The default is alphabetic.
To delete a tube rack type, click the . If a given type is in use anywhere in the freezer system, you cannot delete the type. You may delete the built-in types as well if they are not in use.
Related Topics
View Freezer Details
To view the details of what can be found in a specific freezer, click the freezer name on the main menu, or expand it on the Storage Dashboard and click View Freezer. There are two tabs in the view of a freezer, plus a freezer details menu:

 The Freezer Status panel shows the current status in a colored block. Click the to select among the options: "Active, Defrosting, Backup". It also highlights the set-point temperature and usage of this freezer. Overall capacity is shown in a bar, with the 'in-use' capacity as a shaded portion and the number of used and unused sample storage spaces listed above it.


 You can also 'jump' into a nested storage location from the buttons and breadcrumbs on the Overview tab.


 Hover over the colored dot for a tooltip about which Sample Type it represents, or use the Legend.
 Hover over the to see details for moves.
 If a specific position in a box, plate, or tube rack is selected when you view the Location History tab, you will see the location history for that position in the layout. For example, here a sample was moved out and then back into the A-2 location:
 You can also define storage unit labels when you create the freezer hierarchy, as described here:
Storage unit labels are shown with the unit name, and also in hover text when you hover over the 'breadcrumb trail' for the storage hierarchy.
You can also define storage unit labels when you create the freezer hierarchy, as described here:
Storage unit labels are shown with the unit name, and also in hover text when you hover over the 'breadcrumb trail' for the storage hierarchy.

 Deletion actions are recorded in the Freezer Management Events section of the audit history.
- Overview Tab
- Storage View
- Sample Information in Grids
- Select Storage to View
- Box, Plate, Tube Rack Detail Views
- View Selected Samples in Box, Plate, or Tube Rack
- Sample Actions
- Location History
- Storage Description Labels
- Freezer Details Menu: Edit, Copy, Delete, or View Audit History
Note that to add samples to storage, and perform other sample storage actions, the user must have been granted the Storage Editor and/or Storage Designer roles. This topic assumes the user has both.
Overview Tab
The overview page for freezer details shows a high level view of freezer status, details, and contents
Freezer Status
The Freezer Status panel shows the current status in a colored block. Click the to select among the options: "Active, Defrosting, Backup". It also highlights the set-point temperature and usage of this freezer. Overall capacity is shown in a bar, with the 'in-use' capacity as a shaded portion and the number of used and unused sample storage spaces listed above it.
Freezer Details
The freezer details panel lists the properties, including advanced settings, defined for this freezer.Freezer Contents
Below the status and details panels, you will see a split panel where you can browse the freezer hierarchy and contents.On the left, expandable sections for the top level storage units let you 'browse' the structure of this freezer.- Click the to expand a section. (It will become a that you can click to collapse it again.)
- Click a section on the left to see the details for it on the right.
- A 'breadcrumb' trail along the top identifies the location of the unit being shown. Above we see Box #1 on Shelf #1 in Freezer -4C.
- You can click any level of this breadcrumb to open the details for that unit on the on the Storage View tab.
- A button to Go to [unit name] is displayed. Click to open this unit on the Storage View tab.
- Visual bars follow, summarizing the contents of this storage unit. They are colored using the label colors assigned to Sample Types.
- Capacity: The shaded section indicates used spaces. The number and percent available are listed.
- Sample Types: The breakdown of types of samples in this unit is shown visually using the label colors assigned. Hover over Legend to see which colors represent which types of sample.
- Samples Checked Out: The number checked out is shown, under a bar indicating the type that are checked out.
Storage View Tab
The Storage View presents a more detailed look into the contents of this freezer. Below the Freezer Status and Freezer Details panels, the storage section lets you browse through the freezer storage hierarchy.
Sample Information in Grids
All storage units, from the overall freezer to a shelf to a plate or bag, show information about Samples in a grid in the Storage View, as shown above. Scroll to the right to see additional columns.Select whether to view All Samples or Selected Samples in the grid. You can sort and filter them using the omnibox to find a subset of interest.Use a checkbox to select a sample and details will be shown in a panel on the right.The terminal storage units with assigned locations, i.e. boxes, plates, and tube racks, also include a layout interface with the sample grid below it.Select Storage to View
The top row of the panel shows what location you are viewing and lets you select into the nested levels of the storage hierarchy.- Use the to open a menu of locations available.
- Select one to view it. And if desired, go further by using the to select from the next level 'into' the storage.
- When all of the locations are of the same type, such as when Shelf #1 only contains Boxes below, the menu will have the label of the type; when storage units are mixed, "Location" will be shown.
You can also 'jump' into a nested storage location from the buttons and breadcrumbs on the Overview tab.
Box, Plate, Tube Rack Detail Views
When looking at the Storage View for a Box, Plate, or Tube Rack, you will see a layout of rows and columns matching the definition of the storage unit, and color coded indications of the specifics of each cell, or place, in that layout.- Rows and columns are labeled alphabetically or numerically, depending on how you defined the storage unit.
- The 'occupied' positions will show a color-coded dot.
- Shading indicates positions that are reserved for samples that are currently checked out.
- Hover over the Legend to see it.
- Hover over any position in the grid to see a popup with details about it.
View Selected Samples in Box, Plate, or Tube Rack
- Click any position (cell) to select the sample in it and see details, as well as actions, on the right.
- The clicked/selected position is shaded blue, and if it contains a sample, the corresponding row is also selected in the data grid below the graphical layout.
- If you select a position where a sample is checked out, shaded pink, you will see details about the sample that "belongs" in that position but is currently checked out, including a link to View sample timeline where you can learn more about who checked it out, when, and why.
- If you are a storage editor or administrator, you will also see additional action buttons here.
Hover over the colored dot for a tooltip about which Sample Type it represents, or use the Legend.
Sample Actions
- Learn about adding samples to storage in this topic: Store Samples in Freezers
- Learn more about checking samples in and out in this topic: Check Out and Check In
- Learn about moving and discarding samples in this topic: Move Stored Samples
- Learn how to edit storage details in this topic: Manage Stored Samples
Note that for many sample storage actions, the user must have been granted the Storage Editor and/or Storage Designer roles. This topic assumes the user has both.
Location History
When in the Storage View, if no specific position is selected, use the Location History tab to see a timeline of events for the storage unit you are viewing. For example, viewing a box after it has moved, you would see two events: the original creation, and later movement to elsewhere in the hierarchy.Hover over the to see details for moves.If a specific position in a box, plate, or tube rack is selected when you view the Location History tab, you will see the location history for that position in the layout. For example, here a sample was moved out and then back into the A-2 location:
Storage Description Labels
It may be useful to provide descriptions of individual storage units for your users. You can customize the name of the unit itself, or from within the Storage View, you can add a more verbose label or edit an existing one. For example, you could include more text from box labels here, or names of investigators or projects.Below the name of the unit, click the to edit. Type the new label (or edit the existing label). Hit enter to save.You can also define storage unit labels when you create the freezer hierarchy, as described here:
Storage unit labels are shown with the unit name, and also in hover text when you hover over the 'breadcrumb trail' for the storage hierarchy.
Freezer Details Menu
Use the menu on either tab of the freezer details for the following:
Copy Freezer Definition
Select Copy Freezer Definition from the menu of the freezer you want to duplicate. Use this option to create a new freezer with the same initial properties and hierarchy. No freezer storage contents will be copied.You can use this as a shortcut to creating many similar freezers, or adding a new freezer as you need additional storage capacity. Once copied, customize the new freezer definition. At a minimum, each freezer must have a unique name. The default name of a copied freezer appends "(Copy)" to the end of the original name.Delete Freezer
Select Delete Freezer from the menu while viewing the details for that freezer.Deletion of a freezer is permanent and cannot be undone.- The freezer and all of its storage units will be permanently deleted.
- If any samples are stored in this freezer, you will see a count of how many are stored. The samples themselves (the sample data) will not be deleted if you proceed, but all of the location information for those samples will be cleared.
- You will be asked to confirm this action before it is deleted.
Deletion actions are recorded in the Freezer Management Events section of the audit history.
Related Topics
Edit Freezer Definition
An administrator or storage designer may edit both the properties and the composition of storage units within a given freezer.

Open Freezer Editing
You can edit a freezer definition via two pathways:- Expand it on the Storage Dashboard and click Edit Freezer Definition, or
- From the details page for the freezer, select > Edit Freezer Definition.
Edit Freezer Properties
The Freezer Properties panel can be edited using the same interface as when it was originally created.Edit Freezer Hierarchy
Open the freezer definition for editing, then click Freezer Hierarchy. The interface for editing the freezer hierarchy is the same as when you created it. Drag and drop units to where they should be. Use to expand sections in the hierarchy.When a freezer is empty, i.e. before any Samples have been stored in it, you have more flexibility in changing the layout and storage location contents.Once some samples are stored in a freezer, you will see a icon marking storage units that cannot be deleted. You can still add additional storage units to "locked" non-terminal storage. For example, you can add more boxes to a rack that shows as "locked" because it already contains boxes containing samples.Add New Storage Units
Drag and drop new storage units to the positions in the hierarchy where you want them. Adding additional storage will change the capacity and usage percentages for the freezer.Adjust Existing Storage Units
Edit the Name given to storage units to help your users identify the specific locations and containers they need.Drag existing storage units to different parts of the hierarchy to move them within the current freezer. You can rearrange storage units in the freezer even if they already contain stored samples.Changing the position or name of a terminal storage unit in a freezer will change the current information shown for all stored samples, but does not register as a timeline event for samples provided it stays in the same freezer.Learn about moving a storage unit to a different freezer, which will be tracked as a timeline event for any samples it contains, in this topic: Move Stored Samples.Remove Storage Unit
When removing a storage unit from a freezer, first check to ensure that the physical samples stored there have been moved to new locations in the system, otherwise you will lose the tracking data associated with the first location.Learn more about moving samples in this topic: Move Stored Samples.Change Storage Unit Type
If you find you need to change the type of a storage unit, either because the wrong initial type was created or because your labelling system has been changed, first create the new/corrected unit "parallel" to the one you are replacing.- If you are changing a non-terminal storage unit (such as replacing a shelf with a rack) you can drag the contents of the old unit into the new one.
- If you are changing a terminal storage unit type, such as a box, you must specifically move the samples from the old to the new unit.
Related Topics
Manage Freezer Locations
Organizations managing multiple freezers may find it helpful to organize them by physical location, particularly when they may be in different rooms, on different floors, or even in different buildings across a campus.You could keep track of locations of your freezers by using the "Description" field in a freezer definition, but those details are only available when viewing the freezer details. By contacting LabKey, we can configure your physical location hierarchy within the application for you, so that you can set the Freezer Location, and then all users can see this information in the application interface.
With this information, LabKey will configure the necessary Freezer Location hierarchy for you to use. Freezers could be located at any level of this hierarchy, such as "Building 202", if you do not know (or need) details about which floor or room within the building.
 In the popup, browse the hierarchy to find the physical location for this freezer. Click to select it, then click Apply.Click Finish Updating Freezer and notice that the Freezer Details panel now lists all 'levels' of the selected location.
 When viewing storage details for a sample, you will see both the physical location of the freezer it is in (in gray), and the storage location for that sample within that freezer (in blue). You can click the blue locations within the freezer for a grid of all samples stored with the one you are viewing.
Note that this is distinct from the storage unit hierarchy within the freezer(s), which local administrators can configure themselves.
Configure Location Options
Currently, LabKey will set up your freezer location options for you.To get started, contact your Account Manager with the hierarchy of locations you need. For example, you might have two buildings with various possible freezer locations in one and a single possible location in another. For example:myInstitution
│
├───Building 101
│ ├───2nd Floor
│ │ ├───Room 2A
│ │ └───Room 2B
│ └───3rd Floor
│ ├───Lab - Rm 42
│ └───Storage Center
│
└───Building 202
└───Storage Center
Set Freezer Location
Once LabKey has set up your Freezer Locations, you will be able to edit existing freezer definitions to specify a physical location for each freezer.From the main menu, click the name of the freezer, then select > Edit Freezer Definition. Under Freezer Location, click Select Location.In the popup, browse the hierarchy to find the physical location for this freezer. Click to select it, then click Apply.Click Finish Updating Freezer and notice that the Freezer Details panel now lists all 'levels' of the selected location.
Use Freezer Locations
Unlike any location information you might place in the description field, these locations will be shown on the storage dashboard and in the selection popups when deciding where to store or move samples.When viewing storage details for a sample, you will see both the physical location of the freezer it is in (in gray), and the storage location for that sample within that freezer (in blue). You can click the blue locations within the freezer for a grid of all samples stored with the one you are viewing.
Related Topics
Move Stored Samples
This topic describes how to move Samples from one storage location to another. To move samples in storage, the user must have been granted the Storage Editor role.A location that can hold samples directly (like a box or plate) is called a "terminal storage unit". A location which contains other storage units but cannot directly hold samples (such as a shelf) is a "non-terminal storage unit". Some terminal storage units, like boxes and plates, have a row and column structure, referred to here as a "layout" giving each sample as specific spot. Others, like bags, are not structured.
 You can also click the In storage link on the sample grid to go directly there.
 From the Freezer Storage View, with the sample selected, you will have a Move button if you are authorized to move samples.

 Click the new location for your sample to select it.
 When moving within a cane, there is no layout, you use the Location/SampleId table. Start to type the Sample Id of the sample you are moving into the desired cane position. When shown in the completion menu, select the Sample Id to place it.
 Once you select a location on the right for any type of storage, your button options will be:
 If the target location is a bag or cane, you will see your new sample added to the location listing. If the destination is a plate, box, or tube rack, you will select a new position in the layout.
 The options are the same as for local moves:
 You'll see an abbreviated set of details and the same Move menu as for a single sample:

 In the popup, use the to expand the freezer list and location hierarchy to find the target location. Select it and click Move Here.
 A success banner will be shown, giving you a quick link to navigate to View new location. Unless you click it, you will still be in the original freezer location where the unit was previously.

Move One Sample
To move a single sample, first, find it in storage. You can navigate the freezer hierarchy to find the Storage View of the place where it is stored, or if you are starting from the Sample details page, click the location box in the Storage Location panel.You can also click the In storage link on the sample grid to go directly there.From the Freezer Storage View, with the sample selected, you will have a Move button if you are authorized to move samples.
- For bags, there are no specific locations within the bag, so clicking Move will not open options, but automatically jump to the move to another storage location option.
- For boxes, canes, plates, and tube racks, click to select either:
Move Within Current Terminal Storage Unit
When moving within a box, plate, or tube rack, you will now see two layouts, allowing you to click a location in the right panel to select it as the "destination" for the sample you are moving (from the highlighted section in the left panel). Color coding is repeated so that you can see at a glance which spaces are available.Click the new location for your sample to select it.When moving within a cane, there is no layout, you use the Location/SampleId table. Start to type the Sample Id of the sample you are moving into the desired cane position. When shown in the completion menu, select the Sample Id to place it.Once you select a location on the right for any type of storage, your button options will be:
- Move Here: Complete the move to the selected location.
- Change Destination: Opens a menu for navigating the available storage hierarchies to find another storage location.
- If you only wanted to pick a different space in the local layout, you could just click it or edit the table.
- Cancel Move: Leave the sample(s) in the original storage location(s).
Move to Another Storage Location
When you want to move a Sample to another location, you will navigate the freezer hierarchy in a series of expandable sections to find the desired destination. Available capacity is shown as you navigate. Use to expand the sections and click Select when you find the desired location.If the target location is a bag or cane, you will see your new sample added to the location listing. If the destination is a plate, box, or tube rack, you will select a new position in the layout.The options are the same as for local moves:
- Move Here: Complete the move to the selected location.
- Change Destination: Opens a menu for navigating the available storage hierarchies to find another storage location. If you only wanted to pick a different space in the local layout, you could just click it.
- Cancel Move
Move a Group of Samples
To move a group of Samples, start from the Storage View of where they are currently located. Either drag or click within the layout, or use checkboxes to select the samples you want to move.You'll see an abbreviated set of details and the same Move menu as for a single sample:
- Move within this location: The same process as for moving a single sample locally, except that you will select as many target locations as needed for the group.
- You can move samples back into the same locations as they originally occupied (such as in a different sequence) if desired.
- Move to another storage location: The same process as for moving a single sample to another location.
- If you choose a location without enough room for all the samples, you will be warned and be able to choose a different location.
- To change the size of a terminal storage unit, such as to move a box of samples to a different sized box, create a new unit of the new size, then use this option to move the group of samples.
Move a Storage Unit
To move an entire storage unit, whether it contains samples or not, you might create a new storage unit in the new location and use the steps above to move a group of samples to a new location. You must use this option if you wish to change the definition of the unit, such as to move a box of samples to a different sized box. However, this option does not preserve the location history for the storage unit across this change.Move to Any Freezer
A storage unit, whether empty or full, can be moved to a new location either in the same freezer or in a different one by clicking Move Storage Unit from most views of the storage unit. You can move both individual terminal storage units, (such as boxes) and 'container' storage units (such as racks or shelves), which will also move all the units they contain.View the unit you want to move, either in the freezer overview, or the storage view for that unit, then click Move Storage Unit.In the popup, use the to expand the freezer list and location hierarchy to find the target location. Select it and click Move Here.A success banner will be shown, giving you a quick link to navigate to View new location. Unless you click it, you will still be in the original freezer location where the unit was previously.
- If you move a storage unit containing samples within the current freezer, any samples it contains will stay with the same position assignment within the storage unit.
- See below for an alternative method for moving within a freezer.
- If you move a storage unit containing samples to a different freezer, the samples will still retain their position assignments within terminal storage units.
Move Within Current Freezer - Edit Definition Method
If you are moving a storage unit within a freezer, you can also edit the definition to relocate that box to its new location, as described here:Open the Freezer details page by clicking the freezer name on the main menu.- Select > Edit Freezer Definition.
- Click the Freezer Hierarchy section.
- Use icons to expand sections.
- Lock icons are shown on any terminal units containing samples, indicating that you cannot change the size or type of the units, but you can move them within the freezer here.
- Locate the storage unit you want to move. Shown below, Box#1 - Green" used to be on Shelf #2/Rack #1 and is being moved to Shelf #1.
- Click Finish Updating Freezer.
Related Topics
Manage Stored Samples
Many sample creation and management actions for samples in storage can be completed directly from the storage view, simplifying the process for sample managers. This topic outlines these options for stored samples:
 In the popup, select whether to create Derivatives, Pooled Samples, or Aliquots, specify how many new samples to create, then click Go to Sample Creation Grid. Enter the details as for other sample creation, then click Finish Creating ## Samples.You'll see the green success banner and can immediately click Add them to storage if desired.
 Learn more about these processes in these topics:
 Learn about adding samples to existing picklists and jobs here:
 Update the information in the popup, enter a comment to explain the adjustment you're making (optional), then click Update Sample to save your change. The comment will be retained in the audit log and timeline for the sample.


- Create Samples from Stored Samples
- Create New Picklists and Jobs with Stored Samples
- Add Stored Samples to Existing Picklists and Jobs
- Edit Storage Fields
- Discard Samples from Storage
Create Samples from Stored Samples
When viewing samples in storage, you can create new derivatives, pooled samples, and aliquots directly. Select one or more samples in the grid on the right, then select Create > [Choose Sample Type].In the popup, select whether to create Derivatives, Pooled Samples, or Aliquots, specify how many new samples to create, then click Go to Sample Creation Grid. Enter the details as for other sample creation, then click Finish Creating ## Samples.You'll see the green success banner and can immediately click Add them to storage if desired.
Create New Picklists and Jobs with Stored Samples
To simplify freezer workflows, you can also select samples in storage views and create new picklists and workflow jobs including them. Select samples and choose Create > Picklist or Create > Job respectively.Learn more about these processes in these topics:
Add Stored Samples to Existing Picklists and Jobs
If the picklist or workflow job you want to add stored samples to already exists, you can select the desired samples, then choose Manage > Add to Picklist or Manage > Add to Existing Job respectively.Learn about adding samples to existing picklists and jobs here:
Edit Storage Details
When a sample is initially added to storage, an amount (with units) and initial freeze/thaw count are usually provided. If they are missing, or if you need to edit this information later, you can do so by clicking the sample, and clicking either icon in the Storage Details section to open an Edit Storage Fields panel.Update the information in the popup, enter a comment to explain the adjustment you're making (optional), then click Update Sample to save your change. The comment will be retained in the audit log and timeline for the sample.
Discard Sample from Storage
The action of discarding a sample from storage does not result in removal of the sample information from the system, only that it is taken from an "In Storage" state to a "Not in Storage" state and details about stored amount and freeze/thaw counts are dropped. This could be related to the consumption of all of the sample, and thus it's no longer being available, or could be temporary and the sample could be returned to storage later.If instead you want to delete all data related to a Sample, follow the instructions here: Delete Samples. Discarding samples will:- Remove them from your storage location views.
- No longer retain their stored amounts or freeze/thaw counts (or allow them to be updated).
- Prevent any further check outs or check ins.
- NOT delete the data stored in the system about the samples.
- From the Sample details page, select Discard from Storage from the menu.
- From a grid of Samples, select samples using the checkboxes and select Storage > Discard from Storage.
- From the Storage View of the Sample(s) location, select the sample(s), then select Manage > Discard.
Update Status During Discard
In all methods of discard, you will see a popup detailing the sample(s) you selected to discard. You'll see their locations, a color indicating type, and position information.You can also check the Set Sample Status checkbox to assign a new sample status at this time. For example, discarding a sample often means it has been "Consumed".Enter a comment to accompany the action, if desired, and click Yes, Discard Samples.
Related Topics
Check Out and Check In
This topic describes how a user would check a sample out of storage, such as for use in running an assay, and then check it back in later, recording the volume consumed as well as incrementing the freeze/thaw count where applicable. Note that to check samples in and out of storage, the user (or administrator) must have been granted the Storage Editor role.
 Click Check Out Sample(s).While samples are checked out, they will show "Checked out" as their Storage Status in any grids. Click the linked "Checked out" message to go directly to the storage details for that sample.

 Once your sample is checked back in, you will notice the Stored amount has been decremented by the amount you used, and the freeze/thaw count incremented by one unless you unchecked the box.Note that the units for entering the amount you used defaults to the units set for the Sample Type, but this can be adjusted if needed, within the liter or gram set of units available (i.e. if you are measuring in mL, you could have used uL or L). The system will convert the measurement in the units you enter to decrement the correct amount from the stored total which will always be shown in the storage unit set for the type.
Check Out
To check out samples, you have many options in the interface:- Navigate to the storage location, select the sample or samples you want, and click Check Out.
- From any grid of samples, including in a workflow job, use checkboxes to select the sample(s) you want and select Storage > Check Out.
- From the sample details page, select > Check Out to check out a single sample.
Click Check Out Sample(s).While samples are checked out, they will show "Checked out" as their Storage Status in any grids. Click the linked "Checked out" message to go directly to the storage details for that sample.
Check In
When finished with a sample, you also have several options:- Navigate to the storage location, select the space(s) reserved for the sample(s) you are checking in, and click Check In.
- You can check one or more samples in from a samples grid, including a workflow job, by selecting the row(s) for the sample(s) and choosing Storage > Check In.
- From the sample details page for a sample that is currently checked out, you can select > Check In (otherwise the "Check Out" option will be shown on this menu.
- In the popup:
- Enter the Amount used during checkout.
- By default, the system will Increment freeze/thaw count on check in, under the assumption that you thawed the sample to use it and it will freeze again. If this is not true, you may uncheck this box.
- Enter Comments on check in to be recorded (Optional).
- Click Check In Sample(s).
Once your sample is checked back in, you will notice the Stored amount has been decremented by the amount you used, and the freeze/thaw count incremented by one unless you unchecked the box.Note that the units for entering the amount you used defaults to the units set for the Sample Type, but this can be adjusted if needed, within the liter or gram set of units available (i.e. if you are measuring in mL, you could have used uL or L). The system will convert the measurement in the units you enter to decrement the correct amount from the stored total which will always be shown in the storage unit set for the type.
Related Topics
View Storage Activity
This topic describes how to view and audit Storage Activity of samples in the Freezer Management system, including adding and removing samples from storage as well as check-in and check-out actions.
Having an efficient way to keep track of where you have been working, or where others might be storing similar materials can help administrators make informed choices about where to store new samples.
 The grid of actions can be sorted, filtered, and searched as with any other grid.
 Scroll to see additional columns, including information about who completed the various storage activities listed.You can also reach this page by clicking the number of Total samples checked out by all users in the Sample Activity panel at the top of the Freezer dashboard, in which case you will see it filtered to show only those samples that are currently checked out. Clear the filter to see all stored items.
 In the case of moving a storage unit from one location to another, the event details for all samples contained in that storage unit will give you a full 'breadcrumb' path to both the old and new locations of the individual sample.

Your Activity
From the main menu, click Storage Activity under Your Items, or select Storage Activity from the user menu in the header.The grid of actions can be sorted, filtered, and searched as with any other grid.
- Click a Sample Id to see the details for a sample.
- Click a storage Status ("In" or "Out") to jump directly to the Storage View of the location for that sample, whether it is currently checked in or out.
- Note that the Status column is always updated to the current status of the sample, not the status at the time of the activity in this grid. In the screen image above, samples that were "discarded from storage" still have the current status of "In" because they were re-added to storage later, perhaps in a different location.
Stored Items
From the Storage Activity page, click the Stored Items tab to see a grid of all items in storage throughout the system.Scroll to see additional columns, including information about who completed the various storage activities listed.You can also reach this page by clicking the number of Total samples checked out by all users in the Sample Activity panel at the top of the Freezer dashboard, in which case you will see it filtered to show only those samples that are currently checked out. Clear the filter to see all stored items.
Sample Timeline: Storage Activity
Like other events that happen for an individual sample, storage events will be included on the Sample Timeline, including adding samples to storage, checking in and out, updating storage data, moving the storage unit that contains the sample, and discarding from storage.In the case of moving a storage unit from one location to another, the event details for all samples contained in that storage unit will give you a full 'breadcrumb' path to both the old and new locations of the individual sample.
Audit Log: Freezer Management Events
Freezer management events are logged in the application's Audit Log. From the details pages for a freezer, select > View Audit History to open the audit log filtered to that specific freezer.
Related Topics
Migrate Storage Data into Freezer Management
If you are migrating from using another system, you can take advantage of bulk import and update options to move existing storage information for Samples into Freezer Management.
 In addition to the fields defining your Sample data and fields representing any parent or source import alias(es), you will see fields related to storage including:
 You can now use all the Freezer Management features as if you had stored samples using the user interface:
- Define Freezer(s) in UI
- Templates for Sample Storage
- Adjusting Storage Fields to Match Other Systems
- Import of Samples with Storage Location Data
Define Freezer(s) in UI
You must create the virtual freezers in the Freezer Management application first. Follow the steps in the following topic, taking care to use the naming and layout that will match the pathways to storage locations that will be present in the data coming from your previous system. Naming of freezers, storage structures, and terminal locations like boxes and bags is flexible enough to match the system you were using. If necessary, you can also create custom storage unit definitions as needed.Templates for Sample Storage
Once you have defined your freezers, the next step is to create the Sample Types you will be storing, if they don't already exist in the system. You can use a combination of field inferral from spreadsheets and manual refinement to match the types of samples you have stored. Once your Sample Type exists, whether or not it contains Samples, obtain an import spreadsheet template by beginning to import a new set of samples from a file, then clicking the Template button.In addition to the fields defining your Sample data and fields representing any parent or source import alias(es), you will see fields related to storage including:
- StoredAmount
- Units
- FreezeThawCount
- StorageLocation (A slash-delimited "path" to the terminal storage location - see below)
- StorageRow
- StorageCol
- EnteredStorage (Date)
- CheckedOut (Date)
- CheckedOutBy (UserID) - if omitted, the user who completes the import will be assigned
- StorageComment
Data Format Requirements
- StoredAmount
- Must be a number.
- May be negative.
- Units
- Must be one of the supported unit types listed here.
- May be supplied as either the full plural name (e.g., "grams") or the abbreviation (e.g., "g"). Casing matters.
- If the Sample Type has a default unit type provided, the units must be convertible to this unit type. (e.g., "g" and "kg" are convertible, "g" and "mL" are not).
- FreezeThawCount
- Must be a non-negative integer.
- StorageLocation
- Must contain valid names of locations in a hierarchy separated by slashes (/), for example:
- Freezer #3 / Shelf #1 / Box #1 - Green
- Names of locations may contain slashes, but if so, then they must be quoted.
- Leading and trailing spaces are tolerated and trimmed.
- A leading or trailing slash is tolerated.
- StorageRow
- Must be either a positive integer or one of a series of letters (A-Z, a-z). Casing does not matter for the letters.
- DOES NOT check if the display format for the box type corresponds to the format provided as input. That is, if you’ve chosen to label your axes as Numeric, you can still provide alphabetic designations for the row value (A for row 1) in the input file.
- Must be in the range of the chosen terminal storage type (cannot be < 0 or larger than the number of rows configured for the terminal storage type).
- StorageCol
- Must be blank if the terminal storage type is a bag or a cane.
- If not blank, must be either a positive integer or one of a series of letters (A-Z, a-z). Casing does not matter for the letters.
- DOES NOT check if the display format for the box type corresponds to the format provided as input.
- Must be in the range of the chosen terminal storage type.
- EnteredStorageDate
- Must be a valid date or date-time value.
- Represents when the sample was stored in the physical freezer.
- If omitted, the time of the data import, i.e. the time of entering the management system is used.
- CheckedOut
- Must be a valid date or date-time value.
- If omitted and a CheckedOutBy user is provided, the current date will be used.
- CheckedOutBy
- Must be a valid email address, username, or userID for a user in the system with sufficient permissions to check out samples. Learn about adding users here: Manage Users.
- Leading spaces and quote marks are not tolerated.
- If omitted and a CheckedOut date is provided, the sample will be checked out by the user importing the data.
- StorageComment
- Always optional.
- Will be ignored if the action for the import is not checking in, checking out, or discarding.
Adjusting Storage Fields to Match Other Systems
Examine the export spreadsheet from your previous freezer storage system. It likely includes similar columns, potentially requiring name changes or other adjustments to match the expectation of the template you generated.This section will also be helpful if you are updating sample data to change storage-related fields from a spreadsheet or using the API. Some fields, such as StorageStatus cannot be user-set. They are determined by the presence or absence of values in other fields.Modify your exported data as needed, noting the following requirements for recording specific sample actions in the system:Add a sample to storage- The StorageLocation and StorageRow columns must be present and valid.
- If adding to a Box, the StorageCol column must be present and valid.
- If adding to a Bag, the StorageCol column must be absent or empty.
- Other fields may be present but are not required.
- SampleId column must be present and not empty.
- At least the StorageLocation column must be present and empty.
- If the StorageRow and StorageCol columns are present they should also be empty.
- No other storage metadata columns should have values.
- SampleId column must be present and not empty.
- The corresponding metadata columns should be present.
- If the StorageLocation column is present, the StorageRow must be present and, when updating items in a box, the StorageCol column must also be present. All columns must have valid values. If updating items in a bag, the StorageCol column value should be empty if present.
- SampleId column must be present and not empty.
- The StorageLocation column and the StorageRow column must be present with valid values. If moving to a Box type, the StorageCol column must also be present with a valid value. If moving to a bag, the StorageCol column must be empty if present.
- SampleId column must be present and not empty.
- Either the CheckedOut or the CheckedOutBy column must be present and not empty.
- If the CheckedOut column is valid and the CheckedOutBy column is empty/absent, the item will be checked out by the current user.
- If the CheckedOutBy column is valid and the CheckedOut column is empty/absent, the item will be checked out by the user in the CheckedOutBy column using the current date.
- If both the CheckedOut and the CheckedOutBy columns are present, they must both have valid values.
- If both the CheckedOut and the CheckedOutBy columns are empty, the system will not recognize this as a checkout action.
- SampleId column must be present and not empty.
- One of the CheckedOut or CheckedOutBy columns must be present and empty.
- Note that with a file import, it is possible to perform multiple operations at once. For example, you may provide a row that both checks a sample out and moves it to a new location. For samples, there will be two timeline events created for this. There is no guarantee about the order of these events in the timeline.
- Since updating of storage happens only via sample import, there will always be a “Sample update” timeline event, even if nothing in the sample actually changed.
Import of Samples with Location Data
Once your spreadsheet is ready, use the Import Samples from File option. If you are adding storage information for samples that already exist in the system, check the box to Update data for existing samples during this file import.You can now use all the Freezer Management features as if you had stored samples using the user interface:
Related Topics
Data Resources
This section includes resources for structuring and working with data within LabKey Sample Manager.
Topics
Data Grid Basics
This topic describes how to navigate grids of data in LabKey Sample Manager, and how to use the "omnibox" above each grid to filter, search, and sort your data.


 Once you have sorted a column, notice an indicator lozenge will be added to the box. The double caret symbol represents a sort, and the column name is included. Learn more about using the omnibox in the next section.
 You can create as many independent filter and sort elements as you like. Only one search and view can be applied at once. Each element applied will appear as a separate indicator lozenge in the box. Shown below, two sorts, two filters, and one search are all applied to the grid.
 Hover over any lozenge in the omnibox to reveal an "X" for deleting that element. The other modifiers applied to the grid will not be impacted if you delete one.
 Click the lozenge away from the X area to see the action represented in text form. Here, an ascending sort on the Hb column. You could directly edit the text version here; for example, replace "asc" with "desc" and the sort will reverse when you hit enter.

 Once you have created a search, you can click the indicator lozenge for it to change the keyword searched for.
 You can apply sorts on multiple columns to a grid.
 Notice the menu indicates whether you are exporting rows you have selected or the entire grid. To export the full grid, select no rows.
Select Rows
In LabKey Sample Manager, data is shown in grids, usually with a column of checkboxes on the left for selecting each individual row. Check the box in the header row to select all rows on the current page.Once you've selected a page of rows, you will see buttons to select all the rows, or clear those already checked.
Page Through Data
Large sets of data are displayed on a paged grid. In the upper right, you see which rows you are viewing (here 1-20 of 37). Buttons give you the following control:- Step one page forward or back using the "<" and ">" buttons. Shown here, the 'Previous page' button is grayed out when you are on the first page.
- The page number you are on is shown with a dropdown menu. You can jump to the first page or last page and see a count for the total number of pages.
- Click the page size button to change how the grid is paginated. Options: 20, 40, 100, 250, 400.
Sort by Column Value
In each header, click the to sort the grid by the values in that column. Select either ascending or descending sort.Once you have sorted a column, notice an indicator lozenge will be added to the box. The double caret symbol represents a sort, and the column name is included. Learn more about using the omnibox in the next section.
Omnibox
Above each grid is an "omnibox" which reads "Select..." when empty. Click to see the option menu:You can create as many independent filter and sort elements as you like. Only one search and view can be applied at once. Each element applied will appear as a separate indicator lozenge in the box. Shown below, two sorts, two filters, and one search are all applied to the grid.Hover over any lozenge in the omnibox to reveal an "X" for deleting that element. The other modifiers applied to the grid will not be impacted if you delete one.Click the lozenge away from the X area to see the action represented in text form. Here, an ascending sort on the Hb column. You could directly edit the text version here; for example, replace "asc" with "desc" and the sort will reverse when you hit enter.
Filter
To filter, click in the omnibox anywhere except in an active lozenge and select filter columns... from the menu. Then select the desired column, filter operator, and select or type the desired value. Your filter will be represented in the indicator created, shown below, the steps to creation of a filter on the "WBC" column showing only values greater than 5000.
Search
Select Search keywords from the omnibox menu to search the text fields in the grid. The word search will appear in the box (left hand image below). Type the keyword you want to search for and hit enter to search. You can also simply type any word in the omnibox and the default action is search (right image below).Once you have created a search, you can click the indicator lozenge for it to change the keyword searched for.
Sort
You can initiate a search from a column header (as described above) or select Sort columns from the omnibox menu. Select the column to sort, and the "asc" (ascending) or "desc" (descending) direction.You can apply sorts on multiple columns to a grid.
Export Data
To export the data in the grid, click the (Export) icon and select the format for export:- CSV
- Excel
- TSV
Notice the menu indicates whether you are exporting rows you have selected or the entire grid. To export the full grid, select no rows.
Related Topics
Data Import Guidelines
This topic covers some tips and tricks for successfully importing data to LabKey Sample Manager. These guidelines and limitations apply to uploading files, data describing samples and sources, and assay data.
 Use this template as a basis for your import file. It will include the necessary columns and exclude unnecessary ones and any that you cannot edit directly during import, such as system defined fields like Storage Status.
 Any user in the application will see the spinner in the header bar. To see the status of all asynchronous imports in progress, choose Background Imports from the user menu.
 Click a row for a page of details about that particular import, including a continuously updating log.
 When the import is complete, you will receive an in-app notification via the menu.


 If you expected the field to be recognized, you may need to check spelling or data type to make sure the data structure and import file match.
- Use Import Templates
- Background Import
- Import Performance Considerations
- Batch Delete Limitations
- Column Headers
- Copy and Paste for Data Import
- Data Preview Considerations
- Reserved Fields
- Import to Unrecognized Fields
Use Import Templates
For the most reliable method of importing data, first access the import interface for "Import from File" and click Template.Use this template as a basis for your import file. It will include the necessary columns and exclude unnecessary ones and any that you cannot edit directly during import, such as system defined fields like Storage Status.
Background Import (Asynchronous Import)
When import by file or copy/paste is large enough that it will take considerable time to complete, the import will automatically be done in the background. Files larger than 100kb (or a copy/paste of > 1000 rows) will be imported asynchronously. This allows users to continue working within the app while the import completes.Import larger files (or paste large spreadsheets) as usual. You will see a banner message indicating the background import in progress, and a icon alongside that sample type until it completes:Any user in the application will see the spinner in the header bar. To see the status of all asynchronous imports in progress, choose Background Imports from the user menu.Click a row for a page of details about that particular import, including a continuously updating log.When the import is complete, you will receive an in-app notification via the menu.
Import Performance Considerations
Excel files containing formulas will take longer to upload than files without formulas.The performance of importing data into any structure is related to the number of columns. If your sample type or assay design has more than 30 columns, you may encounter performance issues.Batch Delete Limitations
You can only delete 10,000 rows at a time. To delete larger sets of sample or assay data, select batches of rows to delete.Column Headers
Data column headers should not include spaces or special characters like '///' slashes. Instead of spaces or special characters, try renaming data columns to use CamelCasing or '_' underscores as word separators. Displayed column headers will parse the internal caps and underscores to show spaces in the column names.Once you've created a sample type or assay data structure following these guidelines, you can change the Label for the field (under Name and Linking Options in the field editor)) if desired. For example, if you want to show a column with units included, you could import the data with a column name of Platelets and then set the label to show "Platelets (per uL)" to the user.You can also use Import Aliases to map a column name that contains spaces to a sample type or assay field that does not. Remember to use "double quotes" around names that include spaces.For example, if your assay data includes a column named "Platelets (per uL)", you would define your assay with a field named "Platelets" and include "Platelets (per uL)" (including the quotes) in the Import Aliases box of the assay design definition.
Copy and Paste for Data Import
When importing assay data, you can copy and paste a tab-separated block of data, but the data type "Multi-line Text" is not supported for this method. Either upload a file or manually enter data into a grid to include multi-line text fields.Copy and paste import is limited to 1000 rows.Data Preview Considerations
Previewing data stored as a TSV or CSV file may be faster than previewing data imported as an Excel file, particularly when file sizes are large.Previewing Excel files that include formulas will take longer to preview than similar Excel files without formulas.Reserved Fields
There are a number of reserved field names used within the system for every data structure that will be populated internally when data is created or modified, or are otherwise reserved and cannot be redefined by the user:- Created
- CreatedBy
- Modified
- ModifiedBy
- Name
- RowId
- LSID
- Folder
- Properties
- SampleId & SourceId
- SampleState (surfaced as "Status" in the application)
- Description
- Flag
- SourceProtocolApplication
- SourceApplicationInput
- RunApplication
- RunApplicationOutput
- Protocol
- Alias
- SampleSet & DataClass
- Run
- genId
- Inputs
- Outputs
- SampleCount
- StoredAmount
- SampleTypeUnits
- Units
- Freeze/Thaw Count
- StorageStatus
- StorageLocation
- StorageRow
- StorageCol
- CheckedOutBy
- CheckedOut (Date)
- IsAliquot
- AliquotsCreatedCount
- AliquotTotalVolume
Inferral of Reserved Fields
If you infer a data structure from a file, and it contains any reserved fields, they will not be shown in the inferral but will be created for you. You will see a banner informing you that this has occurred:
Import to Unrecognized Fields
If you import data that contains fields unrecognized by the system for that data structure (sample type, source type, or assay design), you will see a banner warning you that the field will be ignored:If you expected the field to be recognized, you may need to check spelling or data type to make sure the data structure and import file match.
Related Topics
Audit History
Administrators can view the audit history from numerous places within the application, including from any tab within the Administration dashboard.
 The audit log provides access to numerous audits of system activity, and will open on the log most relevant to where you were in the application when you opened it. This image shows Roles and Assignment Events, the default for the Permissions tab.
 Use the selection menu near the top of the page to see a full listing of other logs available to administrators, including:
View Audit History
Select > View Audit History.The audit log provides access to numerous audits of system activity, and will open on the log most relevant to where you were in the application when you opened it. This image shows Roles and Assignment Events, the default for the Permissions tab.Use the selection menu near the top of the page to see a full listing of other logs available to administrators, including:
- Attachment Events
- Assay Events: Run import, deletion, and reimport. Note that for reimport, two assay events are created: one for the 'old' run being replaced and one for the 'new' run representing the new import.
- Domain Events: Tracks changes to columns in definitions (domains) of sample types, sources, and assays.
- Domain Property Events: Changes to the properties of a column in a domain.
- Data Update Events: When a row is updated, the log will show the details of what changed in that row.
- Freezer Management Events: See View Storage Activity.
- List Events
- Roles and Assignment Events
- Sample Type Events: Creation and modification of Sample Types.
- Sample Timeline Events: Records events for all samples.
- Individual sample timelines show all events for each sample.
- Detailed events for merge updates to sample data will show only the fields that were updated.
- Sample registration, update, storage changes, and check in/out actions are all logged.
- Sample Workflow Events: Job and task completion are recorded.
- Sources Events: Including creation of Source Types and registration of Sources.
- User events: Creation of users; logging in and out.
Note that during folder import, data categories will be imported in "chunks" in a certain order. So, for example, all inventory data will be in one chunk and all job/task data in another chunk. Using folder import to load data into Sample Manager may result in sample timelines that do not represent actual usage for individual samples.
Related Topics
Search
LabKey Sample Manager provides full search across data in your server. Search is secure, so you only see results that you have sufficient permissions to view. Results are ordered by relevance. This topic describes site wide search behavior and options. Searching for samples by ID or barcode is covered in the topic: Sample Search
To find samples in bulk, by barcode or sample ID, use this topic:
 The search results will be shown with a few details about the type of item matching the search, shown below a sample and a workflow job are found when we search for "020". Click the item block in the search results to see the full item.

Search Basics
To search for samples, assays, and more, type the search terms in the box in the header of the application. When the browser is narrow, the option will be on the search dropdown menu.The search results will be shown with a few details about the type of item matching the search, shown below a sample and a workflow job are found when we search for "020". Click the item block in the search results to see the full item.
Search Terms and Operators
To search, enter terms (search words) and operators (search modifiers) in the search box using the following guidelines:Terms- The words or phrases you enter are searched as if they have "OR" between them by default. This means results returned will include at least one of the terms.
- Example: a search for Blood test returns all pages that contain at least one of the terms "Blood" and "test". Pages that contain both will appear higher in the results than pages that contain just one of the terms.
- Double quotes around phrases indicate that they must be searched as exact phrases instead of as individual terms.
- Example: Searching the quoted phrase "Blood test" returns only pages that include this two word phrase.
- AND: Use the AND operator to limit results to pages with both terms.
- Example: Blood AND test returns all pages that contain the term both the term "Blood" and the term "test", in any order.
- +: A search term preceded by the + operator must appear on returned pages.
- Example: Blood +test returns pages that must contain the term "test" and may contain the term "Blood".
- NOT: Use NOT before a search term that must not appear on returned pages.
- Example: Blood NOT test returns pages that contain the term "Blood" but do not contain the term "test".
- -: Use like the NOT operator; a term preceded by - must not appear on returned pages.
- Example: Blood -test returns all pages that contain the term "Blood" but do not contain the term "test".
Note: If you use a '-' hyphen as a SampleID separator element (as in the default naming pattern "S-${genId}") be aware that you need to surround a search for one of these sampleIDs with double quotes.
Other Guidelines
- Searching for "S-11" will find the sample named S-ll.
- Searching for S-11 without the quotes will return results that contain "S" and not "11", i.e. will not find the desired sample.
- Capitalization is ignored.
- Parentheses can be used to group terms.
- Extraction of root words, also known as stemming, is performed at indexing and query time. As a result, searching for "study", "studies", "studying", or "studied" will yield identical results.
- Wild card searches
- Use the question mark (?) for single character wild card searches. For example, searching for "s?ed" will return both "seed" and "shed".
- Use the asterisk character (*) for multiple character wild card searches. For example, searching for "s*ed" will return both "seed" and "speed".
- Wild card searches cannot be used as the start of the search string. For example, "TestSearch*" is supported, but "*TestSearch" is not.
- Note that stemming (defined above) creates indexes only for root words, so wild card searches must include the root word to yield the intended results.
Content Searched
- Sample Types (Name and description)
- Samples (SampleID and description)
- Source Types (Name and description)
- Sources (SourceID and description)
- Assay Designs (Name and description)
- Jobs (Name and description)
Search Refinement and Filtering
When searches yield very large result sets, using filtering and search refinement can help locate the set of results you want.Click Show filters > to open the filters panel. You can:- Filter by type: check the boxes for the types of results you want to see (as many as apply). You'll see how many results there are of each type in parentheses.
- Samples, Sample Types
- Sources, Source Types
- Assay Designs
- Jobs
- Refine results for:
- Use the wide dropdown menu to narrow results by category, date, and user. Category options for refining add additional filters below the "By User" menu shown for all selections.
- All (Default)
- Samples (adds "Of sample type" and "Has assay runs for")
- Assay Runs (adds "Has assay runs for")
- Sources (adds "Of source type")
- Jobs (adds "Job status")
- Select one of Created/Modified from the dropdown, then enter "From" and "To" dates.
- By User: Select a user and see only results associated with that user.
- Click Clear to clear filters.
- Click Show Results to apply them.
Related Topics
- Sample Search
- Searching Grids with OmniBox
- Lucene Search Syntax : Additional query syntax that can be used for wildcard searches, fuzzy searches, proximity searches, term boosting, etc.
Field Editor
This topic explains how to use the field editor tool to create and customize fields in Sample Types, Sources, and Assay designs.


 To delete a single field, you can click the .
 In both cases, you will be reminded that deleting a field also deletes any data stored in it. Confirm the deletion if you want to proceed.


 In Summary Mode, you see a grid of fields and properties, not all of which are relevant to Sample Manager usage. Scroll for more columns. Instead of having to expand panels to see things like whether there is a URL or formatting associated with a given field, the summary grid makes it easier to see and search large sets of fields at once.You can add new fields, delete selected fields, and export fields (selected or all) while in summary mode. Click the slider to switch back to Detail mode if you want to edit field properties.
 A Fields_*.fields.json file describing your fields as a set of key/value pairs will be downloaded. All properties that can be set for a field in the user interface will be included in the exported file contents.You can use this file as a template to generate a set of field definitions for import elsewhere.
- Create New Fields
- Edit, Rearrange, and Delete Fields
- Add Field Properties
- View Fields in Summary Mode
- Export Sets of Fields (Domains)
Create New Fields
Import or Infer Fields from File
When creating a sample type, source type, or assay design, you'll have the option to:- import fields from a specially prepared JSON file, OR
- infer them from an example data spreadsheet matching the structure of your data.
Manually Define Fields
To use the Field Editor to create a new set of fields and their properties manually, click Manually Define Fields.- Open the field editor.
- Click Manually Define Fields (or get started by importing or inferring fields, which will prepopulate the manual editor).
- To define a new field, click Add Field.
- Give the field a Name. Field names can contain a combination of letters, numbers, and underscores, should not contain spaces, and should start with a letter or underscore.
- Use the menu to select the Data Type. Each data type has a different set of properties you can set. Once you have saved fields, you can only make limited changes to the type.
- You can use the checkbox if you want to make it required that that field have a value in every row.
- Continue to add any new fields you need - one for each column of your data.
- Click the Finish Creating.../Save... button to save and exit the editor.
Edit Fields
To edit fields, reopen the editor and make the changes you need. If you attempt to navigate away with unsaved changes you will have the opportunity to save or discard them. When you are finished making changes, click Save.Once you have saved a field or set of fields, you can change the name and most options and other settings. However, you can only make limited changes to the type of a field. For example, you can change among text types, but cannot change a text field into a number or a boolean.Rearrange Fields
To change field order, drag and drop the rows using the six-block handle on the left.
Delete Fields
To one or many fields, select them using the checkboxes and click Delete. You can use the checkbox at the top of the column to select all fields in the section.To delete a single field, you can click the .In both cases, you will be reminded that deleting a field also deletes any data stored in it. Confirm the deletion if you want to proceed.
Save Fields
Click Save when finished.Add Field Properties
Each field can have additional properties defined. The properties available vary based on the field type. To open the properties for a field, click the icon on the right (it will become a handle for closing the panel).Fields of different types include some or all of these sections:- Type-specific options for formatting values: See types in the field properties reference.
- Text and integer fields can be marked as barcode fields.
- Name and Linking Options
- Validation Options
Name and Linking Options
All types of fields allow you to set the following properties:- Description: An optional text description. This will appear in the hover text for the field you define.
- Label: Different text to display in column headers for the field. This label may contain spaces. The default label is the Field Name with camelCasing indicating separate words. For example, the field "firstName" would by default be labelled "First Name".
- Import Aliases: Define alternate field names to be used when importing from a file to this field. Multiple aliases may be separated by spaces or commas. To define an alias that contains spaces, use double-quotes (") around it.
- URL: Use this property to change the display of the field value within a data grid into a link. Multiple formats are supported, which allow ways to easily substitute and link to other locations in LabKey. Learn more about using URL Formatting Options.
Validation Options
String-based fields offer regular expression validation. Numeric, date, and user fields offer range expression validation.Create Regular Expression Validator
- Click Add Regex to open the popup.
- If you don't see this option, it is not supported for your field type.
- If any regex validators are defined, you'll also see a link showing the number active and the button will read Edit Regex.
- Enter the Regular Expression that this field's value will be evaluated against. All regular expressions must be compatible with Java regular expressions as implemented in the Pattern class.
- Description: Optional description.
- Error Message: Enter the error message to be shown to the user when the value fails this validation.
- Check the box for Fail validation when pattern matches field value in order to reverse the validation: With this box unchecked (the default) the pattern must match the expression. With this box checked, the pattern may not match.
- Name: Enter a name to identify this validator.
- You can use Add Validator to add a second condition. The first panel will close and show the validator name you gave. You can reopen that panel using the (pencil) icon.
- Click Apply when your regex validators for this field are complete.
- Click Save or Finish in the editor.
Create Range Expression Validator
- Click Add Range to open the popup.
- If you don't see this option, it is not supported for your field type.
- If any range validators are defined, you'll also see a link showing the number active and the button will read Edit Ranges.
- Enter the First Condition that this field's value will be evaluated against. Select a comparison operator and enter a value.
- Optionally enter a Second Condition.
- Description: Optional description.
- Error Message: Enter the error message to be shown to the user when the value fails this validation.
- Name: Enter a name to identify this validator.
- You can use Add Validator to add a second condition. The first panel will close and show the validator name you gave. You can reopen that panel using the (pencil) icon.
- Click Apply when your range validators for this field are complete.
- Click Save or Finish in the editor.
View Fields in Summary Mode
In the upper right, a slider marked Detail mode indicates that all of the above options have been shown in the field detail mode. Click the slider to switch to Summary Mode.In Summary Mode, you see a grid of fields and properties, not all of which are relevant to Sample Manager usage. Scroll for more columns. Instead of having to expand panels to see things like whether there is a URL or formatting associated with a given field, the summary grid makes it easier to see and search large sets of fields at once.You can add new fields, delete selected fields, and export fields (selected or all) while in summary mode. Click the slider to switch back to Detail mode if you want to edit field properties.
Export Sets of Fields (Domains)
Once you have defined a set of fields (domain) that you want to be able to save or reuse, you can export it by clicking (Export).If you want to only export a subset of the fields included, use the selection checkboxes to select the fields to export.- When any (or all) boxes are checked, only the checked fields are exported.
- If no boxes are checked, all fields will be exported.
A Fields_*.fields.json file describing your fields as a set of key/value pairs will be downloaded. All properties that can be set for a field in the user interface will be included in the exported file contents.You can use this file as a template to generate a set of field definitions for import elsewhere.
Note that importing fields from a JSON file is only supported when creating a new set of fields. You cannot apply property settings to existing data with this process.
Related Topics
- Field Properties Reference: Type specific formatting and advanced options.
- uniqueStorageIDs
Field Properties Reference
Each field in an assay design is associated with a set of properties of that field. This topic covers the options available and specific to fields of each data type. In addition, fields of all types have name and linking options and most include validation options, described in the common topic: Field Editor.


 Learn more about populating, editing, and managing text choice fields in the main LabKey documentation topic for Text Choice fields.


 Both field types offer:
In practice, these field types are very similar: both can accept files like PDF documents or images. The contents of these fields will display as thumbnails, open in a larger panel when clicked, and include a download option. Learn more about how these fields are used in this topic:
The differences between File and Attachment include:
Both field types offer:
In practice, these field types are very similar: both can accept files like PDF documents or images. The contents of these fields will display as thumbnails, open in a larger panel when clicked, and include a download option. Learn more about how these fields are used in this topic:
The differences between File and Attachment include:


Type Specific Formatting Options
Text Options
- Text Options:
- Maximum Text Length. Sets the maximum character count for the field. Choose either "Unlimited" or "No longer than X characters", providing a value in the box. The default is 4000.
- Barcode Field: Check the box to include this field when searching samples by barcode.
- Name and Linking Options
- Validation Options: Regular expression validators.
Text Choice Options
A Text Choice field lets you define a set of values that will be presented to the user as a dropdown list. For example, you might offer a "Tube Type" field and let the user choose Heparin, EDTA, or Unknown.
- Text Choice Options:
- Add and manage the set of drop-down values offered for this field, as shown below.
- Name and Linking Options
Learn more about populating, editing, and managing text choice fields in the main LabKey documentation topic for Text Choice fields.
- Up to 200 values can be included in the drop-down options. Values can be single- or multi-word.
- You can change an existing Text field to the Text Choice type; the list of drop down values will be populated for you.
- Values that are in use cannot be deleted. If they are in use by read-only data, they can neither be edited nor deleted.
- All changes to the set of values for a text choice field are audited.
Multi-Line Text Options
- Text Options:
- Maximum Text Length. Sets the maximum character count for the field. Choose either "Unlimited" or "No longer than X characters", providing a value in the box. The default is 4000.
- Name and Linking Options
- Validation Options: Regular expression validators.
Boolean Options
- Boolean Field Options: Format for Boolean Values: Use boolean formatting to specify the text to show when a value is true and false. Text can optionally be shown for null values. For example, "Yes;No;Blank" would output "Yes" if the value is true, "No" if false, and "Blank" for a null value.
- Name and Linking Options
Integer/Decimal Options
- Integer Options/Decimal Options:
- Format for Numbers: To control how a number value is displayed, provide a string format compatible with the Java class DecimalFormat. Learn more about using Number formats in LabKey.
- Default Scale Type: Choose Linear or Log.
- Name and Linking Options
- Validation Options: Range validators.
Date Time Options
- Date and Time Options:
- Format for Dates: To control how a date or time value is displayed, provide a string format compatible with the Java class SimpleDateFormat. Learn more about using Date and Time formats in LabKey.
- Name and Linking Options
- Validation Options: Range validators.
File/Attachment Options
Sources, samples, and assay designs (run and batch fields) support including file attachments, known in different structures as either File or Attachment fields.- Source Types use Attachment
- Sample Types use File
- Assay Designs allow File fields in batch and run field sections
Both field types offer:
In practice, these field types are very similar: both can accept files like PDF documents or images. The contents of these fields will display as thumbnails, open in a larger panel when clicked, and include a download option. Learn more about how these fields are used in this topic:
The differences between File and Attachment include:
- "File" values are stored in the filesystem and "Attachment" values are stored as blobs in the database.
- Learn more about the differences in the main LabKey Server documentation here.
User Options
- Name and Linking Options
- Validation Options: Range validators.
Sample Options
- Sample Options: Select where to look up samples for this field.
- You can choose All Samples to reference any sample in the container, or select a specific sample type to filter by.
- This selection will be used to validate and link incoming data, populate lists for data entry, etc.
- Name and Linking Options
Unique ID Options
A field of type "Unique ID" is read-only and used to house barcode values generated by LabKey. Learn more in this topic: Barcode Fields
Related Topics
- Field Editor
- Fields for Integrating with LabKey Studies: Available when using Sample Manager on a Premium Edition of LabKey Server
Attach Images and Other Files
Attaching an image, document, or other file to a data structure can help place key information where it is needed most. This topic describes how to include and work with files and attachments in Sample Manager.
 Learn more about the properties of these fields here: Field Properties Reference
 Click Save to save this change.


 Once the 'old' file has been removed, you will be able to upload a new file. Note that you may need to refresh your browser window to update the image shown, as the original image may have been cached.
- Add File Field (Admin)
- Upload File (Editor)
- View Thumbnails and Expand Images (Reader)
- Download File (Reader)
- Remove or Change the File (Editor)
Add File Field (Admin)
An administrator must add the field to the data structure. In Sample Types, the field is of type "File" and in Source Types, the field is of type "Attachment". In this example, the field is included in a Sample Type and named "Image".Learn more about the properties of these fields here: Field Properties Reference
Upload File (Editor)
Now by editing the Details for any sample in the system, you will be able to upload a file by either clicking in the selection window or dragging and dropping from your desktop. Click the sample name on any grid to open the OvervieClick Save to save this change.
View Thumbnails and Expand Images (Reader)
A small thumbnail and the filename will be shown in the details panel and in the column of sample grids. Click the thumbnail or filename to open the image in a larger window.
Download File (Reader)
To download the file, select Download from the menu.
Remove or Change the File (Editor)
To change the attached file, reopen the sample details, click to open the Details panel editor and select Remove file from the menu. This option is only available in edit mode.Once the 'old' file has been removed, you will be able to upload a new file. Note that you may need to refresh your browser window to update the image shown, as the original image may have been cached.
Related Topics
URL Field Property
Setting the URL property of a field turns the display value into a link to other content. The URL property setting is the target address of the link. You can link to a static target, or build a URL using values from any field in the row.
For example, you can link to a specific item on a list. If you had a list (here listId=5) that mapped building numbers to details about them, you could create a column "Building" and use this URL property, letting your users click the "Building" value to open the details page.
Substitution Syntax
You can use one or more field values as parameters when creating the URL link, using the ${ } substitution syntax. Put the name of the column whose value you want to use inside the braces. The field with the URL property defined on it is available, but so are any other fields in the data structure.For example, if your data includes a "GeneSymbol" field displaying values like "BRCA", you could link to related information in The Gene Ontology by using a search URL. When the user clicked the value "BRCA", they would go to:http://amigo.geneontology.org/amigo/search/ontology?q=BRCAIn this case the field value is passed as a search parameter, so to create the URL property on the GeneSymbol field, you would include the GeneSymbol field in the URL property definition:http://amigo.geneontology.org/amigo/search/ontology?q=${GeneSymbol} You could also define this URL property on a different field, letting you display the gene symbol unlinked and link a value in another field (like "Click to Search") to perform the search.Substitutions are allowed in any part of the URL, either in the main path, in the query string, or both. For example, here are two different formats for creating links to an article in wikipedia, here using a "CompanyName" field value:- as part of the path:
- as a parameter value:
Local Links
To link to content in the current LabKey folder, use the controller and action name. You can optionally prepend a / (slash) or ./ (dot-slash), but they are not necessary.<controller>-<action>
list-details.view?listId=5&pk=${Building}External Links
To link to a resource on an external server or any website, include the full URL link.http://server/path/page.html?id=${Param}URL Encoding Options
You can specify the type of URL encoding for a substitution marker, in case the default behavior doesn't work for the URLs needed. This flexibility makes it possible to have one column display the text and a second column can contain the entire href value, or only a part of the href.The fields referenced by the ${ } substitution markers might contain any sort of text, including special characters such as question marks, equal signs, and ampersands. If these values are copied straight into the link address, the resulting address would be interpreted incorrectly. To avoid this problem, LabKey Server encodes text values before copying them into the URL. In encoding, characters such as ? are replaced by their character code %3F. By default, LabKey encodes all special character values except '/' from substitution markers. If you know that a field referenced by a substitution marker needs no encoding (because it has already been encoded, perhaps) or needs different encoding rules, inside the ${ } syntax, you can specify encoding options as described in the topic String Expression Format Functions.Related Topics
Date and Number Formats Reference
This topic covers formatting options for dates, times, and numbers within LabKey Sample Manager.
Note that the LabKey date parser does not recognize time-only date strings. This means that you need to enter a full date string even when you wish to display time only. For example, you might enter a value of "2/2/09 4:00 PM" in order to display "04 PM" when using the format string "hh aa".
The following examples apply to Decimal fields.
Date and DateTime Format Strings
Format strings used to describe dates and date-times must be compatible with the format accepted by the Java class SimpleDateFormat. For more information see the Java documentation. The following table has a partial guide to pattern symbols.| Letter | Date/Time Component | Examples |
|---|---|---|
| G | Era designator | AD |
| y | Year | 1996; 96 |
| M | Month in year | July; Jul; 07 |
| w | Week in year | 27 |
| W | Week in month | 2 |
| D | Day in year | 189 |
| d | Day in month | 10 |
| F | Day of week in month | 2 |
| E | Day in week | Tuesday; Tue |
| a | Am/pm marker | PM |
| H | Hour in day (0-23) | 0 |
| k | Hour in day (1-24) | 24 |
| K | Hour in am/pm (0-11) | 0 |
| h ....... | Hour in am/pm (1-12) ....... | 12 ....... |
| m | Minute in hour | 30 |
| s | Second in minute | 33 |
| S | Millisecond | 978 |
| z | Time Zone | Pacific Standard Time; PST; GMT-08:00 |
| Z | Time Zone | -0800 |
| X | Time Zone | -08; -0800; -08:00 |
Number Format Strings
Format strings for Integer and Decimal fields must be compatible with the format that the java class DecimalFormat accepts. A valid DecimalFormat is a pattern specifying a prefix, numeric part, and suffix. For more information see the Java documentation. The following table has an abbreviated guide to pattern symbols:| Symbol | Location | Localized? | Meaning |
|---|---|---|---|
| 0 | Number | Yes | Digit |
| # | Number | Yes | Digit, zero shows as absent |
| . | Number | Yes | Decimal separator or monetary decimal separator |
| - | Number | Yes | Minus sign |
| , | Number | Yes | Grouping separator |
Examples
The following examples apply to Date Type fields.| Format String | Display Result |
|---|---|
| yyyy-MM-dd HH:mm | 2008-05-17 01:45 |
| yyyy-MM-dd HH:mmaa | 2008-05-17 01:45PM |
| yyyy-MM-dd HH:mm:ss.SSS | 2008-05-17 01:45:55.127 |
| MMMM dd yyyy | May 17 2008 |
| hh:mmaa zzzz | 01:45PM Pacific Daylight Time |
| Format String | Display Result |
|---|---|
| <no string> | 85.0 |
| 0 | 85 |
| 000 | 085 |
| .00 | 85.00 |
| 000.000 | 085.000 |
| 000,000 | 085,000 |
| -000,000 | -085,000 |
Java Reference Documents
Dates: https://docs.oracle.com/en/java/javase/12/docs/api/java.base/java/text/SimpleDateFormat.htmlNumbers: https://docs.oracle.com/en/java/javase/12/docs/api/java.base/java/text/DecimalFormat.htmlRelated Topics
String Expression Format Functions
Reference
The following string formatters can be used when building URLs, or creating unique Sample IDs/names.
| Name | Synonym | Input Type | Description | Example | |
|---|---|---|---|---|---|
| General | |||||
| defaultValue(string) | any | Use the string argument value as the replacement value if the token is not present or is the empty string. | ${field:defaultValue('missing')} | ||
| passThrough | none | any | Don't perform any formatting. | ${field:passThrough} | |
| URL Encoding | |||||
| encodeURI | uri | string | URL encode all special characters except ',/?:@&=+$#' like JavaScript encodeURI() | ${field:encodeURI} | |
| encodeURIComponent | uricomponent | string | URL uncode all special characters like JavaScript encodeURIComponent() | ${field:encodeURIComponent} | |
| htmlEncode | html | string | HTML encode | ${field:htmlEncode} | |
| jsString | string | Escape carrage return, linefeed, and <>"' characters and surround with a single quotes | ${field:jsString} | ||
| urlEncode | path | string | URL encode each path part preserving path separator | ${field:urlEncode} | |
| String | |||||
| join(string) | collection | Combine a collection of values together separated by the string argument | ${field:join('/'):encodeURI} | ||
| prefix(string) | string, collection | Prepend a string argument if the value is non-null and non-empty | ${field:prefix('-')} | ||
| suffix(string) | string, collection | Append a string argument if the value is non-null and non-empty | ${field:suffix('-')} | ||
| trim | string | Remove any leading or trailing whitespace | ${field:trim} | ||
| Date | |||||
| date(string) | date | Format a date using a format string or one of the constants from Java's DateTimeFormatter. If no format value is provided, the default format is 'BASIC_ISO_DATE' | ${field:date}, ${field:date('yyyy-MM-dd')} | ||
| Number | |||||
| number | format | Format a number using Java's DecimalFormat | ${field:number('0000')} | ||
| Array | |||||
| first | collection | Take the first value from a collection | ${field:first:defaultValue('X')} | ||
| rest | collection | Drop the first item from a collection | ${field:rest:join('_')} | ||
| last | collection | Drop all items from the collection except the last | ${field:last:suffix('!')} |
Examples
| Function | Applied to... | Result |
| ${Column1:defaultValue('MissingValue')} | null | MissingValue |
| ${Array1:join('/')} | [apple, orange, pear] | apple/orange/pear |
| ${Array1:first} | [apple, orange, pear] | apple |
| ${Array1:first:defaultValue('X')} | [(null), orange, pear] | X |
Explore Sample Manager
 Explore the features of LabKey Sample Manager in this quick guided tour. Open the demonstration application in a new tab using this link:
You are exploring the application as a guest and can immediately see there are 6 types of samples present, and some recent assay data. To return to this dashboard at any time, click the logo in the upper left. Let's click through three main areas of the application:
Step 1: Explore Samples
Click the graph bar for one of the sample types to open a grid of all samples of that type; DNA for example.Click the name of any sample to open a page of details about that sample; DNA-1001 for example. You can use the search bar above the grid to help. Click the Timeline tab to see the history of that specific sample in the system.Click the Lineage tab in the upper left to see the lineage of that particular sample. In our demo, DNA samples are derived from PBMC samples, which in turn were derived from blood samples, which in turn have several sources. Click the 'originating' blood sample, shown above "Blood-1001" then click the Lineage link on the right next to the blood sample name to see the lineage of that 'grandparent' of the original DNA sample.
 After exploring lineage and sample data, return to the home dashboard by clicking the logo in the upper left.
Step 2: Explore Assays
In the lower right of the main dashboard, you can see a panel of Recent Assay Data. By default All Assays are shown. Use the dropdown to narrow the listing to just one of the available assays, such as qPCR.Click the Assay ID (i.e. the name) of any run to see the data. Notice that all data is associated with a sample; in the case of the qPCR assay, you'll see a set of DNA samples. Click a Sample Id to see more details about the sample itself. As when exploring samples above, you can see the Lineage. You can also use the Assays tab to see all the assay data about that sample.The other way to access assay information is via the main menu in the header to select Assays for a grid of all the assays defined. Select Heatmap for a visual representation of the number of runs for each assay each month. After exploring lineage and sample data, return to the home dashboard by clicking the logo in the upper left.
Step 3: Explore Workflow
 As a guest, no work is assigned to you. If it were, you would see it on the Jobs panel default tab: Your Queue. You can explore others' work in progress by clicking Active Jobs.Use the Priority Level dropdown to filter the list. Click the name of any job to see the tasks and assignments.In the upper right, tabs give you more information about Tasks, Samples, Assays, and Files associated with the job.
 If the job was created using a template, you'll see the template name under the job name. Click it to see the template: a sequence of tasks that can be assigned for different groups of samples. On the template page, you can also click the Jobs tab for a list of all jobs created from the same template.To see all workflow jobs in the system, select Workflow from the main menu. Tabs for your queue, all active jobs, completed jobs, all jobs and job templates let you explore more.
Next Steps
Continue to explore the demonstration data available.If you are interested in finding out how Sample Manager can help your own work, or would like a demonstration of features like adding data and creating workflows, please get in touch to request a custom demo with a member of the LabKey team.Help Links
Click to Explore