Sample Picklists |
2024-04-25 |
Samples may be added to user-defined Picklists that facilitate operations on groups of samples such as adding or removing from a freezer, adding to a workflow job, or performing bulk operations. You can add samples to picklists from many places in the application, and create new ones as needed on the fly. Shared Picklists can be shared with others on your team.Administrators and users with the Workflow Editor role can create and edit picklists.A user can build a picklist privately, adding and removing samples until the correct set are defined. Samples of different types can be included on the same picklist. The completed list may be kept private or shared with other team members for use when performing other tasks.
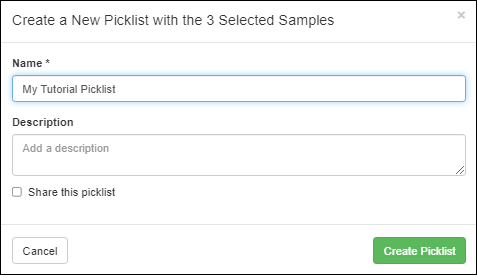
 Give the picklist a name, optional description, check the box if you want to share it with team members, then click Create Picklist. The selected samples will be added to the new picklist.
 You will return to the sample grid, with a banner available offering a quick link to View picklist.

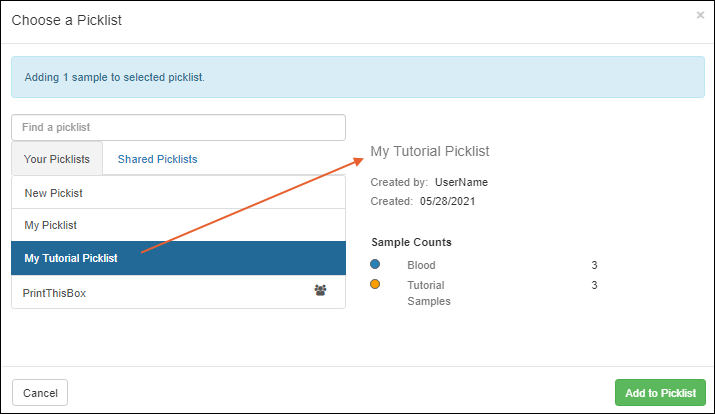 Click Add to Picklist to add your selected samples to it.
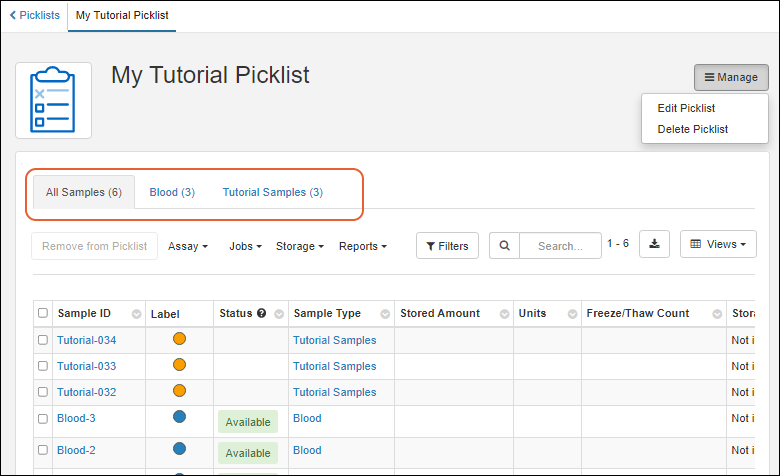 Learn more about multi-tabbed sample grids here.
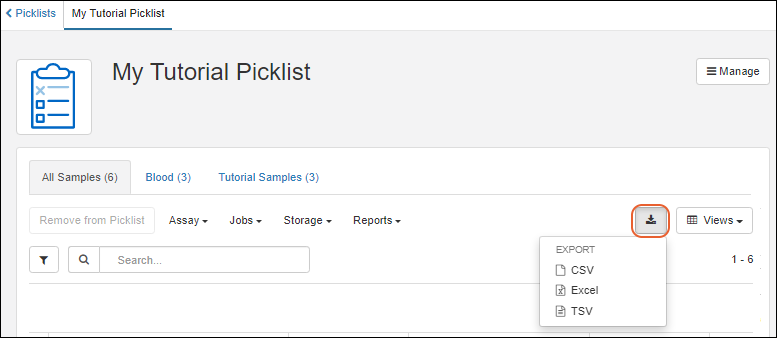 Export formats include:
- Create a New Picklist from Samples
- Create Empty Picklist
- Add Samples to Picklist
- Manage Picklists
- View a Picklist
- Refine and Use a Picklist
- Export Picklist
- Shared Picklists and Permissions
Note that picklists are intended as a temporary grouping to support actions like including in a more persistent workflow job or freezer storage. Addition to picklists is not tracked as a timeline action for a sample.
Create a New Picklist from Samples
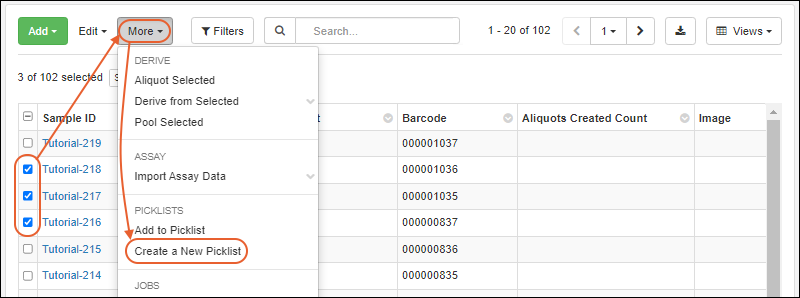
Select the desired samples on a grid and select Picklists > Create a New Picklist. On narrower browsers, this option will be under the More > menu:Create Empty Picklist
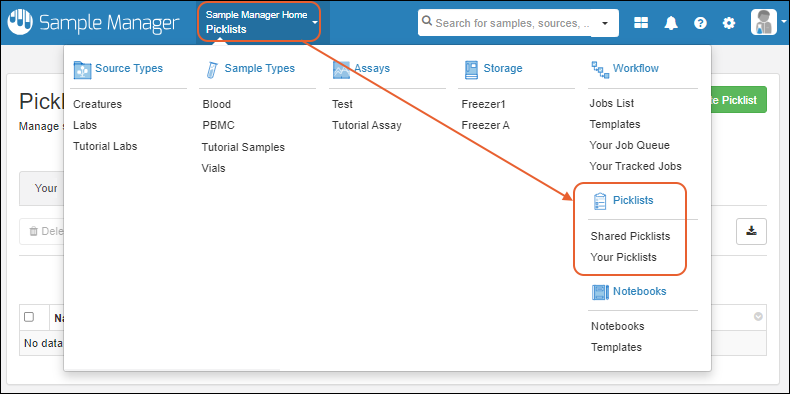
You can also create an empty picklist and add samples later. Click Picklists on the main menu, then click Create Picklist. Give it a name, optional description, and check the box if you wish to share it.Add Samples to Picklist
When you select samples in a grid and choose Picklists > Add to Picklist (or More > Add to Picklist), you will see all the Picklists available. If no picklists exist yet, you will be able to click create a new one here.When the number of picklists is long, you can narrow the list by typing in the "Find a picklist" box. Shared picklists are shown on a separate tab, with shared picklists you created yourself shown on the "Your Picklists" tab with a icon.Click to select the desired picklist. You'll see the existing number of samples already on the list.Manage Picklists
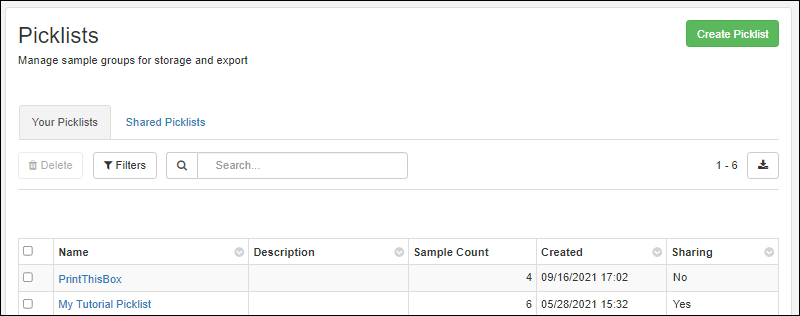
Click Picklists on the main menu.- Click Create Picklist to create a new empty one.
- The primary Your Picklists tab shows the picklists you have created. The Sharing column indicates whether you've shared them ("Yes" or "No").
- Click Shared Picklists to see shared ones created by you or other team members.
- Click the Name of a picklist to open it for review or editing. Learn more about using picklists below.
View a Picklist
From the Picklists dashboard, click the name of a picklist to open it in grid form. You will see the samples on the list, available on a series of tabs.Refine and Use a Picklist
Actions available for picklists include:- Manage
- Edit Picklist: Change the name, description, and whether the list is shared with your team.
- Delete Picklist: This removes the picklist, but does not delete any sample data.
- Remove from Picklist
- Use options on the Assay/Jobs/Storage/Reports menus
Export Picklists
To export a picklist, such as to use as a guide for physically removing samples from the freezer, click the icon above the list of samples in the picklist. If any sample rows are selected, only selected rows will be exported. If no rows (or all rows) are selected, the entire picklist will be exported.- CSV
- Excel: For multi-tabbed picklists, you can select which tabs to include in your Excel export.
- TSV
Note that if you are using Sample Manager within a Premium Edition of LabKey Server, you can export most Sample Manager resources as part of a folder export, but picklists are not included in these folder archive exports.
Shared Picklists and Permissions
When the Share this picklist box is checked for a picklist, it will appear for all team members on the Shared Picklists tab of the Picklist dashboard.- Only the creator of a picklist may edit the name, description, and whether the list is shared with the team.
- All users with the Reader role in Sample Manager can read a team picklist and export the data for completing tasks.
- Any user with Editor or Admin permissions may also add or remove samples from team picklists and add picklists to jobs.
- Storage Editors can use picklists for adding and managing freezer storage of samples.