You can associate sample descriptions with flow data and associate sample columns with FCS keywords as described in this topic.
Share "Samples" Sample Type
The flow module uses a
sample type named "Samples". You cannot change this name expectation, and the type's properties and fields must be defined and available in your folder before you can upload or link to sample descriptions. Each folder container could have a different definition of the "Samples" sample type, or the definition could be shared at the project or site level.
Note that it is important not to rename this sample type later. If you notice "missing" samples or are prompted to define it again, locate the originally created sample type and restore the "Samples" name.
For example, you might have a given set of samples and need to run a series of flow panels against the same samples in a series of subfolders.
Or you might always have samples with the same properties across a site, though each project folder has a unique set of samples.
Site-wide Sharing
If you define a "Samples" sample type in the
Shared project, you will be able to use the definition in any folder on the site. Each folder will have a distinct set of samples local to the container, i.e. any samples themselves defined in the Shared project will not be exposed in any local flow folder.
Follow the steps below to:
Project-wide Sharing
If you define a "Samples" sample type in the top level project, you will be able to use the definition in all subfolders of that project at any level. Each folder will also be able to share the samples defined in the project, i.e. you won't have to import sample descriptions into the local flow folder.
Follow the steps below to:
Note that a "Samples" sample type defined in a folder will not be shared into subfolders. Only project-level definitions and samples are "inherited" by subfolders.
Create "Samples" Sample Type
To create a "Samples" sample type in a folder where it does not already exist (and where you do not want to share the definition), follow these steps.
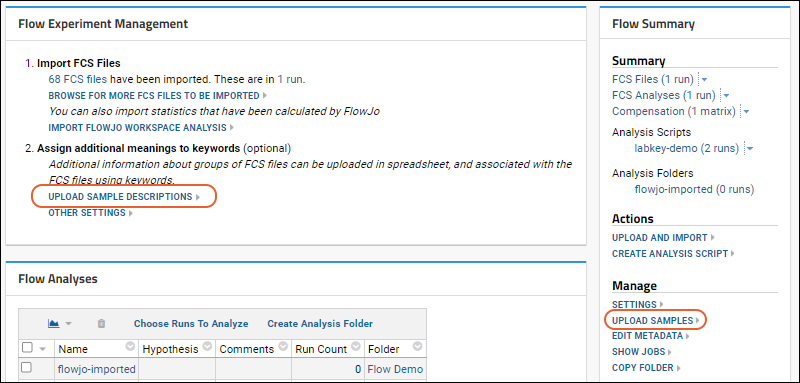
- From the flow dashboard, click either Upload Sample Descriptions or Upload Samples.
- If you don't see the link for "Upload Sample Descriptions", and instead see "Upload More Samples", the sample type is already defined and you can proceed to uploading.
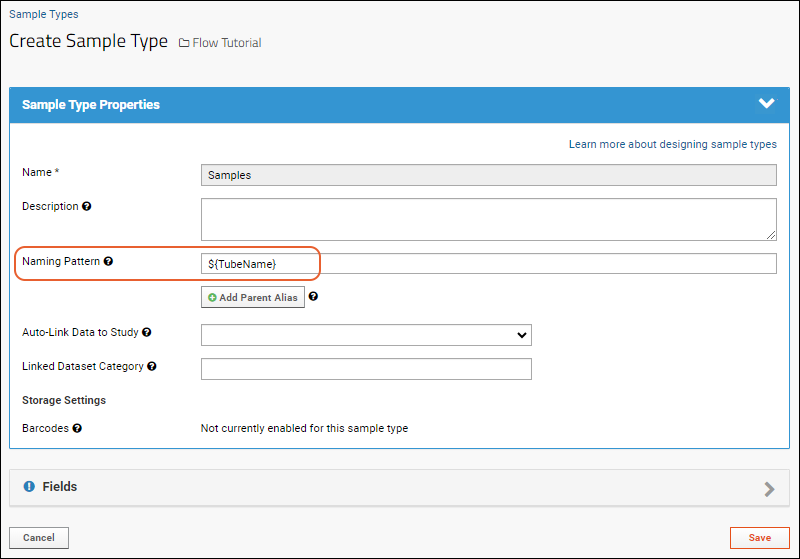
- On the Create Sample Type page, you cannot change the Name; it must be "Samples" in the flow module.
- You need to provide a unique way to identify the samples of this type.
- If your sample data contains a Name column, it will be used as the unique identifier.
- If not, you can provide a Naming Pattern for uniquely identifying the samples. For example, if you have a "TubeName" column, you can tell the server to use it by making the Naming Pattern "${TubeName}" as shown here:
- Click the Fields section to open it.
- Review the Default System Fields.
- Fields with active checkboxes in the Enabled column can be 'disabled' by unchecking the box.
- The Name of a sample is always required, and you can check the Required boxes to make other fields mandatory.
- Collapse this section by clicking the . It will become a .
- You have several options for defining Custom Fields for your samples:
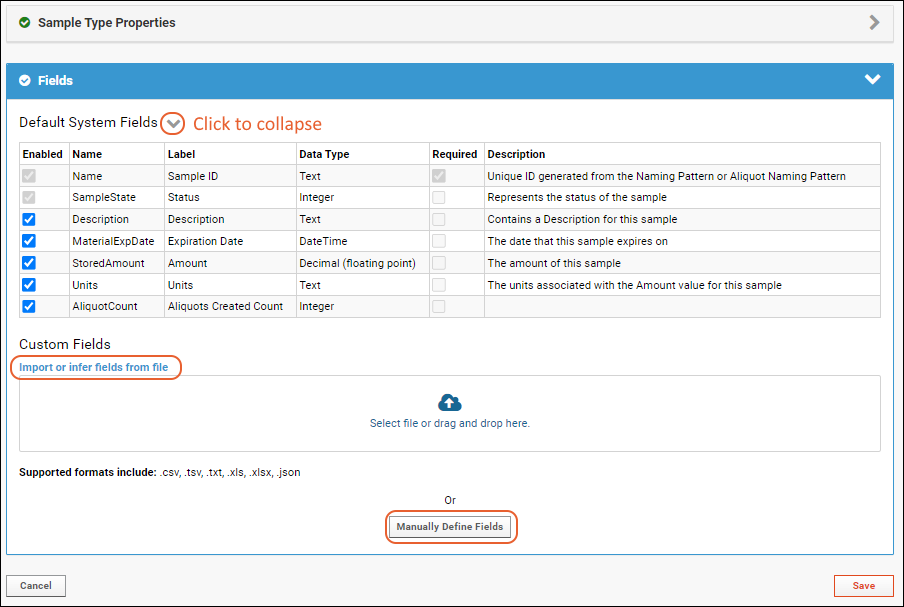
- Import or infer fields from file: Drag and drop or select a file to use for defining fields:
- Manually Define Fields: Click and use the field editor to add new fields.
- Learn more about defining sample type fields in this topic: Create Sample Type.
- See an example using the following fields in this tutorial: Tutorial: Set Flow Background.
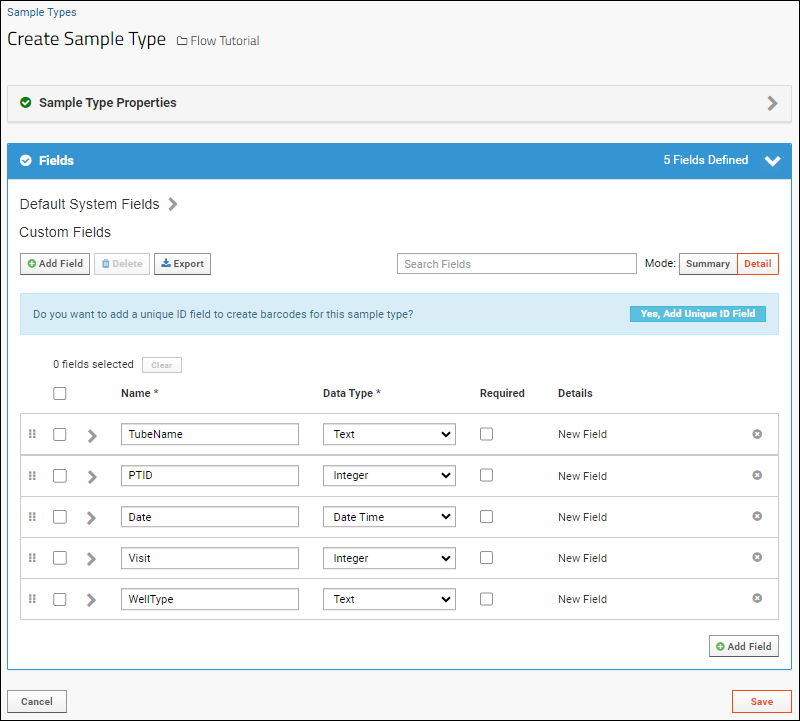
When finished, click
Save to create the sample type.
You will return to the main dashboard where the link
Upload Sample Descriptions now reads
Upload More Samples.
Upload Sample Descriptions
- Once the "Samples" sample type is defined, clicking Upload Samples (or Upload More Samples) will open the panel for importing your sample data.
- Click Download Template to download a template showing all the necessary columns for your sample type.
- You have two upload options:
- Either Copy/Paste data into the Data box shown by default, and select the appropriate Format: (TSV or CSV). The first row must contain column names.
- OR
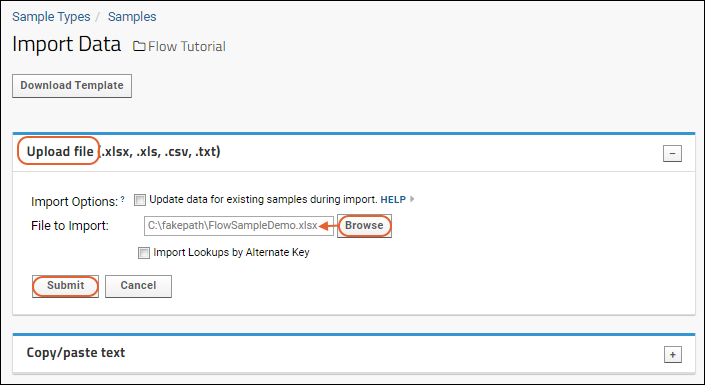
- Click Upload file (.xlsx, .xls, .csv, .txt) to open the file selection panel, browse to your spreadsheet and open it. For our field definitions, you can use this spreadsheet: FlowSampleDemo.xlsx
- Import Options: The default selection is Add Samples, i.e. fail if any provided samples already defined.
- Change the selection if you want to Update samples, and check the box if you also want to Allow new samples during update, otherwise, new samples will cause import to fail.
- For either option, choose whether to Import Lookups by Alternate Key.
Define Sample Description Join Fields
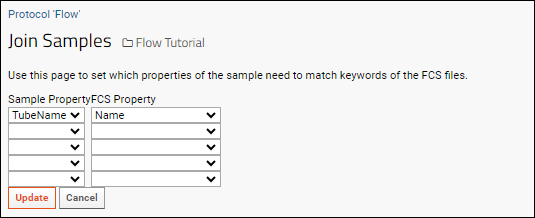
Once the samples are defined, either by uploading locally, or at the project-level, you can associate the samples with FCS files using one or more sample join fields. These are properties of the sample that need to match keywords of the FCS files.
- Click Flow Tutorial (or other name of your folder) to return to the flow dashboard.
- Click Define sample description join fields and specify the join fields. Once fields are specified, the link will read "Modify sample description join fields". For example:
| Sample Property | FCS Property |
|---|
| "TubeName" | "Name" |
Return to the flow dashboard and click the link
## sample descriptions (under "Assign additional meanings to keywords"). You will see which Samples and FCSFiles could be linked, as well as the values used to link them.

Scroll down for sections of unlinked samples and/or files, if any. Reviewing the values for any entries here can help troubleshoot any unexpected failures to link and identify the right join fields to use.
Add Sample Columns to View
You will now see a new
Sample column in the
FCSFile table and can add it to your view:
- Click Flow Tutorial (or other name of your folder).
- Click FCS Files in the Flow Summary on the right.
- Click the name of your files folder (such as DemoFlow).
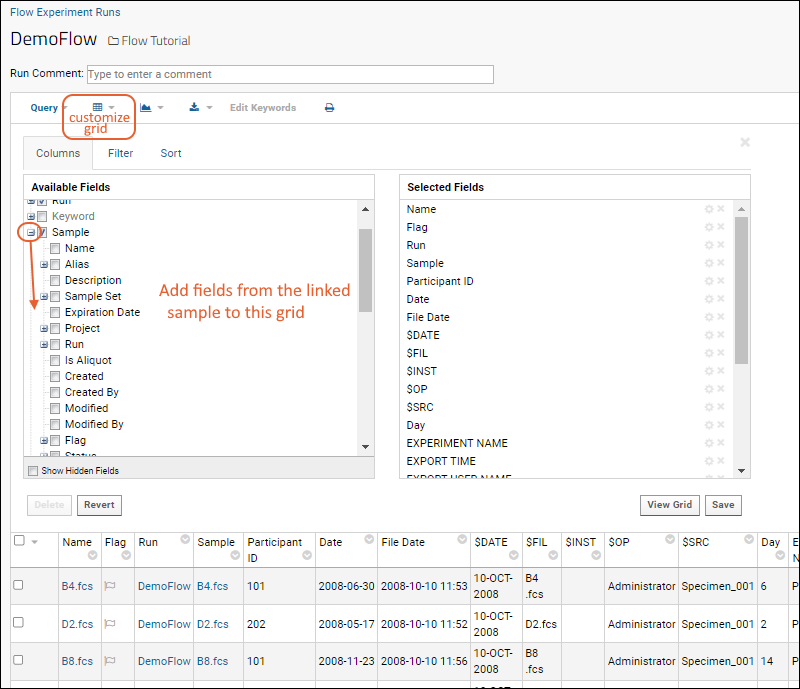
- Select (Grid Views) > Customize Grid.
- Expand the Sample node to see the columns from this table that you may add to your grid.
Related Topics:
