Tutorial: Define an Assay Type in a Module |
2024-04-27 |
Module-based assays provide a quick and easy method for defining new assay types beyond the types of assays already built into LabKey Server.To create a module-based assay, you create a set of files that define the new assay design, describe the data import process, and define various types of assay views. The new assay is incorporated into your server when package these files as a module and restart your server. The new type of assay is then available on your server as the basis for new assay designs, in the same way that built-in assay types (e.g., Luminex) are available.This tutorial explains how to incorporate a ready-made, module-based assay into your LabKey Server and make use of the new type of assay. It does not cover creation of the files that compose a module-based assay. Please refer to the "Related Topics" section below for instructions on how to create such files.


Download
First download a pre-packed .module file and deploy it to LabKey Server.- Download exampleassay.module. (This is a renamed .zip archive the contains the source files for the assay module.)
Add the Module to your LabKey Server Installation
- On a local build of LabKey Server, copy exampleassay.module to a module deployment directory, such as <LABKEY_HOME>\build\deploy\modules\
- Or
- On a local install of LabKey Server, copy exampleassay.module to this location: <LABKEY_HOME>\externalModules\
- Restart your server. The server will explode the directory.
- Examine the files in the exploded directory. You will see the following structure:
exampleassay
└───assay
    └───example
        │   config.xml
        │
        ├───domains
        │       batch.xml
        │       result.xml
        │       run.xml
        │
        └───views
                upload.html
- upload.html contains the UI that the user will see when importing data to this type of assay.
- batch.xml, result.xml, and run.xml provide the assay's design, i.e., the names of the fields, their data types, whether they are required fields, etc.
Enable the Module in a Folder
The assay module is now available through the UI. Here we enable the module in a folder.- Create or select a folder to enable the module in, for example, a subfolder in the Home project.
- Select Admin > Folder > Management and then click the Folder Type tab.
- Place a checkmark next to the exampleassay module (under the "Modules" column on the right).
- Click the Update Folder button.
Use the Module's Assay Design
Next we create a new assay design based the module.- Select Admin > Manage Assays.
- On the Assay List page, click New Assay Design.
- Select LabKey Example and click Next.
- Name this assay "FileBasedAssay"
- Leave all other fields at default values and click Save and Close.
Import Data to the Assay Design
- Download these two sample assay data files:
- Click on the new FileBasedAssay in the Assay List.
- Click the Import Data button.
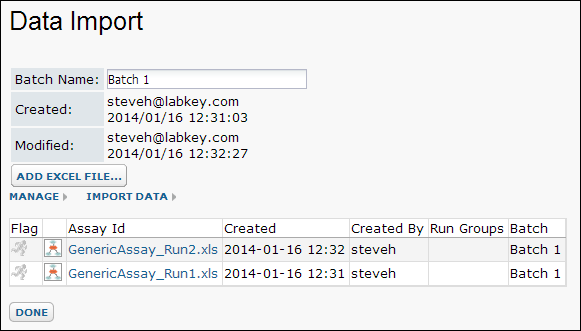
- Note that instead of the standard UI for importing data, you will see the custom UI for importing data defined by upload.html in exampleassay\assay\example\views.
- Also note the URL to the custom upload page. It follows the pattern: http://myserver.org/labkey/myproject/myfolder/assay-moduleAssayUpload.view?rowId=1
- Enter a value for Batch Name, for example, "Batch 1"
- Click Add Excel File and select GenericAssay_Run1.xls. (Wait a few seconds for the file to upload.)
- Notice that the Created and Modified fields are filled in automatically, as specified in the module-based assay's upload.html file.
- Click Import Data and repeat the import process for GenericAssay_Run2.xls.
- Click Done.

Review Imported Data
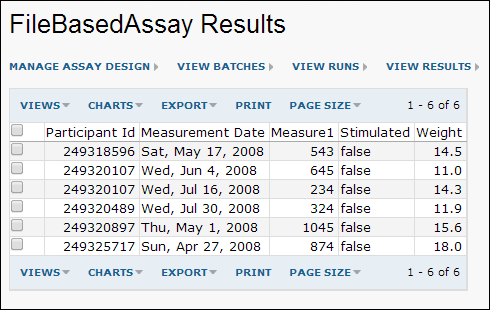
- Click on the first run (GenericAssayRun1.xls) to see the data it contains. You will see data similar to the following:

- You can now integrate this data into any available target studies.