This topic describes how to find samples in bulk using properties of their
sources or
parents. The Sample Finder helps you build a set of criteria to find samples of interest across all the Sample Types in your system. For example, you might want to find all samples of different types from a specific source or lab, or see if you have enough samples in the system from male, BALB/c mice to perform a given experiment.
The criteria you define will persist for the next time you visit the Sample Finder making it easy to focus on what you need regularly. You can also save your search criteria by name to keep track of common searches.
If instead you want to search for samples in bulk by barcode or sample ID, follow the instructions in this topic:
Sample Search.
Sample Finder
To open the Sample Finder, select it from the search menu anywhere in the application. You can also click
Go to Sample Finder from the main dashboard.
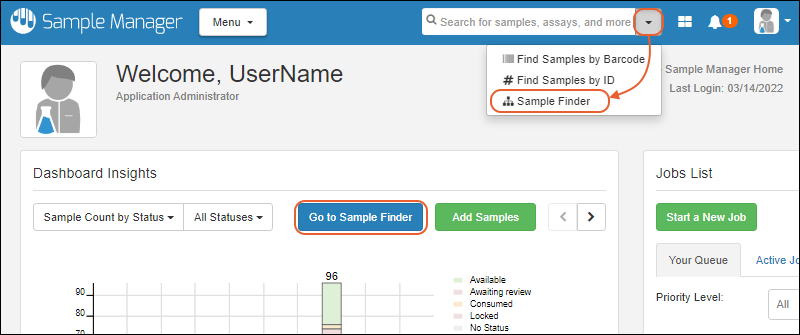
Click to find samples by either:
- Source Properties
- Parent Properties
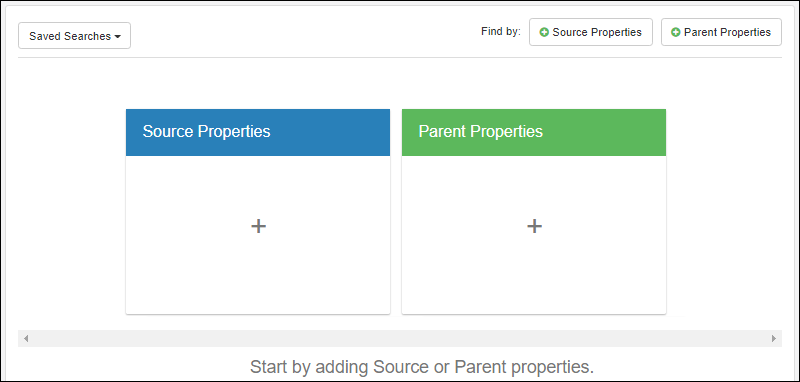
Click either the
Source Properties or
Parent Properties tile to add a new sample filter based on ancestor criteria.
In the popup, choose the specific type (of source or parent), and field on which you want to filter. You can filter some fields by
values and any field using
filtering expressions.
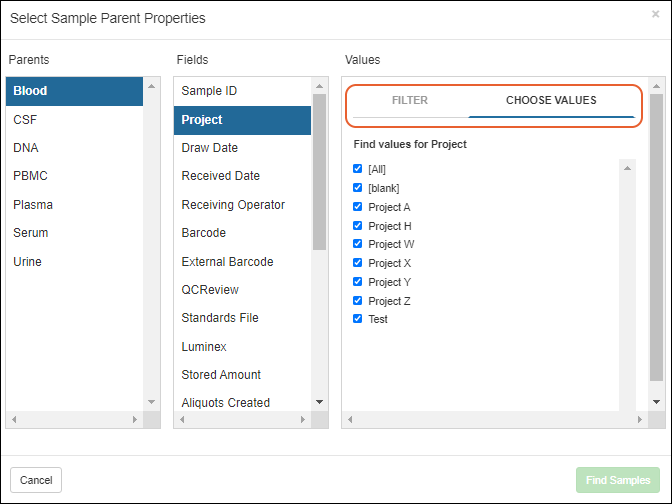
Click
Find Samples to add your filter.
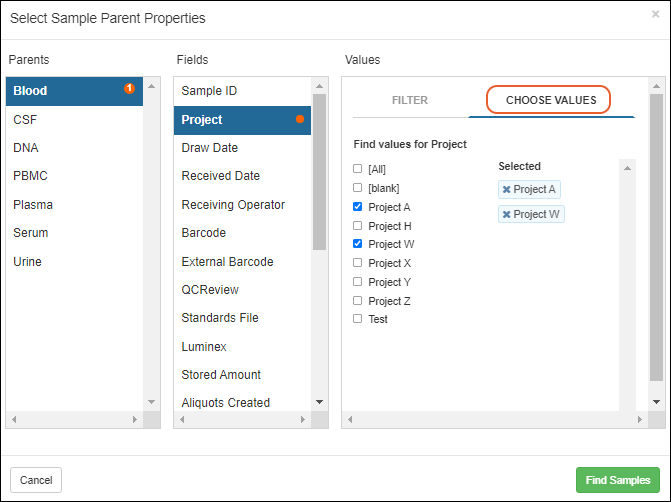
Choose Values
For some fields with a limited set of value options, you can use a checkbox interface to select one or more values to include. For example, to choose only samples with a
Blood parent where the
Project is either A or W:
Filter with Expressions
You can also use the
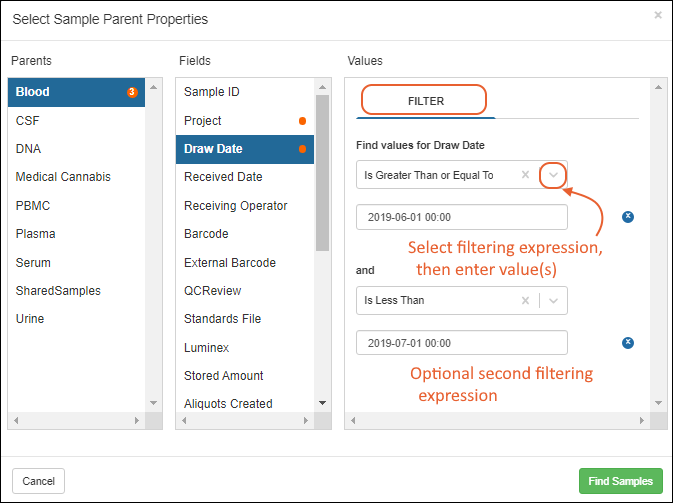
Filter tab to specify a filtering expression and enter a value. If desired, you can add a second filter to this column to indicate a range or other combination of expressions that will be AND-ed together.
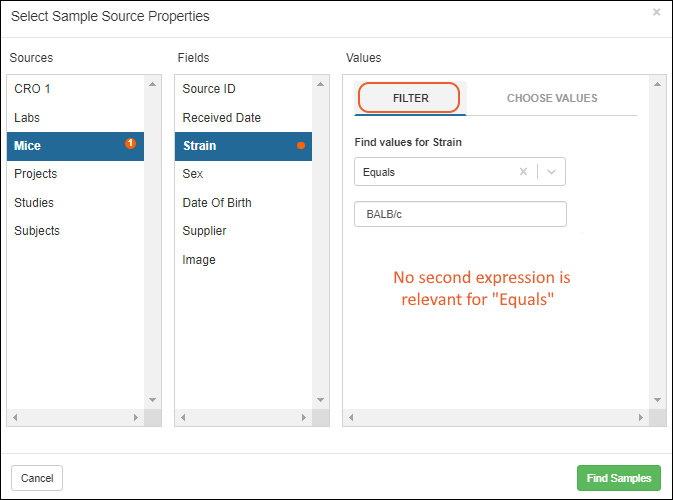
If your first filtering expression fully constrains the result (such as an "Equals" filter) you will not have the option to add a second expression.
Edit Criteria
Once you've defined any sample finding criteria, you can use the
Source Properties and Parent Properties buttons in the upper right to add more filters on other columns.
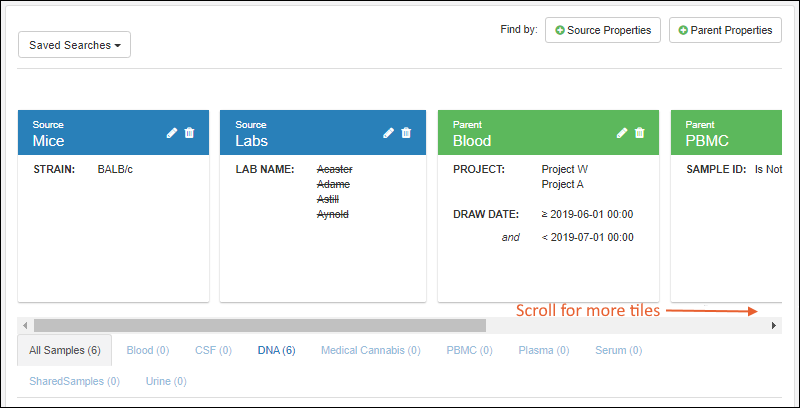
Each parent or source type will have a tile, listing the active filters on columns in that type.
You can use the
for any tile to edit the criteria it will use to find samples. For example, you could add additional filters on other fields of a parent or source filter you already created.
To add search criteria for another type of source or parent, start from the
Source/Parent Properties button.
- Each type will have a separate "tile" showing filters applied. When a filter includes "does not equal", you will see the values with strikethrough styling.
- To set a filter to simply require that the sample have any parent of a given type, use "SampleID is not blank" for that filter.
As the set of criteria tiles grows, you can scroll to see them all above the results. You can
save your current search criteria at any time for later reuse.
To delete all criteria associated with a given source or parent, click the
for that tile.
Search Results
As you build your set of criteria, you will see the results grid below the tiles. There is a tab for
All Samples as well as individual tabs for all defined sample types. Each shows the count of samples of that type that were found using your criteria.
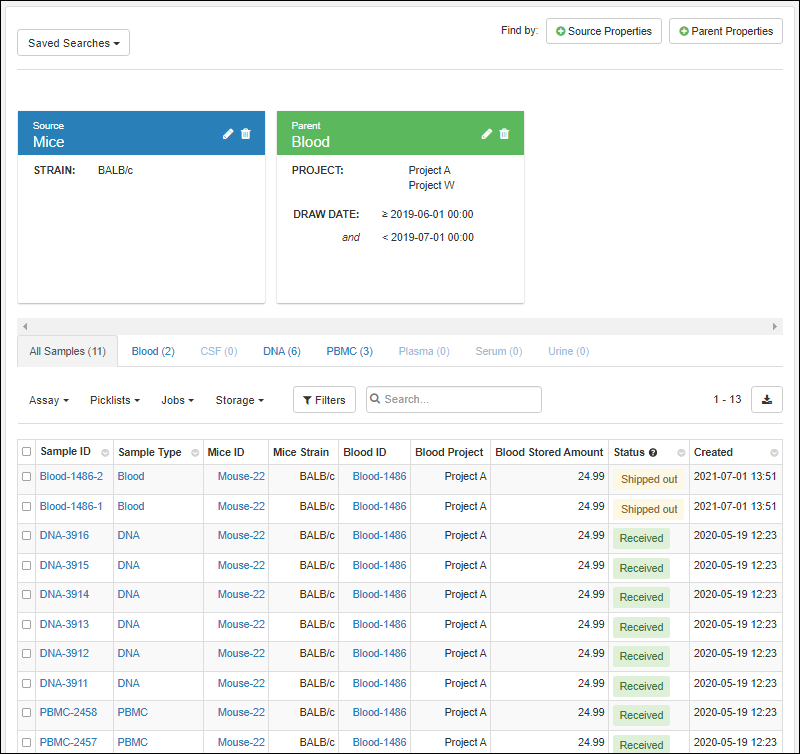
The data grid will show the parent and source columns included in your criteria, as well as common properties of the samples themselves, such as status and creation date. You can use these results to refine the sample finder criteria tiles. When ready, you can
save your current search criteria so that you can apply them later. If you want to save a given result set of samples, use a
picklist.
Learn about options for actions, filtering, searching, and sorting sample grids in this topic:
Actions available on the Sample Finder results vary based on user permissions, but include actions available on other kinds of sample grids for the same user, such as:
- Creating new derivatives or aliquots (only available on the tab for a specific sample type)
- Importing assay data
- Adding to picklists or workflow jobs
- Storage Editors can manage storage status, including checking out the found samples
Saved Searches
To save a Sample Finder search, click the
Saved Searches menu, then choose
Save as custom search.

Give your search a name, then click
Save. This name will be used to retrieve this set of criteria later, and perform a new search using them, possibly finding a different set of samples depending on how your data has changed over time.
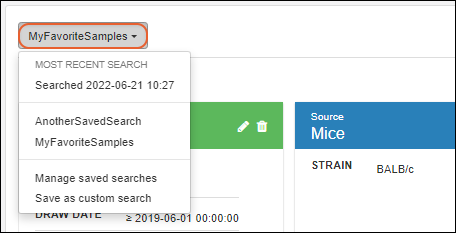
You'll now see the name of your custom search as the name of the
Saved Search menu. Options:
- Most Recent Search:
- The date and time of your most recent search is shown; click to open it.
- Saved Searches:
- You'll see a list of any named saved searches here. If none exist "No Saved Search" will be shown.
- Manage saved searches
- Save as custom search
Save Search Button
Switching to a previous search result (such as "Searched 2022-06-21 10:27" in the above) will add a
Save Search button to the header.

If you make changes to an existing saved search, you'll be able to use the
Save Search dropdown menu to select either:
- Save this search using the existing name
- Save as a new search

Manage Saved Searches
When you click
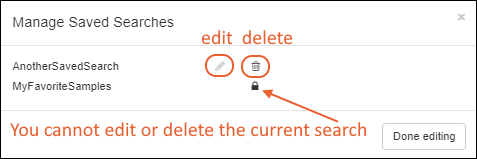
Manage Saved Searches you can edit the name of other searches, or delete them. You cannot edit (or delete) the currently active search; it is shown with a lock icon.
Related Topics

 If your first filtering expression fully constrains the result (such as an "Equals" filter) you will not have the option to add a second expression.