In this step of the tutorial, you will create a simple job and template, helping you understand how to use jobs, tasks, and templates to represent an efficient sample management workflow. Jobs can include a set of samples, direct links to the necessary assays, and notification mechanisms to ensure the right people know about actions that impact their work.
Create a Job with Selected Samples
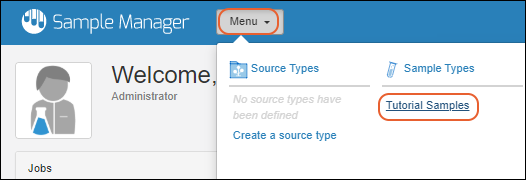
- Select "Tutorial Samples" from the Sample Types section of the main menu.
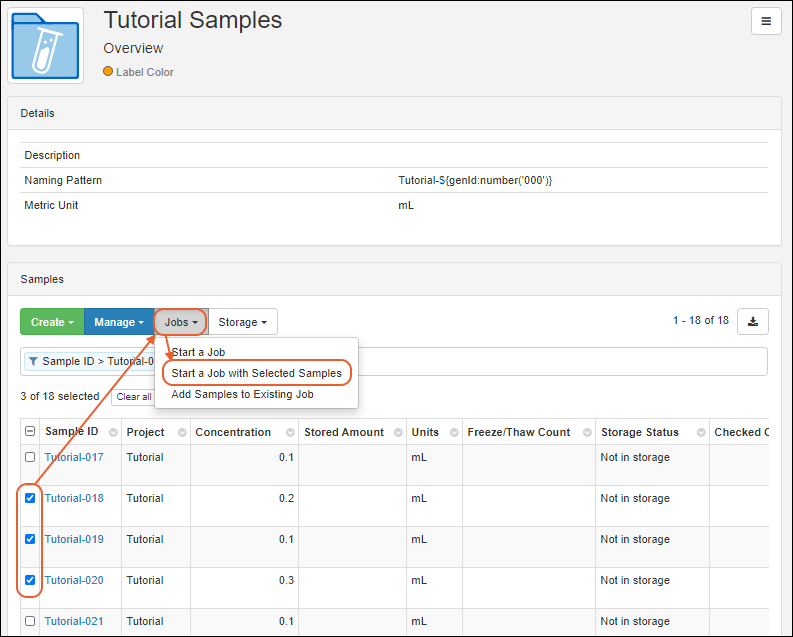
- Check the boxes to select "Tutorial-018", "Tutorial-019" and "Tutorial-020".
- We're including some assay data for these specific samples below.
- Select Jobs > Start a Job with Selected Samples from the menu above the grid.
Job Details and Priority
On the first panel of the job creation wizard, enter details about the job:
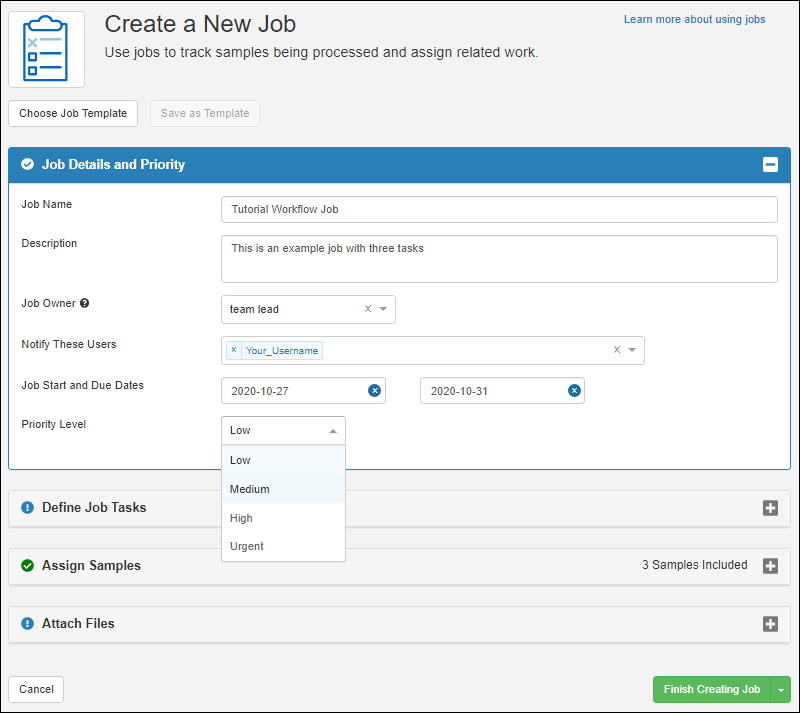
- Job Name: "Tutorial Workflow Job"
- Description: "This is an example job with three tasks"
- Job owner: Select "team lead" for this tutorial. This is the user who "owns" the overall job completion, not necessarily owns the tasks. Note that if you did not create the fake "team lead" user and assign them the role of "Editor" in the previous step, you won't be able to select them here and can just select yourself.
- Notify these users: Add users who should get notifications as this job progresses. Select yourself here.
- Job start and due dates: Use the date picker to select any begin and end dates you like.
- Priority level: Use the pulldown menu to select "Medium".
Define Job Tasks
Click the
Define Job Tasks section to open it.
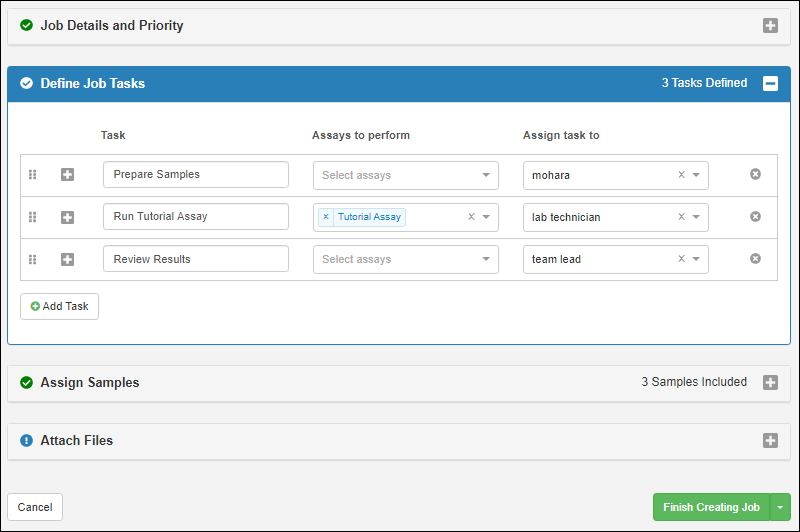
Any job can be composed of several tasks to complete in sequence. For each task in your job, enter the name in the
Task column, select any
Assays to Perform as part of that task, and use the dropdown to select an
Assignee.
For this tutorial enter the following, using
Add Task to add rows for the second two tasks:
| Task | Assays to Perform | Assign task to |
|---|
| Prepare Samples | | Yourself |
| Run Tutorial Assay | Tutorial Assay | lab technician |
| Review Results | | team lead |
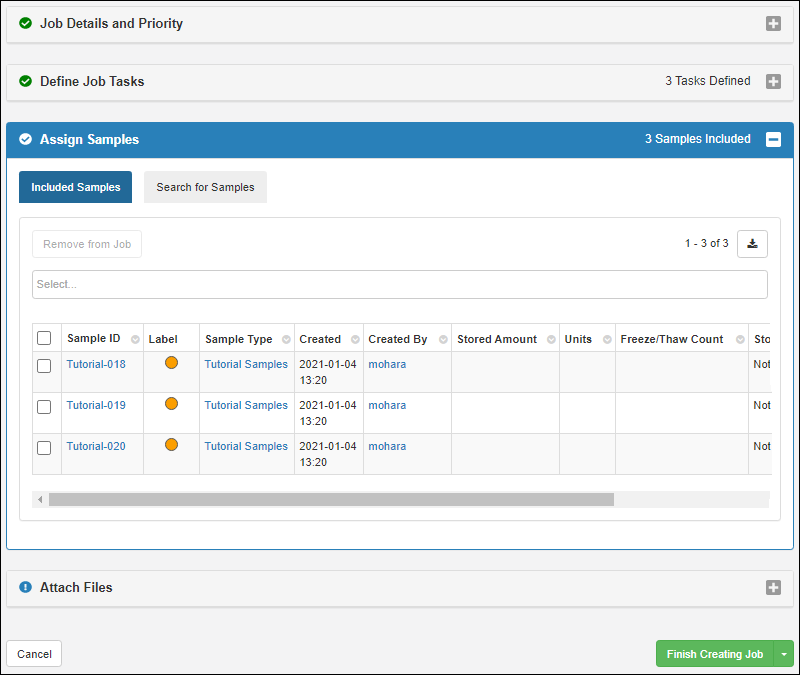
Assign Samples
Click the
Assign Samples section to open it. You will see the samples you selected listed on the
Included Samples tab.
Attach Files (Optional)
Click the
Attach Files section to open the final wizard panel. You could drag and drop to upload any files needed for the job. For example, an SOP document or other instructions related to the job could be included here. You can skip this for the tutorial.
Finish Creating Job and Template
Before finishing job creation, consider whether you want to make this job available as a template for creating similar future jobs.
Creating a template from a job is offered only during initial job creation.
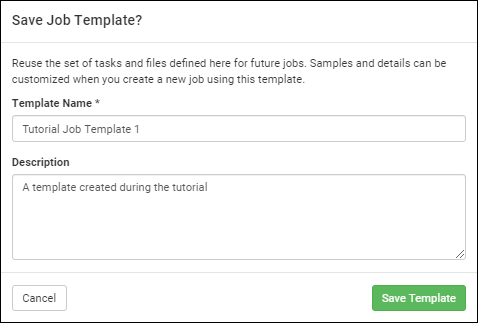
- Use the dropdown menu option Save as Template and Start Job to create a template and start this job.

In the popup, you will name the template and provide an optional description. For this tutorial, name the template "Tutorial Job Template 1."
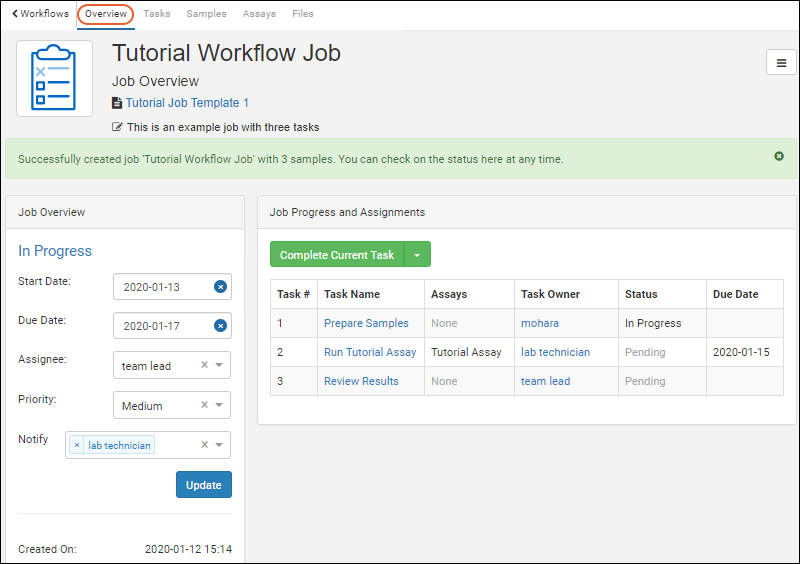
You will see the job overview. Note the tabs along the top edge for viewing
Tasks, Samples, Assays, and Files in addition to the
Overview.
Complete Job Tasks
Click the
Sample Manager logo to return to the home page of the application. You will now see that the
Jobs section has begun to grow.
Your Queue includes the job you just created (because the first task is assigned to you).
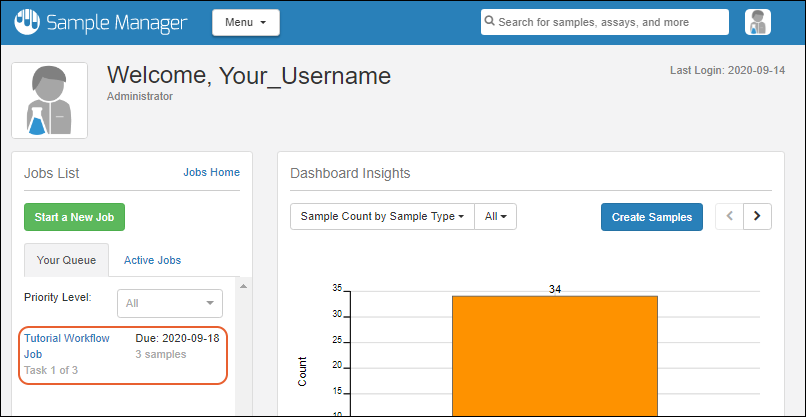
Click the name of the job to open it. On the
Overview page, you'll see summary information, including the list of tasks. The current task is assigned to you.
- Click Complete Current Task to mark it as complete.
In the
Status column, you'll now see that the second task, "Run Tutorial Assay" is now "In Progress".
The assay task is assigned to the "lab technician" but as an administrator you have the ability to complete any task in the system. Let's use that power here to illustrate assay data import from within the workflow system.
- Click the Tasks tab to see more detail about the task. In this view, you have an Import Data button since the task involves importing data to the "Tutorial Assay".
- Click Import Data.
- Enter:
- Assay Id: "Run2"
- Date: Today's date (click the entry field to use the date picker)
- Instrument: INS-01
- Download this example data sheet: TutorialAssay_Run2.xlsx, then drop it into the upload window.
- You'll see the data preview.
- Click Import.
- When complete, you'll see the imported data.
- To return to the job details page, you can click here in the green "Successfully created assay run" banner. For this tutorial, navigate as follows to see how task assignment changes your task queue.
- Click the Sample Manager logo to return to the home page.
- In the Jobs section, notice that the job is no longer shown in Your Queue because the current task is not assigned to you. To find the job, click Active Jobs.
- Click the name Tutorial Workflow Job.
- Click the Assays tab to see the data you just uploaded.
- Click the Tasks tab to return to task details.
- You can now click Complete This Task to mark the lab technician's task complete.
View Timeline
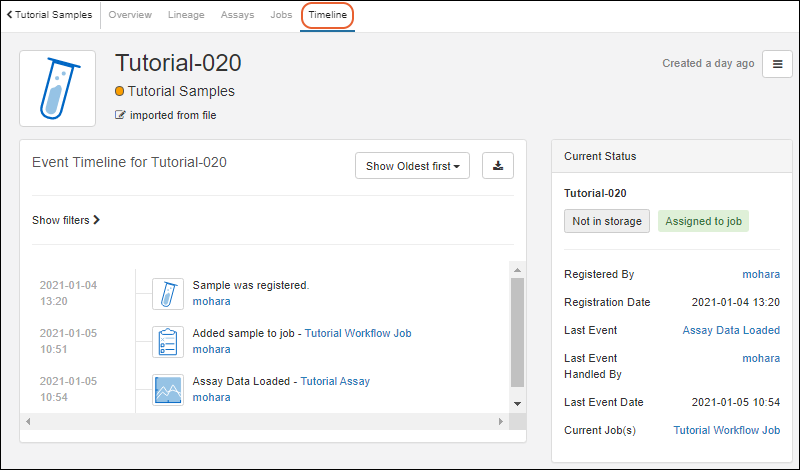
Each sample has a record of all activities that happen for it within the system. To see a timeline, select
Sample Types > Tutorial Samples from the main menu and locate "Tutorial-020". Click the name to open details about that sample.
Click the
Timeline tab to see the event timeline for this sample.
- You'll see when it was created (registered), when it was added to the job, and when assay data was uploaded for it.
- You're also shown the current status of the sample on the right, including who last handled it.
- If you click an event, such as "Assay Data Loaded" you'll see an additional panel on the right which includes details including a link to the run of data you uploaded.
Related Topics
