This topic describes how to define and explore sample lineage and parentage among samples.
Add Parent Alias
Within the definition of a Sample Type, you can indicate one or more columns that will generate a parentage relationship with the samples being created. The parent(s) can exist in the same or different Sample Type than the one you are creating. Setting a
parent alias in the definition of a Sample Type creates the linkage to parent samples during import, but note that the column aliased is not actually added to the Sample Type, instead the system pulls data from it to determine parentage relationships.
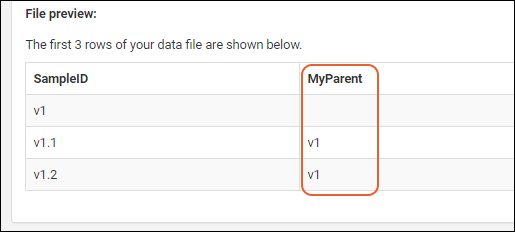
For example, if you have a group of samples like the following:
| SampleID | MyParent |
|---|
| v1 | |
| v1.1 | v1 |
| v1.2 | v1 |
You would indicate the parent column alias as "MyParent" in the definition of this Sample Type.
- You can add the parent alias:
- During initial Sample Type creation.
- After creation by reopening the type for editing via > Edit Sample Type Details.
- Click Add Parent Alias.

- Enter an alias for import: Name the column containing parentage information that will be in the file. The column name is case sensitive.
- Select a sample type...: Select the Sample Type where the parent resides. This may be in the "(Current Sample Type)" or another one that has been defined.

- You can add additional parentage columns if applicable by clicking Add Parent Alias and repeating the process.
- Click Save.
You will see the
Parent Import Aliases listed on the
overview tab for the Sample Type.
When importing samples of this type, include parent information in one of the aliased columns. As shown below, the "MyParent" column contains the parent identifier.
The system will capture and generate lineage for the parent(s) of the samples you have created. Learn more about using the
Lineage tab in sample details
below.
Add Source Alias
Within the definition of a Sample Type, you can indicate one or more columns that will indicate a
Source of the samples being created. Setting a
source alias in the definition of a Sample Type creates the linkage to sources during import, rather than requiring sources be added later.

You will see the
Source Import Aliases listed on the
overview tab for the Sample Type.
Give the name of the source alias column and select the source type from the dropdown, as for parent samples. You can include multiple source aliases as needed.
Learn more about sources in this section:
Sources
Create Aliquots, Derivatives, and Pooled Samples
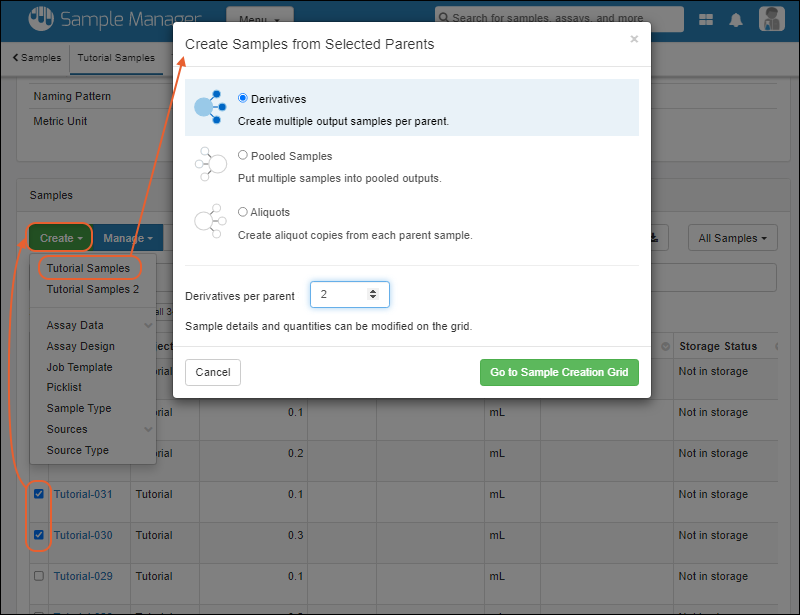
Once you have created the parent samples in the system and want to create new samples with specific parents (i.e. aliquot, pool, or derive new samples), you can do so from the Samples grid. (Note that if you select more than 1000 rows, the option to create samples with those parents is disabled.)
- Select the Sample Type of interest from the main menu.
- Select the parent sample(s) using the checkbox(es).
- Select Create > [Name of Sample Type].
- In the popup, specify whether you want to create:
- Derivatives: Create multiple output samples per parent.
- Pooled Samples: Put multiple samples into pooled outputs.
- Aliquots: Create aliquot copies from each parent sample.
- Add the desired number of new samples and click Go to Sample Creation Grid.
Learn more about providing the required information to
Finish Creating the selected type of child sample in this topic:
Create Samples from Selected Sources
If you have already created the Sources in the system and want to create new samples from specific sources, you can do so from the Sources grid.
- Select the Source Type of interest from the main menu.
- Select the desired source(s) using the checkbox(es).
- Select Create > Samples > [Name of Sample Type].
- Add the desired number of samples by entering the number and clicking Go To Sample Creation Grid.
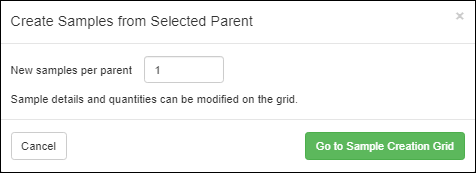
- You will see the selected Sources prepopulated in the column for that type of source in the grid.
- Enter remaining sample information before clicking to Finish Creating the samples.
Explore Sample Lineage Graph
Viewing any sample detail page, you will see a tab for
Lineage in the header bar. For example:
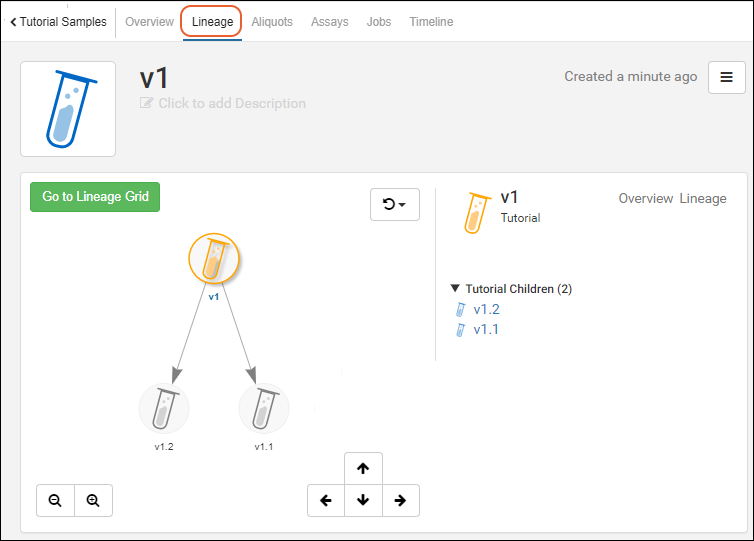
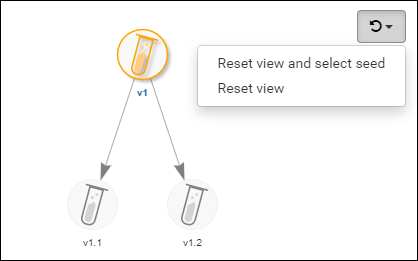
The lineage graph lets you explore a visual representation of the parentage of samples.
- Zoom out and in with the and buttons in the lower left.
- Step up/down/left and right within the graph using the arrow buttons.
- Click anywhere in the graph and drag to reposition it in the panel.
- Refresh the image using the button. There are two options:
- Reset view and select seed
- Reset view
- On the right of the graph, a side panel lists the children as links.
- Click any sample to reset the graph focus in the left hand panel.
- Hover over a link to reveal direct links to the overview page or lineage view for that child. A tooltip will also show the Sample Type name.
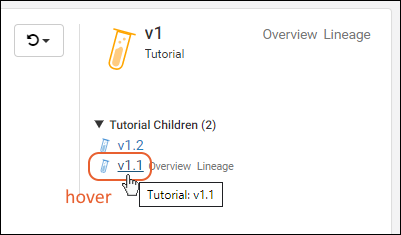
Note that only three generations will display on the lineage graph. To see additional generations, walk the tree up or down to see more levels in either direction.
You can switch to the grid view of the lineage by clicking the green
Go To Lineage Grid button.
Explore a more complex lineage example in our
"Explore Sample Manager" demo project.
Lineage Grid
The lineage grid can be especially helpful when viewing lengthy lineages or derivation histories. By default, the children of the currently selected sample, aka the "seed", are shown.
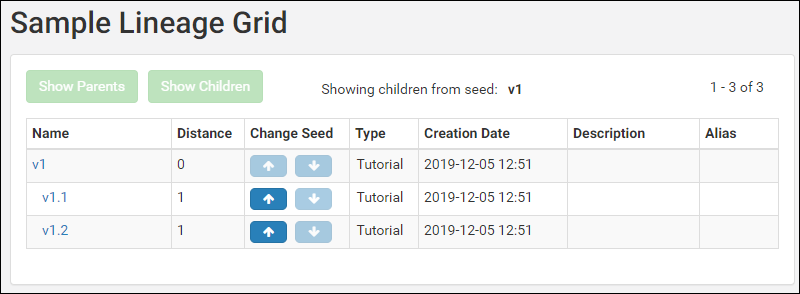
If this sample has parents, the
Show Parents button will be enabled and you can click it to see them. If the sample has children that are not shown, the
Show Children button will be enabled and you can click it to see them.
Entries in the
Names column are clickable and connect to the overview page for the sample.
The
Distance column specifies the number of generations between each row and the selected seed sample.
Use the arrow buttons in the
Change Seed column to change the focus of the grid, expanding and collapsing lineage hierarchies to focus on a different seed.
Related Topics