Explore the features of LabKey Sample Manager in this quick guided tour. Open the demonstration application in a new tab using this link:
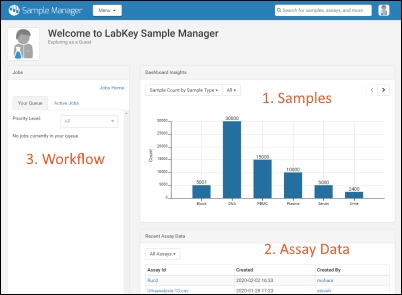
You are exploring the application as a guest and can immediately see there are 6 types of samples present, and some recent assay data. To return to this dashboard at any time, click the logo in the upper left. Let's click through three main areas of the application:
Step 1: Explore Samples
Click the graph bar for one of the sample types to open a grid of all samples of that type;
DNA for example.
Click the name of any sample to open a page of details about that sample;
DNA-1001 for example. You can use the search bar above the grid to help. Click the
Timeline tab to see the history of that specific sample in the system.
Click the
Lineage tab in the upper left to see the lineage of that particular sample. In our demo, DNA samples are derived from PBMC samples, which in turn were derived from blood samples, which in turn have several sources.
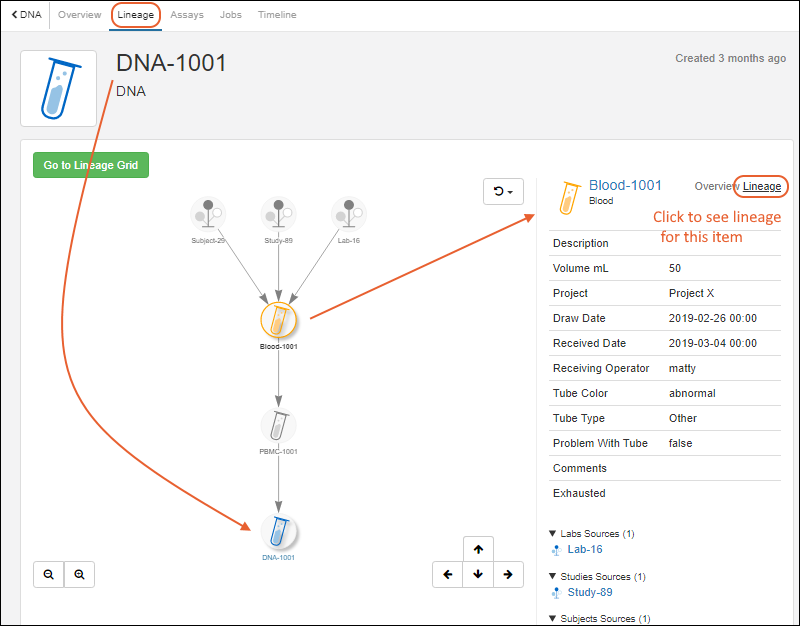
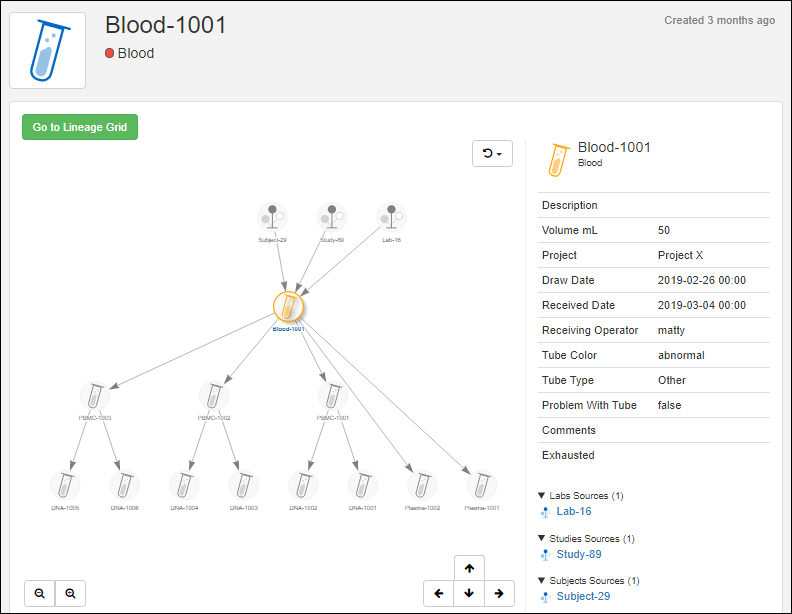
Click the 'originating' blood sample, shown above "Blood-1001" then click the
Lineage link on the right next to the blood sample name to see the lineage of that 'grandparent' of the original DNA sample.
After exploring lineage and sample data, return to the home dashboard by clicking the logo in the upper left.
Step 2: Explore Assays
In the lower right of the main dashboard, you can see a panel of
Recent Assay Data. By default
All Assays are shown. Use the dropdown to narrow the listing to just one of the available assays, such as
qPCR.
Click the
Assay ID (i.e. the name) of any run to see the data. Notice that all data is associated with a sample; in the case of the qPCR assay, you'll see a set of DNA samples. Click a
Sample Id to see more details about the sample itself. As when exploring samples above, you can see the
Lineage. You can also use the
Assays tab to see all the assay data about that sample.
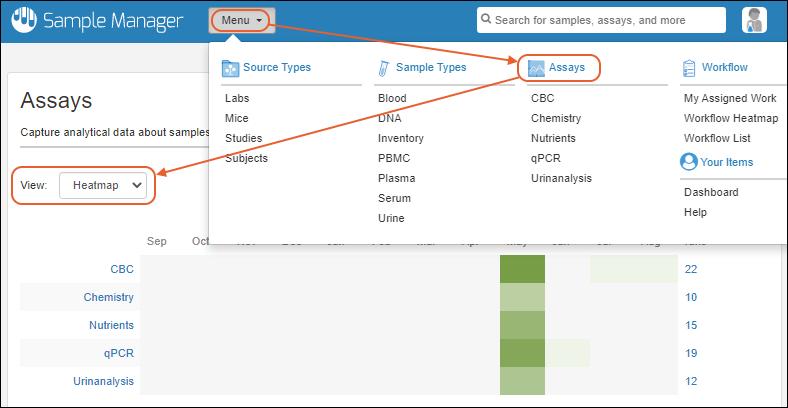
The other way to access assay information is via the main menu in the header to select
Assays for a grid of all the assays defined. Select
Heatmap for a visual representation of the number of runs for each assay each month.
After exploring lineage and sample data, return to the home dashboard by clicking the logo in the upper left.
Step 3: Explore Workflow
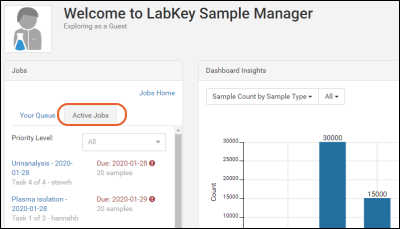
As a guest, no work is assigned to you. If it were, you would see it on the
Jobs panel default tab:
Your Queue. You can explore others' work in progress by clicking
Active Jobs.
Use the
Priority Level dropdown to filter the list. Click the name of any job to see the tasks and assignments.
In the upper right, tabs give you more information about
Tasks, Samples, Assays, and Files associated with the job.
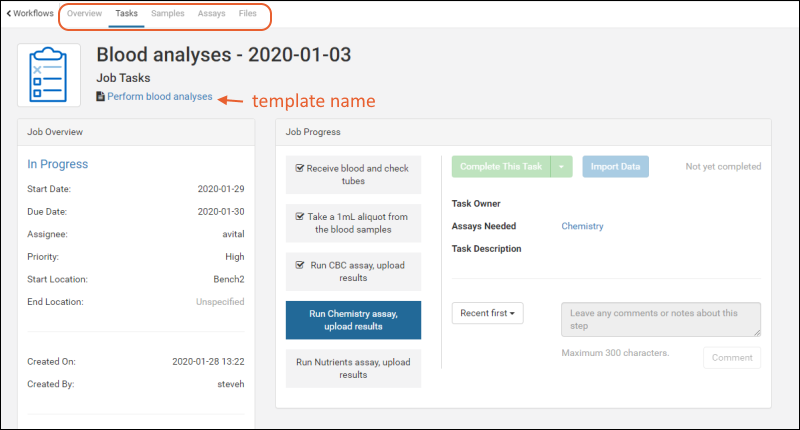
If the job was created using a template, you'll see the template name under the job name. Click it to see the template: a sequence of tasks that can be assigned for different groups of samples. On the template page, you can also click the
Jobs tab for a list of all jobs created from the same template.
To see all workflow jobs in the system, select
Workflow from the main menu. Tabs for your queue, all active jobs, completed jobs, all jobs and job templates let you explore more.
Next Steps
Continue to explore the demonstration data available.
If you are interested in finding out how Sample Manager can help your own work, or would like a demonstration of features like adding data and creating workflows, please get in touch to
request a custom demo with a member of the LabKey team.
 Explore the features of LabKey Sample Manager in this quick guided tour. Open the demonstration application in a new tab using this link: