Exploring Project Creation |
2025-07-03 |
Once you've learned about LabKey and explored your LabKey Trial Server, you can start creating your own projects and custom applications.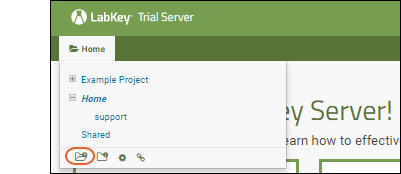 The project creation wizard includes three steps.

 You can now use this project as the base for tutorials.
 You can also change the theme for the site as a whole by selecting > Site > Site Console. Click Settings, then under Configuration, choose Look and Feel Settings. The same options are available for the Theme setting.
This topic assumes you are using a LabKey Trial Server and have it open in another browser window.
As a first project, let's create a "Tutorials" project in which you can run some LabKey tutorials.
Create a Project
To open the project creation wizard you can:- Click the "Create" button on the Trial Server home page.
- OR: Select > Site > Create Project.
- OR: Click the "Create Project" icon at the bottom of the project menu as shown:
 The project creation wizard includes three steps.
- Give the project a Name and choose the folder type.
- Configure users and permissions (or accept the defaults and change them later).
- Choose optional project settings (or configure them later).
- Select > Site > Create Project.
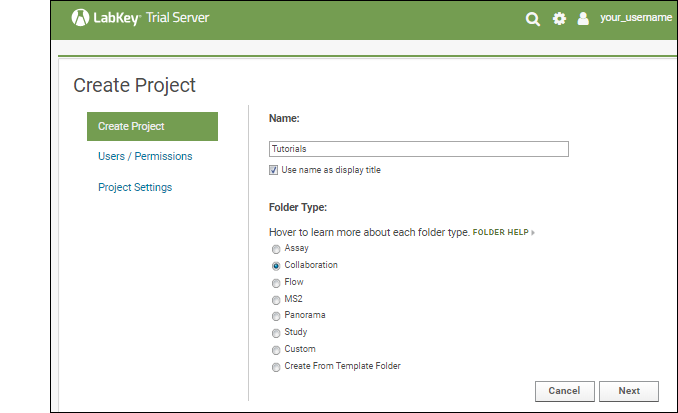
- Step 1: Create Project:
- Enter the Name: "Tutorials". Project names must be unique on the server.
- Leave the box checked to use this as the display title. If you unchecked it, you could enter a different display title.
- Folder Type: Leave the default selection of "Collaboration". Other folder types available on your server are listed; hover to learn more about any type. Click Folder Help for the list of folder types available in a full LabKey installation.

- Click Next.
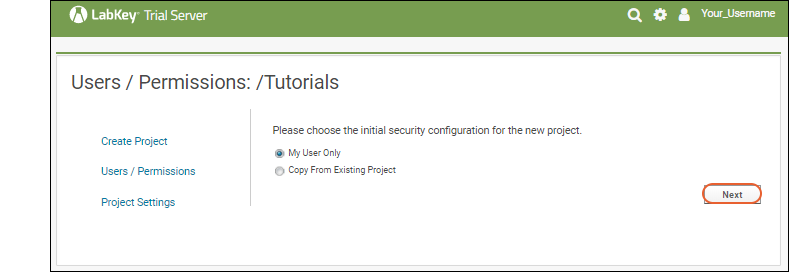
- Step 2: Users / Permissions: Choose the initial security configuration. As the admin, you can also change it later.
- The default option "My User Only" lets you set up the project before inviting additional users.
- The other option "Copy From Existing Project" is a helpful shortcut when creating new projects to match an existing one.
- Leave "My User Only" selected and click Next.

- Step 3: Project Settings:
- On a LabKey Trial Server, you cannot Choose File Location, so this option is grayed out.
- Advanced Settings are listed here for convenience, but you do not need to set anything here.
- Simply click Finish to create your new project.

- You'll now see the landing page of your new project and can start adding content.
Add Some Content
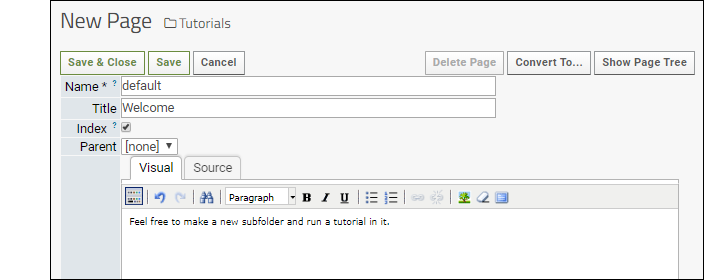
Let's customize the landing page and make it easier to use.- In the Wiki web part, click Create a new wiki page to display in this web part.
- Leave the Name as "default"
- Enter the Title "Welcome"
- In the body field, enter: "Feel free to make a new subfolder and run a tutorial in it."
- Click Save & Close.

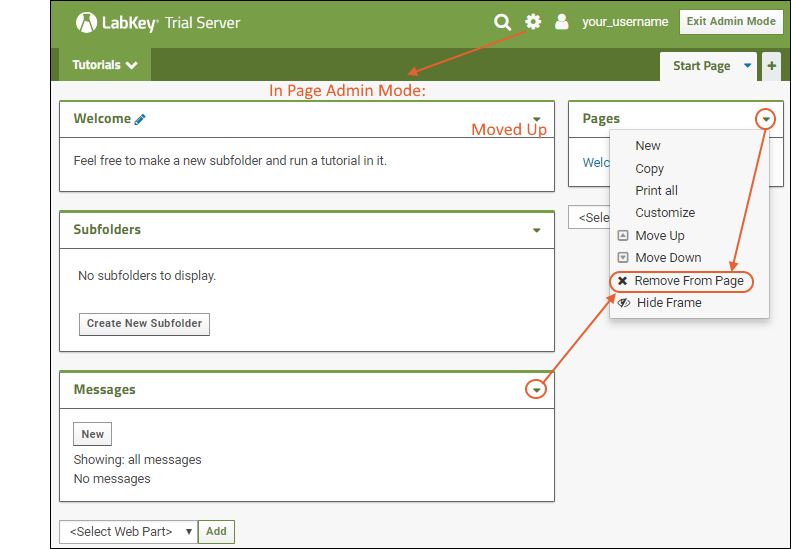
- Customize the page layout:
- Select > Page Admin Mode.
- In the web part header menu for your new "Welcome" wiki, select (triangle) > Move Up.
- In the web part header menu for both "Messages" and "Pages", select (triangle) > Remove From Page.

- Click Exit Admin Mode.
Subfolders Web Part
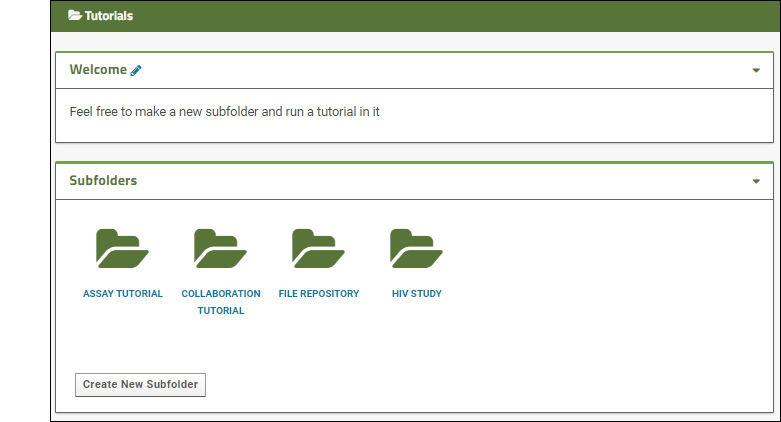
Most LabKey tutorials begin with creation of a new subfolder of a specific type, which you can add by clicking Create New Subfolder here. There are no subfolders to display yet, but once you add a few, this web part will look something like this, giving you a one click way to return to a tutorial folder later.
Tutorials for your LabKey Trial Server
Try one of these:- Tutorial: Security
- Tutorial: File Repository
- Tutorial: Import Experimental / Assay Data
- Tutorial: Longitudinal Studies
Share With Others
Now that you have created a new project and learned more about LabKey Server, consider sharing with a colleague. To invite someone to explore the Trial Server you created, simply add them as a new user:- Select > Site > Site Users.
- Click Add Users above the grid of existing site users.
- Enter one or more email addresses, each on it's own line.
- If you want to grant the new user(s) the same permissions on the server as another user, such as yourself, check the box for Clone permissions from user: and enter the user ID. See what permissions will be cloned by clicking Permissions.
- To grant different permissions to the new user, do not check this box, simply click Add Users and configure permission settings for each project and folder individually.
- Notification email will be sent inviting the new user unless you uncheck this option. You can also see this email by clicking the here link in the UI that will appear.
- Click Done.
- You will see the new user(s) listed in the grid. Click the Permissions link for each one in turn and see the permissions that were granted. To change these in any given project or folder, navigate to it and use > Folder > Permissions. See Configure Permissions for more information.
What Else Can I Do?
Change the Color Scheme
The color scheme, or theme, is a good way to customize the look of a given project. To see what the other themes look like, see Web Site Theme.To change what your Tutorials project looks like:- Navigate to the Tutorials project, or any subfolder of it.
- Select > Folder > Project Settings.
- Under Theme, select another option.
- Scroll down and click Save.
- Return to the folder and see the new look.
- Switch to the home project (click the LabKey logo in the upper left) and see the site default still applies there.
- To restore the original look, return to the Tutorials project and reset the "Leaf" theme.