When
creating new Samples, the
Create Samples From Grid tab gives you several options for entering sample information in the application directly, as opposed to uploading a file of data. You can manually enter values for the fields in a grid format, or use bulk insert and bulk update to streamline entry of similar values.
Note that fields of type
File are not included in grid import methods. Values must be individually added as described in this topic:
Attach Images and Other Files.
Create Samples From Grid
Open the grid method for creating new Samples from the home dashboard by clicking
Create Samples, choosing the desired
Sample Type, then stay on the default
Create Samples from Grid tab.
Add Parent (Optional)
If the samples you are adding have one or more
Parent samples, click
Add Parent to add parentage information. Select the Sample Type of the parent(s). If you will have parents of different types, add one for each type of parent.
Learn more about including parentage information in this topic: Sample Lineage / Parentage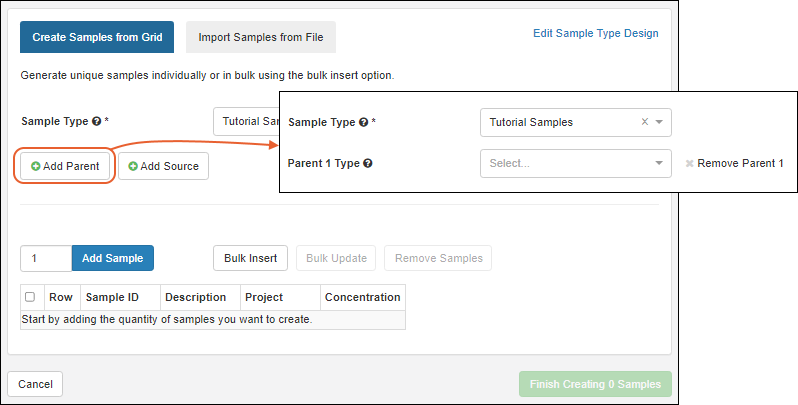
If you add but then want to remove parent linkages, you can delete it by clicking the X next to "Remove Parent #" on the right.
Add Source (Optional)
If the samples you are adding have one or more
Sources, click
Add Source to add a column for each Source Type you will associate with samples of this type. Select the Source Type from the dropdown.
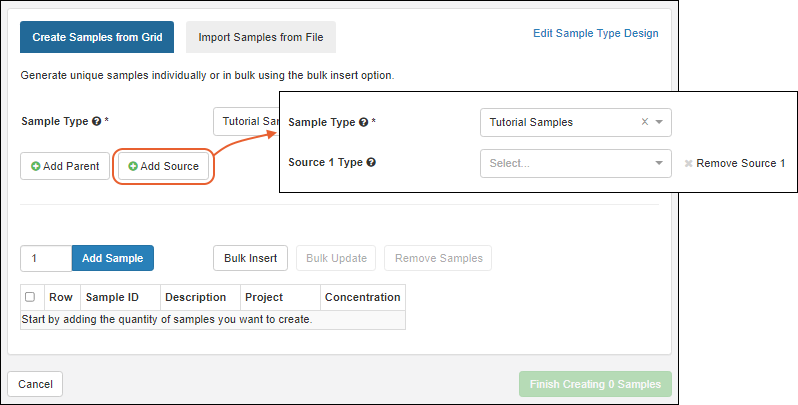
If you add but then want to remove source linkages, you can delete it by clicking the X next to "Remove Source #" on the right.
Add Samples Individually
To directly create samples in a grid, start by adding a blank row for the samples you want to create. Enter the number of samples you want to add and click
Add Samples.
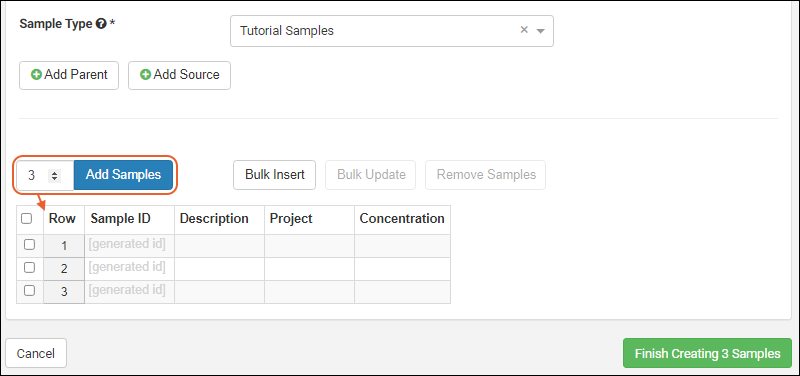
A grid with the requested number of rows will be created, with a column for each field included in your Sample Type (
not including any "File" fields).
- Sample ID:
- If you provided a Naming Pattern with the Sample Type, the Sample ID will be generated, and this will be noted in the grid. You could override this value by manually typing in the box, but remember that all sample IDs must be unique.
- If you are providing your own Sample ID, you will a column in which to enter it.
- Enter values for remaining fields as well.
- Shown below, an ID will be generated and there are fields populated for "Description" and "Project":

Enter your data directly into the grid. Copy and paste of single cells is supported. When ready, click
Finish Creating # Samples. The number you are creating will appear on the button.
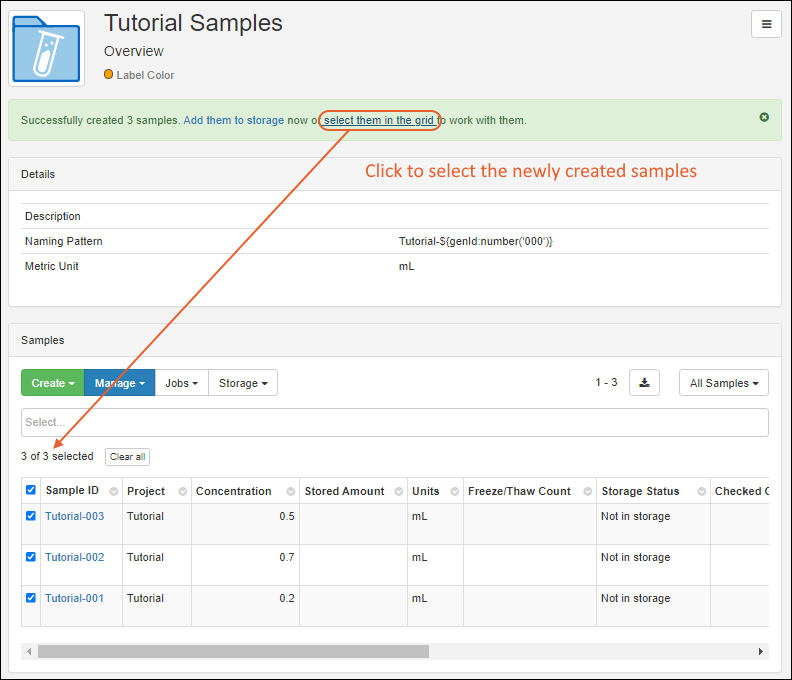
You will see the sample grid for that type, with a banner message indicating how many were created. In that message, click
select them in the grid to select this recently created batch for actions like adding them to a workflow job. You can also click
Add them to storage to immediately
add the new samples to freezer storage locations.
Reopen to add more samples by selecting
Create > [Sample Type].
Bulk Insert
Instead of directly populating a grid, you can click
Bulk Insert to create many samples at once. This is particularly convenient when samples share the same settings for some or all columns.
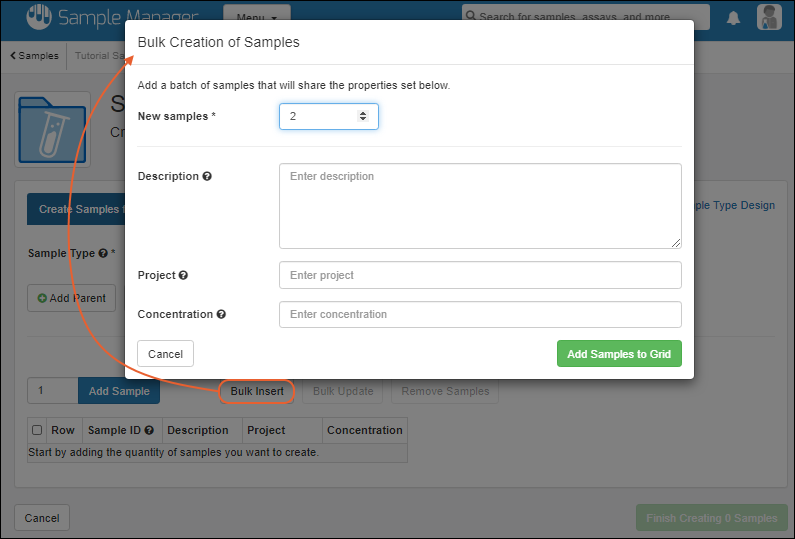
- Specify the number of New Samples.
- Enter values for any or all of the properties listed.
- Click Add Samples To Grid.
You will see the samples in the same grid as if you had created them individually, with the shared values. If necessary, you can further edit the property settings in the grid (directly or using
bulk update, before clicking
Finish Creating # Samples.
You will see a banner message offering a link to select these newly created samples for further work if desired.
Bulk Insert with Parent(s)
If you
added one or more parent fields before clicking
Bulk Insert, you will have an additional selection to make in the bulk creation popup. Choose whether you want to use the parent sample(s) to create:
- Derivatives, specifying the number of derivatives per parent.
- Pooled Samples, specifying the number of new samples to create for the parent(s).
- Aliquots, specifying the number of aliquot copies per parent.
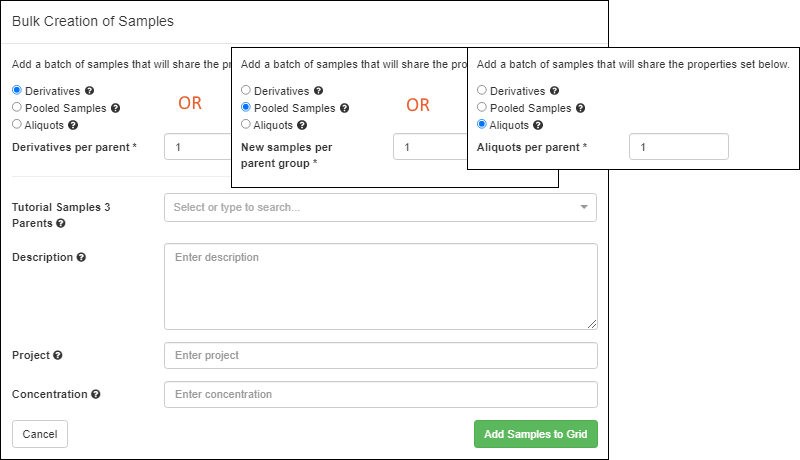
- Provide values for properties that will be shared by the newly created samples. Including 'parents' as applicable.
- Click Add Samples to Grid and continue to complete the grid with any properties not shared by all the new samples.
- Click Finish Creating ## Samples when done.
Bulk Update
While creating new samples in the grid, you can use the
Bulk Update option to assign a common value to a selected set of rows. As for
bulk update of assay data rows, you control which fields are
Enabled for update to a new common value you provide. The disabled fields will retain their original values.
Related Topics
