This topic covers the management of samples and types of samples within the Sample Manager application.
Freezer Management AvailableYou can track the storage and usage of samples through the Freezer Management feature. Learn about storing samples in freezers here:
View All Sample Types
To view all the Sample Types defined in LabKey Sample Manager, click
Sample Types on the main menu.

You can select between several ways to view all the samples in the system.
Grid
The grid view of all Sample Types lists the name, description, and other details about each type of sample in the system.
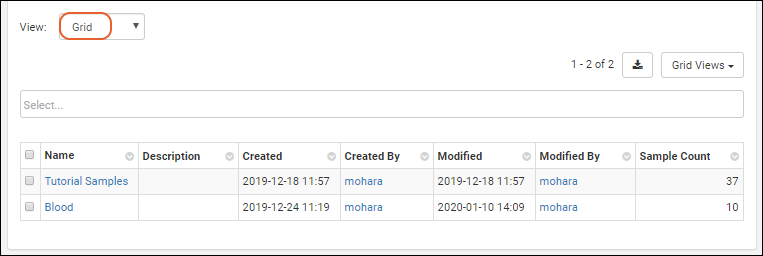
Click the name to
open the set of individual samples of that type.
Heatmap
The heatmap shows a 12 box row for each type, representing 12 months of sample collection. Darker shades are used for months where more samples were collected. Hover over any square for more details.
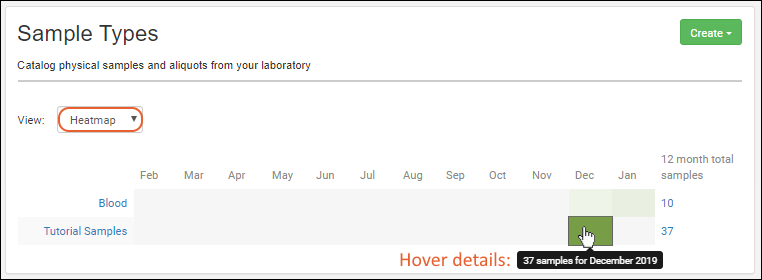
Click a square to open a
grid view of data filtered for that month and Sample Type.
Cards
The card view of all samples indicates the total number of samples for that type.
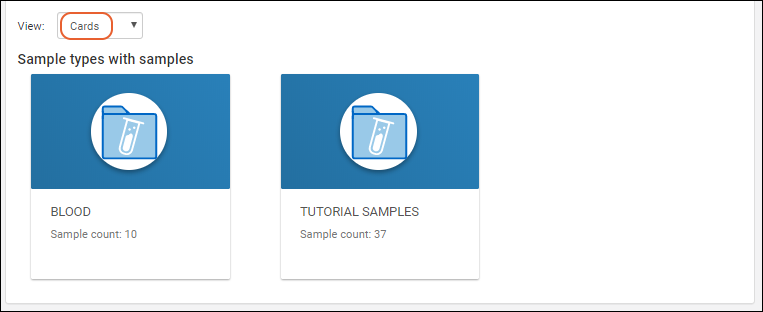
Click a card to see the
grid of data for that Sample Type.
View Samples of One Type
You can open the grid of all samples of a specific type in several ways:
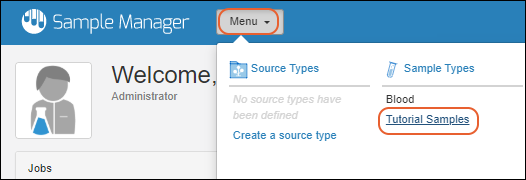
Sample Type
Details are shown in the panel, including the
Description, Naming Pattern, Metric Unit, Parent Import Alias(es), and Source Import Alias(es).
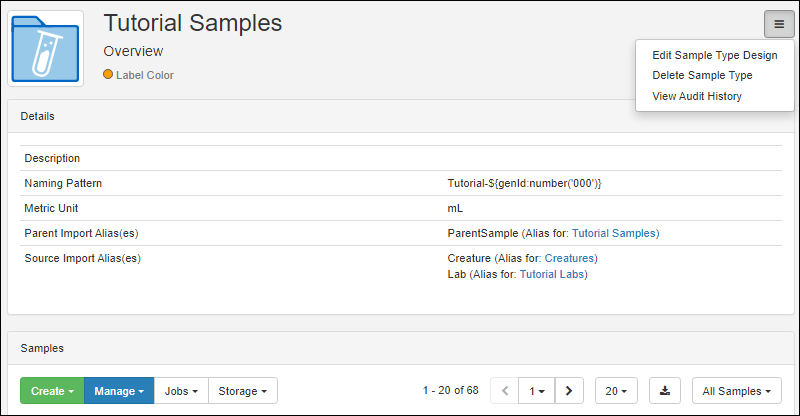
Below the details, the grid of
Samples can be filtered, sorted, and searched using the
omnibox selection field.
Menu
The
menu in the upper right (expanded above) offers these options:
- Edit Sample Type Design: Reopen the existing details and fields; edit using the same interface as you used to create the Sample Type. Note that you cannot edit the Name of the type, and use caution if you change the naming pattern that you will maintain unique names for each sample.
- Delete Sample Type: Note this will delete all sample data as well
- View Audit History: Administrators can view the audit history for this Sample Type from this link.
Manage Menu
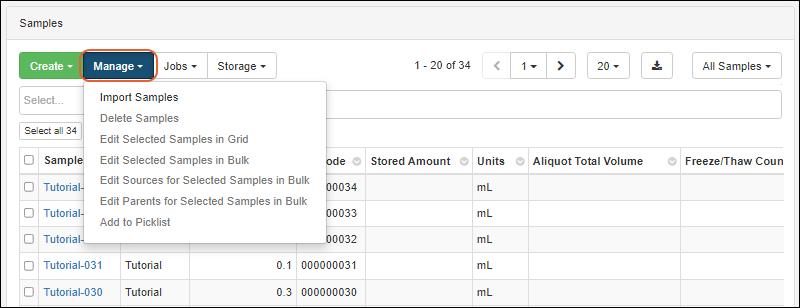
Actions on the
Manage menu for a Sample Type include:
Jobs Menu
The
Jobs menu offers the following options. Learn more at the links:
Storage Menu
The
Storage menu offers the following options. Learn more at the links:
View Individual Sample Details
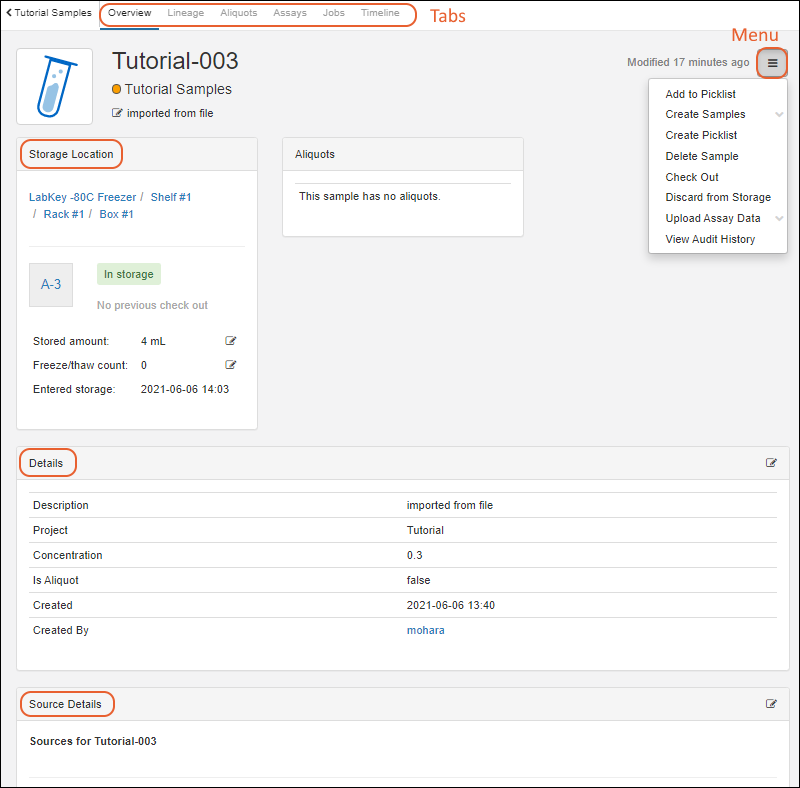
Click the Sample ID for any sample to view the details entered about it. Any description will be shown in the header and properties defined for that type of sample will be shown under
Details with their values. From the
(bars) menu you can create new samples of this type,
delete this sample,
check it out of storage, or upload assay data for this sample. You can also view the audit history for this specific sample.
Panels on the
Overview tab include:
- Storage Location: Shows the current location, checkout status, and storage details.
- Aliquots: Details about any aliquots created of this sample.
- Details: Details about this sample.
- For an aliquot, this panel will include details about the aliquot and about the original sample.
- Source Details: Information about sources of this sample.
- Parent Details: Information about parents of this sample.
The tabs along the top of the details page let you see the following for this specific sample:
- Lineage: View a lineage graph or grid.
- Aliquots: See aliquots and subaliquots of this sample.
- Assays: All assay data available for this sample (and any aliquots).
- Jobs: Find all jobs involving this sample (and any aliquots).
- Timeline: See a detailed timeline of all events involving this sample.
Edit Sample Details
To edit the details for this sample, click the
(Edit) icon for that section. Make changes using dropdowns and selectors similar to when you originally assigned the values. Remember to click to
Save your changes.
Edit Sample Lineage
You can edit the source and parent information (i.e. the lineage) for a sample directly from the sample details page. Use the
(Edit) icon for the
Source Details or Parent Details section as needed. Make changes using dropdowns and selectors similar to when you originally assigned the values. Remember to click to
Save your changes.
More Sample Editing
Learn more about editing samples in this topic:
Delete Samples
Deletion of samples may be necessary for a variety of reasons, and once completed, deletion cannot be undone. You can delete a single sample while viewing it's details page.
- From the detail page for the sample to delete, open the (bars) menu on the right.
- Select Delete Sample.

- You will be asked to confirm the deletion.
You can also delete one or more samples from the grid view for the Sample Type. Note that you can only delete up to 10,000 samples at one time, so if you need to delete more than that, perform the deletion in batches.
- From the grid view for the type of sample to delete, select one or more checkboxes for the sample(s) you wish to delete. To select all samples, use the checkbox at the top of the column.
- Select Manage > Delete Samples.
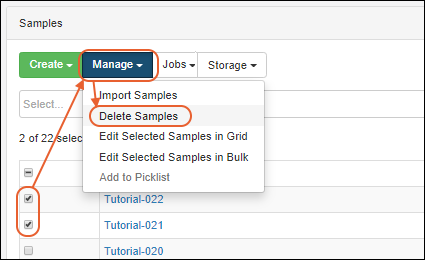
- You will be asked to confirm the deletion.
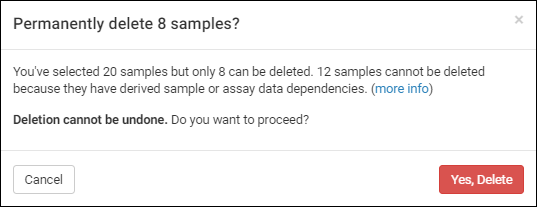
If any of the samples you attempt to delete were used to derive other samples (i.e. are parent samples) or are associated with assay runs (i.e. linked as lookups from data you have imported) you will not be able to delete them. The popup will give you more details and ask you to confirm or cancel the partial deletion of any samples without dependencies.
When you delete samples, they will be automatically removed from any picklists to which they had been added. On affected picklists, users will see a
blank row where the deleted sample used to be.
Related Topics