Create a Wiki |
2025-07-11 |
This topic can be completed using a free 30-day trial version of LabKey Server.
Wikis provide an easy way to create web pages and arrange content for users. Pages rendered with different syntax, such as Markdown, HTML, Wiki syntax and even plain text can be used in combination.
- Wiki Tutorial
- Example Page
- Create a Wiki Syntax Page
- Create a Markdown Page
- Create an HTML Page
- Organize Wiki Pages
- Include Links in Wikis
- View Version History
Wiki Tutorial
To use this topic as a tutorial, you can use any folder where you have administrator access and it is suitable to do testing. For example:- Log in to your server and navigate to your "Tutorials" project, "Collaboration Tutorial" subfolder. Create them if necessary, accepting default types and settings.
- If you don't already have a server to work on where you can create projects and folders, start here.
- If you don't know how to create projects and folders, review this topic.
Example Page
The following example wiki page is shown as an administrator would see it.- The page includes a title in large font.
- Links are shown for editing the page, creating a new one, viewing the history of changes, etc. These buttons are shown only to users with appropriate permissions.
- Links and images can be included in the body of the page.
 The following steps will take you through the mechanics of creating and updating wiki pages. As a resource to use, first download this image file and keep the name demoImage.png to use our examples as written:

Create a Wiki Syntax Page
The default wiki page format is HTML, which is powerful, but not needed for most wiki pages. Wiki syntax is a much simpler format to read and write than HTML, and supports many useful layout and formatting options.- Navigate to the folder where you want to create the page.
- In the Wiki web part, click Create a new wiki page.
- If this link is not present, i.e. another wiki already exists in the folder, use the menu for the wiki web part and select New.
- If you don't see the web part, you can add it.

- In the wiki editor, if the Body section indicates a format other than Wiki Page, click Convert To....
- In the Change Format pop up dialog, select Wiki Page and click Convert.
- In the New Page form, make the following changes:
- In the Name field, leave "default" if this is the first page, or enter a new unique page name like "example".
- In the Title field, paste "Correlation Between CD4 and Lymphs" to match our example.
- Copy the following and paste into the Body field:
1 Results

See the section [detailed results|#more] for a full explanation of the graph below.

1.1 Figure 1

[demoImage.png]

{anchor:name=more}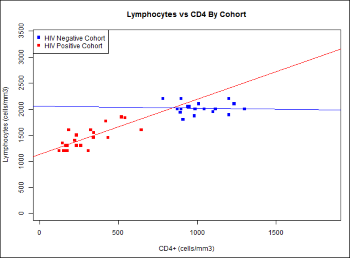
**Figure 1** shows the mean count values for both cohorts at initial subject evaluation. The correlation coefficient between Lymphocyte and CD4 cell counts was significant (0.7). There were 33 subjects in one cohort and 78 subjects in the other cohort. - Uncheck the box for "Show Attached Files". When this box is checked, you will see a listing of all attached file names at the bottom of your page, which can be useful for attachments a user should download, but is unnecessary and potentially confusing when the attached files are images displayed within the text.
- Scroll down and click Attach a file. Click Choose File (or Browse) and select the demoImage.png file you downloaded.
- Click Save & Close.
- You will now see your own version of the example wiki shown above.
- You may notice that you see a Pages panel (the wiki table of contents) appears both on the folder home page and on the display page for an individual wiki page.
Create a Markdown Page
Next we'll add with a short text-only wiki using the Markdown rendering option.- In the upper corner of any wiki web part, select New from the (triangle) menu.
- In the New Page form, make the following changes:
- In the Name field, enter "projectx".
- In the Title field, enter "Project X".
- Click the Convert To... button on the right, select Markdown, then click Convert.
- In the Body panel, enter the following text: "Project X data collection proceeds apace, we expect to have finished the first round of collection and quality control by...".
- Notice a brief guide to additional Markdown formatting options appears at the bottom of the editing pane. For more information, see Markdown Syntax.
- Click Save & Close.
- After saving this second wiki, you will be viewing it on a page of it's own. Unlike the first page you created, this one was not automatically added to a web part on the home page of the folder.
- Notice that you now have a link near the top of the page Collaboration Tutorial. You can click it to return to the main folder page. The Pages web part (the table of contents) in the right hand column shows a link to your new page.
Create an HTML Page
HTML formatting can provide additional control over the layout and rendering of any wiki page. You can use either the visual tab or source tab where you can directly edit the HTML source. As a way of comparing to the wiki syntax above, we'll show how the same page would look using HTML syntax, but with another page as the 'detailed results' link target.- In the Pages panel, either on the main page or while viewing an individual page, click the , and select New.

- In the New Page form, make the following changes:
- In the Name field, enter "projectz".
- In the Title field, enter "Project Z".
- Click Convert To....
- In the Change Format pop up dialog, select HTML (if it is not selected by default), and click Convert.
- Notice the Body section now has two tabs: Visual and Source. Use the Source tab for this example.
- Paste the following into the body panel:
<h3 class="heading-1">Results</h3>
<p>See the section <a href="projectx">detailed results</a> for a full explanation of the graph below.</p>
<h3 class="heading-1-1">Figure 1</h3>
<p><img src="demoImage.png" alt="" /></p>
<p><strong class="bold">Figure 1</strong> shows the mean count values for both cohorts at initial subject evaluation. The correlation coefficient between Lymphocyte and CD4 cell counts was significant (0.7). There were 33 subjects in one cohort and 78 subjects in the other cohort.</p> - Scroll down and click Attach a file. Click Choose File (or Browse) and select the demoImage.png file you downloaded.
- Uncheck the box for "Show Attached Files". When this box is checked, you will see a listing of all attached file names at the bottom of your page, which can be useful for attachments a user should download, but is unnecessary and potentially confusing when the attached files are images displayed within the text.
- Click Save & Close.
- You have now recreated the example wiki shown at the top of this tutorial page. The link in this case only goes to the "Project X" wiki you created; in practice you could direct this link to any other location where your detailed results were located.
Organize Wiki Pages
Now that the menu on the far right (Pages) contains three links to the new pages, we can show how you might organize and manage multiple pages. To simplify things, first edit the "Correlation Between CD4 and Lymphs" page so that the title is to "Project Y".When you are viewing a page, the title is bolded on the Pages list. As you add pages, links are added to the menu creating a table of contents. You can rearrange their order, and can also arrange your table of contents hierarchically, making some pages "parents", with "children" pages underneath.- In the Pages web part, click Project X.
- Click Manage in the wiki header.

- All sibling pages can be reordered with the Move Up/Move Down buttons, not just the page you selected. Any changes will not be reflected in the Pages web part until you save.
- Using the Parent dropdown, select "Project Z (projectz)". This makes Project Z the parent topic for Project X. Notice the "Project X" topic no longer shows any siblings (as "Project Z" has no other child pages).
- Click Save.
- Notice the Pages web part: any parent page now has a or for expanding and collapsing the table of contents.

Include Links in Wikis
Wiki pages can incorporate links to other pages in the same wiki, wiki pages in other containers on the site, outside websites, and for some formats, on page anchors can provide inter-page links.Inter-page Links
To link to content on the same page, such as to create a table of contents at the top of a topic, you can use either Wiki syntax or HTML. In both cases you need to place a uniquely-named anchor somewhere, then use # syntax to link to it.- In Wiki syntax:
{anchor:name=target}
This is the target text I want to jump to.

And elsewhere, I can [link to that text|#target]. - In HTML:
<p id="target">This is the target text I want to jump to.</p>

<p> And elsewhere, I can <a href="#target">link to that target</a>.</p>
Link to Local Page
To link to a page in the local wiki, you need only name it:- In Wiki syntax, use this to use the page title as display text:
[myPageName]
- In Wiki syntax, use this for the same link with non-title display text:
[Display text|myPageName]
- In HTML, use something like:
<a href="myPageName">Display text</a></li>
Link to Anchor on Another Page
Combine the above two to link to an anchor on another page.- In wiki syntax:
[Display text|myPageName#target]
- In HTML, you can also use controller-action syntax. This is required if linking to an on-page anchor on another page:
<p><a href="./wiki-page.view?name=myPageName#target">Display text</a></p>
Link to Wiki in Another Container
To link to a wiki in another container on a given server, you can use a full path on the current server.- In Wiki syntax, use the "link" (or "new-tab-link") macro, optionally including an on-page anchor:
{link:Display text|/full/path/wiki-page.view?name=myPageName#target} - In HTML:
<p><a href="/full/path/wiki-page.view?name=myPageName#target>Display text</a></p>
Link to Another Site
To link to another server or any outside website, use a full URL.- In Wiki syntax:
{link:Display text|https://www.labkey.org/full/path/wiki-page.view?name=myPageName#target}
{link:LabKey Support|https://www.labkey.org/home/project-begin.view?} - In HTML:
<p><a href="https://www.mydomain.org/full/path/wiki-page.view?name=myPageName#target">Display text</a></p>
<p><a href="https://www.labkey.org/home/project-begin.view?">LabKey Support</a></p>
View Version History
All changes to wiki pages are tracked and versioned, so you can see how a document has developed and have a record of who made changes. To see these features, first make an edit to one of your pages, in order to build an editing history for the page.- In the Pages menu, click Project X.
- Click Edit. (If you do not see the edit link, you may need to log in again.)
- Make some changes. For example, you might add some statement about "details" from Project Z being here (to support the link from the Project Z wiki we included).
- Click Save & Close.
- Click History to see the list of edits.
- Click Version 1. You'll see the original page.
- Click Compare With... and then select Latest Version (your_username) to see the changes made between the two revisions. Green highlighting shows added content; anything removed would be highlighted in pink.
