A wiki is a collection of documents that multiple users can edit. Wiki pages can include static text and image content, as well as embed live data and reports using queries, visualizations, scripts, etc. Wiki pages can be written using plain text, Wiki syntax, HTML, or Markdown.
Once the first wiki web part has been created by an administrator:
- Users with update permissions ("Editor" or higher) can perform all the actions described in this topic.
- Users with insert but not update permissions ("Submitter/Author") can create new pages.
- Users with the site role "Platform Developer" can author and edit pages that incorporate JavaScript <script>, <style>, <object> and similar tags or embedded JavaScript in attributes like onclick handlers.
Learn about how
administrators create the first wiki, display wikis in one or more web parts, and manage other aspects in this topic:
Wiki Admin Guide.
Topics
Wiki Menu
When viewing a wiki web part, the menu is accessed using the
(triangle) menu in the upper right.

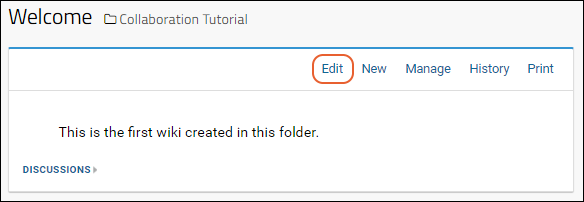
When viewing a wiki page directly, such as after you click on the title of the web part, you will see links in the header.

- Edit: Edit the page.
- New: Create a new wiki page.
- Manage: Change page order and other metadata.
- History: View past revisions of this page, compare them, and revert if necessary.
- Print: Render the wiki in the browser as a printable page. This view can also be generated by appending "_print=1" to the page URL.
- Print Branch: This option is shown only if the page has "child" pages, and will print the parent and all children (in display order) in one printable browser window.
Edit a Wiki Page
To edit the wiki shown in a web part, click the pencil icon next to the title or choose
Edit from the
wiki menu.

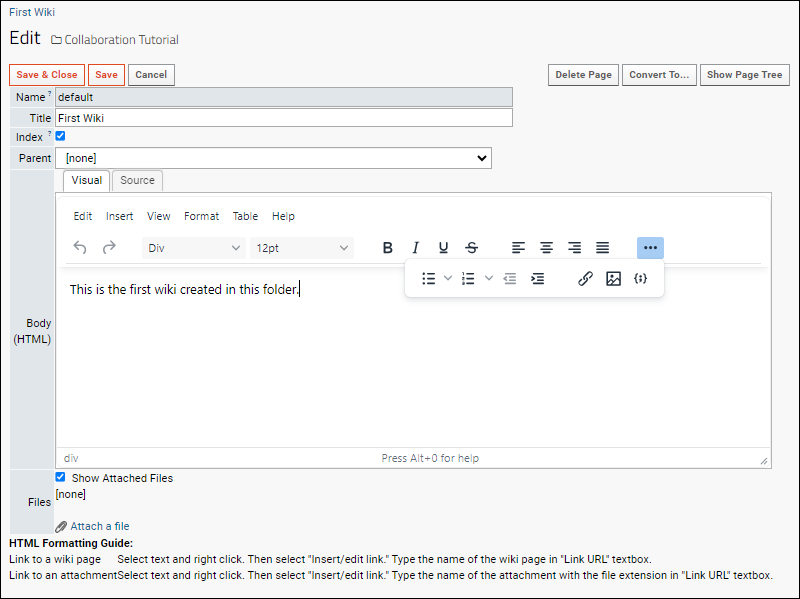
- Name: Required. The page name must be unique within the folder.
- You cannot edit the page name from this interface; use the Manage option to change the name and optionally include a page alias so that links to the original name will continue to work.
- Title: The page Title is shown in the title bar above the wiki page, and web part frame, if shown.
- Index: Uncheck if the content on this page should not be indexed. Note that it will not be hidden, it will just not show up on searches from other containers.
- Parent: The page under which your page should be categorized, if any, creating a hierarchy of wiki 'nodes'.
- Using page parents can help users find related topics more easily; the 'ancestors' of a given page are shown in a breadcrumb trail at the top of the page view.
- Pages without parents are all shown at the top level of the table of contents.
- Body: This section contains the main text of your new wiki page. The sidebar specifies the format in use; this can be changed using the Convert to... button in the upper right.
- Files: You can add and delete files and attachments from within the wiki editor.
The buttons above the editor panel are largely self-explanatory:
- Save & Close: Saves the current content, closes the editor and renders the edited page.
- Save: Saves the content of the editor, but does not close the editor.
- Cancel: Cancels out of the editor and does not save changes. You return to the state of the page before you entered the editor.
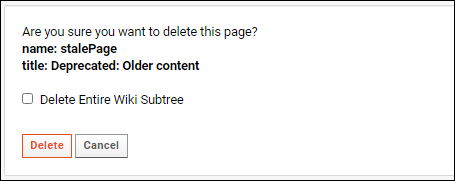
- Delete Page: Delete the page you are editing. You must confirm the deletion in a pop-up window before it is finalized. If the page has any children, you can check the box "Delete an Entire Tree/Node of Wiki Pages" to delete all the child pages simultaneously.
- Convert To...: Change the syntax used for this page.
- Show/Hide Page Tree: Toggle the visibility of the table of contents within the editor, which can be helpful when linking wikis. This has no effect on the visibility of the table of contents outside of the editor. Use the / icons to expand and collapse nodes in the page tree.
Changing Wiki Format Types
The
Convert To... button opens a pulldown menu which allows you to change how the wiki page is defined. Each format option shows a few notes at the bottom of the page about formatting and links.
Options from simplest to most complex:
- Plain text: Simply enter the text you want to display.
- Wiki page: Use special wiki markup syntax to format the text you want to display. This is the recommended format as it is easy to use and contains many powerful formatting features. See also: Wiki Syntax.
- Markdown: Enter text using Markdown formatting syntax to control how it is displayed. The markdown gets translated on the fly into HTML. See also: Markdown Syntax.
- HTML: Enter HTML markup on the "Source" tab in the body of the wiki editor to format your text and page layout.
- Note that when using the "HTML" syntax option, there is a "simple" page editor available from the menu and you'll need to click Advanced Editor to open the full editor.
- The "Visual" input tab allows you to define and layout the page using common document editor tools and menus. Additional control and options are also possible when directly entering/editing the HTML source for the page.
- Menus available include "Edit, Insert, View, Table, and Help". Toolbar buttons let you undo, redo, set the style (Div > Headings, Inline, Blocks, Align), font size, as well as bold, italic, underline, strikethrough, and more. Hover over any tool to learn more. Click the ellipsis to show any remaining tools on narrower browsers.
- When a page contains elements that are not supported by the visual editor, you will be warned before switching from the "Source" to "Visual" tab that such elements would be removed if you did so. Examples include but are not limited to <i>, <form>, <script>, and <style> tags.
- Best practice is to save changes on the "Source" tab before switching to the "Visual" tab, and vice versa. If you want to check how the wiki will appear, do so using a separate browser tab. Not all elements on the visual tab will exactly match the end view. You may also want to copy the HTML content to an outside document for safekeeping and comparison if you are concerned.
- If you accidentally save a document that is missing any content removed by switching to the "Visual" tab, you can restore the prior version from the page History.
Please note that your
content is not automatically converted when you switch between rendering methods. It is usually wise to copy your content elsewhere as a backup before switching between rendering modes, particularly when using advanced layouts. You may also choose to open a view of a wiki page in one browser window and the editor in another, particularly when changing from an HTML-source page to a simpler to edit type like Wiki syntax.
Using File Attachments in Wikis
Below the body in the wiki editor, the
Files section enables attaching images, downloadable files, and other content to your page.
- Add Files: Click "Attach a file", then "Browse or Choose File" to locate the file you wish to attach. Within the popup, select the file and click "Open." The file will be attached when you save the page. Two files uploaded to the same page cannot have the same name. To replace an attachment, delete the old attachment before adding a new one of the same name.
- Delete Files: Click Delete next to any attached file to delete it from the page.
- Show Attached Files: If you check this box, the names of the files are rendered at the bottom of the displayed page. This can be useful when attachments should be downloaded, but unnecessary when the attachments are images displayed within the text.
If you want the user to be able to download a non-image file, without showing the attached filenames at the bottom, in wiki syntax you can use the
same square bracket linking syntax as for images:
[FILENAME]
OR
[Display text|FILENAME]
Show/Hide Attachment List
The list of files and images can be shown at the bottom of a wiki page, or hidden by using the
Show attached files checkbox within the editor. When attachments are shown, they will be listed at the bottom with a divider like this:

If you are writing an HTML format wiki and wish to hide the "Attached Files" line border, include this styling in your page source:
<style>
.lk-wiki-file-attachments-divider
{
    display: none;
}
</style>
To hide the dividers on all pages, you can include this same css in your
project or site wide style sheet.
Add Images to Wikis
To add images to a wiki-language page, first
add the image as an attachment, then refer to it in the body of the wiki page:
- Wiki syntax: [FILENAME.PNG].
- HTML source editor: <img src="FILENAME.PNG"/>
- HTML visual editor: Place the cursor where you want the image, and either click the image icon on the toolbar, or select Insert > Image. Enter the filename as the Source and click Save. Note that the visual editor panel does not display your image, but you can see "img" in the Path shown at the bottom of the panel when your cursor is on the location of the image.
Embed Data or Other Content in a Wiki
You can embed other "web parts" into any HTML wiki page to display live data or the content of other wiki pages. You can also embed client dependencies (references to JavaScript or CSS files) in HTML wiki pages with sufficient permissions.
Learn more about embedding content in this topic:
Embed Live Content in HTML Pages
Only admins and users with the
"Platform Developer" role can create or edit wiki pages that use JavaScript <script> tags or embedded JavaScript in attributes like onclick handlers.
Manage a Wiki Page
Click
Manage to configure elements of the wiki page other than the contents, such as name, parent, and alternate name aliases.
Learn more in this topic:
Delete an Entire Tree/Node of Wiki Pages
When you delete a wiki page that is the parent of one or more other pages, you have the option of simultaneously deleting all the children (and subchildren if such exist). From the parent page, click
Manage or
Edit, then
Delete. Check the box to "Delete Entire Wiki Subtree."

Wiki Table of Contents
The web part
Wiki Table of Contents lists all pages in the folder to help you navigate among them. The page you are viewing will appear in bold italics (for this page,
Wiki User Guide). Click on any page to open it.
- / icons: Expand or collapse parent/child nodes within the wiki.
- Expand/Collapse All: Use these links to expand or collapse all nodes in the wiki.
- Previous/Next: Use these links to page through the wiki.
The
(triangle) menu in the header of the
Pages wiki table of contents web part contains these options:
- New: Create a new wiki page. Remember to select the page order and parent as appropriate.
- Copy: Administrator only. Copy the entire wiki (all wiki pages) to another container. See also : Wiki Admin Guide
- Print All: Print all wiki pages in the current folder. Note that all pages are concatenated into one continuous document.
Related Topics