This topic describes how to edit and manage existing assay designs. To create new designs, see this topic:
Describe Assay Data Structure
View All Assay Designs
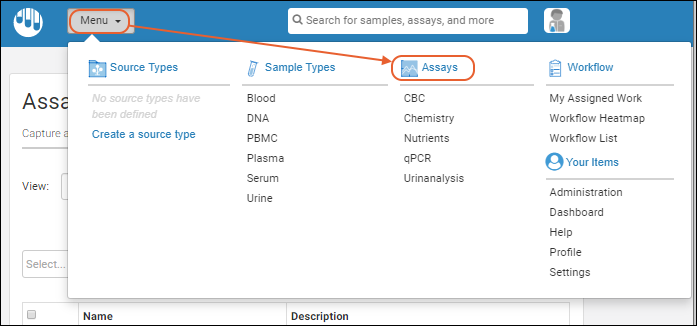
The assays defined are all listed on the main menu under
Assays. To see the list of assays as a heatmap or a grid, click the heading
Assays.

By default, you will see the
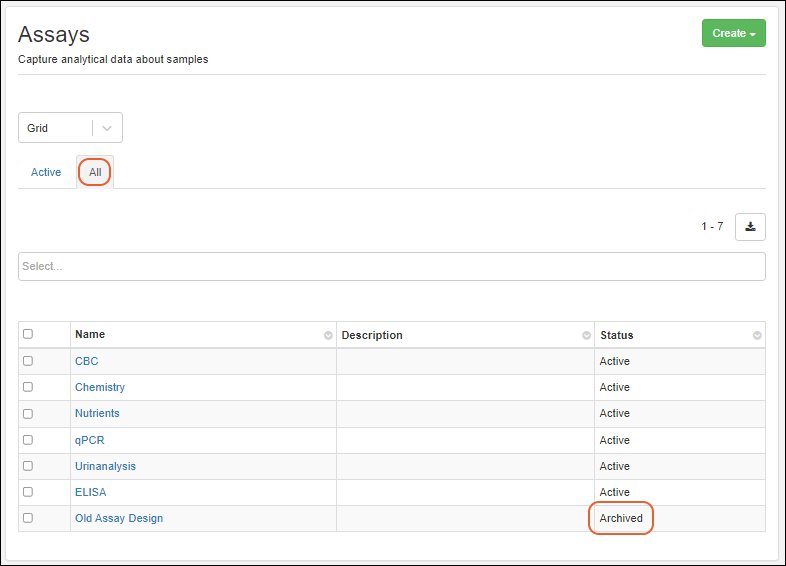
Grid listing the name and description of each defined assay. The
Active tab is shown by default; click the
All tab to also see
archived assay designs.
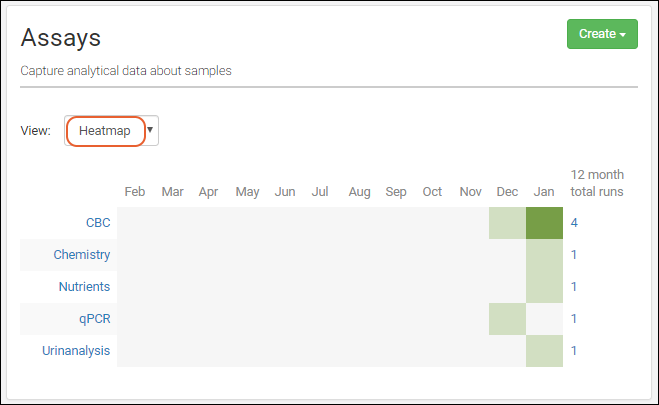
Select
Heatmap from the
View menu to see a visual representation of relative count of runs over the past 12 months for each assay. Darker blocks indicate more runs. Hover over any block for details.

Manage Assay Design
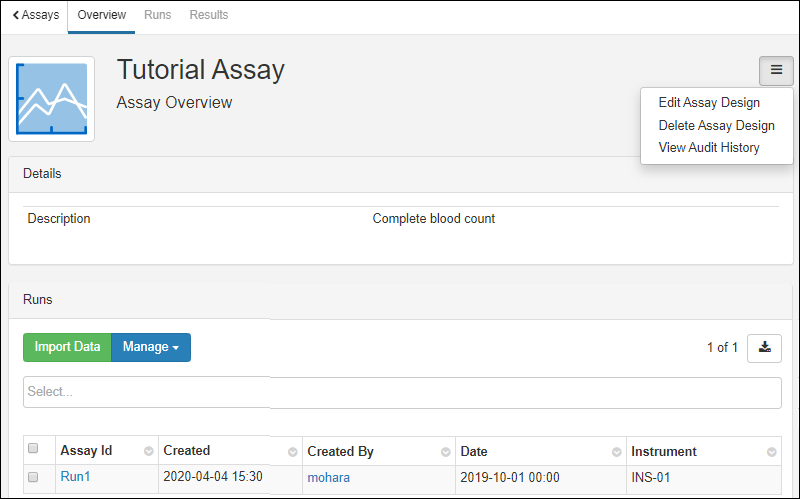
Click the name of any assay from the main menu, grid, or heatmap to open the overview page for that assay. You will see the assay description, as well as a grid of runs.

Use the
(three bar) menu in the upper right to
edit or delete the assay design. Administrators can also view the audit history for this assay.
In addition to the overview tab, tabs for runs and results for the assay are available in the upper left. Click
Runs for the grid of runs and
Results for the grid of result data.
From any page within the assay interface, you can click
Import Data to import a new run.
Edit Assay Design
Click the name of any assay from the main menu or assay grid to open the overview page.
- To edit the design select > Edit Assay Design.

- The panels for editing properties and fields in your assay will open.
- Use the field editor to adjust as needed. Remember that if you delete any fields, all their data will be deleted as well.
- When finished making changes, click Save.
Note that you have the ability to edit the assay results field mapped as a sample lookup. Use caution if you change the sample lookup for this field, as it may change or remove the links in your existing assay results.
For instance, if you create an assay design that maps result data to "All Samples", import some data mapped to samples of both "Blood" and "Serum" types, and then later edit this sample lookup to map results to only "Serum" samples, the existing run results linked to "Blood" samples will show only the row and not the link.
You can work around this limitation by defining a copy of the assay design mapped to a narrower set of samples instead of changing the mapping lookup in the original assay design.
Delete Assay Design
Click the name of any assay from the main menu or assay grid to open the overview page.
- To delete the design select > Delete Assay Design.

- Note that when you delete a design, all runs of data associated with it will also be deleted. Deletion cannot be undone.
- Confirm in the popup to complete the deletion.
Archive Assay Design
Assay Designs can be hidden from certain views by unchecking the
Active checkbox in the
Assay Properties panel. Archived, or inactive, designs are not shown on the main menu or available for new data entry through Sample Manager, but existing data is retained for reference.
Using the archive option can be helpful when a design evolves over time. Making the older versions "inactive" will ensure that users only use the latest versions. An assay design may be reactivated at any time by returning to edit the design and checking the
Active box again.
When viewing all assay data for a sample, both the active and archived assays will be shown if there is any data for that sample.
On the main
Assays dashboard, you will be able to find inactive assays by switching to the
All tab.

Related Topics

