This topic describes how a user would check a sample out of storage, such as for use in running an assay, and then check it back in later, recording the volume consumed as well as incrementing the freeze/thaw count where applicable. Note that to check samples in and out of storage, the user (or administrator) must have been granted the
Storage Editor role.
Check Out
To check out samples, you have many options in the interface:
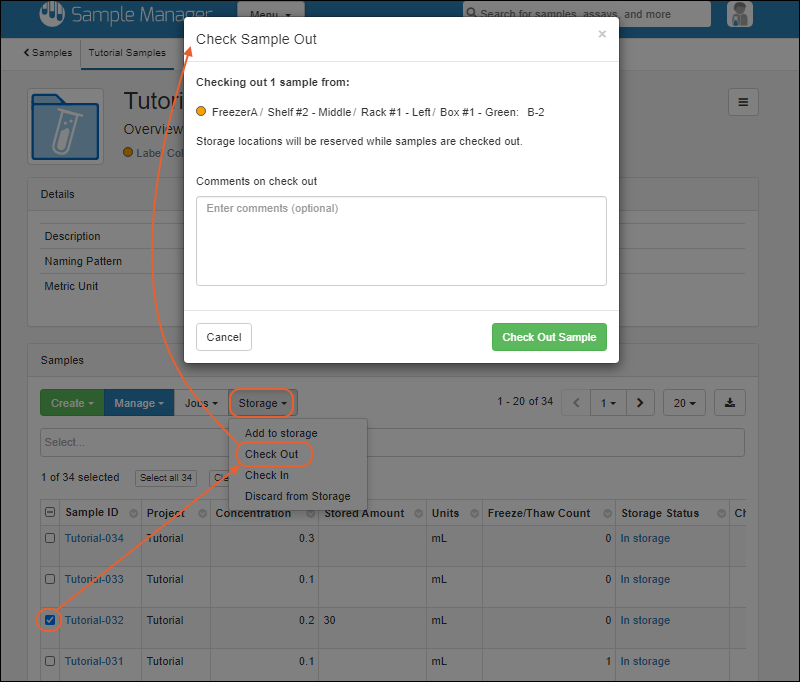
- Navigate to the storage location, select the sample or samples you want, and click Check Out.
- From any grid of samples, including in a workflow job, use checkboxes to select the sample(s) you want and select Storage > Check Out.
- From the sample details page, select > Check Out to check out a single sample.
In the popup, you will see the specific storage location, and be able to enter
Comments on check out that will be recorded with this action. Note that when you check samples out of the system, their storage locations are reserved while they are checked out.

Click
Check Out Sample(s).
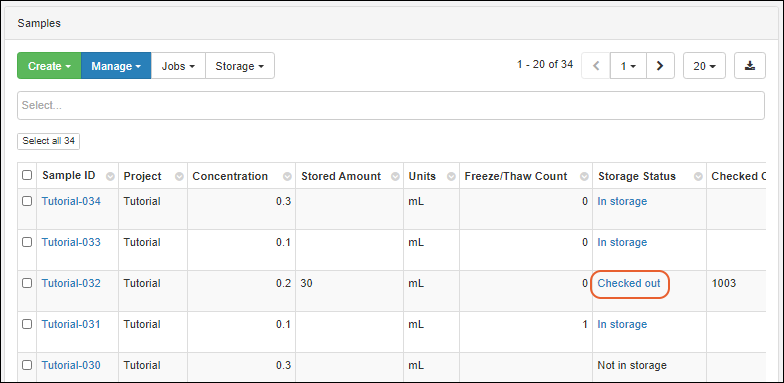
While samples are checked out, they will show "Checked out" as their
Storage Status in any grids. Click the linked "Checked out" message to go directly to the storage details for that sample.

Check In
When finished with a sample, you also have several options:
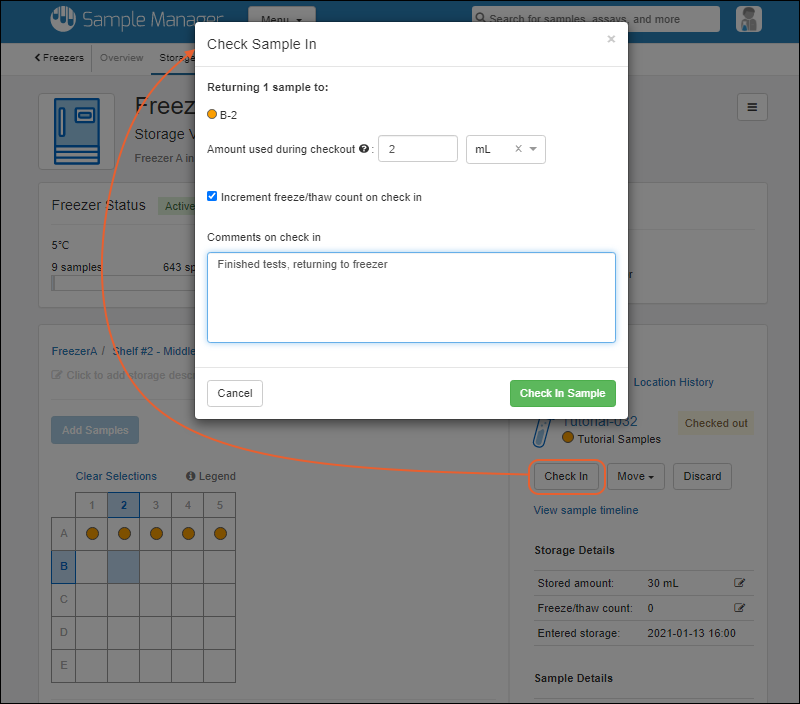
- Navigate to the storage location, select the space(s) reserved for the sample(s) you are checking in, and click Check In.
- You can check one or more samples in from a samples grid, including a workflow job, by selecting the row(s) for the sample(s) and choosing Storage > Check In.
- From the sample details page for a sample that is currently checked out, you can select > Check In (otherwise the "Check Out" option will be shown on this menu.

- In the popup:
- Enter the Amount used during checkout.
- By default, the system will Increment freeze/thaw count on check in, under the assumption that you thawed the sample to use it and it will freeze again. If this is not true, you may uncheck this box.
- Enter Comments on check in to be recorded (Optional).
- Click Check In Sample(s).

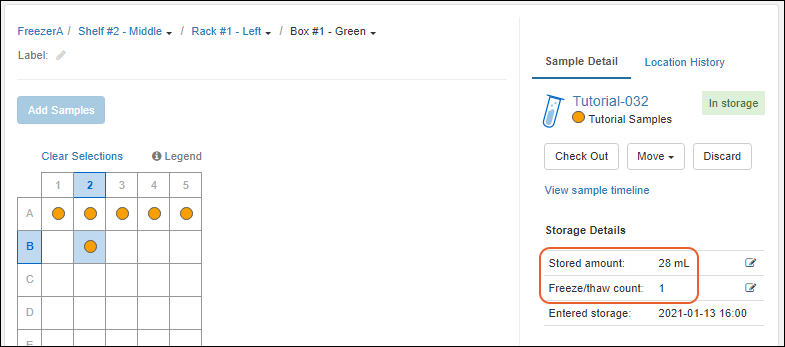
Once your sample is checked back in, you will notice the
Stored amount has been decremented by the amount you used, and the freeze/thaw count incremented by one unless you unchecked the box.
Note that the units for entering the amount you used defaults to the units set for the Sample Type, but this can be adjusted if needed, within the liter or gram set of units available (i.e. if you are measuring in mL, you could have used uL or L). The system will convert the measurement in the units you enter to decrement the correct amount from the stored total which will always be shown in the storage unit set for the type.
Related Topics