This topic describes how to navigate grids of data in LabKey Sample Manager, and how to use the "omnibox" above each grid to filter, search, and sort your data.
Select Rows
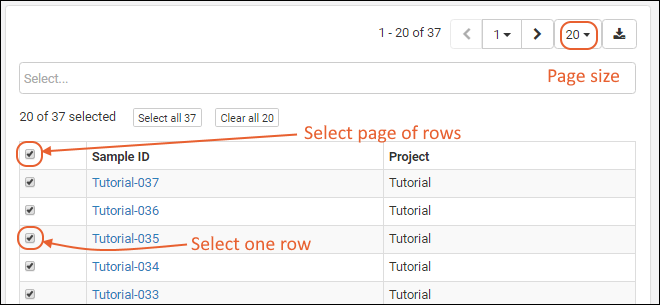
In LabKey Sample Manager, data is shown in grids, usually with a column of checkboxes on the left for selecting each individual row. Check the box in the header row to select all rows on the current page.
Once you've selected a page of rows, you will see buttons to select all the rows, or clear those already checked.
Page Through Data
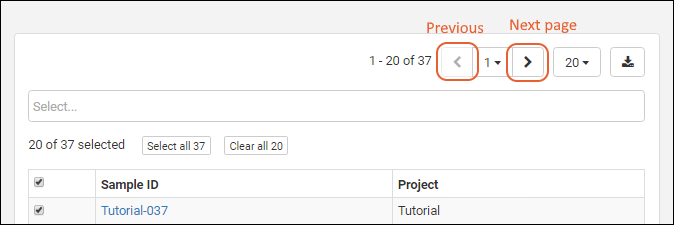
Large sets of data are displayed on a paged grid. In the upper right, you see which rows you are viewing (here 1-20 of 37). Buttons give you the following control:
- Step one page forward or back using the "<" and ">" buttons. Shown here, the 'Previous page' button is grayed out when you are on the first page.
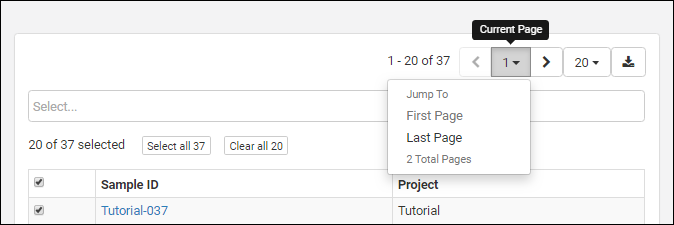
- The page number you are on is shown with a dropdown menu. You can jump to the first page or last page and see a count for the total number of pages.
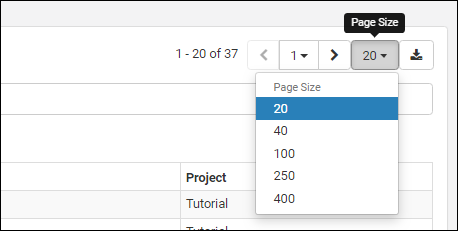
- Click the page size button to change how the grid is paginated. Options: 20, 40, 100, 250, 400.
Sort by Column Value
In each header, click the
to sort the grid by the values in that column. Select either ascending or descending sort.

Once you have sorted a column, notice an indicator lozenge will be added to the box. The
double caret symbol represents a sort, and the column name is included. Learn more about using the omnibox in the next section.
Omnibox
Above each grid is an "omnibox" which reads "Select..." when empty. Click to see the option menu:
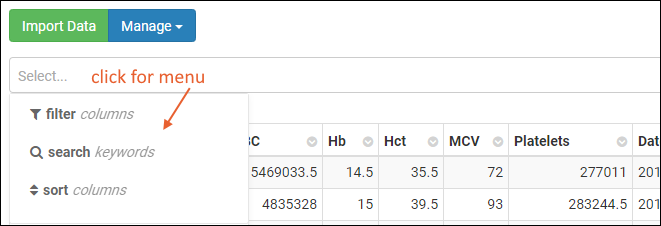
You can create as many independent filter and sort elements as you like. Only one search and view can be applied at once. Each element applied will appear as a separate indicator lozenge in the box. Shown below, two sorts, two filters, and one search are all applied to the grid.

Hover over any lozenge in the omnibox to reveal an "X" for deleting that element. The other modifiers applied to the grid will not be impacted if you delete one.

Click the lozenge away from the X area to see the action represented in text form. Here, an ascending sort on the Hb column. You could directly edit the text version here; for example, replace "asc" with "desc" and the sort will reverse when you hit enter.

Filter
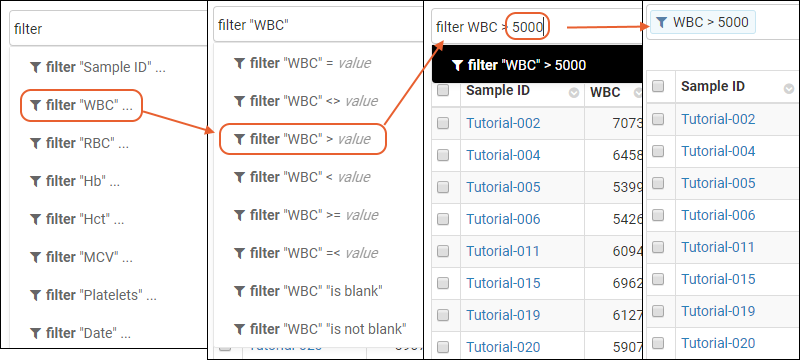
To filter, click in the omnibox anywhere except in an active lozenge and select
filter columns... from the menu. Then select the desired column, filter operator, and select or type the desired value. Your filter will be represented in the indicator created, shown below, the steps to creation of a filter on the "WBC" column showing only values greater than 5000.
Search
Select
Search keywords from the omnibox menu to search the text fields in the grid. The word search will appear in the box (left hand image below). Type the keyword you want to search for and hit enter to search. You can also simply type any word in the omnibox and the default action is search (right image below).

Once you have created a search, you can click the indicator lozenge for it to change the keyword searched for.
Sort
You can initiate a search from a column header (as described
above) or select
Sort columns from the omnibox menu. Select the column to sort, and the "asc" (ascending) or "desc" (descending) direction.

You can apply sorts on multiple columns to a grid.
Export Data
To export the data in the grid, click the
(Export) icon and select the format for export:

Notice the menu indicates whether you are exporting rows you have selected or the entire grid. To export the full grid, select no rows.
Related Topics