Sources help you track where your samples came from and trace common attributes across sets of samples from the same source. Sources can be:
- Physical like labs, vendors, locations, studies, etc.
- Biological like patients, mice, trees, cell lines, etc.
In this tutorial step, we create and populate two kinds of sources, "TutorialLabs" and "Creatures", then associate the tutorial samples we created earlier with some of each. After doing that, we will examine the kinds of detailed information that are available for samples including timeline and lineage.
Create a Source Type
Creating source types is very similar to the creation of sample types covered in the
first step of this tutorial.
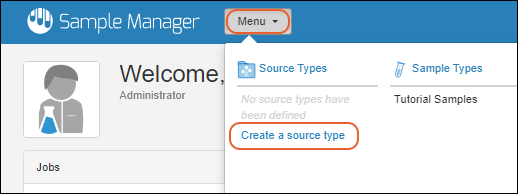
- From the main menu, look under Source Types and click Create a source type.
- Once source types have been created, click Source Types, then select Create > Source Type.
- Enter:
- Name: Tutorial Labs
- Delete the default Naming Pattern that is provided (and ignore the placeholder text). We will provide unique source names when we create them.
- Click the Fields section to open it.
- Download this spreadsheet and drop it in the upload area: TutorialLabSources.xlsx
- You will see the inferred fields.
- Notice the blue banner informing you that reserved fields were found and are not shown. This refers to the "SourceId" field that is present in the data file and cannot be "defined again."
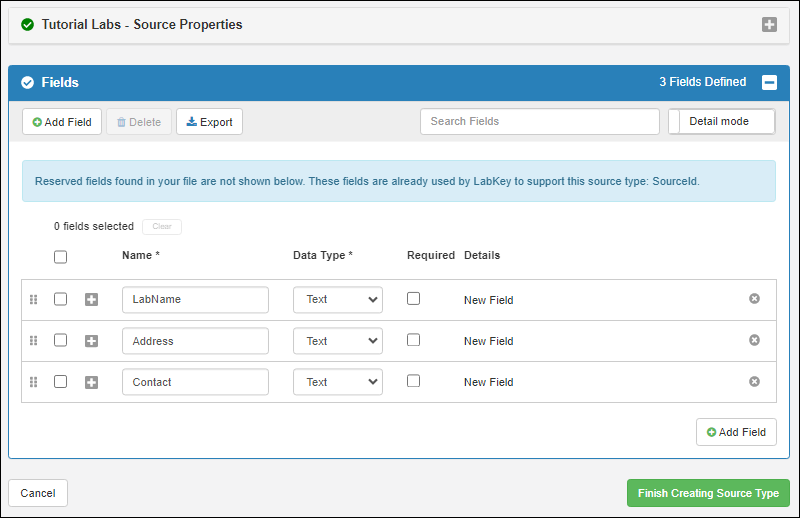
- Click Finish Creating Source Type.
You can now select your new source from the
Source Types section of the main menu.
Create Sources (Populate a Source Type)
- Select your Tutorial Labs Source Type from the main menu, if you navigated away.
- Select Create > Tutorial Labs.
- Click Import Sources from File.
- Drag and drop the same "TutorialLabSources.xlsx" spreadsheet into the target area.
- You'll see a preview of the first three lines.
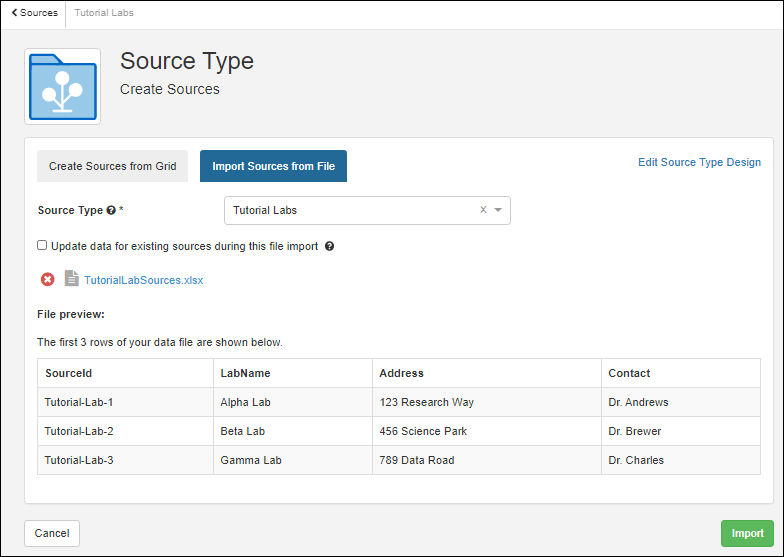
- Click Import to import the file and create these sources.
Create and Populate a Second Source Type
Follow the two sections above to create another source type to use for our tutorial samples, in this case a biological one.
- From the page for the "Tutorial Labs" you just imported, select Create > Source Type.
- Name this type "Creatures".
- Delete the Naming Pattern.
- Download and use this file for inferring the Fields: TutorialCreatures.xlsx
- Click Finish Creating Source Type.
- Select Create > Creatures.
- Click Import Sources From File.
- Drag and drop the same "TutorialCreatures.xlsx" spreadsheet into the target area.
- Click Import.
Now you have two Source Types and we can mark the Samples as having come from one or both types of source.
Associate Samples with Sources
When we originally created the "Tutorial Samples" type, we had not defined these sources, and did not include a way to reference them in the Sample Type definition.
We can now use these new sources when using the
Create Samples from Grid entry method for new samples, or by directly editing each individual Sample. Learn more in this topic:
Associate Samples with Sources.
For this tutorial, we want to add Source information to our existing Samples. To do so, we must modify the Sample Type design to identify the columns where we will import source information, i.e. the source aliases.
- From the main menu, select the Tutorial Samples Sample Type.
- Select > Edit Sample Type Design.
- Click Add Source Alias.
- Enter the Source Alias "Lab", and select the Tutorial Labs Source Type.
- Click Add Source Alias again.
- Enter the Source Alias "Creature" and select the Creatures Source Type.
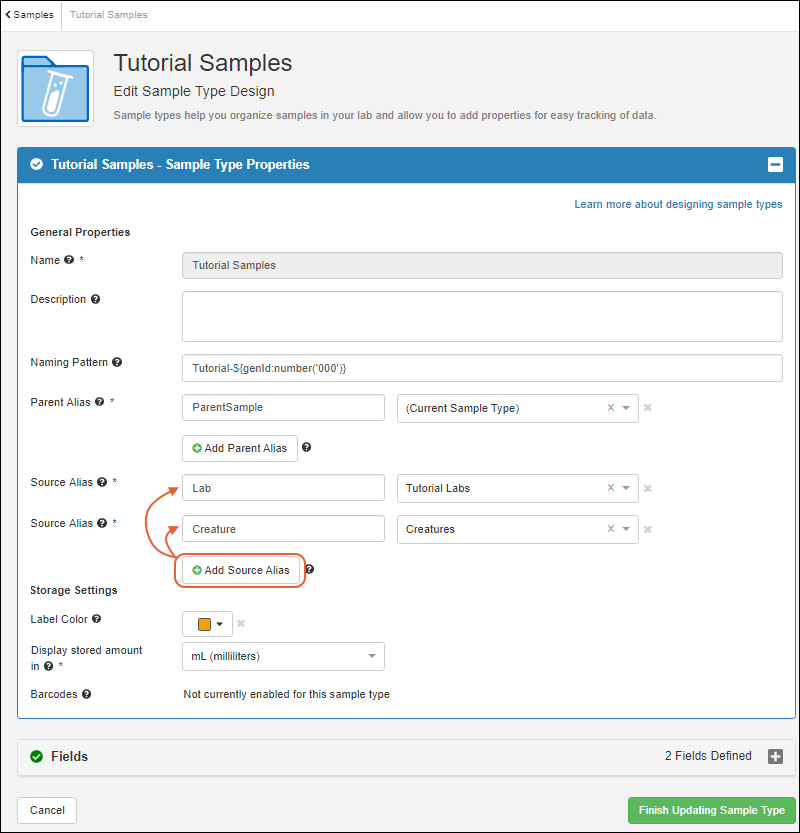
- Click Finish Updating Sample Type.
We now will update the samples we created earlier.
- If any samples are currently selected, click Clear All.
- Select Create > Tutorial Samples.
- Click Import Samples from File.
- Check the box to Update data for existing samples during this file import.
- Download this file: TutorialSamplesWithSources.xlsx then drop it into the target area.
- You'll see a preview:
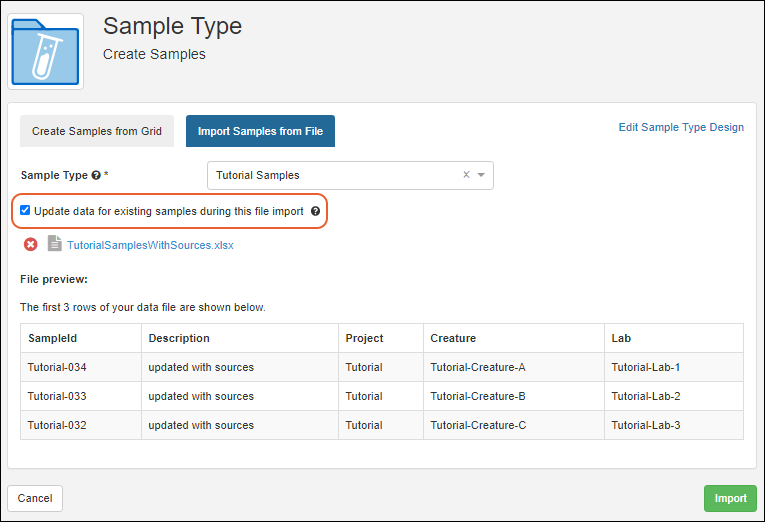
The existing samples have now been updated with source information.
View Lineage
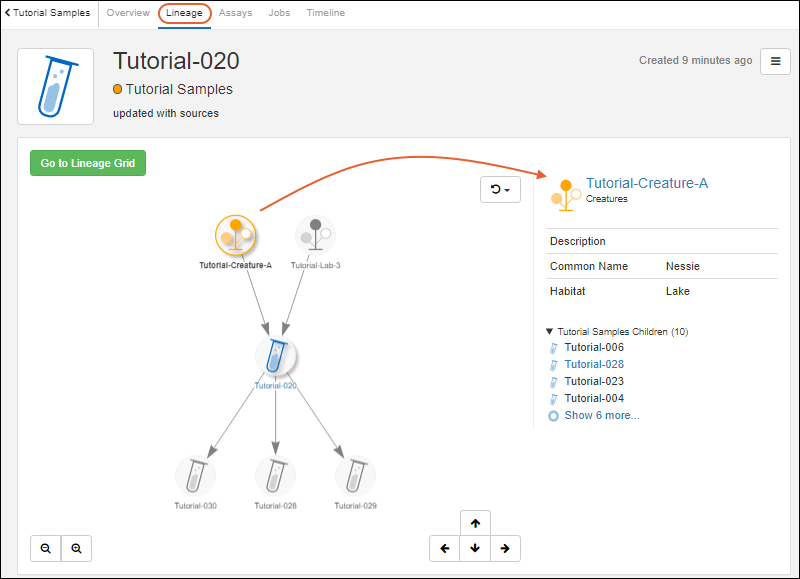
As an example, click the
Tutorial-020 sample.
Click the
Lineage tab. You'll see a graphical representation of the creature and lab sources for this sample, as well as child samples 'derived' from it.
Click the icon for either source to see more details about it in the panel to the right.
View Timeline
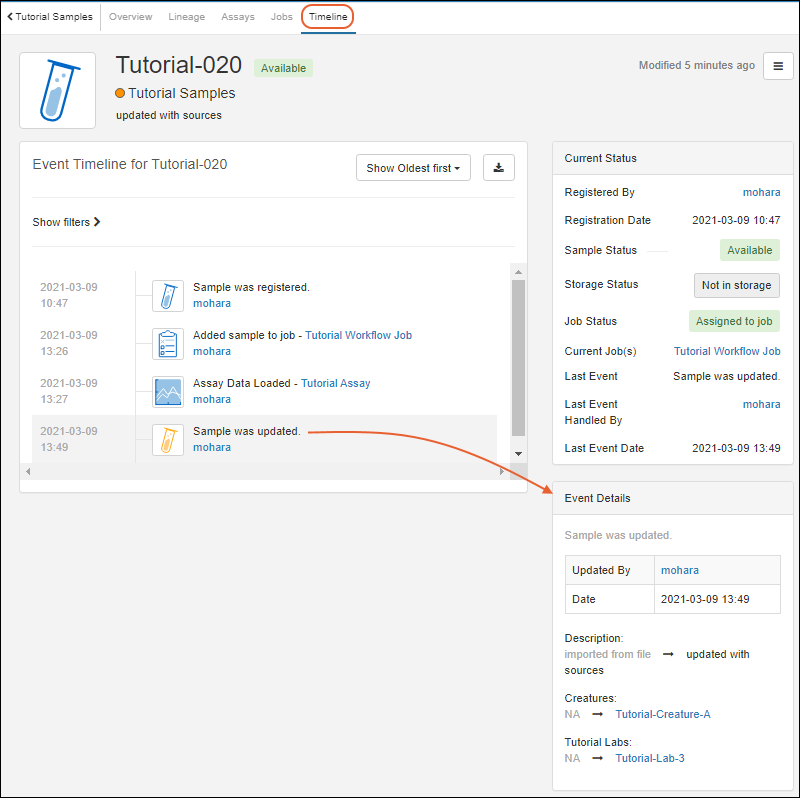
In the previous step, we saw how assay data import is included in the timeline for a sample, open the
Timeline tab for the "Tutorial-020" sample to see that the update we just completed was also recorded for this sample. Clicking the timeline event populates the
Event Details panel.
Learn more about the timeline here:
Sample Timeline
Congratulations!
Now that you have learned to use Sample Manager with our tutorial content, you are ready to start loading your own data into the system. Learn more in the documentation for each area: