This topic covers editing and updating workflow jobs and tasks. Administrators and users with the
Workflow Editor role can edit workflow jobs and tasks.
Update Job Details
In the left-hand panel you can edit many common job details including
Owner, Notify list, Priority Level,
Start and Due Dates, and the Description. Use dropdowns or
icons to edit. Click outside the selection area for an element to save changes.
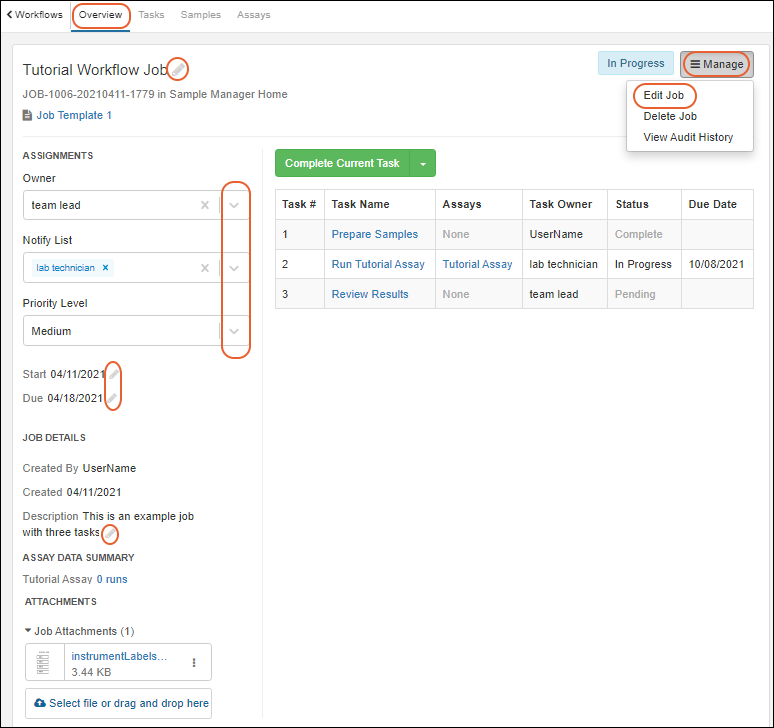
You can also use
Manage > Edit Job to
edit all job details.
Rename a Job
To change the name of the job, click the
next to the name, type the new name and hit return (or click away) to save.
Add or Delete Files from a Job
Files attached to a job are shown in the
Attachments section on the
Overview tab.

- Add a new file using the Select file or drag and drop here box.
- Use the menu to:
- Download
- Remove Attachment
Manage Menu
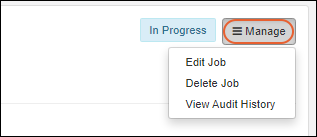
The
Manage menu includes:
Edit Tasks: Add, Reorder, Edit, Delete
Note that you cannot edit any tasks that have been completed. You also cannot edit tasks in a job that was created from a template, or in a job from which a template was created. A banner message and icons will inform you when tasks are not editable. The process in this section applies to non-template jobs with tasks that may be edited.
To adjust the tasks involved in the job, select
Edit Job from the
Manage menu.
You will see the same interface you used to
define job details, tasks, and samples.
- Click the Tasks section.
- Any tasks that have been completed (or are part of a template) cannot be changed and will be shown with a icon.
- Add more tasks via Add Task. (You cannot add tasks to a job created from a template.)
- Reorder tasks by dragging and dropping the six-block handle on the left.
- Delete a task by clicking the icon on the right.
- Click a task panel to open the details for editing.
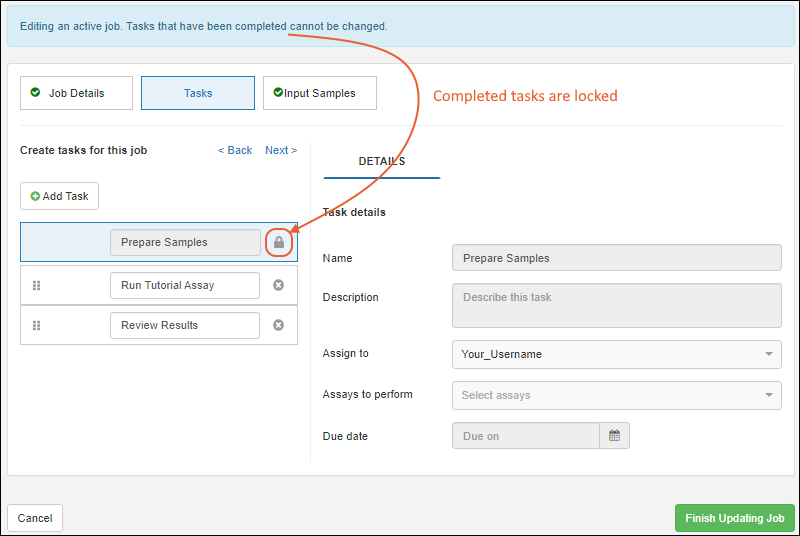
Make the necessary changes and click
Finish Updating Job when you are finished.
Edit Samples Assigned to a Job
While
editing job tasks, you can use the
Input Samples section to adjust the set of samples within the job. You can also click the
Samples tab from within the job and click
Add Samples to open the same interface.
Follow the instructions in
this topic to search for samples within the job wizard. If you only need to add or remove samples, it may be easier to follow the steps below to
add or
delete samples from jobs.
Add Samples to a Job
From the main menu, click the name of the type of samples you wish to add to open the grid of available samples. Alternatively, choose
Picklists from the user menu and click the name of the curated picklist you want to use. Select the desired sample(s) using the checkboxes and select
Jobs > Add to Job. In the popup, select the desired job by name from the dropdown. Click
Add to Job.
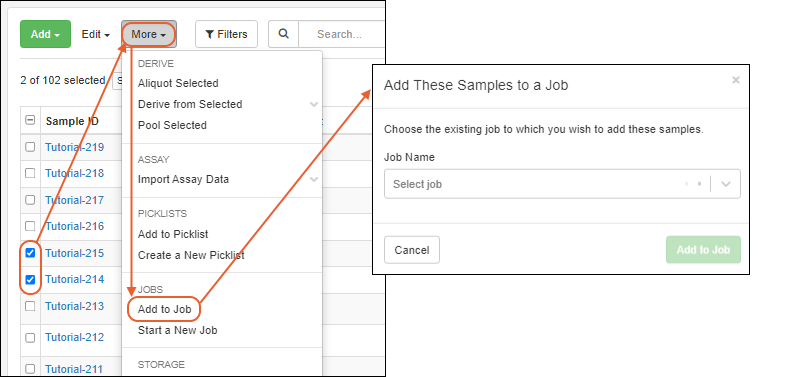
If you attempt to add samples that are already included in the job, they will be skipped automatically and only new samples will be added.
Delete Samples from a Job
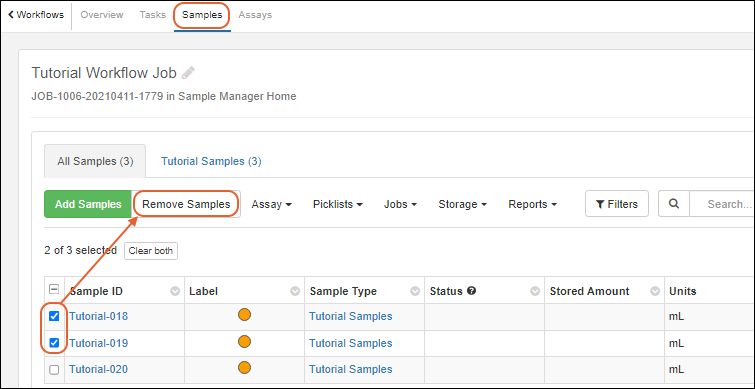
Open the job and click the
Samples tab. Select the sample(s) you wish to delete and click
Remove Samples.
Reactivate Closed Task
To reactivate a closed task, click the
Tasks tab in the upper left, then click the name of the closed task to select it. It will be shown with a green check icon. In the following image, "Prepare Samples" is in a closed state. Click
Reactivate Task.
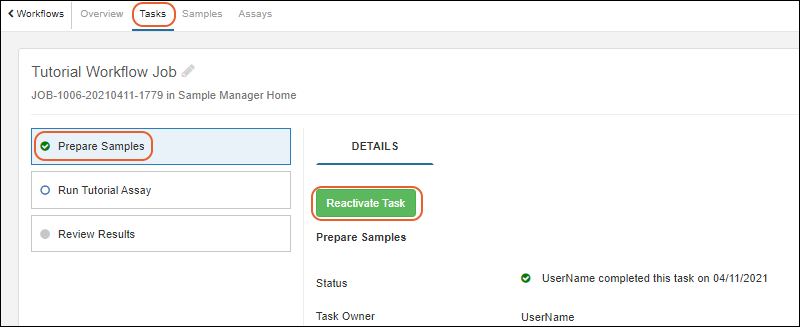
You will be asked to confirm the action, and when completed, the checked box icon will disappear and the task will be restored to an "In Progress" state. You may also want to
leave a comment when you reactivate a task, explaining the action.
Reactivate Completed Job
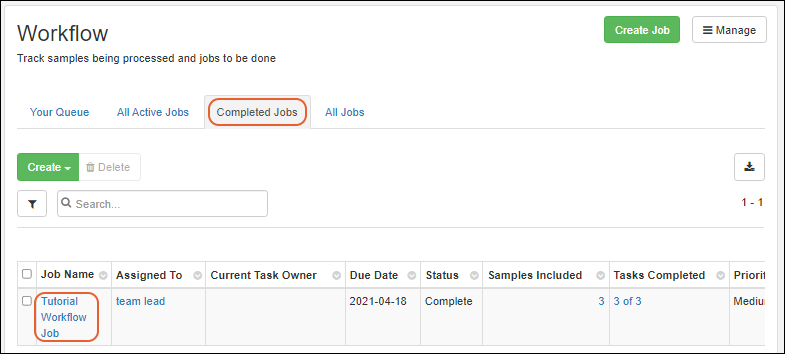
If you need to reactivate a job that was marked completed, find it by opening the
Workflows page from the main menu and clicking
Completed Jobs. Click the desired job name to open it.
Click
Reactivate Job. You will be asked to confirm the action.
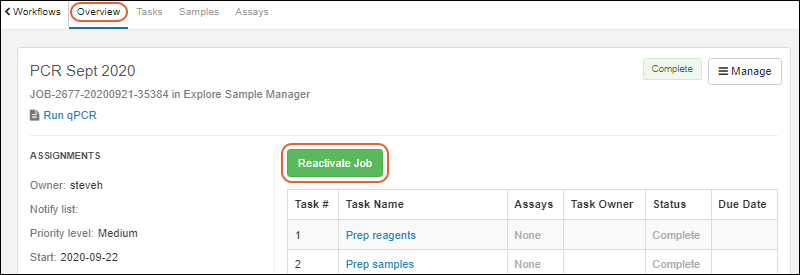
When you reactivate a job, the last task of the job is also automatically reactivated. If you would like to reactivate additional tasks, follow the steps
above.
Delete Job
To delete a job that is no longer necessary, select
Manage > Delete Job.

Related Topics
