Your physical storage can be duplicated within the Storage Management tools by customizing the storage units that can hold samples directly, known as
terminal storage units. Non-terminal storage units like shelves and racks cannot hold samples themselves, but must have terminal storage units 'within' them. They can be of different sizes, and in the case of structured storage units (boxes, plates, and tube racks), you can also configure the labeling pattern to match existing conventions, making it easy for your users to find the correct positions within these structured layouts.
An administrator can define the storage unit sizes, layouts, and labelling systems that will be available when creating storage in the system.
To manage storage units, select
Storage from the main menu and click
Manage Storage Units in the
Storage List panel. Note that you do not need to have created any storage systems yet to manage the storage units that they will be able to contain.
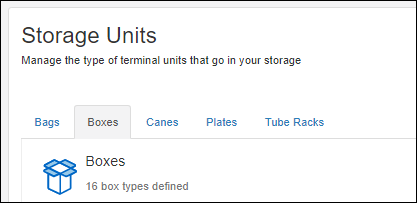
After editing storage units, click
Finish Editing Units to save your changes.
Bags
Bags are a flexible way to store samples. Default bag sizes created in the system can hold 10, 100, 200, or 500 samples.
If you want to add an additional size bag, select the
Bags tab and click
Add a New Bag. There is no internal limit to the number of samples a bag can hold.
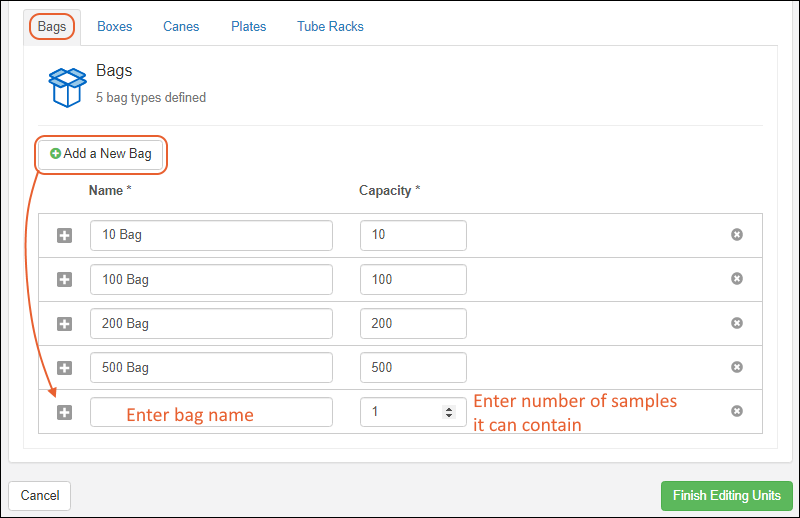
Enter the
Name and
Capacity for the new bag. While it is good practice to use the capacity in the name of the bag, the system does not require it.
To delete a bag type, click the
. You may delete the built-in types if desired.
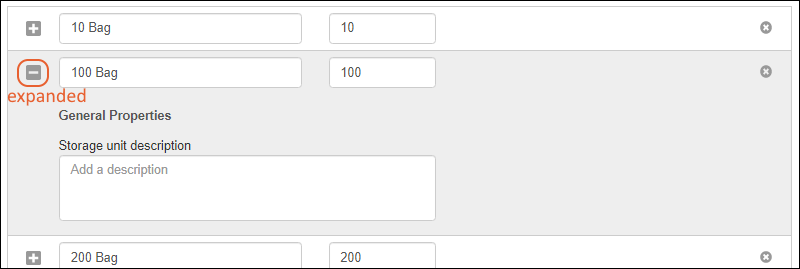
To expand the details for a bag type, click the
icon to expand it. You can add a
Storage unit description to assist your users.
Boxes
Boxes can be of different sizes and layouts, accommodating many types of sample storage. Click the
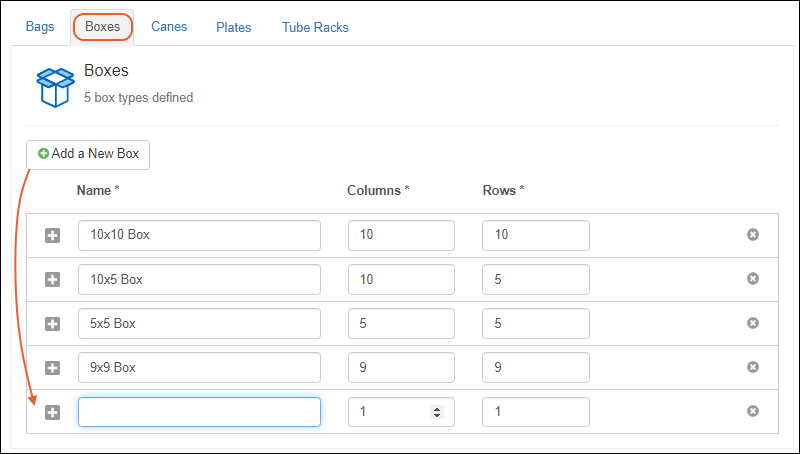
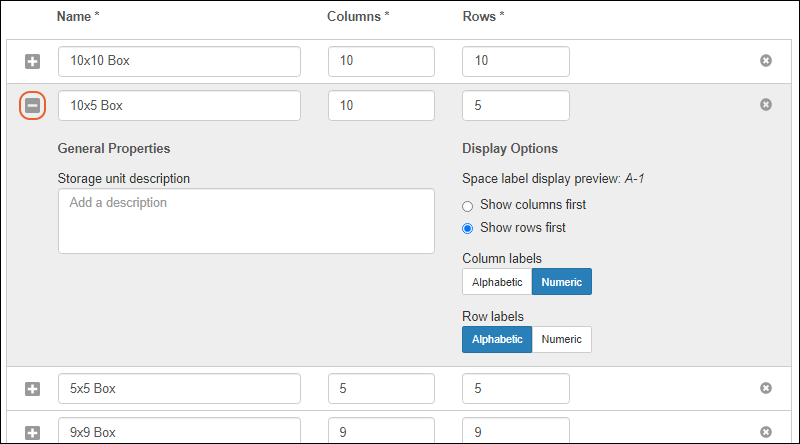
Boxes tab to manage box types. Some common sizes are built in to the system:
- 10x10
- 10x5 (10 columns, 5 rows)
- 5x5
- 9x9
These built-in boxes use a default of alphabetic row labels and numeric column numbers, and by default display rows first, i.e. A-1. All of these default attributes can be edited, or you can add a new box with different attributes.
Click
Add a New Box to add a new one. A box is limited to a maximum of 25 rows and 25 columns.
To expand the details for a box type, click the
icon to expand it.
- You can add a Storage unit description to assist your users.
- Under Display Options you will see a preview of how the spaces in your box will be labeled (shown here "A-1").
- Select either Show columns first or Show rows first. The default is to show rows first.
- Specify for Column labels whether they are alphabetic or numeric. The default is numeric.
- Specify for Row labels whether they are alphabetic or numeric. The default is alphabetic.
To delete a box type, click the
. If a given type is in use anywhere in the storage system, you cannot delete the type. You may delete the built-in types as well, if they are not in use.
Canes
Canes hold a number of samples typically in a vertical alignment. Click the
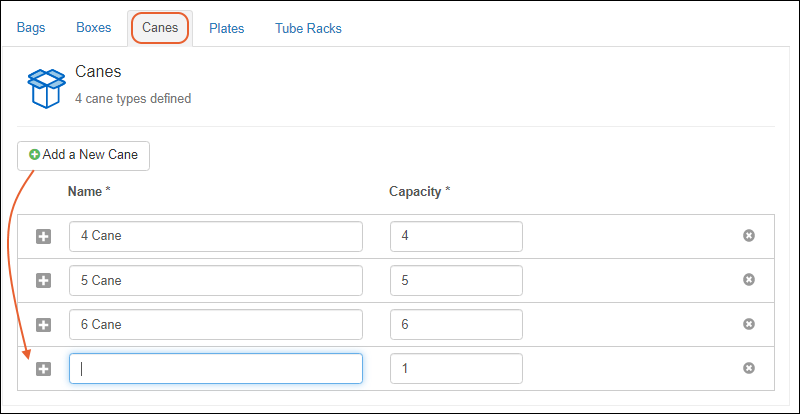
Canes tab to see and add cane sizes. Built-in cane types are named for the sample capacity in the cane:
Click
Add a New Cane to add a new type of cane to hold a different number of samples. There is no system limit to the number of spaces available in a cane.
To delete a type of cane, click the
. If a given type is in use anywhere in the storage system, you cannot delete the type. You may delete the built-in types as well if they are not in use.
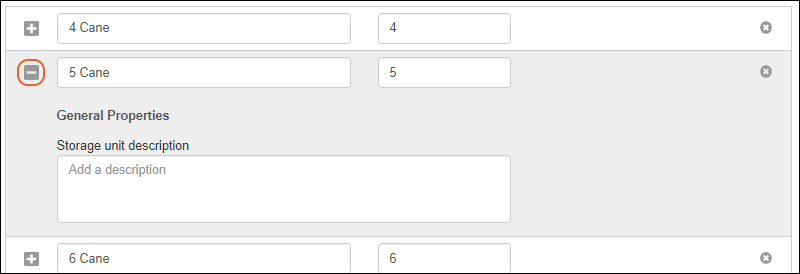
To expand the details for a cane type, click the
icon to expand it.
- You can add a Storage unit description to assist your users.
Plates
Plates can be of different sizes and layouts, accommodating many types of instrument. Click the
Plates tab to see and add plate types. Built-in plate types are:
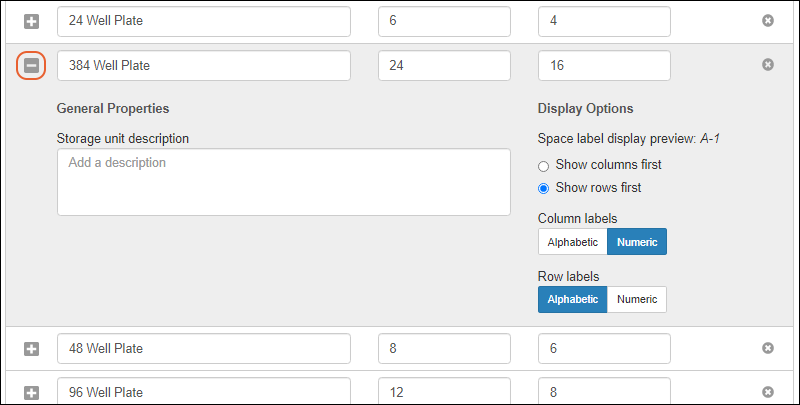
- 24 Well Plate (6x4)
- 384 Well Plate (24x16)
- 48 Well Plate (8x6)
- 96 Well Plate (12x8)
These built-in plates use a default of alphabetic row labels and numeric column numbers, and by default display rows first, i.e. A-1. All of these default attributes can be edited for the built in plates, or you can add a new type of plate with different attributes.
Click
Add a New Plate to add a new one customized to your needs. While our convention is to name plates by the total number of wells, this is not required by the system. Plate sizes are limited to a maximum of 25 rows and 25 columns.
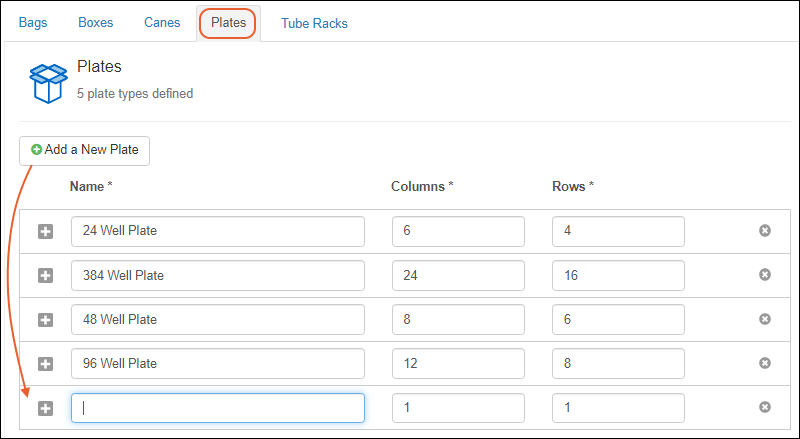
To expand the details for a plate type, click the
icon to expand it.
- You can add a Storage unit description to assist your users.
- Under Display Options you will see a preview of how the spaces in your plate will be labeled (shown here "A-1").
- Select either Show columns first or Show rows first. The default is to show rows first.
- Specify for Column labels whether they are alphabetic or numeric. The default is numeric.
- Specify for Row labels whether they are alphabetic or numeric. The default is alphabetic.
To delete a plate type, click the
. If a given type is in use anywhere in the storage system, you cannot delete the type. You may delete the built-in types as well if they are not in use.
Tube Racks
Tube racks can vary greatly in size and layout. Click the
Tube Racks tab to see and add the types you need. Built-in types are:
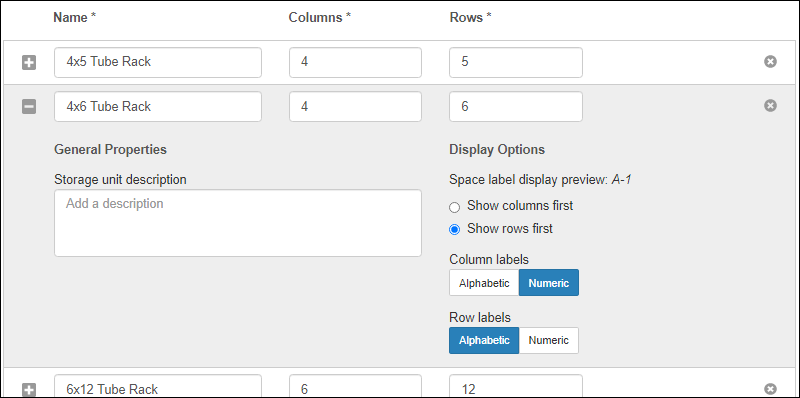
- 4x5 Tube Rack
- 4x6 Tube Rack
- 6x12 Tube Rack
- 6x6 Tube Rack
Tube racks use a default of alphabetic row labels and numeric column numbers, and by default display rows first, i.e. A-1. All of these default attributes can be edited for the built in types, or you can add a new tube rack with different attributes.
Click
Add a New Tube Rack to add a new one customized to your needs. While our convention is to name the built-in tube racks by number of rows and columns, this is not required by the system. Rack sizes are limited to a maximum of 25 rows and 25 columns.

To expand the details for a tube rack type, click the
icon to expand it.
- You can add a Storage unit description to assist your users.
- Under Display Options you will see a preview of how the spaces in your rack will be labeled (shown here "A-1").
- Select either Show columns first or Show rows first. The default is to show rows first.
- Specify for Column labels whether they are alphabetic or numeric. The default is numeric.
- Specify for Row labels whether they are alphabetic or numeric. The default is alphabetic.
To delete a tube rack type, click the
. If a given type is in use anywhere in the storage system, you cannot delete the type. You may delete the built-in types as well if they are not in use.
Related Topics