Many sample creation and management actions for samples in storage can be completed directly from the storage view, simplifying the process for sample managers. This topic outlines these options for stored samples:
Create Samples from Stored Samples
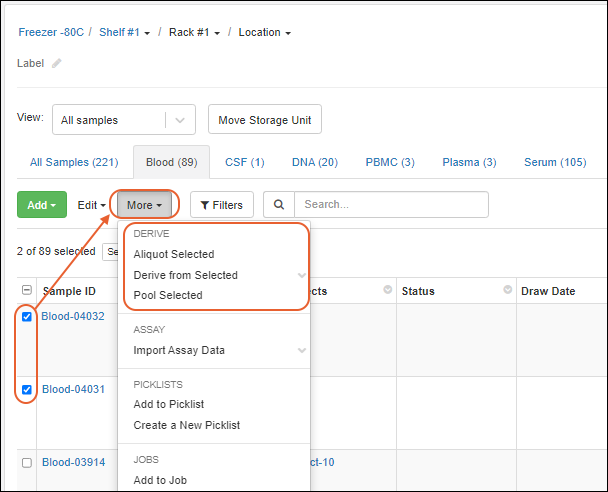
When viewing samples in storage, you can create new derivatives, pooled samples, and aliquots directly. Use the grid view and select the Sample Type of the parent samples from which you want to create new ones. Choose
More > Derive and the desired action.
In the popup, select whether to create
Derivatives, Pooled Samples, or Aliquots, specify how many new samples to create, then click
Go to Sample Creation Grid. Enter the details as for other
sample creation, then click
Finish Creating ## Samples.
You'll see the green success banner and can immediately click
Add them to storage if desired.
Add Stored Samples to Picklists and Jobs
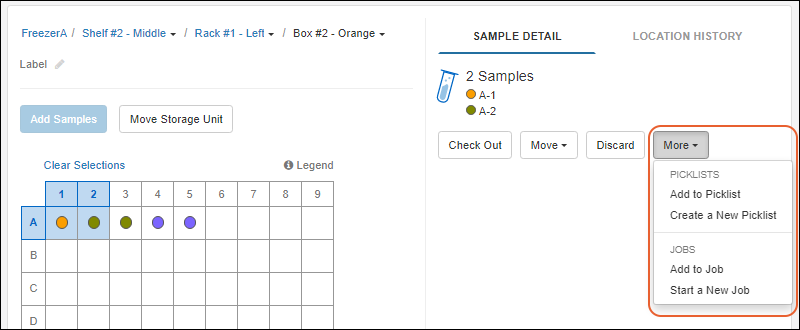
To simplify storage workflows, you can also select samples in storage views and create new picklists and workflow jobs including them, or add them to existing picklists and jobs. You can use the tabs for the specific Sample Type, where you'll use the
usual sample grid menus. Or from the "All Samples" tab or a storage grid view, select samples and choose the desired action from the
Picklists or Jobs menu. Note that on narrower browsers, these buttons will be combined into a
More menu.
Learn more about these processes in these topics:
Edit Storage Details
When a
sample is initially added to storage, an amount (with units) and initial freeze/thaw count are usually provided (for temperature-controlled storage). If they are missing, or if you need to edit this information later, you can do so by clicking the sample, and clicking either
icon in the
Storage Details section to open an
Edit Storage Fields panel.

Update the information in the popup, enter a comment to explain the adjustment you're making (optional), then click
Update Sample to save your change. The comment will be retained in the audit log and timeline for the sample.
Discard Sample from Storage
The action of
discarding a sample from storage does not result in removal of the sample information from the system, only that it is taken from an "In Storage" state to a "Not in Storage" state and details about stored amount and freeze/thaw counts are dropped. This could be related to the consumption of all of the sample, and thus it's no longer being available, or could be temporary and the sample could be returned to storage later.
If instead you want to
delete all data related to a Sample, follow the instructions here:
Delete Samples.
Discarding samples will:
- Remove them from your storage location views.
- No longer retain their stored amounts or freeze/thaw counts (or allow them to be updated).
- Prevent any further check outs or check ins.
- NOT delete the data stored in the system about the samples.
You can discard one or more Samples from Storage in many places throughout the application, including:
- From the Sample details page, select Discard from Storage from the Manage menu.

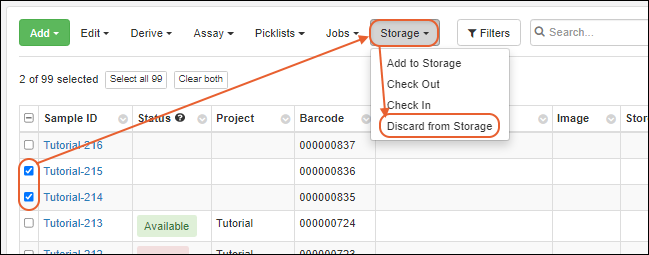
- From a grid of Samples, select samples using the checkboxes and select Storage > Discard from Storage.
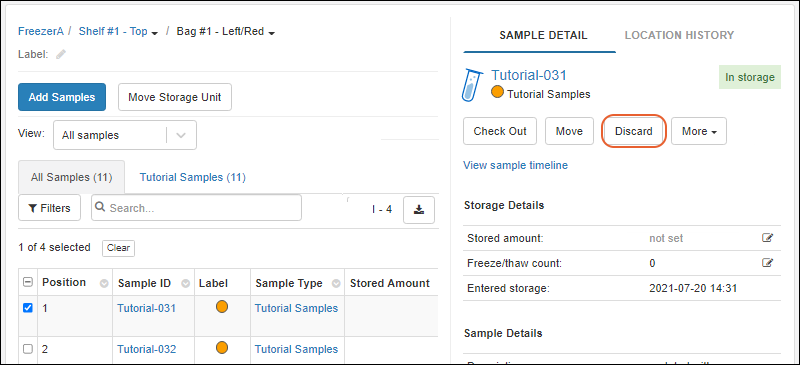
- From the Storage View of the Sample(s) location, select the sample(s), then click Discard.
Update Status During Discard
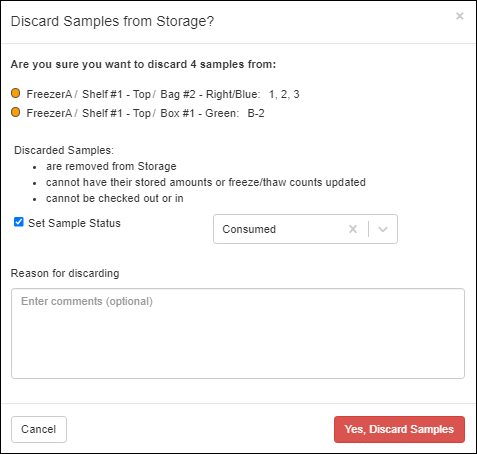
In all methods of discard, you will see a popup detailing the sample(s) you selected to discard. You'll see their locations, a color indicating type, and position information.
You can also check the
Set Sample Status checkbox to assign a new sample status at this time. For example, discarding a sample often means it has been "Consumed".
Enter a comment to accompany the action, if desired, and click
Yes, Discard Samples.
Related Topics