Managing user accounts by
groups can make it more efficient to assign permissions, workflow tasks, and review of notebooks. In many organizations, the specific person assigned to complete a task is not known in advance, but work can be picked up by anyone on a given team.
User Groups
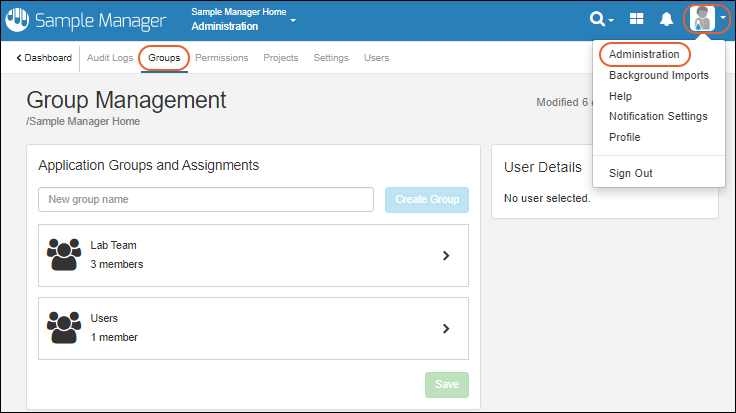
To access the group management page, select
Administration from the user menu, then click the
Groups tab. All existing project level groups will be shown.

Create Group
To create a new group, type the name of the group and click
Create Group.

You'll now see a new tile for your group. Click
Save when ready to save your changes.
Add Users to Groups
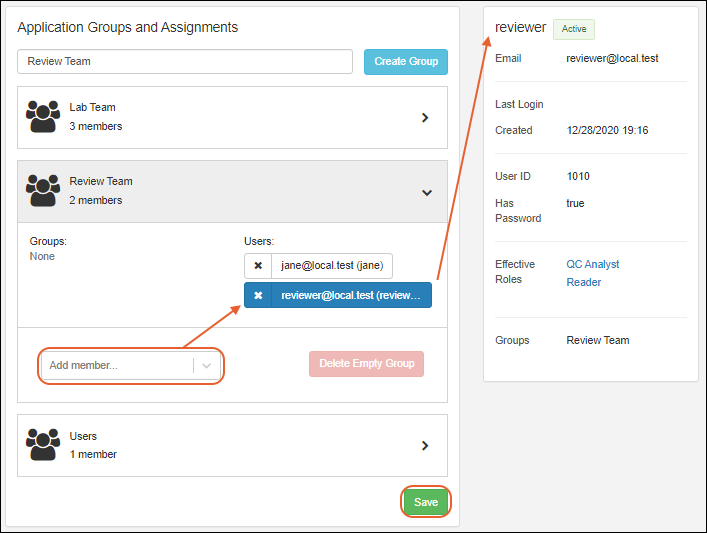
Expand the group by clicking anywhere in the tile and use the
Add member dropdown to add members. You can add individual users, or other groups, to a group. Each time you add a new member, you'll see
User Details on the right.

Click
Save to update groups and assignments.
Grant Permission Roles to Groups
User groups can be added to permission roles just as users can. Learn more in this topic:
When using the Professional Edition, if you want to be able to assign
notebook review to a group, that group must be granted the "Editor" role (or higher).
The "Users" Group
Note that there is always a "Users" group predefined in every project, sometimes used to represent every user with any access to the project, though this is not automatic. Users or groups must be explicitly added to this project group. For example, you might add all the groups you define to this group in order to assign "Reader" permissions and ensure a minimal level of read access to every group member.

You can also choose to delete this group (when it is empty) if you don't want to use it.
Delete Group
To delete a group, you must first delete the members by clicking the
X for each, then click
Delete Empty Group.
Related Topics