Organizations managing multiple storage systems may find it helpful to organize them by
Physical Location, particularly when they may be in different rooms, on different floors, or even in different buildings across a campus.
You could keep track of locations of your storage by using the "Description" field in the Storage Definition, but those details are only available in some areas. By contacting LabKey, we can configure your physical location hierarchy within the application for you, so that you can set the
Physical Location, and then all users can see this information in the application interface.
Configure Location Options
Currently, LabKey will set up your physical storage location options for you.
To get started, contact your Account Manager with the hierarchy of locations you need. For example, you might have two buildings with various possible storage locations in one and a single possible location in another. For example:
myInstitution
│
├───Building 101
│   ├───2nd Floor
│   │   ├───Room 2A
│   │   └───Room 2B
│   └───3rd Floor
│       ├───Lab - Rm 42
│       └───Storage Center
│
└───Building 202
    └───Storage Center
With this information, LabKey will configure the necessary
Physical Location hierarchy for you to use. Storage could be located at any level of this hierarchy, such as "Building 202", if you do not know (or need) details about which floor or room within the building.
Set Physical Location
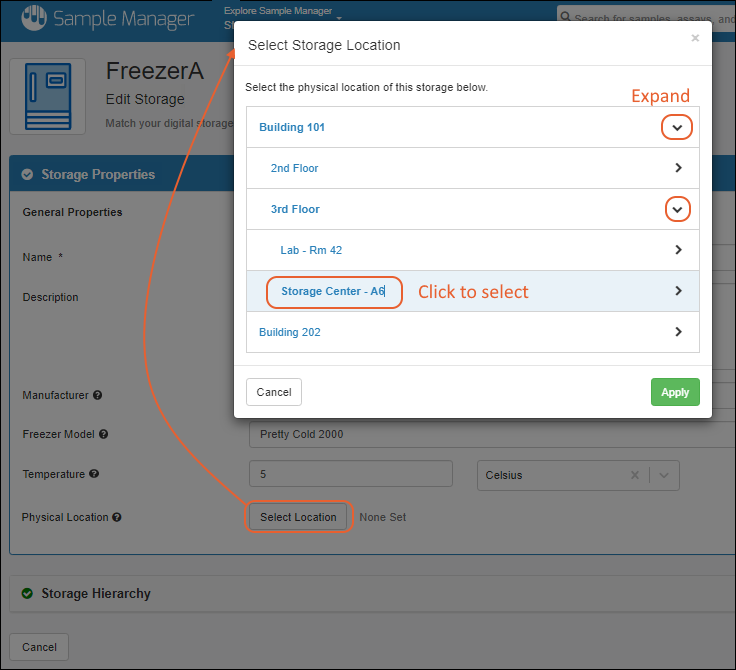
Once LabKey has set up your Physical Locations, you will be able to edit existing storage definitions to specify a physical location for each storage system.
From the main menu or storage dashboard, click the name of the storage, then select
Manage > Edit Storage Definition. Under
Physical Location, click
Select Location.

In the popup, browse the hierarchy to find the physical location for this storage. Click to select it, then click
Apply.
Click
Finish Updating Storage and notice that the
Storage Details panel now lists all 'levels' of the selected location.
Use Physical Locations
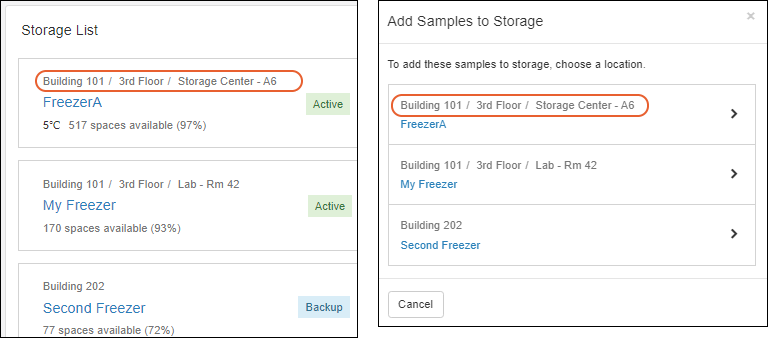
Unlike any location information you might place in the description field, these locations will be shown on the storage dashboard and in the selection popups when deciding where to store or move samples.

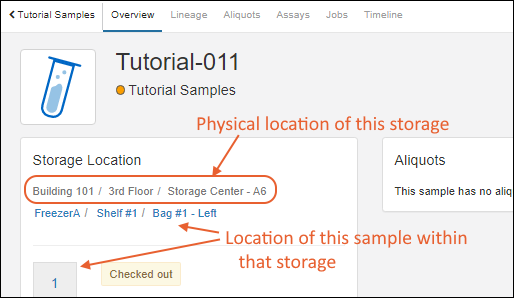
When viewing storage details for a sample, you will see both the physical location of the storage it is in (in gray), and the storage location for that sample within that storage system (in blue). You can click the blue locations within the storage for a grid of all samples stored with the one you are viewing.

Related Topics