Once one or more storage systems have been configured in your system, you will see them in the
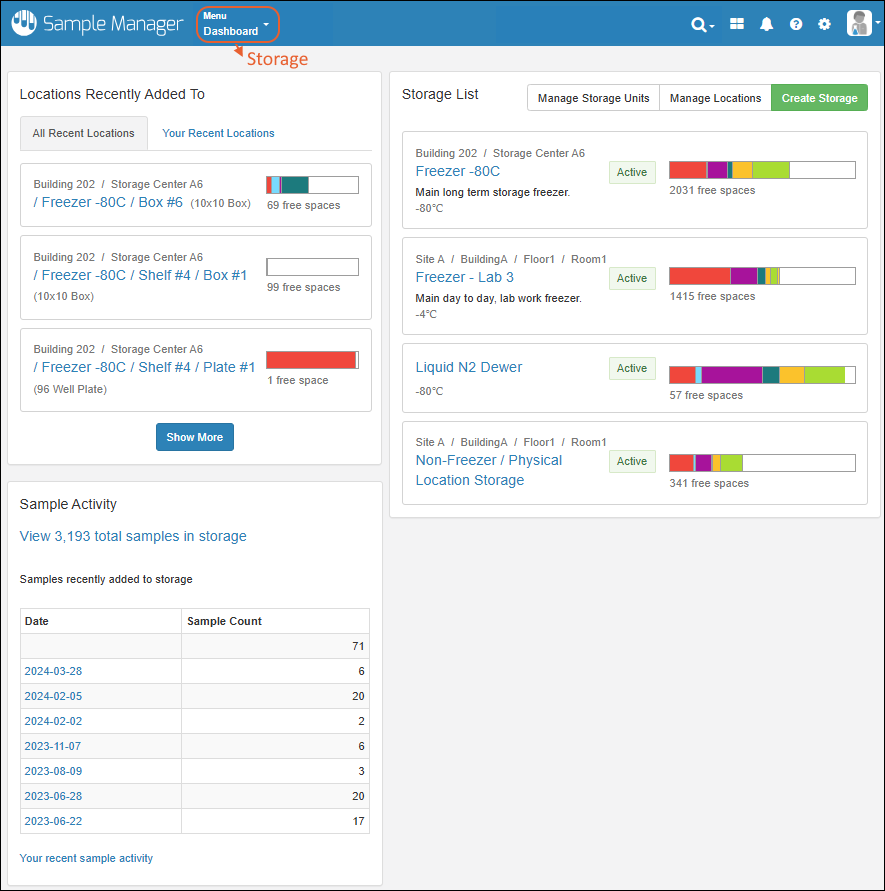
Storage List on the main dashboard. View the overall Storage Management dashboard from the
Storage option on the main menu. Note that some storage management and sample actions require the user to have the
Storage Editor and/or Storage Designer roles. This topic assumes the user has both.

From this
Storage Dashboard, you can see an overview and manage your sample storage.

Locations Recently Added To
The panel titled
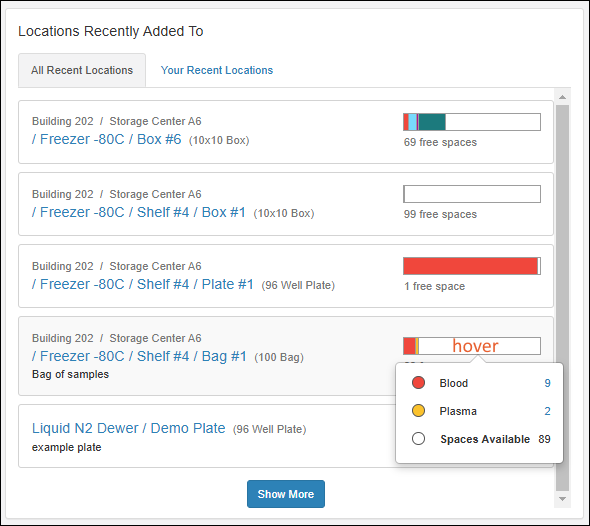
Locations Recently Added To lists the storage units where samples were most recently added. There are two tabs:
- The "All Recent Locations" tab is the default, showing storage locations that have had samples added to them most recently.
- You can also choose "Your Recent Locations" to see where you last added samples, giving you a quick way to jump back to where you were.

Each bar is color coded to show the types of samples it contains; hover for a guide. Click to jump to that location in storage.
The 5 most recent locations are shown for each tab. Scroll down and click
Show More to view the next batch, up to 20 recent locations.
Storage List
The top of the
Storage List shows
Recent Storage, the most recently accessed storage systems for each individual user. Below that,
All Other Storage is listed. Note that only 10 freezers are shown in this list initially; click
Show More to see the rest, also 10 at a time.
There are two action buttons for administrators:
- Manage Storage Units: Define the "terminal" storage units in which samples are stored. Boxes, bags, canes, plates, and tube racks can be of different sizes, storage layouts, and labelling conventions.
- Create Storage: Add another storage system.
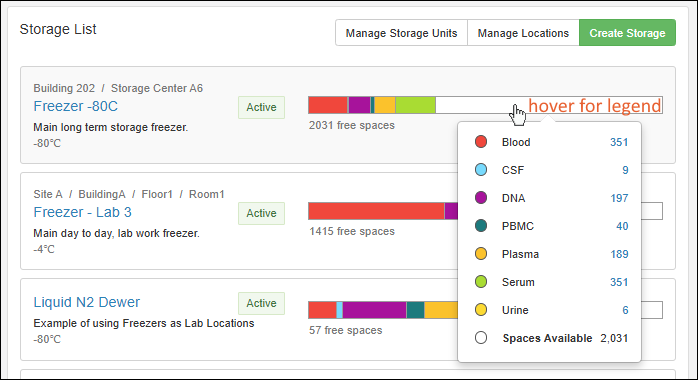
Hover over any bar for a guide to the colors and counts for each sample type, as well as the space available.

In the section for each storage you have defined, the panel includes:
- On the left:
- Name: Click the name to open the details for this storage.
- Above the name, you'll see this storage system's location, if any has been defined.
- If set, the Status will be displayed in a colored block.
- Below the name, the label (description) may also give more identifying information to users.
- Configured set-point temperature (for temperature-controlled storage).
- On the right:
- Color coded bars represent the number of samples currently stored in that storage, scaled to give a visual indication of overall capacity free.
- The number of free spaces is below the bars.
- Click anywhere in the tile to go to that storage overview page.
Sample Activity

The
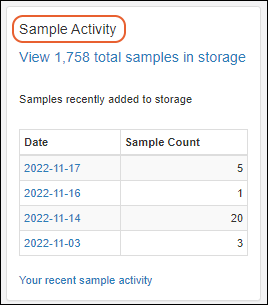
Sample Activity panel shows summary information about all samples in storage. Clickable links give you access to :
- View ### total samples in storage: open a filterable grid of all stored samples. Learn more here: View Storage Activity
- Click a Date to open the grid of samples added to storage by any user on that date.
You can also click to see
Your recent sample activity. Learn more here:
View Storage Activity.
Related Topics
 From this Storage Dashboard, you can see an overview and manage your sample storage.
