Once
source types and sources have been created, individual samples can be associated with them. This topic describes how to make those associations.
Associate Samples with Sources During Sample Creation
When you create new samples, you will see an
Add Source button in the creation wizard if any source types have been created in the system. If the Sample Type you are adding has any
source aliases, source columns for them will be added by default.

Note that if no source types have been created yet, you will not see this button in the user interface.
To add a source for the samples you are creating, click
Add Source and select the Source Type. A new column is added where you will select the source(s) of the samples you are creating.
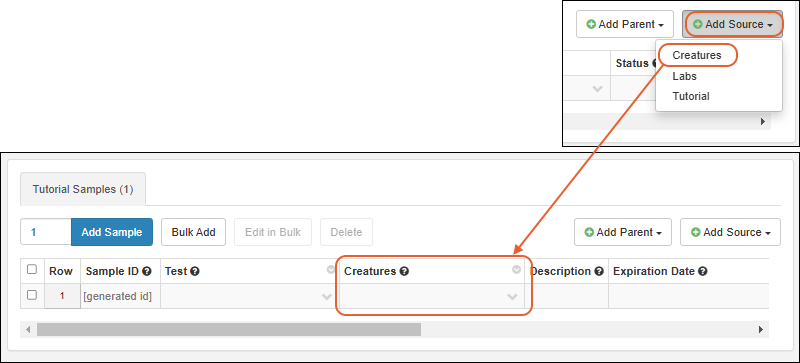
You can add columns for as many types of source as needed. For example, you might have both a biological source organism, and a physical source lab.
Populate the grid as
when creating samples, making use of "Bulk Add" and "Edit in Bulk" if appropriate. When you start typing into the source parent field, it will filter a listing of all sources of that type from which you can select one or more.
When ready, click
Finish Creating Samples as before.
Derive from Sources
You can also derive, new samples or new sources from selected sources. Start from the grid listing the Sources you want to derive from, then select one or more. Select
Derive > Samples or
Derive > Sources as desired. (Note that if you select more than 1000 source rows, the option to derive is disabled.)
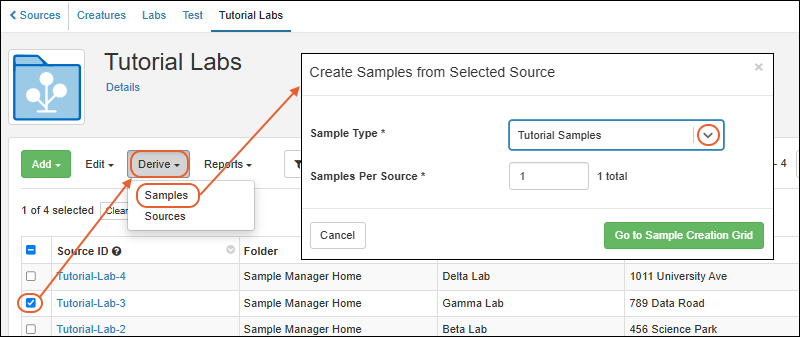
To derive from a single source, you can also go to the overview page for the specific source "parent" you want to use and select
> Create Samples/Sources to open the same selection modal.
In the popup, choose the Sample (or Source) Type to derive and enter the desired number for each selected ancestor source. Click
Go to Sample/Source Creation Grid.
You'll see the grid prepopulated with rows showing the associated source(s). For each source you selected, you'll have the specified number of rows. Provide necessary details in the grid before finishing creation.
View Source Association
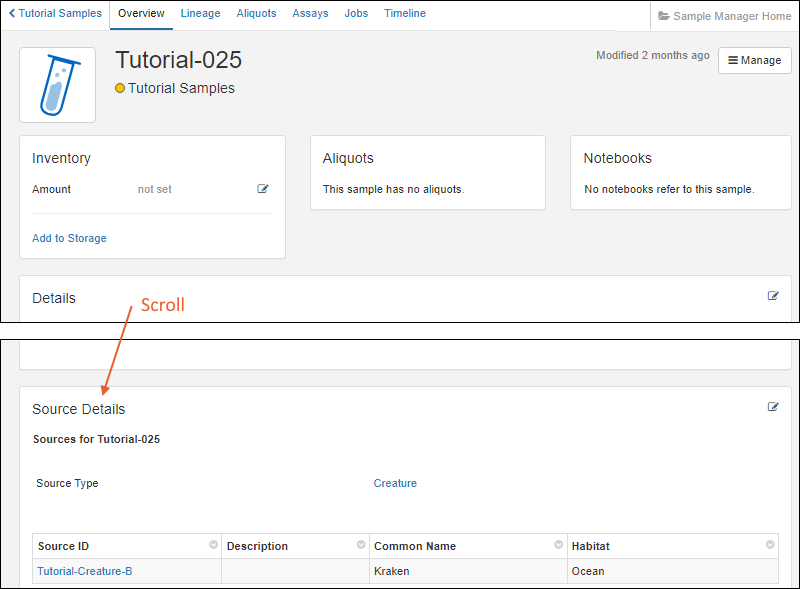
Click the name of a newly created child samples (or source) to open the overview page.
Scroll down and notice that the
Source Details section has been populated with details about the source(s) you linked when you created it.
View Source Lineage
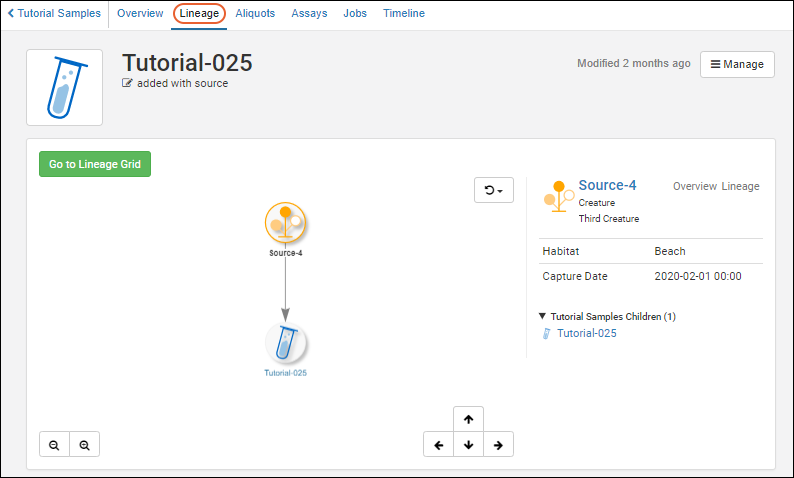
Click the
Lineage tab to see that the source is also represented in the lineage grid. Click the node for the source to see if there are other samples derived from that specific source.
Associate Existing Samples with Sources
If you create new sources after creating samples, you can add the association from the sample details page. In the next section, see how to
edit existing source associations for a single sample.
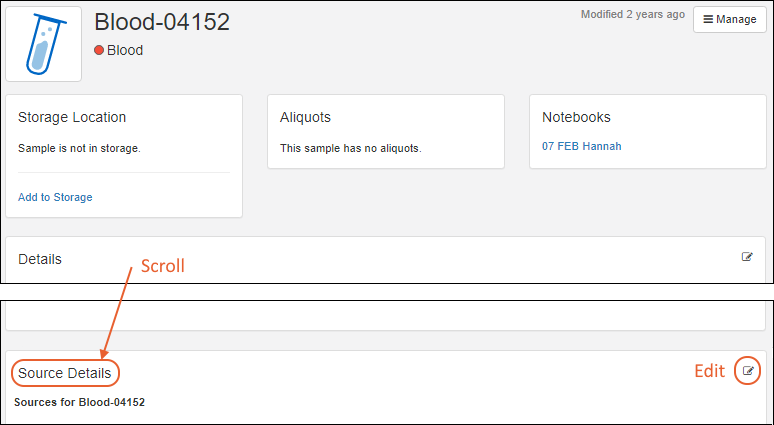
Open a sample type using the main menu, then an individual sample by clicking the Sample ID. You will see the
Source Details (if any). Click the
icon to edit the source associations for this sample.
This will open an editor panel similar to that in the sample creation wizard. Select the
Source Type you want to associate.
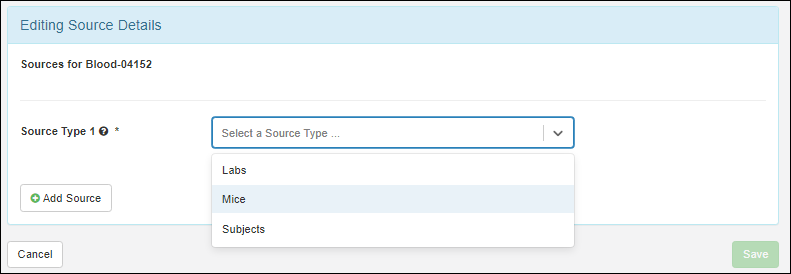
This will add an entry box for
Source IDs. Click to select from the menu; type ahead to narrow the choices. You can select more than one source ID for this field.

Note that if more than one source type is defined in the system, the
Add Source button would remain activated allowing you to add sources of different types for the sample.
Click
Save when finished.
You can now
view the details and lineage for this sample and it's source(s) as described above.
When you have included source import aliases in your sample type, you can also
update many samples at once, providing sources in the file you import.
Edit/Remove Source Associations
Open a sample type using the main menu, then an individual sample by clicking the Sample ID. Use the same
icon to edit existing source associations in the
Source Details section.
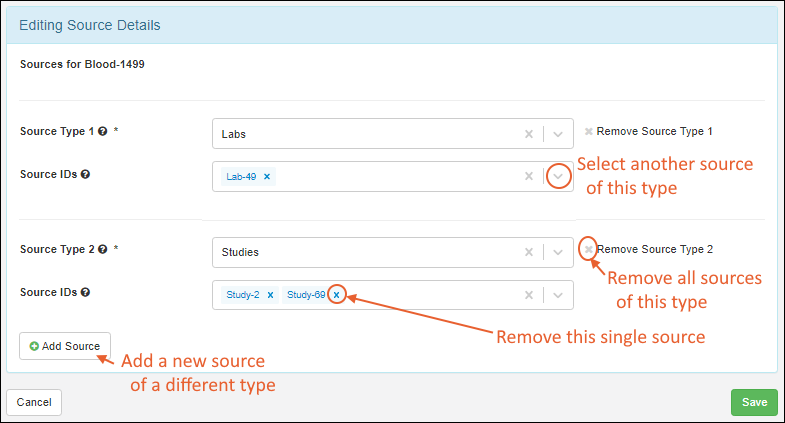
- Use dropdowns for Source IDs to add new sources of the types that are already associated.
- Click 'X' to delete individual sources or remove all sources of a given type
- Click Add Source to add new sources of another type.
Related Topics