Samples often get categorized as scientists are tracking them. By defining and using
Sample Status values, your users can easily tell whether samples are available, consumed, or locked (unavailable). Aliquots have status values separate from their parent sample.
Sample Manager supplies basic built in status types,
Available, Consumed, and Locked, as well as assignable statuses by these names. An administrator can add additional statuses of any of these types to match their workflows. For example, custom status values could be used to track which samples have been shipped, received, are in use, are offsite, etc.
Sample Status Types
The Sample Manager application has 3 built-in status types, also represented by assignable statuses. Additional named statuses can be created of any of these types.
- Available: Allows any action. This status type is also used to determine calculations of available amounts.
- Consumed: Used up, and no longer can be aliquoted or checked out, but remains in the system for analysis and tracking. Storage updates are prevented.
- Locked: While locked, all actions are prevented except adding the sample to a picklist. A sample cannot be edited, have its storage updated, be moved between folders, or be added to workflows. The status can later be changed to another type of status.
Manage Sample Statuses
From the main menu, click
Sample Types then select
Manage > Sample Statuses. You can also reach this option using
> Application Settings.

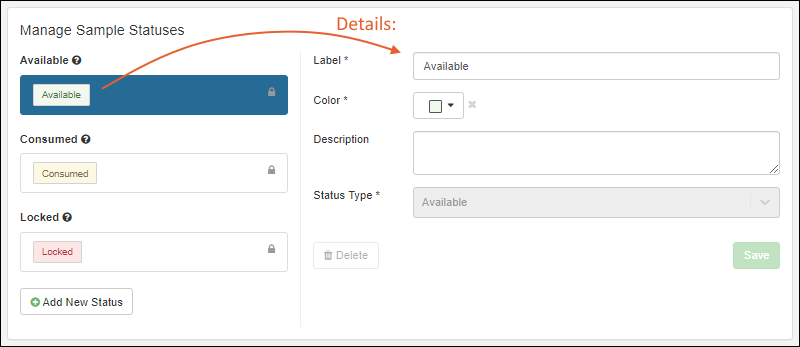
Scroll down to find the current set of defined statuses. You'll see the lozenge for each showing the color assigned to it. A lock icon indicates that there are currently samples "using" that status value so that it may not be deleted and its type cannot be changed. Additional status values can be defined of any of the three basic types. For example, "Received" might be an interim internal status on they way to full availability. The sample is neither consumed, nor locked, but might still need a step like assignment to a storage location before it will be switched to full "Available" status.
Samples in certain statuses will be prevented from certain actions, both in the UI and enforced by the server. For example, a Locked sample can't be deleted or checked out of storage, a consumed sample can't be aliquoted, etc. An administrator may, however, update the status of a sample if a mistake was made or conditions have changed.
View or Edit Status Details
Click the name of a status to see details on the right. Here you may edit the Label,
Color, Description, and for statuses not currently in use, you can change the Status Type.
Add New Status
The three main statuses correspond to the three main "status types" with different actions allowed for each type. Adding additional custom status settings can support your lab's procedures and user expectations. Click
Add New Status and populate the fields on the right.
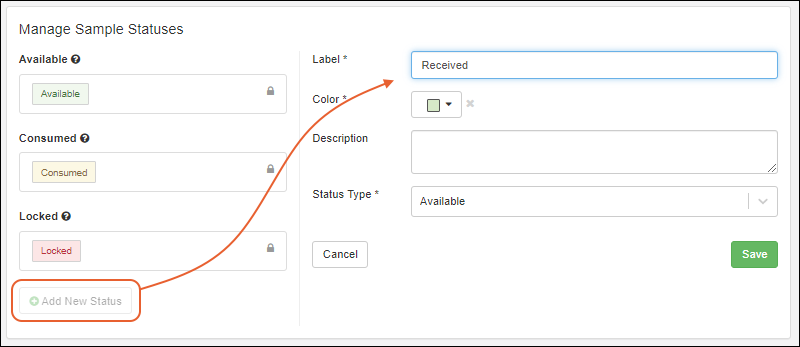
For example, you might add a new status named "Received" which is another form of the "Available" type of status, representing newly arrived samples which may need an additional step performed before they are officially "Available" to your users.
Choose Status Color
For both built in and custom statuses, you can customize the color by selecting from the color picker. You may choose to assign the same color to all status of a given type, such as green for all "Available" statuses, or can choose something else to make specific statuses stand out in the system.

Assign Sample Status
Users can assign statuses to their samples throughout the system:
- At sample creation
- During file import of new or updated samples
- When updating a single sample's details
- In a bulk sample update
Aliquots have status values separate from their parent sample.

The status of a sample can later be changed by editing in a grid or in bulk for a set of samples at once.
Change Status to Consumed
When you change the Sample Status to "Consumed" (i.e. to any named status of the "Consumed" type), this typically means that there is no more of the sample to be used. If the sample is in storage, the user will also be asked whether they also want to remove it from storage.
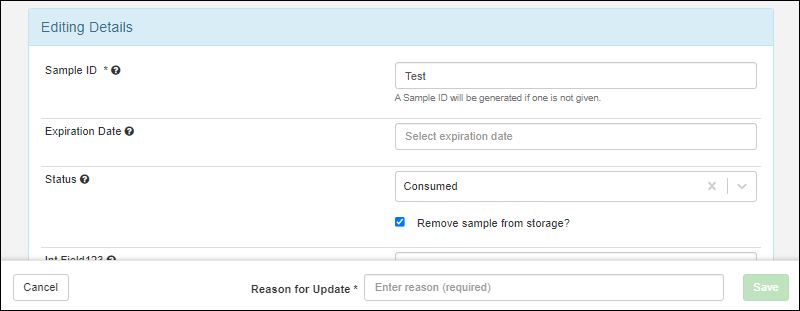
When editing a single sample's details, use the checkbox to also
Remove sample from storage?, adding a reason for the update if desired or
required:
When editing in a grid or in bulk, saving will open a popup where you can check
Yes, remove the sample(s) and enter a reason if desired or
required::

Sample Status Legend
To see the set of available status values, hover over the
for the
Status column or field to see a legend listing all the available status values and their
color coding.

View a Sample's Status
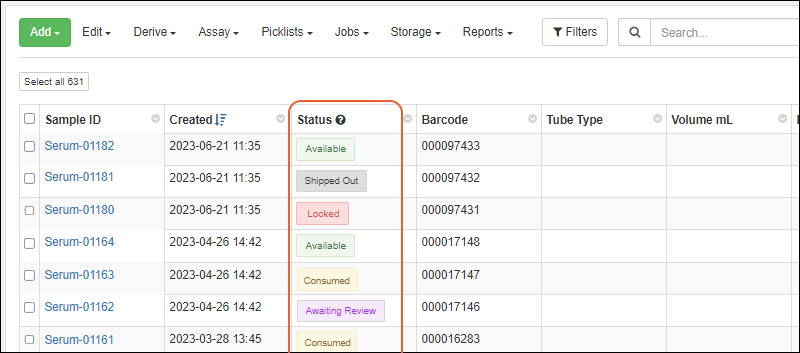
Sample status information will be displayed in sample grids and on the sample overview and storage sample details pages. Color-coded blocks and the
legend make it easy to see status at a glance. The name of the specific status will be shown, using the
color-coding you have assigned.
Sample Status and Storage Status
Sample Status can be viewed for a sample in storage, and is not the same as the
Storage Status (In Storage, Checked Out, etc.), described further in this section:
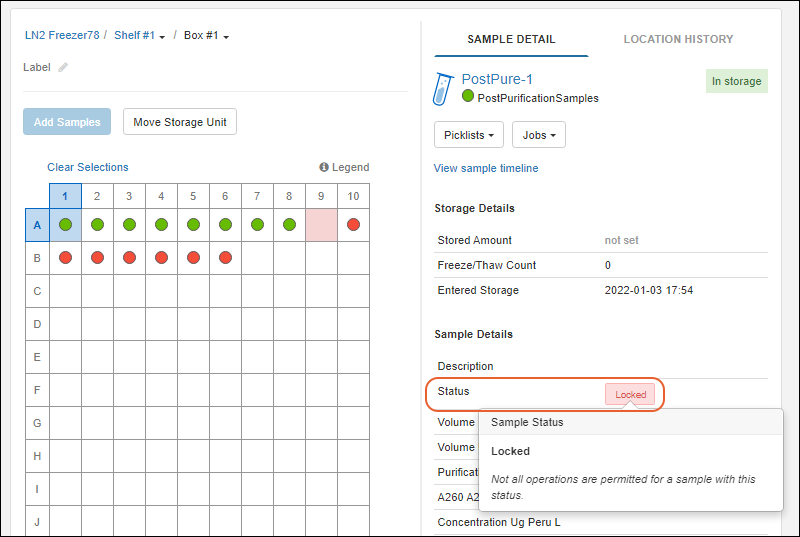
Storage ManagementSample status values are available in storage views as part of the sample details. Hovering will show the description of the status value, as shown below for a locked sample.
Sample Count by Status Dashboard
On the main dashboard, you can see an overall picture of the status of your samples using the
Sample Count by Status chart. A bar for each Sample Type is color coded to show how many samples of that type in each status.
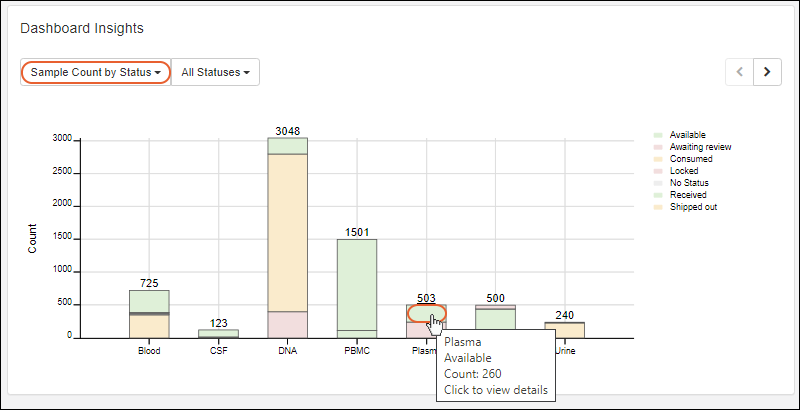
Hover over any bar segment for more details and click for the filtered set of samples of that type in that status; shown above, you'd see 260 "Available" Plasma samples.
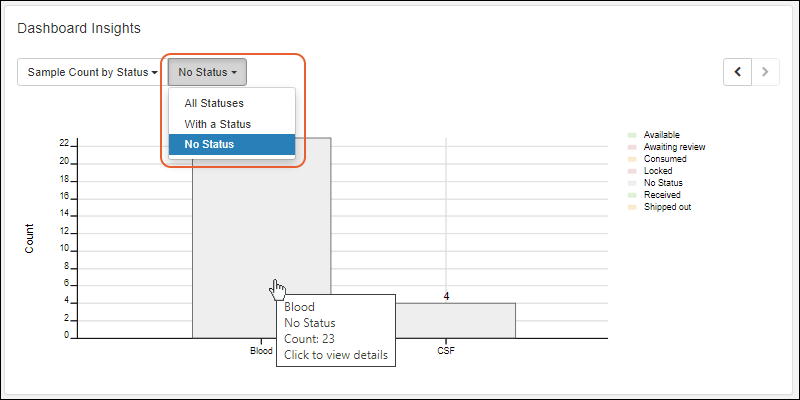
Use the refinement menu, select
All Statuses, With a Status, or No Status to control which sample statuses are displayed. For instance, using the
No Status option, you can easily see and click through to the subset of samples that still need to have a status assigned, in this case in two sample types.
Related Topics