Message boards let you post team announcements and set up threaded conversations among users. Announcements might include planned site outage announcements, new results in a study, organizational and personnel changes, introducing new features for users, etc.
Message boards can be made available to the general public, or restricted to a selected set of users. Message board access is controlled by the security configuration of the folder where it resides. If a folder is only accessible to the user group "Lab A", then the message board is accessible only to users in that group. See the security tutorial for details.
Individual announcements in the message board can also include threaded discussions contributed by users. This allows users to ask questions and receive answers in a public (or private) forum.
Example Message
Researchers often use the message board to announce new content and updates to their work. Here a fictional example message, announcing new data and press resources:
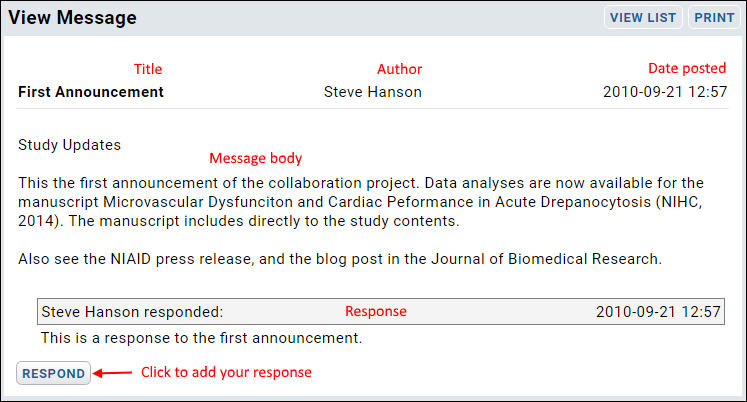
Notice that each message contains:
- A title
- The author's name
- The date posted
- The body of the message
- A link to post a response message.
Set up a New Message Board
To set up a workspace and message board of your own:
- Navigate to a location on your LabKey Server in which you have administrative access and can create a new folder.
- Sign in.
- Create a new folder workspace:
- Go to Admin > Folder > Management and click Create Subfolder.
- Name: "Collaboration Tutorial".
- Folder Type: Collaboration.
- Click Next.
- On the Permissions page, confirm "inherit from parent folder" is selected and click Finish.
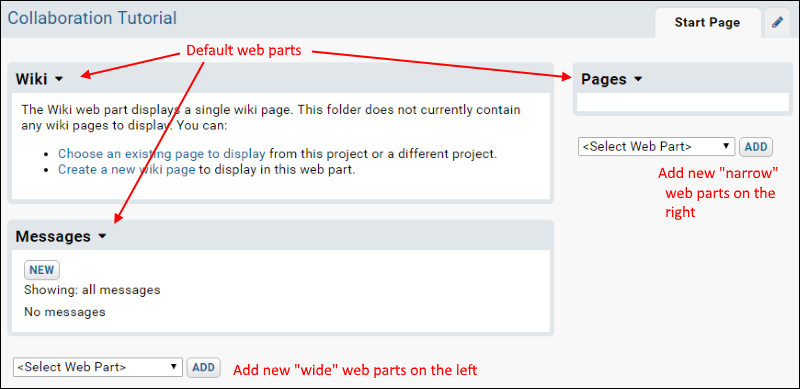
- Notice that the page contains two main sections or "web parts": a Wiki web part and a Messages web part.
Start a Conversation on the Message Board
- In the Messages web part, click New.
- On the New Message page, make the following changes:
- In the Title field, enter "First Announcement".
- In the Body field, enter "This is the first announcement of the collaboration project."
- Notice the Render As pulldown. Options:
- Plain Text (default): Leave this selected for the tutorial.
- Wiki Page: Supports the use of wiki syntax to format the page.
- HTML: Supports HTML editing.
- Notice the option to attach a file attachment (but skip this option for the tutorial).
- Click Submit.
- Notice that the Messages web part contains a new listing titled First Announcement.
Continue the Conversation
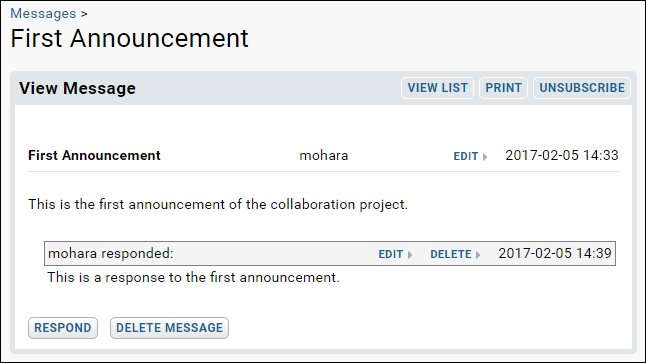
When you submit the message, you are returned to the main page of your tutorial and see the message in the Messages web part. To open the message for editing or responding, click the message title or the View Message Or Respond link.
On the page for this message, you have a few additional options: you can print (to a new browser window) or view the message on a list. As the creator of the message, and an administrator, you will also see "Edit" or "Delete Message" options. You are also automatically "subscribed" to any responses - an "unsubscribe" link is available.
- Click View Message or Respond to open the message page.
- Click Respond.
- In the Body field, enter "This is a response to the first announcement."
- Click Submit.
- Notice that the response is displayed underneath the announcement. Other responses can be added to form a longer conversation.
Configure the Message Board
- Click the Start Page tab to return to the main page.
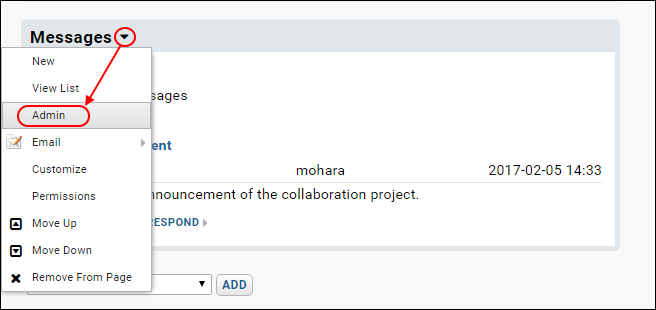
- In the Messages web part, click the dropdown arrow at the top of the web part and then Admin.
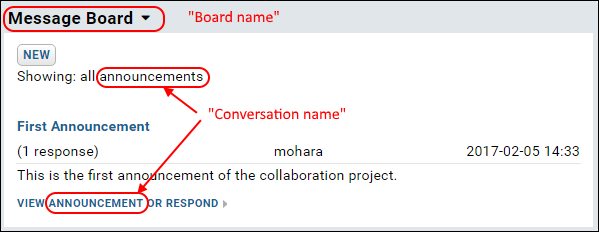
- In the Board name field, replace the text "Messages" with the text "Message Board".
- In the Conversation name field, replace the text "Message" with "Announcement".
- Review but do not change the other customization options.
- Click Save.
- Notice that the web part has a new name: "Message Board", and now is showing "all announcments".
Notice that the web part itself can be configured using the "Customize" option from the same web part triangle menu - this allows you to select whether full or simple messages are shown in the web part. Opening a message page always shows the full message.
Related Topics

