The NAb Assay design tools offer a range of default templates, which you may further customize to create a template for your assay design that matches the exact layout of the controls, viruses, samples, specimens, and replicates on your plate or plates.
TZM-bl Neutralization
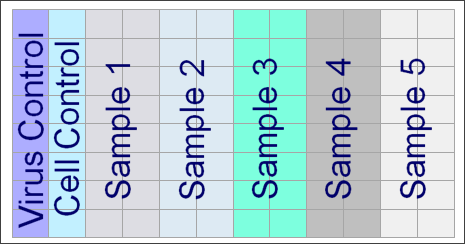
The default, low-throughput NAb plate template is called "NAb: 5 specimens in duplicate" and corresponds to the following plate layout:

This plate tests five samples in duplicate for inhibition of infection and thus decreased luminescence. The first column of eight wells provides the background signal, measured from the luminescence of cells alone, the “Virus Control.” The second column of eight wells, the “Cell Control” column, provides the maximum possible signal. This is measured from cells treated with the virus without any antibody sample present to inhibit infection. These two columns define the expected range of luminescence signals in experimental treatments. The next five pairs of columns are five experimental treatments, where each treatment contains a serial dilution of the sample.
Create a New NAb Assay Plate Template
- In the Assay List web part, select Manage Assays.
- Click Configure Plate Templates.
- Choose one of the links to start from one of the built-in NAb templates. The correct link to choose depends on the number of wells, layout, and dilution method you used for your experiments.
- Once you've selected a place to start, you will see the plate editor.
- Name the template. Even if you make no changes, you need to name the base template to create a usable instance of it.
- Edit if required as described below.
- Click Save and Close.
Customize a NAb Assay Plate Template
Customize an assay plate template to match the specific plate and well layout used by your instrument.
- In the Assay List web part, select Manage Assays.
- Click Configure Plate Templates.
- The plate templates already defined are listed, you can either:
- Edit to edit the existing template.
- Edit a Copy to create a new variant of an existing template.
- Choose one of the built-in NAb templates to start a new template.
- You will see the plate editor (see examples below).
- Explore the Control, Specimen, Replicate, and Other tabs.
- Edit as desired on any of the tabs. For instance, on the specimen tab, you can select a specimen (using the color coded radio buttons under the layout) and then drag across the plate template editor to “paint” with the chosen specimen. There are also buttons to shift the entire array Up, Down, Left, or Right.
- Well Group Properties may be added in the column on the right. For instance, you can reverse the direction of dilution for a given well group.
- Warnings, if any, will be shown as well. For example, if you identify a given well as both a specimen and control group, a warning will be raised.
- Click Save and Close.
Once you have created a template, you will see it available as a dropdown option when you import data runs.
Reverse Dilution Direction
Single-plate NAb assays assume that specimens get more dilute as you move up or left across the plate. High-throughput NAb assays assume that specimens are more dilute as you move down or right across the plate. To reverse the default dilution direction for a specimen well group, select it and add a well group property named 'ReverseDilutionDirection' with the value 'true.'

Example Plate Template Editors
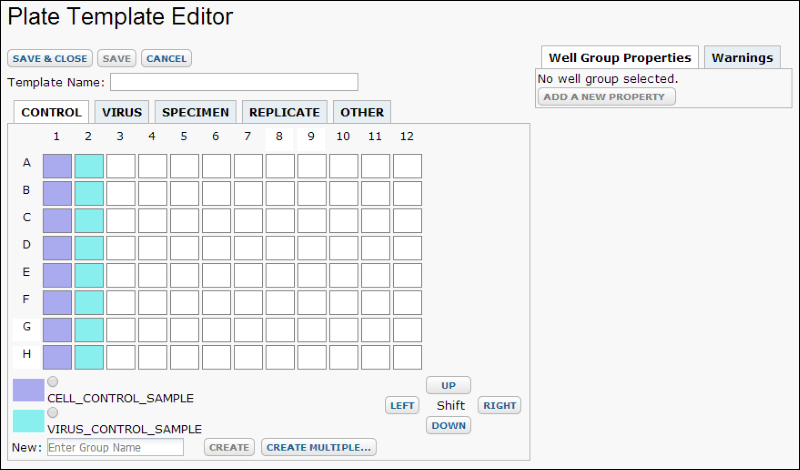
The plate template editor for low-throughput NAb assays, showing control layout:

The plate template editor for a high-throughput NAb assay with cross plate dilution, showing specimen layout:

 This plate tests five samples in duplicate for inhibition of infection and thus decreased luminescence. The first column of eight wells provides the background signal, measured from the luminescence of cells alone, the “Virus Control.” The second column of eight wells, the “Cell Control” column, provides the maximum possible signal. This is measured from cells treated with the virus without any antibody sample present to inhibit infection. These two columns define the expected range of luminescence signals in experimental treatments. The next five pairs of columns are five experimental treatments, where each treatment contains a serial dilution of the sample.