Once you have
set up the folder and
uploaded the FCS files, you can import a FlowJo workspace and then use LabKey Server to extract data and statistics of interest.
Import a FlowJo Workspace
- Click the Flow Dashboard tab at the top of the page.
- Click Import FlowJo Workspace Analysis. This will allow you to start the process of importing the compensation and analysis (the calculated statistics) from a FlowJo workspace.
1. Select Analysis
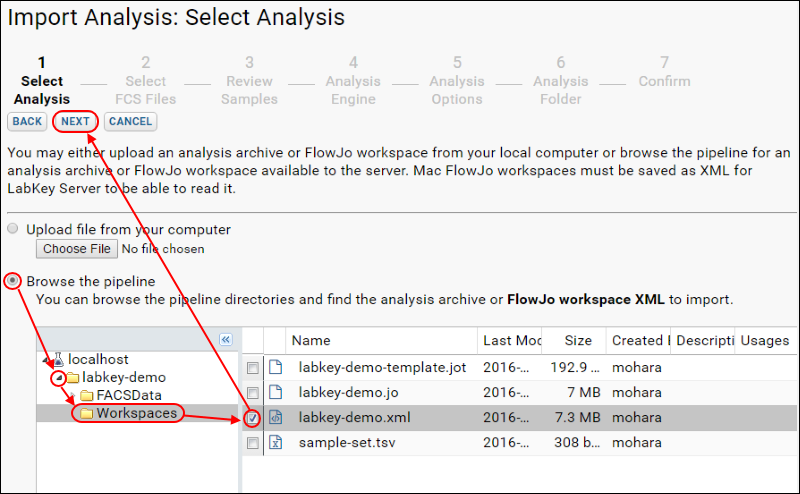
- Select Browse the pipeline.
- In the left panel, click to expand the labkey-demo directory, then click the Workspaces folder.
- In the right panel, select the labkey-demo.xml file, and click Next.

- Notice the two warnings that appear.
Warning:
Sample 118756.fcs (286): 118756.fcs: S/L/-: Count statistic missing
Sample 118756.fcs (286): 118756.fcs: S/L/FITC CD4+: Count statistic missing
We have intentionally incorporated these warnings to illustrate the point that if the FlowJo workspace is missing calculations for any statistics, those values won't be imported. If this were real data and you were required to import these statistics, you would have to go back to FlowJo, re-calculate the missing statistics, and then save as xml again. For the sake of this tutorial, you can safely ignore these warnings.
2. Select FCS Files
- Select Browse the pipeline for the directory of FCS files.
- Click the "labkey-demo" folder to open it.
- In the right panel, check the box for the FACSData folder.
 3. Review Samples
- The import wizard will attempt to match the imported samples from the FlowJo workspace with the previously imported FCS files. If you were importing samples that matched existing FCS files, such as reimporting a workspace, they would have a green checkmark and unmatched samples would have a red checkmark. To manually correct any mistakes, select the appropriate FCS file from the combobox next to the sample's name. See FCS File Resolution for more on the exact algorithm used to resolve the FCS files.
- Confirm that all samples are selected and click Next.
4. Analysis Engine
- Confirm that FlowJo statistics with LabKey Server graphs is selected and click Next.
5. Analysis OptionsThis step is used only when experimental R normalization is configured, and will be skipped in this tutorial.
6. Analysis Folder
- Accept the default name of your analysis folder, "Analysis".
- (Optional) Choose a target study folder. If the flow metadata includes PTID and Date/Visit columns matching those in the study, specimen information from the study will be included in the FCSAnalyses table.
- Click Next.
7. Confirm
- Review the properties and click Finish to import the workspace.
- Wait for Import to Complete. While the job runs, you will see the current status file growing and have the opportunity to cancel if necessary using the button at the bottom. Import can take several minutes.
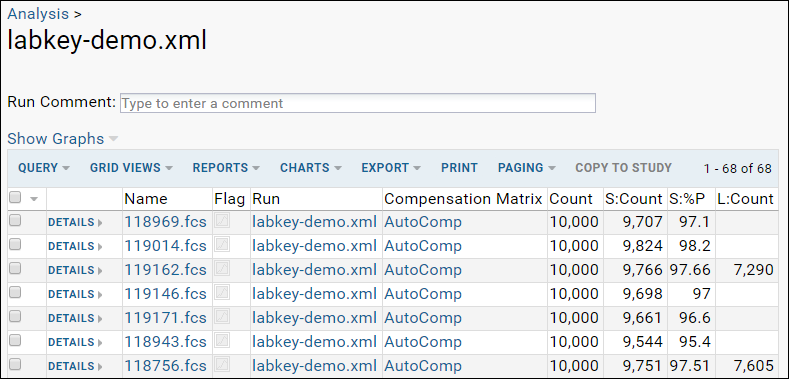
- When the import process completes, you will see a datagrid named "labkey-demo.xml." In the next step you will learn how to customize this datagrid to display the columns of your choice.
