Projects and folders are used to organize workspaces in LabKey Server. To create a new project or folder, you must have administrative privileges.
Create a New Project
- To create a new project, either:
- Select Admin > Site > Create Project, or
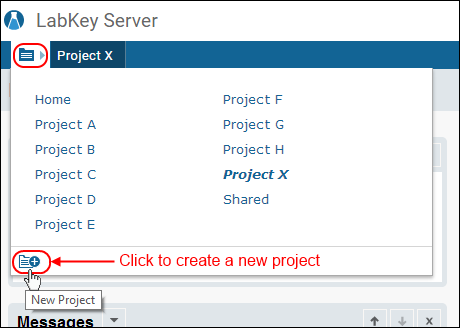
- Click the Create Project icon at the bottom of the project menu.

- Enter a Name for your project. By default, the name will also be the project title.
- If you would like to specify an alternate title, uncheck the Use name as title box and a new box for entering the title will appear.
- Select a Folder Type, and click Next.
- Choose permissions for the project: My User Only, Copy from Existing Project or Configure Later. Click Next.
- Select Project Settings as desired (see list below), and click Finish.
- You will now be on the home page of your new project.
Project Settings:
- Properties
- Declare inheritance of permissions.
- Customize the look and feel of the project, including headings, colors, logos, and how to connect with project support.
- Customize settings used in system emails.
- Customize default formats for dates and numbers.
- Resources
- Customize the logo, icon, and stylesheets used in the project.
- Menu Bar
- Folder Settings/Files tab
- Configure the file root for the project.
- Configure the data processing pipeline.
- Permissions
- Adjust permission settings.
- Define project groups and site groups.
Create a New Folder / Subfolder
- To add a folder to a project, navigate to where you want the subfolder. There are two options:
- Select Admin > Folder > Management and click Create Subfolder to create a new (child) folder.

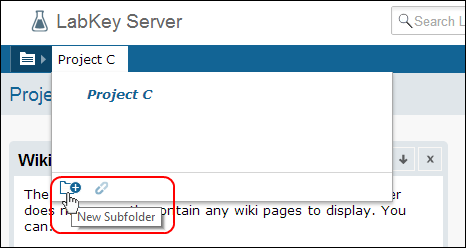
- Or use the Create Folder icon at the bottom of the folder menu.

- Provide a Name. By default, the name will also be the folder title.
- If you would like to specify an alternate title, uncheck the Use name as title box and a new box for entering the title will appear.
- Select a Folder Type.
- Select how to determine Users/Permissions in the new folder.
- Click Finish.
Create a Folder from a Template
You can create a new folder based on an already existing template folder, selecting which objects to copy to the new folder.
- To add a folder to a project, select Admin > Folder > Management.
- Select the parent folder.
- Click Create Subfolder to create a new (child) folder.
- Provide a Name, and optional alternate title.
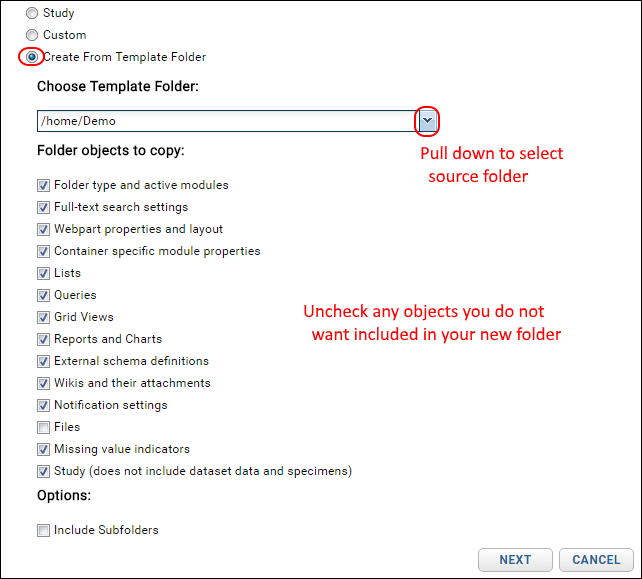
- Select the "Folder Type" radio button Create from Template Folder which will open new input options:
- From the dropdown menu, select an existing folder to use as a template.

- Select the objects you wish to copy from the template and whether to include subfolders. Note that when using a study folder as a template, the dataset data and specimens are not copied to the new folder.
- Click Next.
- Select how to determine Users/Permissions in the new folder.
- Click Finish to accept the defaults (you can change them later) and go directly to your new folder.
- Select Finish and Configure Permissions to open the folder permissions page. When you save and finish, you will be in your new folder.


