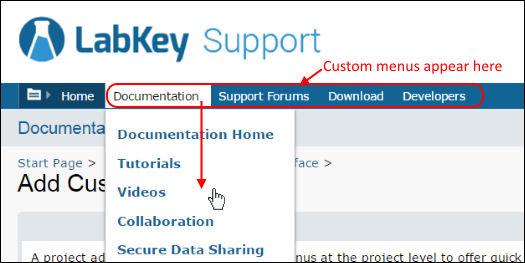
A project administrator can add custom menus at the project level to offer quick pulldown access to commonly used tools and pages from anywhere within the project. Custom menus will appear in the top bar of every page in the project, just to the right of the project and folder menus. For example, the LabKey Server Documentation is itself part of a project featuring custom menus:
Included in this topic:
Add a Custom Menu
This walkthrough uses a collaboration project named "Andromeda" on
an evaluation server installed locally, into which we have
installed the demo study in order to have some sample content to make into custom menus. The contents of your project will of course determine what can be placed on menus. When you first create a project, you have the option to click
Menu Bar from the project settings page to directly access this UI, but you can also return at any time with project admin permissions.
- From the project home page, select Admin > Folder > Project Settings.
- Click the Menu Bar tab.
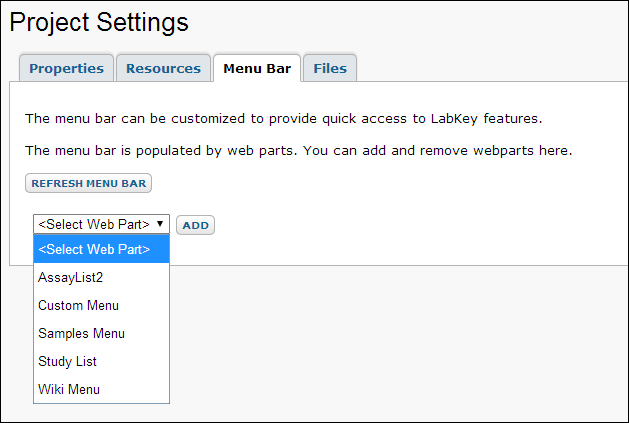
A selected subset of web parts can be added as custom menus. By adding, populating, and reordering web parts on this page, you can design a set of menus that offers your users the tools they need in the way that best suits your organization.
- For each custom menu you would like, add a web part on this page.
- Populate and customize the menu bar web parts (see below for instructions for each type).
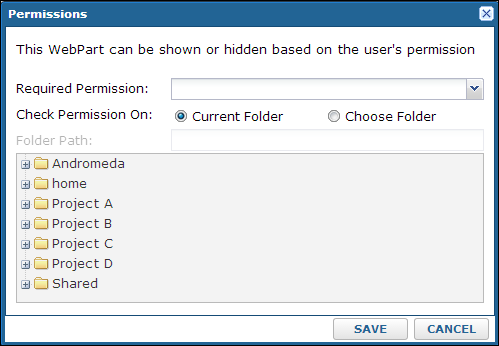
- Optionally limit visibility of the menu based on user's permission.
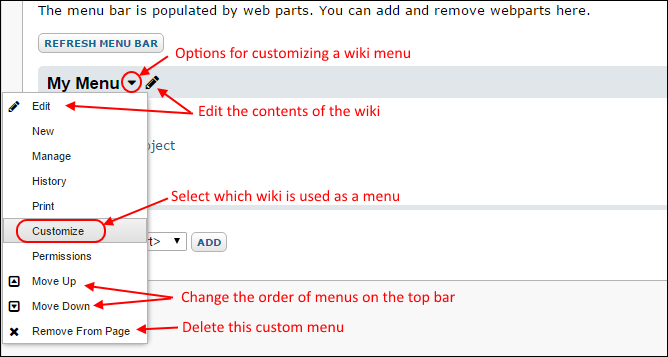
- Reorder web parts using the up and down arrows - the top web part will become the left-most custom menu.
- Click the X in the upper left on the web part if you want to delete a menu.
- Click Refresh Menu Bar to see your changes reflected.
- Be sure to refresh the menu bar before leaving the page to ensure your menus are properly saved.
Wiki Menu
The
Wiki Menu adds a wiki page to the menu. By creating a wiki page that is a series of links to other pages or folders, you can customize a basic menu for linking to common locations and tools from anywhere in the project. Different teams might have different menus, or multiple menus could organize content however you require.
To construct an example, we created two basic wikis "Project Overview" and "Staff Directory" in the home folder for the Andromeda project. The project also has a "Charleston" study in a subfolder. Now we can make a menu wiki:
- Navigate to a page where you want to add a menu wiki. In this example we use the Andromeda project home page.
- Create a new Wiki web part.
- Click Create a new wiki page in the new web part.
- Give your new page a unique title (such as "menu1").
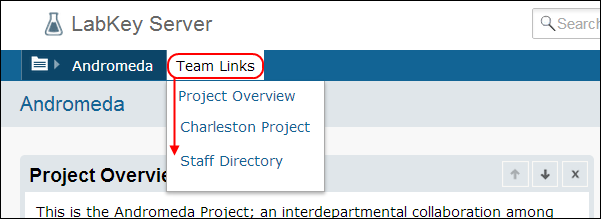
- Name your wiki as you want the menu title to appear "Team Links" in this example.
- Add links to folders and documents you have created, in the order you want them to appear on the menu.
[overview]

[Charleston Project|http://localhost:8080/labkey/project/Andromeda/Charleston/begin.view?]

[directory]
- In this example, we include three menu links: the overview document, the Charleston project home page, and the staff directory document in that order.
- Note that the URL shown here is an example of a possible local path. In practice, you would paste the URL of your own desired folder. For details see, Wiki Syntax.
- Save and Close the wiki, which will look something like this:

To add as a custom menu:
- Return to the Project Settings > Menu Bar tab.
- Select Wiki Menu from the Add Web Part pulldown and click Add.
- In the new web part, select Customize from the arrow pulldown.
- Select the location of your menu wiki from the pulldown for Folder containing the page to display: In this example, we used the /Andromeda project root.
- Select the menu wiki we just created, "menu1 (Documents)" from the pulldown for Name and title of the page to display:
- Click Submit to save.
- If your menu does not immediately appear in the menu bar, click Refresh Menu Bar.
- You can now hover over your new menu anywhere in the Andromeda project and click to directly open the included wiki pages.
Study List
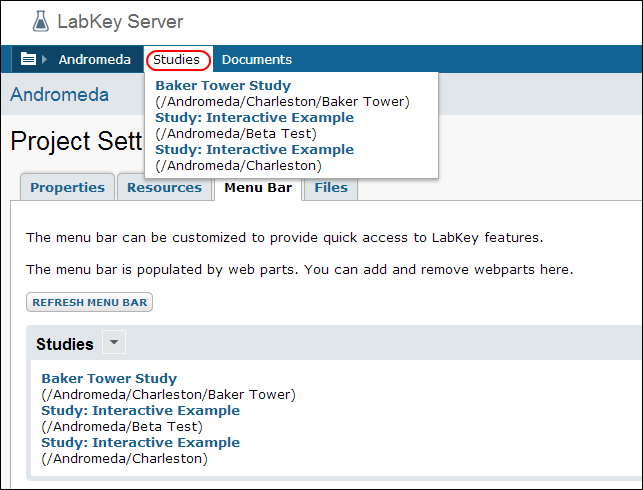
If your project contains one or more studies, you can add a quick access menu for reaching the home page for any given study from the top bar.
- Return to the Project Settings > Menu Bar tab.
- Add a Study List web part. Available studies will be listed in the new web part as well as in the menu named "Studies".
AssayList2
If your project contains Assays, you can add a menu for them using the
AssayList2 web part. Available assays are listed, along with a manage button, for easy access from anywhere in your project.
Custom Menu
A
Custom Menu lets you create a menu to display either:
- Go to the Project Settings > Menu Bar tab, add a Custom Menu web part.
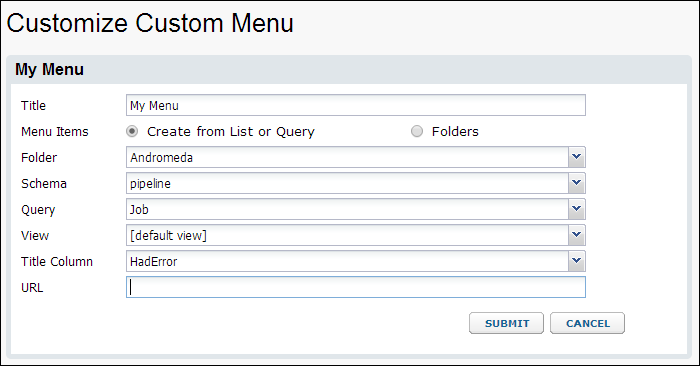
- The web part and menu are named "My Menu" by default.
- Select Customize from the arrow pulldown.
- To create a list or query menu (the default):
- Change the Title and pull down lists to select the Folder, Schema, Query, View, Title Column, and URL for the menu.
- Click Submit.
- Click Refresh Menu Bar.
To create a folder menu, click the radio button for
Folders in the new custom menu. You can change the title, root folder, select folder types to display, and specify a URL if desired. Click
Submit then
Refresh Menu Bar to add a new subfolder menu.

Note that the built in project and folder menus cannot be edited or relocated through the UI; this alternate way to create a folder menu could be used to provide a selected subset of folders.
Custom Menu Permissions
By selecting the
Permissions link from the pulldown on any item on the
Menu Bar tab, you can choose to show or hide the given menu based on the user's permission. The
Required Permission field is a pulldown of all the possible permission levels.
Check Permission On: allows you to specify where to check for that permission.
