For our sample data, we will use three mzXML files from the paper 'Quantitative mass spectrometry reveals a role for the GTPase Rho1p in actin organization on the peroxisome membrane' (Marelli
et al.). One of the research goals was to identify proteins associated with peroxisomes that were not previously associated.
Obtain the Sample MS2 Data Files
Download the sample data files. (Choose either zip or tar format, whatever is most convenient for you.)
- If you haven't already, install LabKey Server: Install LabKey Server (Quick Install)
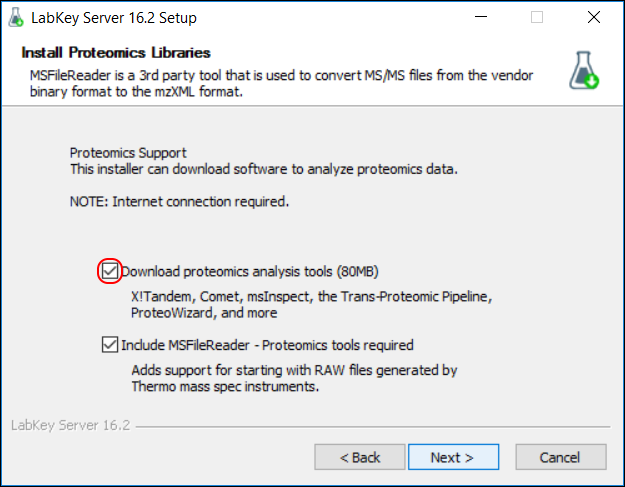
- In the installation wizard, on the Install Proteomics Libraries page, make sure to place a checkmark next to Download proteomics analysis tools. (If you are building the server from source code, obtain the proteomics analysis tools using these instructions.)

Create a Proteomics Folder for the Sample Data
Create a new project or folder inside of LabKey server to store the demo data.
- Select the Home project (or any project where you can create a subfolder).
- Create a new folder to work in:
- Go to Admin > Folder > Management and click Create Subfolder.
- Name: "Proteomics Tutorial"
- Folder type: MS2, which will automatically set up the folder for proteomics analysis.
- Click Next.
- On the Users/Permissions page, make no changes and click Finish.
Set Up the Pipeline
Finally, we'll configure the data "pipeline", so that LabKey Server knows where to look for files/data to process.
- In the Data Pipeline section, click Setup.
- In the Data Processing Pipeline Setup web part, select Set a pipeline override.
- Enter the path to the sample files you download and extracted. (For example: C:/ProteomicsDemo)
- Click Save.
- Look for the confirmation message (in green text): "The pipeline root was set to..."
