Now that we have defined our analysis script, we can apply it to flow experiment runs. The results derived from analyzing multiple experiment runs are grouped together and placed in a folder. This folder is called an
analysis. A given experiment run can only be analyzed once per analysis folder. To analyze it in a different way, you either delete the first instance or place the new one in a different folder.
Initiate Run Analysis
Select which experiment runs should be analyzed, using which script, and where to place the results.
- Reopen the script main page by clicking Flow Dashboard and then labkey-demo.
- To apply the script, click Analyze some runs.

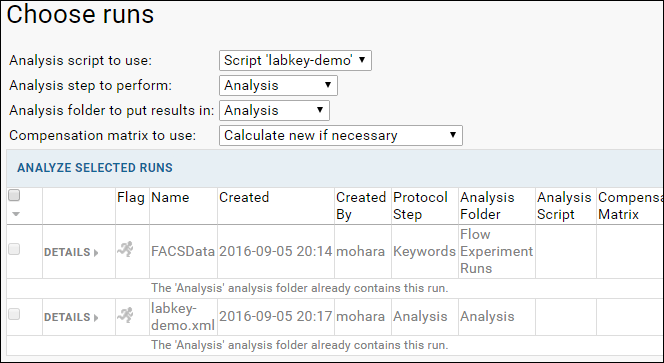
Note that the labkey-demo.xml run in the grid view is greyed out. You may also see the FACSData run grayed out if you ran the
Tutorial: Import a Flow Workspace in the same project first. This is because these runs have already been analyzed. To perform an additional analysis on the same FCS files, you need to place the results into a different folder.
The drop-down menus present the following choices:
- Analysis script to use: This is the script which will be used to define the gates, statistics, and graphs.
- Analysis step to perform: If the script contains both a compensation calculation and an analysis, the user can choose to perform these steps separately.
- Analysis folder to put results in: Either select an existing folder or create a new one.
- Compensation matrix to use: Select one of the following ways of specifying the compensation matrix:
- Calculate new if necessary: If a compensation matrix has not yet been calculated for a given experiment run in the target analysis, it will be calculated.
- Use from analysis 'xxxx': If there is at least one run with a compensation matrix in analysis 'xxxx', it will be used.
- Matrix: 'xxxxx': The named compensation matrix will be used for all runs being analyzed
- Use machine acquired spill matrix: Use the compensation matrix found in the FCS file marked with a "$SPILL" keyword.
For this tutorial, use default values for all dropdowns except the results folder:
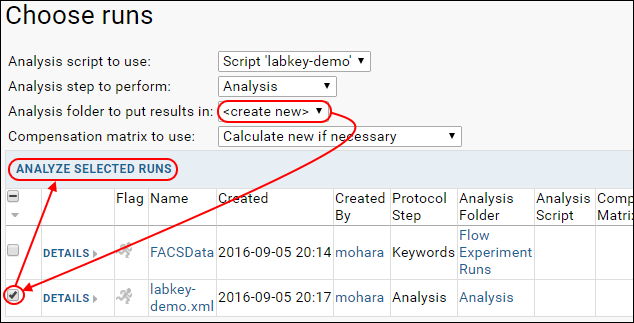
- From the Analysis folder to put results in dropdown, select create new. Notice that the runs in the grid are no longer grayed out.
- Select the checkbox associated with the labkey-demo.xml run.
- Then click Analyze Selected Runs.

- Name the new folder: 'labkey-analysis'.

- Click Analyze runs.
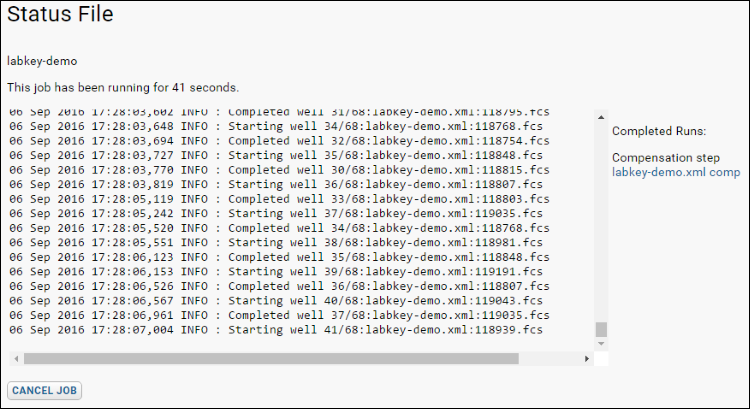
- Processing may take a while, and will take even longer for large amounts of data.
- Status will be reported as the analysis runs:

When the analysis is complete you will see the Runs grid.

