Before you can work with haplotype assay data, you must first set up your genotyping dashboard, configure the haplotype assay to match your data and import the haplotype assignments you will be using. See
Import Haplotype Assignment Data for instructions.
Import Haplotype Assay Data
- Select Admin > Manage Assays.
- Click the Haplotype assay design you defined and named above.
- Click Import Data to import a run, entering requested information.
- Once one or more runs have been uploaded, you will see them listed in the runs grid.

Review Haplotype Results
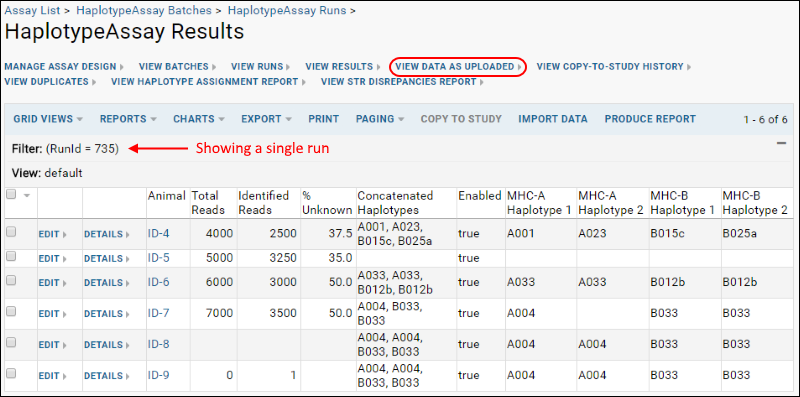
Haplotype Assay results can be viewed on a one animal per file basis. Each row may have information for only a subset of all the haplotypes. When you click the name of a given run, you will
View Data as Uploaded which might look something like this:

You can also view haplotype results aggregated by animal for a different angle on the same data by clicking
View Results:

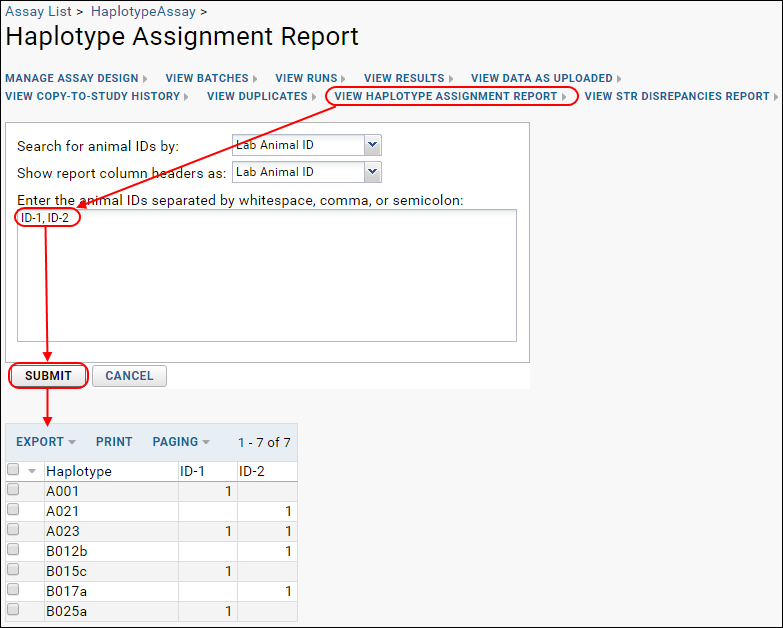
View Haplotype Assignment Report
After uploading runs, you may click
View Haplotype Assignment Report and enter one or more Animal IDs, then click
Submit to generate a report of haplotype assignments.

Report Discrepancies Between STR and Other Haplotype Assignments
Some animals have STR haplotype data generated by an alternative mechanism from the lab's sequencing based analysis. A single STR assignment implies three separate haplotypes (A, B, and DR). To screen for discrepancies between the lab's analysis and the haplotypes predicted by STR assignment, there is color coding of the inconsistent values built into a custom report.
Click
View STR Discrepancies Report to see the list of animals for which there are discrepancies.

Checking the box to ignore subtype distinctions would, for example, cause haplotypes D012 and D012b to be considered as matching. Otherwise they would raise a discrepancy here.