This topic describes one possible data entry interface for electronic health record data. Your center may use something similar or have a different interface to match legacy forms.
Permission to access any given data entry form is controlled by administrators using
dataset-level permissions.
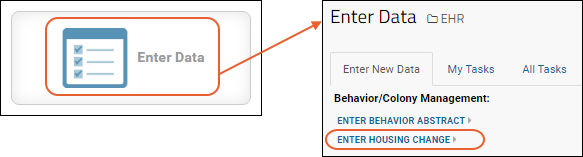
Enter Data
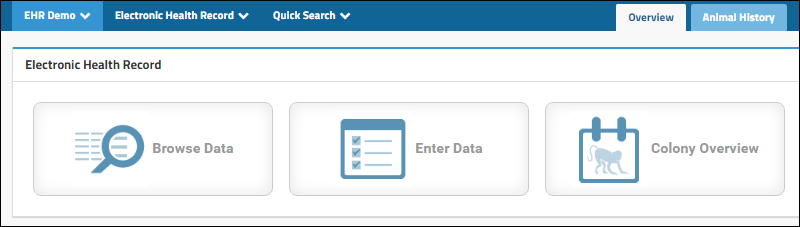
From the
Overview tab, click
Enter Data.
By default, you will see the
Enter New Data tab. You can also select the
My Tasks or
All Tasks tabs for a list of pending tasks requiring data entry.
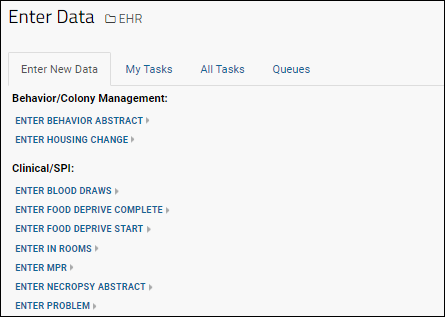
Click a link to open the form. Use
Add or
Add Batch to enter data. Entry forms can be customized to aid data entry by showing required fields with highlighting, guidance text or labels, and some fields will be drop down selectors to limit input to values contained in another table. For example, a Blood Draw entry form could incorporate entry of other information, or entry for multiple animals at once. For example, it could look like this:
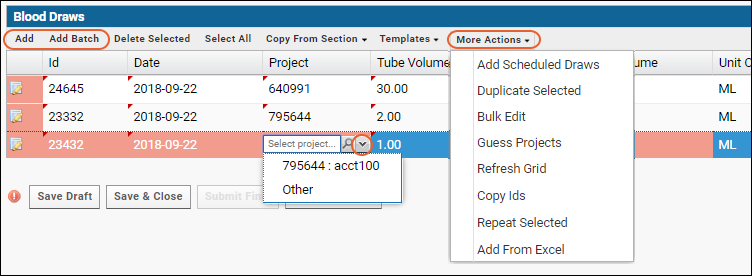
The set of
More Actions available may vary by center.
Use Templates
Users entering routine combinations of data can make use of templates to save time and reduce errors. A set of partially completed rows can be saved as template, then used later to prepopulate the same rows with commonly entered information, such as a list of measurements to enter, medications to administer, etc. The user then has a guide to what needs to be entered and completed and only needs to add the new data.
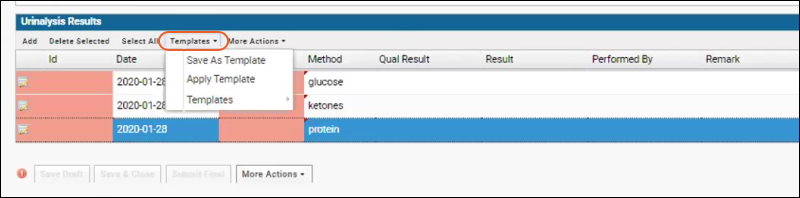
There are two types of template, one for the form as a whole and one for a specific section.
To create a template, enter the data that will be common for entry events. Populate the information you will need in as many rows as you like, then select
Templates > Save as Template.
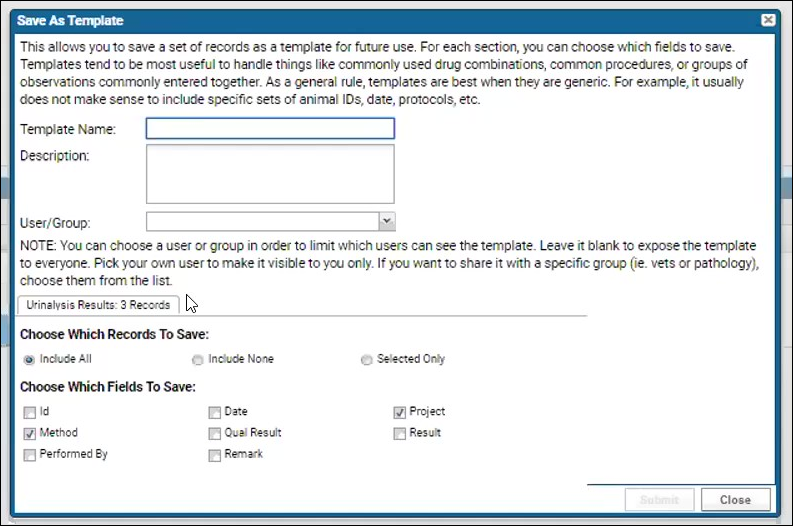
You will name the template, decide whether to limit the template to a specific user or group, and select which records and fields to save. Click
Submit to save the template.
Note that only users who are folder admins or have been added to the "EHR Template Creator" role are allowed to save templates. Any saved templates are visible to all users who have permission to enter data.
Later, you (or another user with access) can load data from the template by selecting
Templates > Apply Template and selecting the template name.
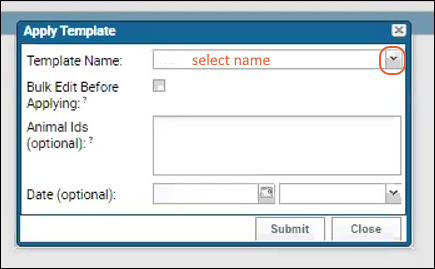
In the popup, you can:
- Bulk Edit Before Applying
- Enter Animal IDs: Optional, but will shorthand entering the same animal ID in all rows.
- Date: Also optional and will prepopulate the rows if you enter one.
- Time: Use the dropdown next to the date field to include a time (in 15 minute increments) or type an exact time value in the field.
Click
Submit to apply the template, adding all rows. Then the user enters remaining information specific to that entry task and can also edit the values provided in the template if needed.
Edit Data vs. Add Data to Build Records
An important distinction is to understand the difference between editing existing data and adding new data to build records over time.
When you
Edit an existing data record, you are changing the data stored.
- For example, you might edit an incorrectly entered arrival date or a misspelling in the name of a location. The edit you make is intended to apply to all timepoints for that information.
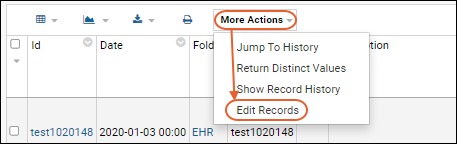
- To edit data, authorized users can click Browse All Datasets from the overview, then use the Update Records link (if present), or open the dataset directly and select More Actions > Edit Records.
When you
Add a new record, you can build the history of what has happened over time, particularly in datasets specifically designed to track such "change dates". This is the most common case.
- For example, instead of editing the location of a study subject, if you add a new housing record with a start date, then the history for that subject will include both the previous location and the date on which the subject moved to the new location.
- Adding new data is described in the sections above.
- Some datasets (including housing, project assignments, group assignments, etc.) use a Date/Enddate pattern. When you add a record of cage info in the housing dataset, the date provided will 'start' the new location and the system automatically updates the previous one as ended.
Related Topics

