In this step you will download and install a basic workspace for working with ETL processes. In our example, the
source and
target are both tables on the same server, rather than requiring configuration of multiple machines.
Set Up ETL Workspace
In this step you will import a pre-configured workspace in which to develop ETL processes. There is nothing mandatory about the way this tutorial workspace has been put together -- your own needs will likely be different. This particular workspace has been configured especially for this tutorial as a
shortcut to avoid many set up steps, steps such as connecting to source datasets, adding an empty dataset to use as the target of ETL scripts, and adding ETL-related web parts.
- Download the folder archive:
- Log in to your server and navigate to your "Tutorials" project. Create it if necessary.
- If you don't already have a server to work on where you can create projects, start here.
- If you don't know how to create projects and folders, review this topic.
- Create a new subfolder named "ETL Workspace". Choose the folder type "Study" and accept other defaults.
- Import ETLWorkspace.folder.zip into the folder:
- In the Study Overview panel, click Import Study.
- On the Folder Management page, confirm Local zip archive is selected and click Choose File.
- Select the folder archive that you downloaded: ETLWorkspace.folder.zip.
- Click Import Study.
- When the import is complete, click ETL Workspace to see the workspace.
You now have a workspace where you can develop ETL scripts. It includes:
- A LabKey Study with various datasets to use as data sources
- An empty dataset named Patients to use as a target destination
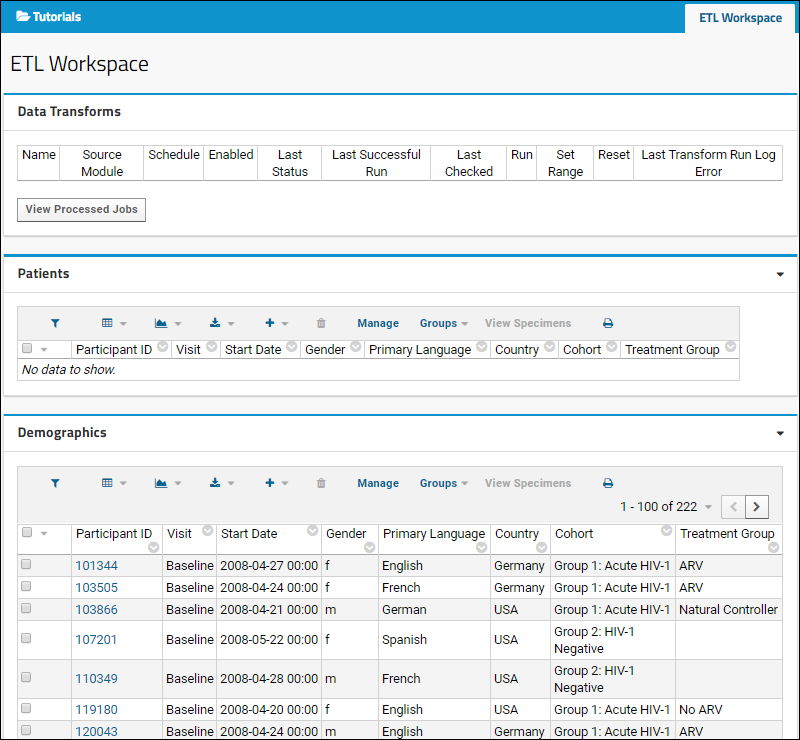
- The ETL Workspace tab provides an area to manage and run your ETL processes. Notice that this tab contains three web parts:
- Data Transforms shows the available ETL processes. Currently it is empty because there are none defined.
- The Patients dataset (the target dataset for the process) is displayed, also empty because no ETL process has been run yet. When you run an ETL process in the next step the empty Patients dataset will begin to fill with data.
- The Demographics dataset (the source dataset for this tutorial) is displayed with more than 200 records.

Create an ETL
ETL processes are defined using XML to specify the data source, the data target/destination, and other properties and actions. You can include these XML files in a custom module, or define the ETL directly using the user interface as we do in this tutorial.
- Click the ETL Workspace tab to ensure you are on the main folder page.
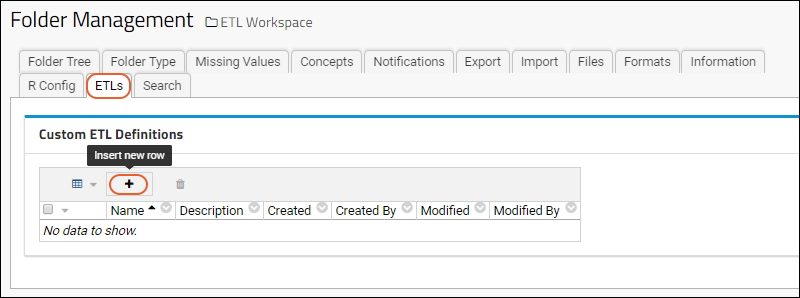
- Select > Folder > Management.
- Click the ETLs tab. If you don't see this tab, you may not have the dataintegration module enabled on your server. Check on the Folder Type tab, under Modules.

- Click (Insert new row) under Custom ETL Definitions.
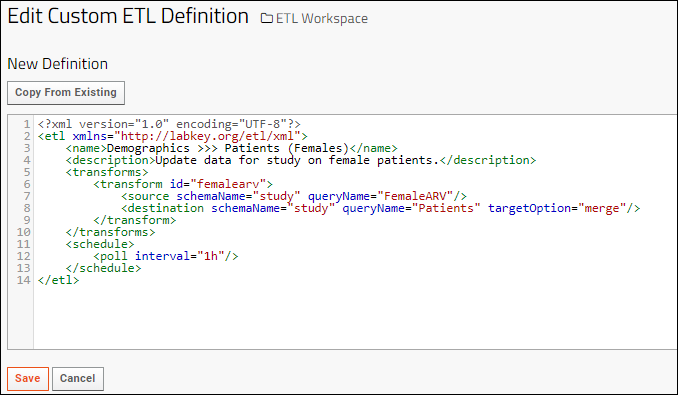
- Replace the default XML in the edit panel with the following code.
- Notice the definition of source (a query named "FemaleARV" in the study schema) and destination, a query in the same schema.
<?xml version="1.0" encoding="UTF-8"?>
<etl xmlns="http://labkey.org/etl/xml">
    <name>Demographics >>> Patients (Females)</name>
    <description>Update data for study on female patients.</description>
    <transforms>
        <transform id="femalearv">
            <source schemaName="study" queryName="FemaleARV"/>
            <destination schemaName="study" queryName="Patients" targetOption="merge"/>
        </transform>
    </transforms>
    <schedule>
        <poll interval="1h"/>
    </schedule>
</etl>

- Click Save.
- Click the ETL Workspace tab to return to the main dashboard.
- The new ETL named "Demographics >>> Patients (Females)" is now ready to run. Notice it has been added to the list under Data Transforms.


