Assay and instrument data can be integrated with other datasets in a study provided there is a way to resolve it to the participants and visit/timepoint information used in those datasets. When you import most kinds of assay data, you can select a
Participant/Visit Resolver, to define how the assay data will be mapped and integrated.
Background
Assay and instrument data often includes a Sample ID field, but not Participant ID or Visit fields. In many cases, this is "by design", since it allows laboratories to work with research data in a de-identified form: the laboratory only knows the Sample ID, but does not know the Participant IDs or Visit IDs directly.
This topic outlines some general principles and options available for data identifiers; specific options available vary based on the type of assay.
Participant/Visit Resolver
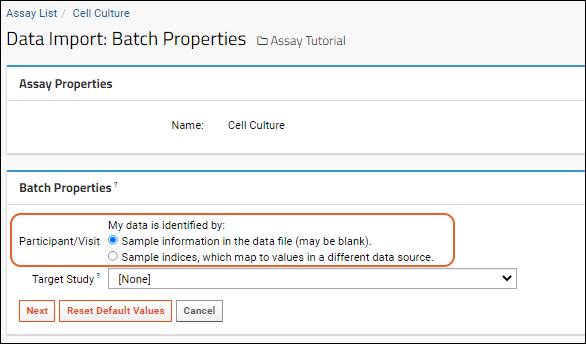
When importing runs of instrument data in the user interface, one of the Batch Properties lets the user select from a set of options which may include some or all of the following:
- Sample information in the data file (may be blank).
- Participant id and visit id.
- Participant id and date.
- Participant id, visit id, and date.
- Specimen/sample id.
- Sample indices, which map to values in a different data source.
Note that not all assay types include all options.

Map Sample Indices
The
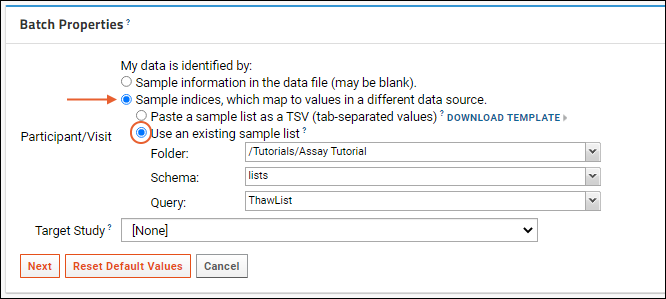
Sample indices, which map to values in a different data source option allows you to use an existing indexed list of participant, visit/date, and sample information, such as a thaw list. At upload time, the user will enter a single index number for each sample; the target data source will contain the required mapping values. The sample indices list must have your own specimen identifier (index) as its primary key, and include the 'SpecimenID', 'ParticipantID', 'Date', and 'VisitID' columns.
You can specify a mapping either by pasting a TSV file or by selecting a specific folder, schema, and list. Either method can be used during each upload or specified as a default. To paste a TSV file containing the mapping, you can first click
Download Template to obtain a template. After populating it with your data, cut and paste the entire spreadsheet (including column headers) into the box provided:

To specify an existing list, use the selection dialog pulldowns to choose the folder, schema, and list (or query) containing your mapping:

Use Default Values
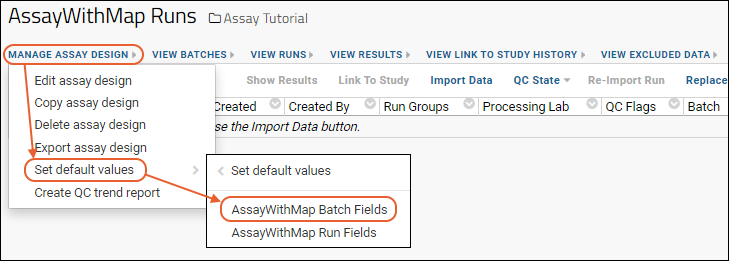
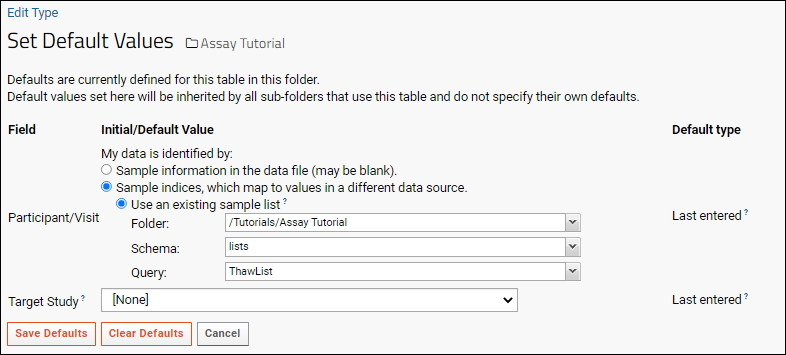
The operator may specify the mapping each time data is uploaded, but in some cases you may want to set automatic defaults. For example, you might always want to use a specific source list for the participant/visit identifier, such as a thaw list populated at the time samples are removed from the freezer for testing. The operator could specify the list at the time of each batch upload, but by including the default list as part of your assay design you can simplify upload and improve consistency.
- Select Manage Assay Design > Set Default Values > [design name] Batch Fields.

- Select Sample indices, which map to values in a different data source.
- Either paste the contents of a TSV file or select Use an existing list and select the Folder, Schema, and Query containing your list.

You may also choose to
include the list or other default value as part of the assay design directly.
Related Topics
