In this step you will become familiar with the ETL user interface, run the ETL process you
added to the server in the previous tutorial step, then learn to use it for some basic updates.
ETL User Interface
The web part
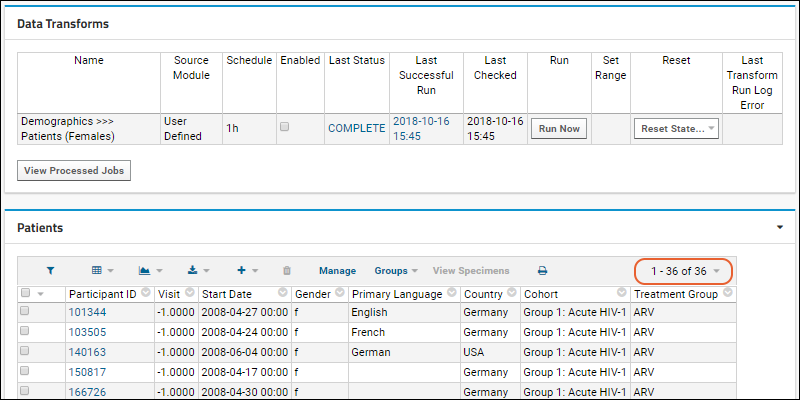
Data Transforms lists all of the ETL processes that are available in the current folder. It lets you review current status at a glance, and run any transform manually or on a set schedule. You can also reset state after a test run.

For details on the ETL user interface, see
ETL: User Interface.
Run the ETL Process
- If necessary, click the ETL Workspace tab to return to the Data Transforms web part.
- Click Run Now for the "Demographics >>> Patients (Females)" row to transfer the data to the Patients table. Note that you will need to be signed in to see this button.
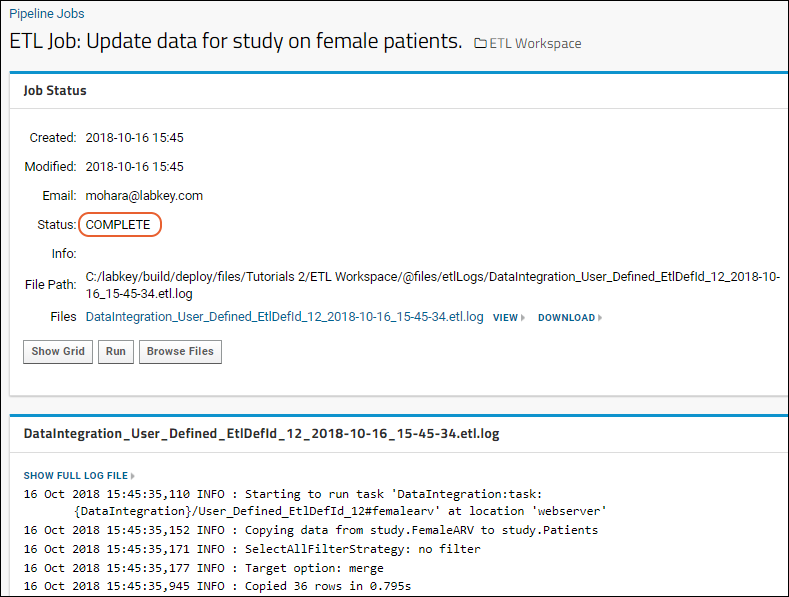
- You will be taken to the ETL Job page, which provides updates on the status of the running job.
- Refresh your browser until you see the Status field shows the value COMPLETE

- Click the ETL Workspace link to see the records that have been added to the Patients table. Notice that 36 records (out of over 200 in the source Demographics query) have been copied into the Patients query. The ETL process filtered to show female members of the ARV treatment group.

Experiment with ETL Runs
Now that you have a working ETL process, you can experiment with different scenarios.
Suppose the records in the source table had changed; to reflect those changes in your target table, you would rerun the ETL.
- First, roll back the rows added to the target table (that is, delete the rows and return the target table to its original state) by selecting Reset State > Truncate and Reset.

- Confirm the deletion in the popup window.
- You may need to refresh your browser to see the empty dataset.
- Rerun the ETL process by clicking Run Now.
- The results are the same because we did not in fact change any source data yet. Next you can actually make some changes to show that they will be reflected.
If you are interested in exploring the query that is the actual
source for this ETL, use
> Go To Module > Query. Open the
study schema,
FemaleARV query and click
Edit Source. This query selects rows from the Demographics table where the Gender is 'f' and the treatment group is 'ARV'.
- Edit the data in the Demographics table on which our source query is based.
- Click the ETL Workspace tab.
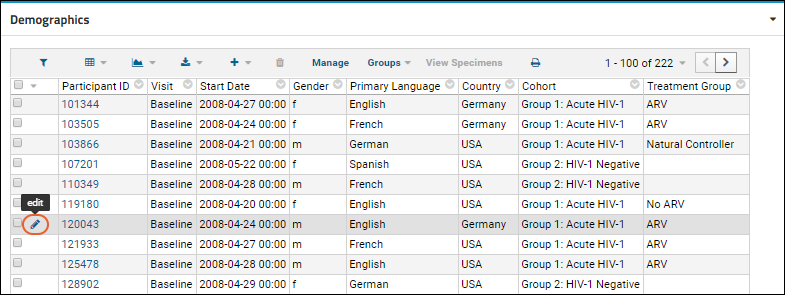
- Scroll down to the Demographics dataset.
- Hover over a row for which the Gender is "m" and the Treatment Group is "ARV" then click the (pencil) icon revealed.

- Change the Gender to "f" and click Submit to save.
- Rerun the ETL process by clicking Run Now.
- Click the ETL Workspace tab to return to the main dashboard.
- The resulting Patients table will now contain the additional matching row for a total count of 37 matching records.
 For details on the ETL user interface, see ETL: User Interface.


