A
schema is a named collection of tables and queries. The
Query Browser, or
Schema Browser, is the dashboard for browsing all the database data in a LabKey Server folder. It also provides access to key schema-related functionality. Using the schema browser, users with sufficient permissions can:
- Browse the tables and queries
- Add new SQL queries
- Discover table/query relationships to help write new queries
- Define external schemas to access new data
- Generate scripts for bulk insertion of data into a new schema
Topics
Premium Feature AvailableWith Premium Editions of LabKey Server, administrators have the ability to trace query dependencies within a container or across folders. Learn more in this topic:
Browse and Navigate the Schema
Authorized users can open the Query Schema Browser via one of these pathways:
- > Go To Module > Query
- > Developer Links > Schema Browser
The browser displays a list of the available schemas, represented with a folder icon, including external schemas and data sources you have added. Your permissions within the folder determine which tables and queries you can see here. Use the
Show Hidden Schemas and Queries checkbox to see those that are hidden by default.
Schemas live in a particular container (project or folder) on LabKey Server, but can be marked as
inheritable, in which case they are accessible in child folders. Learn more about controlling schema heritability in child folders in this topic:
Query Metadata
Built-In Tables vs. Module-Defined Queries vs. User-Defined Queries
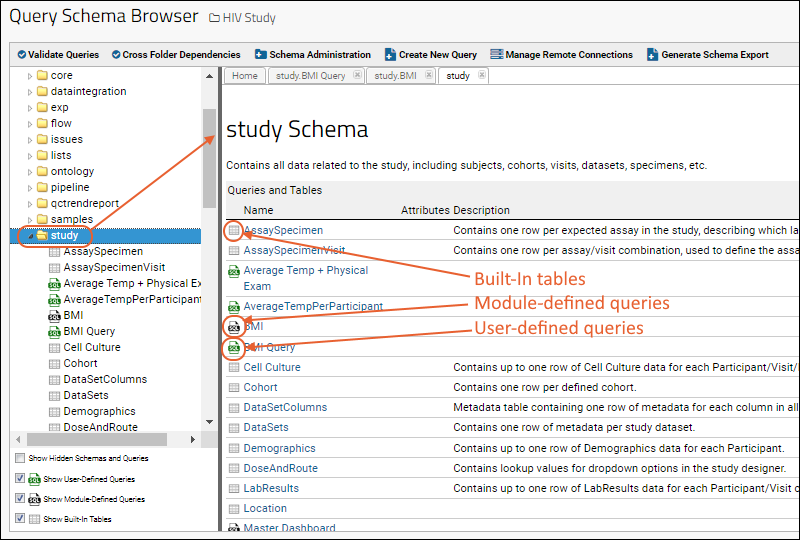
Click the name of a schema to see the queries and tables it contains. User-defined, module-defined, and built-in queries are listed alphabetically, each category represented by a different icon. Checkboxes in the lower left can be used to control the set shown, making it easier to find a desired item on a long list.
- Show Hidden Schemas and Queries
- Show User-Defined Queries
- Show Module-Defined Queries
- Show Built-In Tables: Hard tables that are defined in the database, either by a user, module, or in code, but is not a query or in one of the above categories.

All Columns vs. Columns in the Default Grid View
You can browse columns by clicking on a particular table or query. The image below shows the column names of a user-defined query. In the Professional and Enterprise Editions of LabKey Server, you will also see a
Dependency Report here.
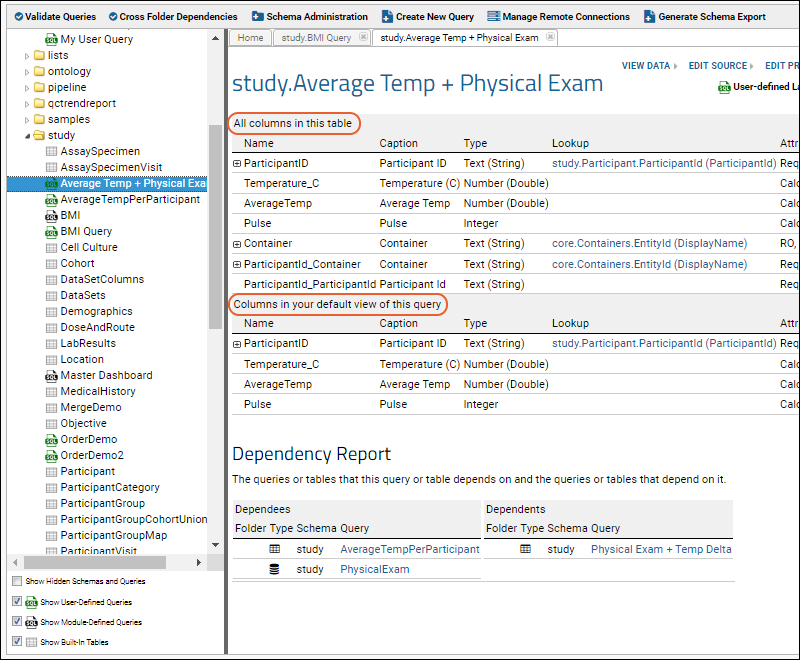
For a particular table or query, the browser shows two separate lists of columns:
- All columns in this table: the top section shows all of the columns in the table/query.
- Columns in your default view of this query: Your default grid view of the table/query may not contain all of the columns present in the table. It also may contain additional "columns" when there are lookups (or foreign keys) defined in the default view. See Step 1: Customize Your Grid View to learn about changing the contents of the "default" view.
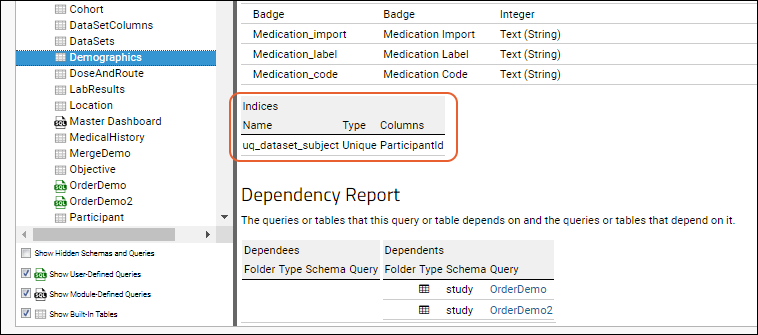
Below these lists for Built-In Tables, the
Indices of the table are listed.
Validate Queries
When you upgrade to a new version of LabKey, change hardware, or database software, you may want to validate your SQL queries. You can perform a validation check of your SQL queries by pressing the
Validate Queries button, on the top row of buttons in the Query Schema Browser.
Validation runs against all queries in the current folder and checks to see if the SQL queries parse and execute without errors.
- To validate entire projects, initiate the scan from the project level and select Validate subfolders.

- Check Include system queries for a much more comprehensive scan of internal system queries. Note that many warnings raised by this validation will be benign (such as queries against internal tables that are not exposed to end users).
- Check Validate metadata and views box for a more thorough validation of both query metadata and saved views, including warnings of potentially invalid conditions, like autoincrement columns set userEditable=true, errors like invalid column names, or case errors which would cause problems for case-sensitive js. Again, many warnings raised in this scan will be benign.
Note: When running broad query validation and also using the
experimental feature to Block Malicious Clients, you may trigger internal safeguards against "too many requests in a short period of time". If this occurs, the server may "lock you out" reporting a "Try again later" message in any browser. This block applies for an hour and can also be released if a site administrator turns off the experimental feature and/or clears the server cache.
Export Query Validation Results
Once query validation has been run, you can click
Export to download the results, making it easier to parse and search.
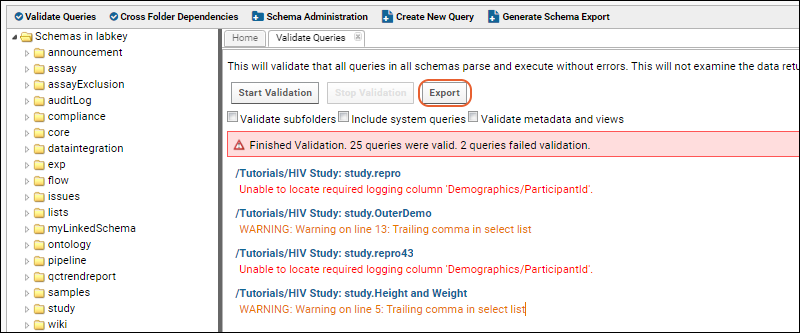
The exported Excel file lists the container, type (Error or Warning), Query, and Discrepancy for each item in the list.
View Raw Schema and Table Metadata
Links to
View Raw Schema Metadata are provided for each schema, including linked and external schemas, giving you an easy way to confirm expected datasource, scope, and tables.
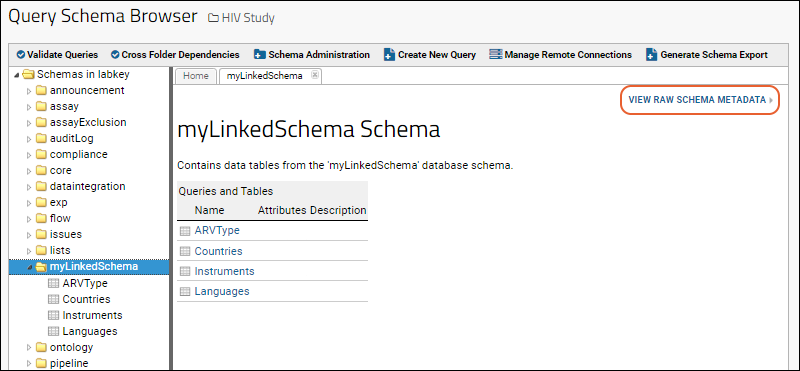
Links to
View Raw Table Metadata are provided for each built in table, giving details including indices, key details, and extended column properties.

Related Topics
 For a particular table or query, the browser shows two separate lists of columns: