LabKey Biologics offers a number of different ways to work with assay data in the system. Administrators can control which options are available and to which users.
Assay Dashboard
Click
Assays on the main menu to go to the assay dashboard. You'll see a grid listing the
Assay Designs in the system with name, description, type, and run count. A button to
download a template is provided for each assay.
Any
archived, or inactive, assay designs are only included when you click the
All tab.
Assay Data Details
Click the name of an Assay Design to see it's summary page, with several tabs, showing various scopes of the data:
- Batches (Shown only if any Batch fields are defined): View batches, the widest grouping of the data. Each batch generally groups together multiple runs of data.
- Runs (Default): Runs are the mid-level grouping of the data, standing between the batches and the result data. Each run generally represents one file of data.
- Results: Displays the result data of the assay, showing the data output of the instrument.
Hover over the
Details link in the header to see creation information and status.
Custom grid views are available by clicking the
Views button. Learn about customizing data grids in this topic:
Biologics: Grids, Detail Pages, and Entry Forms.
If an administrator has added any charts to an assay, as detailed in the topic:
Biologics Admin: Charts, they can be viewed by clicking the
(Charts) button.
Edit Assay Runs and/or Results
If your assay design provides for editable runs and/or results, and you have sufficient permission, you can edit run properties and results in bulk:
- To edit run properties, start from the Runs tab and select the runs to edit.
- To edit assay result rows, either click the run name or the results page for the assay (to see results from any run).
- Note that including the Created/CreatedBy/Modified/ModifiedBy fields in the assay result grid view will help track the time of creation and edit.
Select the rows of interest and select your option from the
Edit menu. If you don't see this menu, it may be because the assay design does not support editable runs or results.
- Edit in Grid: Start from a grid view of all the data for the selection; manually adjust as needed.
- Edit in Bulk: Assign one value for a field to all the selected rows. For example, if an incorrect Day was entered for a set of runs, you could correct it in one step.
For details about using the editors for these two methods of updating run properties and/or results rows, see the
documentation for the same feature in LabKey Sample Manager
Move Assay Runs Between Folders
If you are working with multiple
Biologics Folders, you can move assay runs between them by selecting the desired run(s) on the
Runs tab and choosing
Edit > Move to Folder. This option is only shown when Folders are in use.
Learn more in the
Sample Manager documentation for moving data between folders.
Delete Assay Results
Specific results rows within a run can be deleted from either the grid for a specific run, or for the results page for the assay as a whole. If you want to delete an entire assay run, learn how in this topic:
Biologics: Upload Assay Data.
From the results grid, select the rows to delete and select
Edit > Delete.
You will be reminded that deletion of rows is permanent and cannot be undone. You can enter a comment about the
Reason(s) for deleting that will be audited. Click
Yes, Delete in in the popup to actually delete the results.
Work with Samples Associated with Assay Data
When your assay data is
linked to samples, you can select a desired set of rows and then use the
Samples menu to work with the set of samples mapped to those results.
- Jobs:
- Picklists:
- Reports:
Assay Quality Control
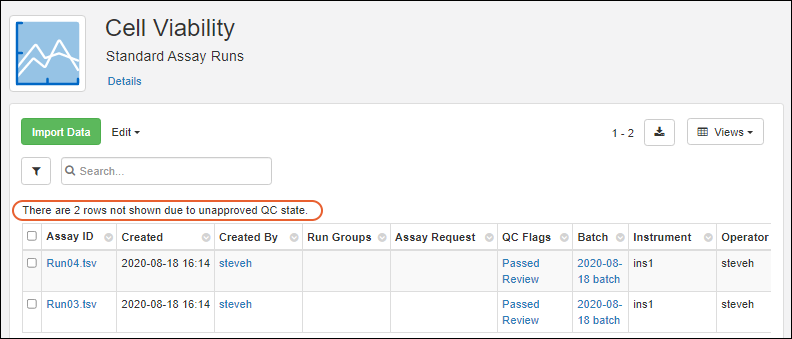
Visibility of assay data in Biologics can be controlled by setting quality control states. While an admin can edit assay designs to use QC states within the Biologics application, the actual states themselves cannot be configured in the application.
Set Up QC States (Admin)
To configure states, an admin must:
- Open the Assay Design where you want to use QC. Select > Edit Design.
- Confirm that the QC States checkbox is checked. If not, check it and click Finish Updating [Assay Design Name].
- Use > LabKey Server > [current Biologics folder name] to switch interfaces.
- Configure the available QC states in the system, using this topic: Assay QC States: Admin Guide.
- Select (Admin) > Manage Assays.
- Click the name of your assay design.
- Select QC State > Manage states.
- Define the states you want to use.
- Once complete, use > LabKey Biologics > [current Biologics folder name] to return to Biologics.
Use QC States (Users)
Once QC states have been configured in the system, users (with the appropriate roles) can assign those states to assay run data. Users can update QC states in the following cases:
- When a user has both Reader and QC Analyst roles
- When a user has either Folder-, Project-, or Site Administrator roles
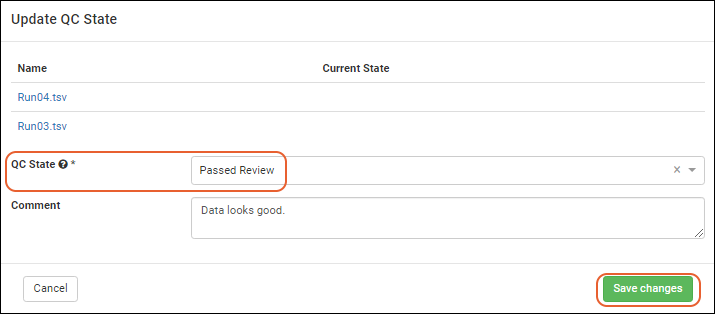
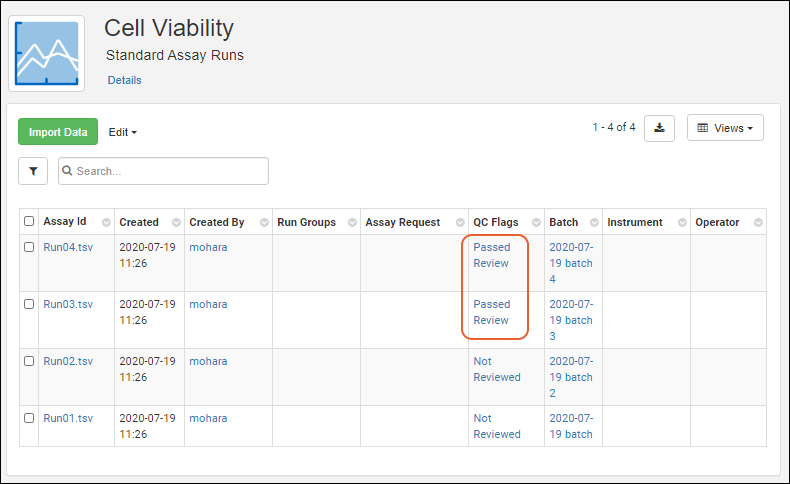
To assign QC states within the Biologics application:
Related Topics