This topic describes how to use the Biologics application to create new Registry Sources, i.e. members of any Registry Source Type, including cell lines, molecules, nucleotide sequences, expression systems, etc. Users creating these entities may specify a name, or have one generated for them using a naming pattern. Names can also be edited later. If desired, administrators may also hide the ability to specify or edit names.
Create Registry Sources in the User Interface
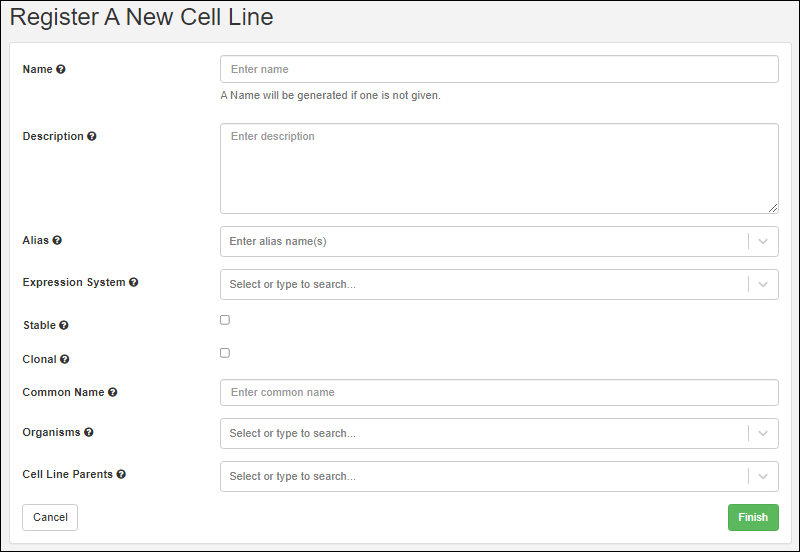
In this example, we show creation of a new cell line. Other kinds of sources will have different fields that compose them, and may also have additional tabs in the creation wizard. See specific documentation listed at the end of this topic.
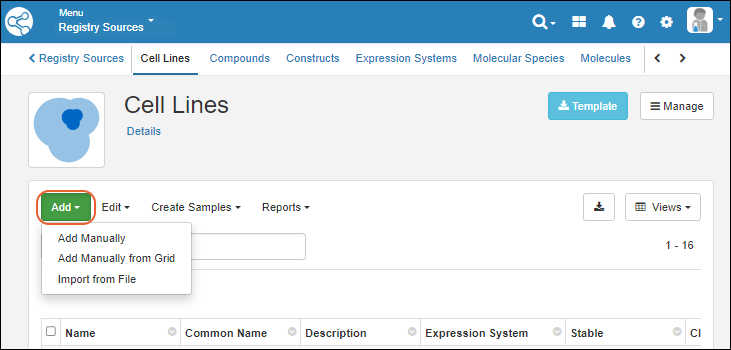
- From the main menu, click the type of registry source to create. Then use the Add > menu:

Add Manually
- Provide the details in the registration wizard:

- Name: Provide a short unique name, or leave this field blank to have one generated using the naming pattern for this Registry Source Type.
- Hover over the to see an example generated name.
- Description: Optional, but will be shown in the grids and can be a helpful way to illustrate the entity.
- Common Name: Every entity includes a field for the common name.
- Remaining fields: Required fields are marked with an asterisk.
- When the fields are completed, click Finish to create the new entity.
You can now return to the grid for this Registry Source Type (i.e. Cell Lines in this example) to find your new entity later.
Add Manually from Grid
Using the grid interface to create Registry Sources as described in
the Sample Manager documentation for Sources.
Note that this option not supported for all Registry Source Types. You will not see this option on the menu for Nucleotide Sequences, Protein Sequences, Molecules, Molecular Species, etc.
Create/Import Entities from File
For bulk registration of many entities, including registry sources, samples, assay result data, ingredients, and raw materials, you can make use of importing new data from file. Templates are available to assist you in reliably uploading your data in the expected format.
Learn more in
the Sample Manager documentation for importing Samples from file.
Update or Merge Registry Sources from File
To update data for existing Registry Sources from file, or to import a spreadsheet merging updates with creation of new Registry Sources, use
Edit > Update from File.
Learn more in
the Sample Manager documentation for updating Samples from file.
Entity Naming Patterns
If you do not provide a name, the naming pattern for the Registry Source Type will be used to generate one. Hover over the
to see the naming pattern in a tooltip, as well as an 'example name' using that pattern.

The default naming patterns in LabKey Biologics are:
| Registry Source Type | Default Naming Pattern |
|---|
| Cell Lines | CL-${genId} |
| Compounds | CMP-${genId} |
| Constructs | C-${genId} |
| Expression Systems | ES-${genId} |
| Molecular Species | MSp-${genId} |
| Molecule Sets | MS-${genId} |
| Molecules | M-${genId} |
| Nucleotide Sequences | NS-${genId} |
| Protein Sequences | PS-${genId} |
| Vectors | V-${genId} |
To change a naming pattern,
edit the Registry Source Type design and provide a different one.
Hide Name Entry/Edit Options
An administrator can hide the
Name field for insert, update, or both. When insert of names is hidden, they will be generated using the
naming pattern for the registry source type. When update of names is hidden, names remain static after entity creation.
This can be done:
As an example, you can hide the
Name field for cell lines for both insert and update
using this example.
Review Registry Source Details
Once created, you'll see a grid of all entities of the given type when you select it from the main menu.
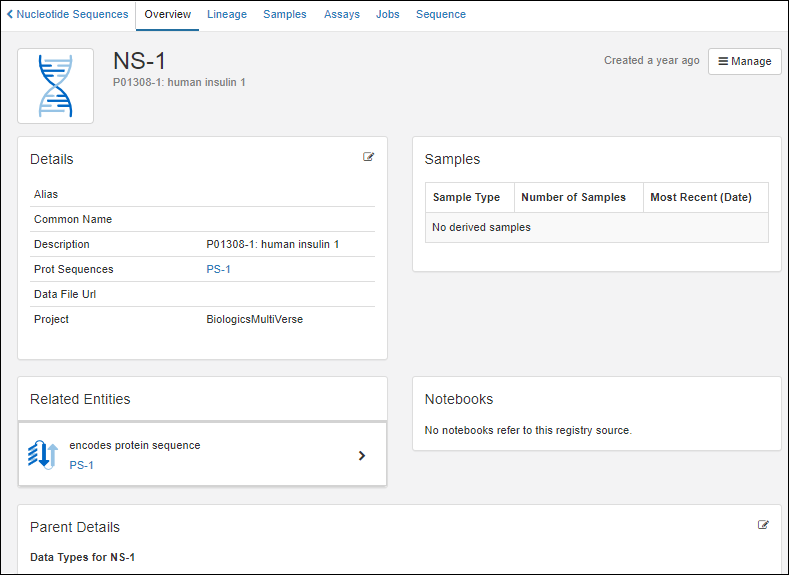
To see details for a specific Registry Source, click the name.

As for Sources in Sample Manager, tabs provide more detail. Learn more in
the Sample Manager documentation for Sources.
- Overview: Panels for details, samples, related entities (for built in Registry Source Types), notebooks, and parent sources.
- Lineage: See the lineage in graph or grid format.
- Samples: Contains a grid of all samples 'descended' from this source.
- Assays: See all assay data available for samples 'descended' from this source.
- Jobs: All jobs involving samples 'descended' from this source.
In Biologics LIMS, additional tabs may be included such as:
Related Topics