Plate Templates describe the layout of wells on the plate read by a given instrument. Each well can be associated with experimental groups describing what is being tested where and how the data read should be interpreted. Different instruments and experiments use different configurations of these groups.
Plate templates are used to describe the specifics of each layout for interpretation within an assay design. Using a custom plate template, you can create the precise match you need to describe your own exact configuration of wells and roles.
View Plate Template Options
- Select > Manage Assays (or click Manage Assays in the Assay List web part) to see the list of currently defined assays.
- Click Configure Plate Templates to open the Plate Templates page.

All plate templates currently defined (if any) are listed, along with the type and how many usages of each. For each, you can:
- Edit: Open this template in the plate template editor.
- Note that you cannot edit a template after it has been used to import data.
- Edit a copy: This option opens a copy of the template for editing, leaving the original unchanged.
- Copy to another folder: Click, then select the target folder.
- Delete: Only available if more than one template is defined. Once any templates are defined, you cannot delete all of them.
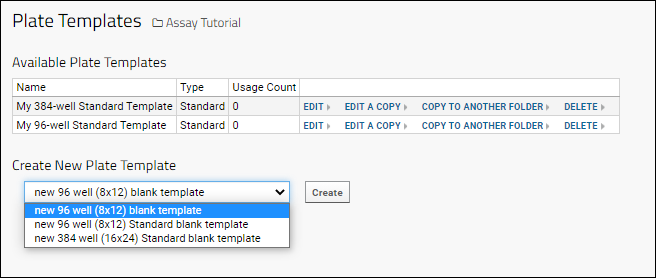
From the Plate Templates page you can also create a new template from any one of the available built-in types.
- Select the desired type from the dropdown below the currently defined templates.
- Click Create.
Premium Features AvailableSubscribers to premium editions of LabKey Server can use a variety of built-in Specialty Assays, some of which have corresponding custom plate templates to start from. Learn more here:
Learn more about premium editions
Plate Template Editor
The Plate Template editor lets you lay out the design of your experiment by associating plate wells with experimental groups. An individual cell might be associated with multiple groups of different types, such as different viruses applied to both controls and specimens. This walkthrough uses the 96-well Standard template as a representative example with some predefined groups.
Each tab in the plate template editor can define a different set of groups, properties, and layouts to meet your experiment needs.
When you wish to save your changes, you can click
Save and continue to edit. When you have finished editing, click
Save & Close to exit the template editor.
Create a Plate Template
- Select > Manage Assays.
- Click Configure Plate Templates.
- Select "New 96 Well (8x12) Standard blank template" from the dropdown.
- Click Create.
- Enter a unique Template Name. This is required even if you make no changes to the default layout.
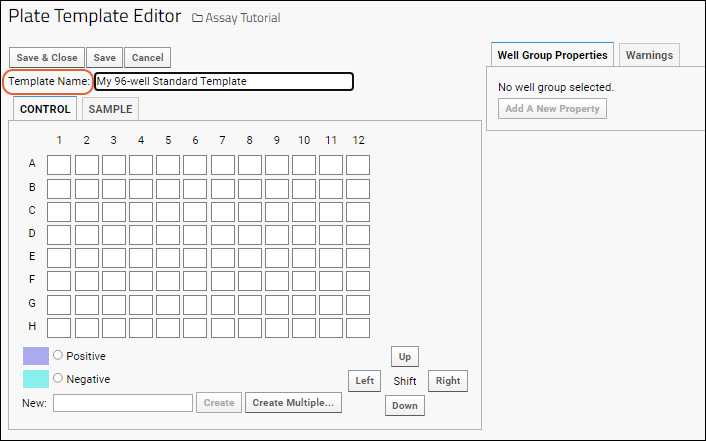
- Click Save and complete the template as described below.
Use Well Groups
Plate templates can have multiple tabs for different "layers" on the plate, or aspects of your layout. Shown in the Standard example here are Control and Sample. In premium editions,
some Specialty plate templates have additional layers.
Below the grid, you will see any
well groups defined. Color coding distinguishes them on the layout. Colors are assigned arbitrarily and will be unique for every group in a template but cannot be individually set or changed.
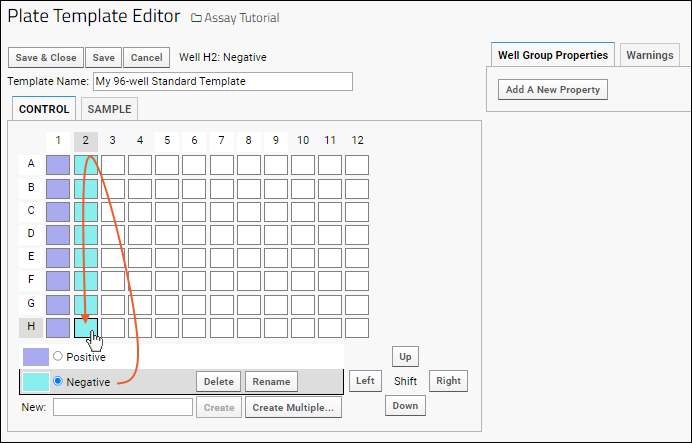
- On the Control tab of the Standard blank template, you have predefined well groups for "Positive" and "Negative" controls.
- You could add additional control well groups following the steps below.
- Select one of these well-groups and click (or "paint" by dragging) to identify the wells where those controls will be on your plate.
- Shown here we have column 1 as the Negative control and column 2 as the Positive control.
Create and Edit Well Groups
On the
Sample tab, there are no predefined well groups for the Standard blank template.
Add additional groups by entering a group name in the
New box and clicking
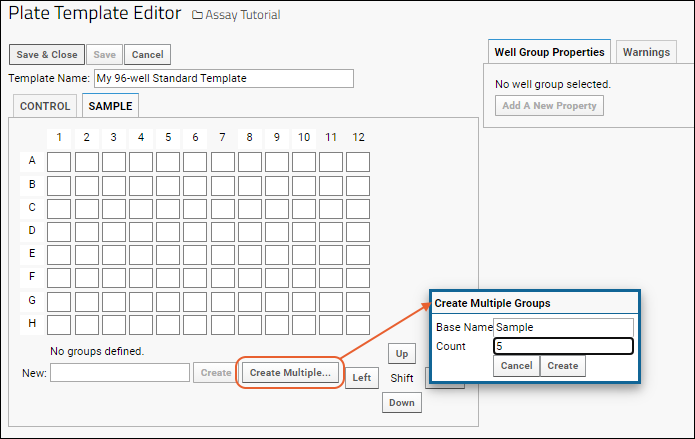
Create. For example, you might want to have 5 different samples tested on each plate. You can add each group individually:
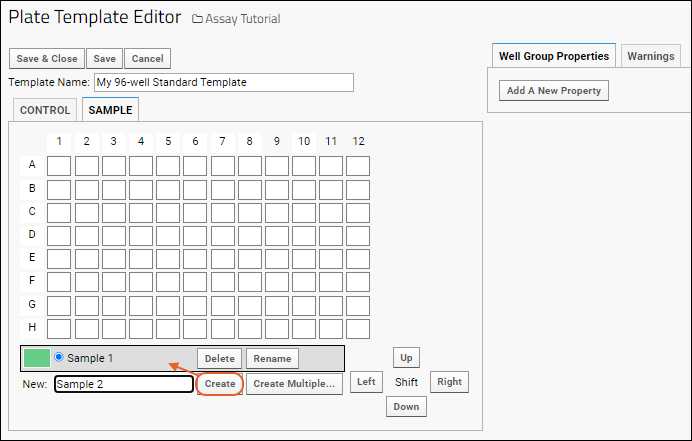
Or add multiple groups at once by clicking
Create Multiple.... You can create as many groups as you like sharing a common name root. In this example, 5 "Sample" groups are created:
 Select any well group
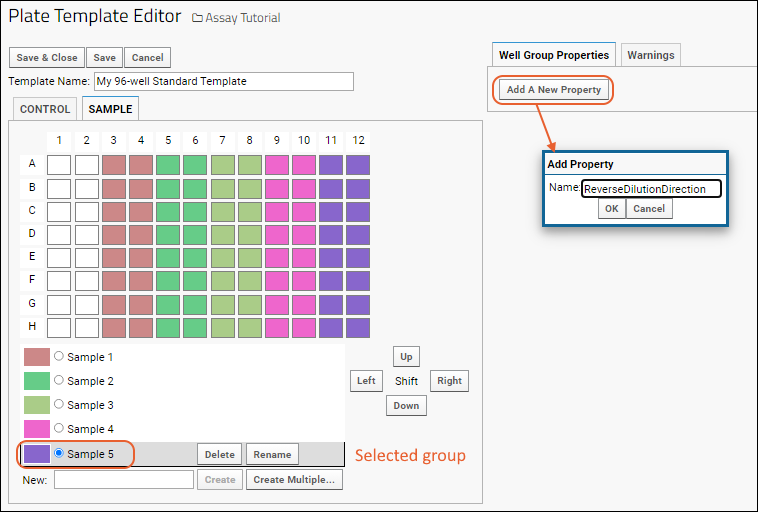
 by clicking the name below the grid. Once a group is selected you can:
The
Up, Down, Left, and Right buttons can be used to shift the entire layout if desired.
Define and Use Well Group Properties
In the section on the right, click the
Well Group Properties tab to see any currently defined properties for this group. You can enter a value, use the
to delete, or click to
Add a new property.
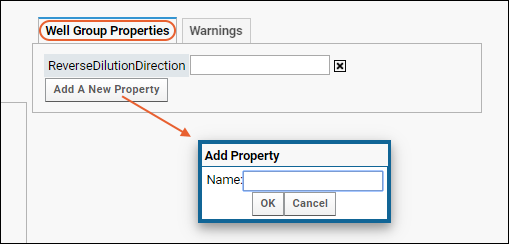
For example, some assays assume that samples get more dilute as you move up or left across the plate, others reverse this direction. Adding a well group property named 'ReverseDilutionDirection' will support controlling this default behavior. Enter the value 'true' to reverse this default behavior for a given well group.
View Warnings
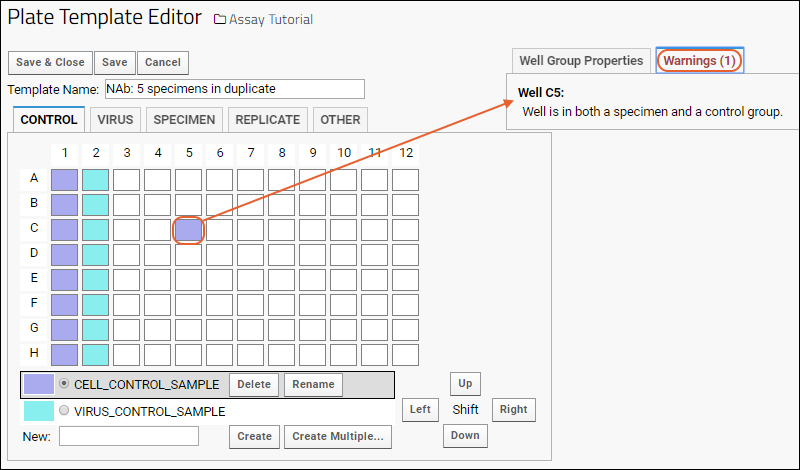
If any
Warnings exist, for example, if you identify a single well as belonging to both a sample and control group, the tab label will be red with an indication of how many warnings exist. Click the tab to see the warnings.
Related Topics