×
We value your feedback! Please click here to access our 2024 Client Survey.
The survey will remain open until November 1st. Your perspective will help guide our product/service planning and goals for the upcoming year and beyond!

Enterprise Master Patient Index Integration

Documentation
Premium Feature — Available in the Professional and Enterprise Editions of LabKey Server. Also available as an Add-on to the Starter Edition. Learn more or contact LabKey.

Premium edition subscribers can integrate with the OpenEMPI (Enterprise Master Patient Index), using EMPI IDs to create an authoritative connection between LabKey-housed data and a patient's master index record. A master patient index is useful in cases where multiple studies across different organizations may recruit the same patients and duplicate tests and procedures can be avoided when data is shared between them.

Configure EMPI Integration

You must first have OpenEMPI running, and the administrator configuring LabKey Server must have a login credential.

  • Select (Admin) > Site > Admin Console.
  • Under Premium Features, click Master Patient Index.
    • If your edition of LabKey does not support this feature, you will see a message about upgrading instead of the following interface.
  • Select the Type of master patient index. At present, only OpenEMPI is supported.
  • Enter the Server URL, then the User and Password credential to access OpenEMPI at that URL.
  • Click Test Connection. If you don't see the message "Connection succeeded", try logging directly into the OpenEMPI server, then retry with corrected credential information.
  • When the connection tests successfully, click Save.

Patient-Identifying Fields

OpenEMPI uses matching algorithms to identify duplicate patients. Specific patient-identifying fields are defined by an administrator for use in making these matches. If data is missing for any field, no match is made. To see the fields the OpenEMPI server is expecting, log in to OpenEMPI and select Matching > Matching Configuration.

Shown are the field names defined in OpenEMPI and used for matching. The match threshold is a way of catching "near" but nonidentical matches, such as due to spelling or formatting differences. Shown above, some fields only need an 86% match to be considered a participant match.

The dataset or query containing patient data within LabKey must have at least the fields shown in the OpenEMPI matching configuration. Further, the field names must match exactly (including case) with the field names defined in the OpenEMPI entity model. To see the exact field names in OpenEMPI, select Edit > Edit Entity Model. Select the entity model and click Edit Entity. You will see the entity definition including the actual column names. Scroll to see more fields.

Note the entry in the Name column for each item in the matching configuration. Above, the 5 fields selected in the example configuration above are numbered and the actual column names circled.

Using Master Patient Index Information

Once OpenEMPI has been enabled on your server, a folder administrator can enable the functionality in a study and use it to match participants to global UIDs. There are two requirements:

1. You need to have a dataset or query containing the exact fields named in the OpenEMPI entity definition. Using a query over an existing dataset can allow you to add filtering. For example, you might only seek matches for recently modified rows or those where the UID field is NULL.

2. You also need to have a column of type "Text (String)" in a demographic dataset that will receive the UID sent back when OpenEMPI matching is complete.

It is possible to meet both requirements in the same demographic dataset, as shown in this sample, but you do not need to do so.

  • Navigate to your study folder.
  • On the Clinical and Assay Data tab:
    • Identify the dataset or query that contains the data that will be used for matching. Confirm that it contains the exact field IDs required by OpenEMPI.
    • Identify the dataset and field where the UID returned by a match will be placed.

  • Click the Manage tab.
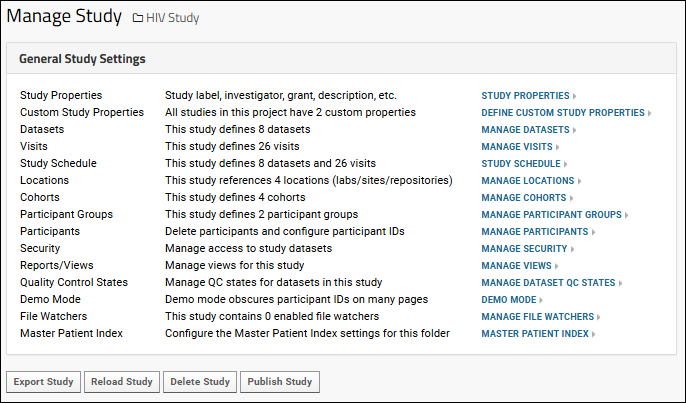
  • Click Master Patient Index. If your edition of LabKey does not support this feature, you will see a message about upgrading instead of the following interface.
  • The Study schema is selected by default.
  • Select the Query that contains the fields to be used for matching.
  • Select the UID Dataset. The dropdown will list all demographic datasets in the selected schema.
  • Select the UID Field within that dataset. The dropdown will list all the String fields in the UID dataset selected.
  • Check Enabled.
  • Click Save.

  • Click Master Patient Index again. The configuration information is shown.
  • Click Update Patient Identifiers.
  • The process of querying for matches will run in the pipeline. You can click the message shown in the pipeline log ("Processing", "COMPLETE", or "ERROR") to see details of the job, including which records found matches and information about any errors.


  • Click the Clinical and Assay Data tab and open the dataset you specified to receive the UIDs. The UID column you specified has now been populated.
  • Use data in this column to filter for matching participants across studies in LabKey.

Related Topics

Was this content helpful?

Log in or register an account to provide feedback


previousnext
 
expand allcollapse all