In this first step, we set up a folder to work in, learn to create lists, then import a set of lists to save time.
Set Up
- Log in to your server and navigate to your "Tutorials" project. Create it if necessary.
- If you don't already have a server to work on where you can create projects, start here.
- If you don't know how to create projects and folders, review this topic.
- Create a new subfolder named "List Tutorial". Accept all defaults.
Create a New List
When you create a new list, you define the properties and structure of your table.
- In the Lists web part, click Manage Lists.
- Click Create New List.
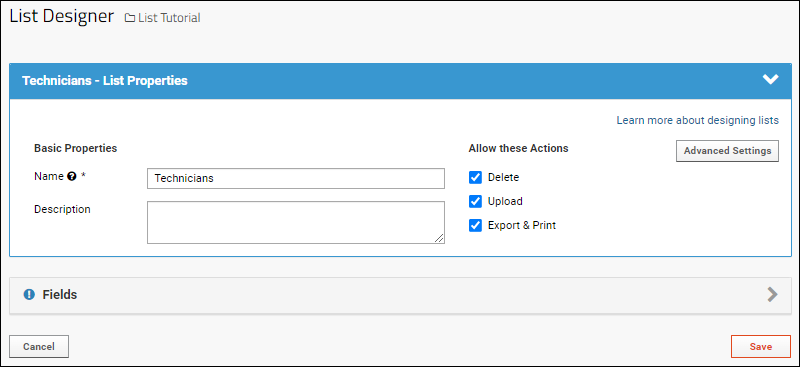
- In the List Properties panel, name the list "Technicians".
- Under Allow these Actions, notice that Delete, Upload, Export & Print are all allowed by default.
- You could adjust things like how your list would be indexed on the Advanced Settings popup. Leave these settings at their defaults for now.

- You'll see the set of fields that define the columns in your list.
- In the blue banner, you must select a field to use as the primary key. Using the name could be non-unique, and even badge numbers might be reassigned, so select Auto integer key from the dropdown and notice that a "Key" field is added to your list.

- Click Save.
- You'll see the empty "frame" for your new list with column names but "No data to show."
- Now the "Technicians" list will appear in the Lists web part when you return to the main folder page.
Populate a List
You can populate a list one row at a time or in bulk by importing a file (or copying and pasting the data).
- If you returned to the List Tutorial main page, click the Technicians list name to reopen the empty frame.
- Click (Insert data) and select Insert new row.
- Enter your own name, make up a "Department" and use any number as your badge number.
- Click Submit.
- Your list now has one row.
- Download this file: Technicians.xls
- Click (Insert data) and select Import bulk data.
- Click the Upload file panel to open it, then click Browse (or Choose File) and choose the "Technicians.xls" file you downloaded.
- Alternately, you could open the file and copy paste the contents (including the headers) into the copy/paste text panel instead.
- Click Submit.
You will now see a list of some "Technicians" with their department names. Before we continue, let's add a few more lists to the folder using a different list creation option below.
Import a List Archive
A list archive can be exported from existing LabKey lists in a folder, or manually constructed following the format. It provides a bulk method for creating and populating sets of lists.
- Click here to download the Tutorial.lists.zip archive. Do not unzip it.
- Select > Manage Lists.
- Click Import List Archive.
- Click Choose File and select Tutorial.lists.zip from where you downloaded it.
- Click Import List Archive.
Now you will see several additional lists have been added to your folder. Click the names to review, and continue the tutorial using this set of lists.
Related Topics