A Sample Type is a group of samples accompanied by a suite of properties that describe shared characteristics of all samples in the group. Users must have administrator permissions (the Folder Admin role, or higher) to create new Sample Types or edit existing Sample Type designs.
Before you create a new Sample Type, consider how you will provide or generate unique Sample IDs. For options, see
Sample Naming Patterns.
Decide also where you want the Sample Type to be available. If you define it in a given folder, it will be available only in that folder. Defined in a project, you will be able to add samples to it from the project itself and all subfolders of that project. If you
define it in the Shared project, it will be available site-wide.
Create A New Sample Type
Sample Properties
Enter:
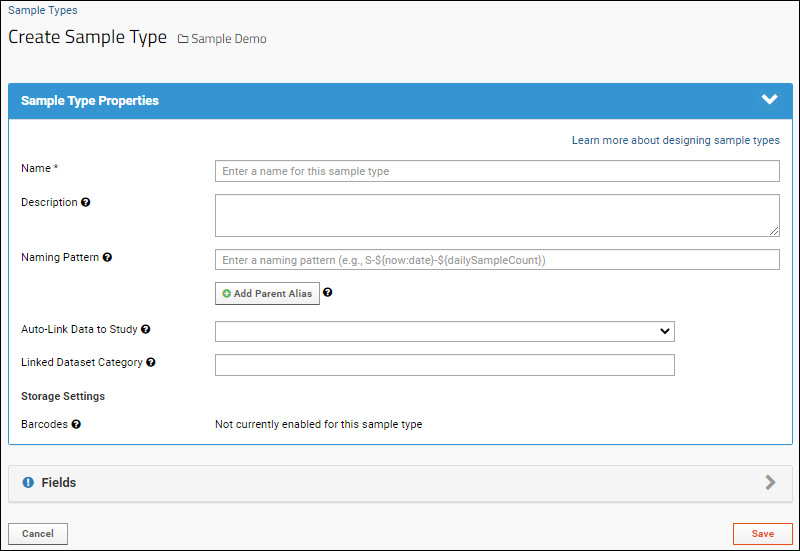
- Name: (Required) This is the name for the Sample Type itself, not to be confused with a "Name" column within the Sample Type for unique names for the Samples.
- The name must be unique, must start with a letter or number character, and cannot contain special characters or some reserved substrings listed here.
- Description: Optional description of the Sample Type itself. This is not to be confused with the "Description" column also available in the sample data.
- Naming Pattern: Every sample must have a unique name/id within the Sample Type. You can either provide these yourself in a "Name" column in your data, or ask the server to generate them using a naming pattern provided here. If you are providing names, leave the naming pattern field blank and ignore the placeholder text. Learn more about the options in the topic Sample Naming Patterns.
- Add Parent Alias: (Optional) If your imported data will include lineage/parentage information for your samples, provide the column name and Sample Type here. Learn more in this topic: Sample Parents: Derivation and Lineage.
- Auto-link Data to Study: (Optional) Select a study to which the data in this Sample Type should be linked. Learn more in this topic: Link Sample Data to Study.
- Linked Dataset Category: (Optional) Specify the desired category for the Sample Dataset that will be created (or appended to) in a target study when rows are linked. Learn more here: Manage Categories.
- Barcodes: (Optional) To enable auto-generation of barcodes for these samples, you will add a field of type Unique ID in the Fields section. Learn more in this topic: Barcode Fields.

Sample Fields
Default System Fields
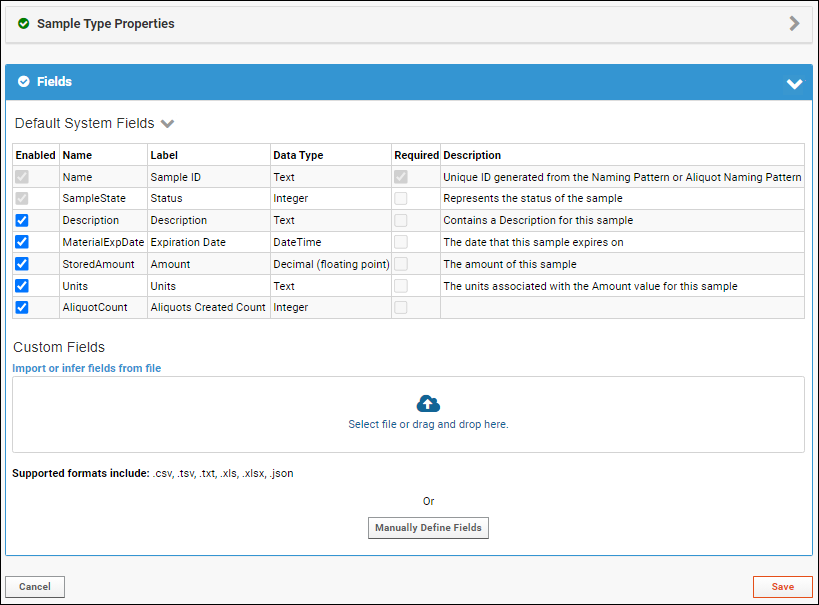
Every Sample Type includes
Default System Fields, including:
- Name: Unique ID provided or generated from a naming pattern
- SampleState: Represents the status of the sample
- Description: Contains a description for this sample
- MaterialExpDate (Expiration Date): The date this sample expires on. Learn more about using Expiration Dates in the Sample Manager Documentation
- StoredAmount (Amount): The amount of this sample
- Units: The units associated with the Amount value for this sample
- AliquotCount (Aliquots Created Count)
Learn more about providing the Storage Amount and Units at the time of Sample creation in this topic:
Provide Sample Amount and Units
- Click the Fields panel to open it.
- The Default System Fields are shown in a collapsible panel.
- You can use the Enabled checkboxes to control whether to use or hide eligible system fields. "Name" and "SampleState" are always enabled.
- Use the Required checkbox if you want to make one of these fields required. By default only "Name" is required.

- Click the to collapse the default fields section.
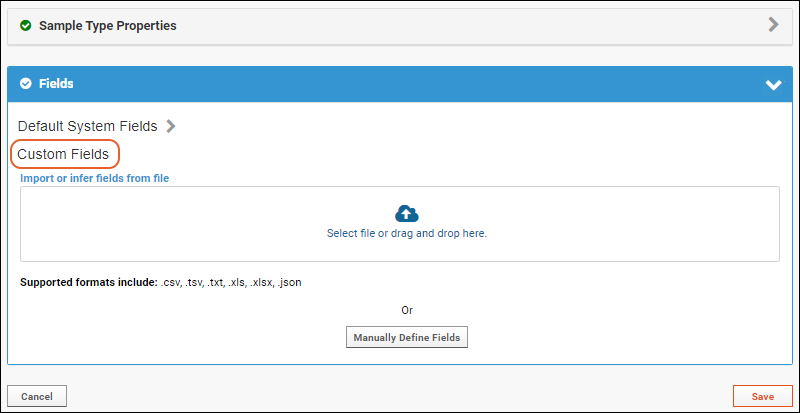
Custom Fields
To add additional custom fields, you have several options:
- Import or infer fields from file: Select or drag and drop a file into the panel.

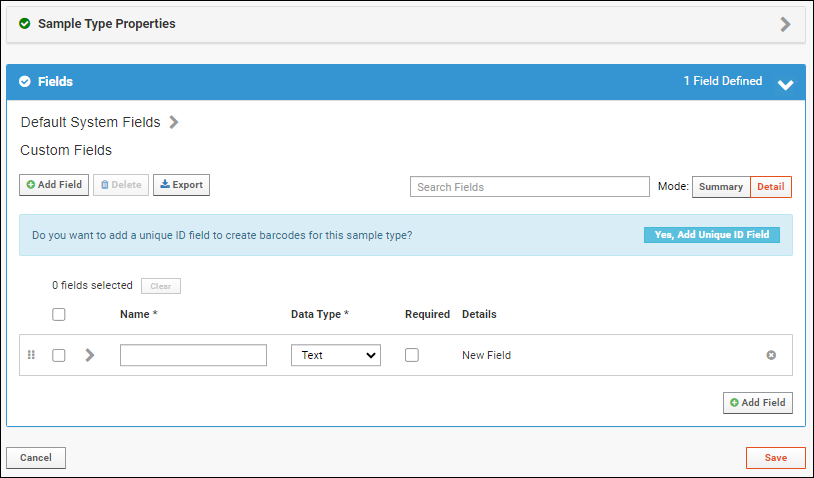
- If you prefer (or don't have a file to use here), click Manually Define Fields.
- You will also have the option to add more fields after importing or inferring.
- Click Add Field for each additional field you need.
- Learn more about adding and editing fields in this topic: Field Editor
- Learn more about integrating Samples and Study data with Subject/Participant, VisitID, and VisitDate fields in this topic: Link Sample Data to Study
- Learn more about generating barcodes using Unique ID fields in this topic: Barcode Fields

- Click Save when finished.
You will now see your sample type listed in the
Sample Types web part.
Related Topics