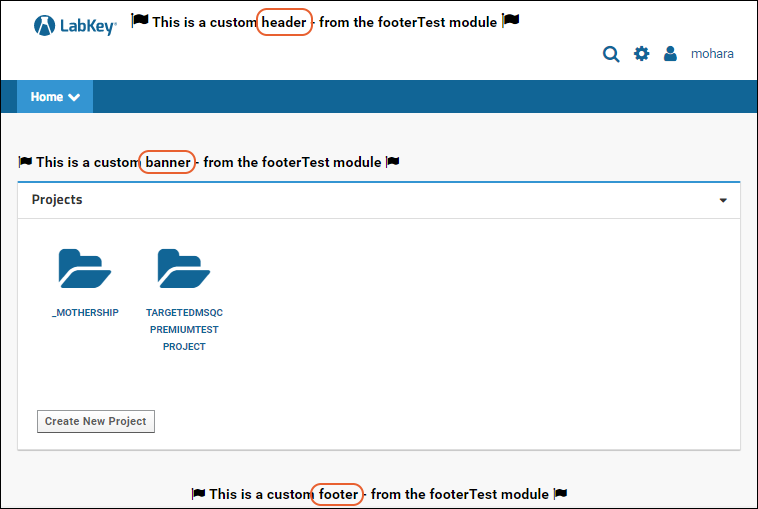
To customize the branding of your LabKey Server, you can use custom headers, banners, and footers to change the look and offer additional options. Each of these elements can be applied site-wide or on a per-project basis. They can also be suppressed, including the default "Powered by LabKey" footer present on all pages in the Community Edition of LabKey Server.
Page Elements
The elements on the page available for customization are the header, banner area, and footer. There are no default headers or banners, but the default footer reads "Powered by LabKey" and links to labkey.com.

An administrator can customize these page elements sitewide via the Admin Console or on a per project basis via project settings. By default, projects inherit the site setting.
Edit page elements site-wide:
- Select > Site > Admin Console.
- Under Premium Features, click Configure Page Elements.
Edit page elements for a project:
- Select > Folder > Project Settings.
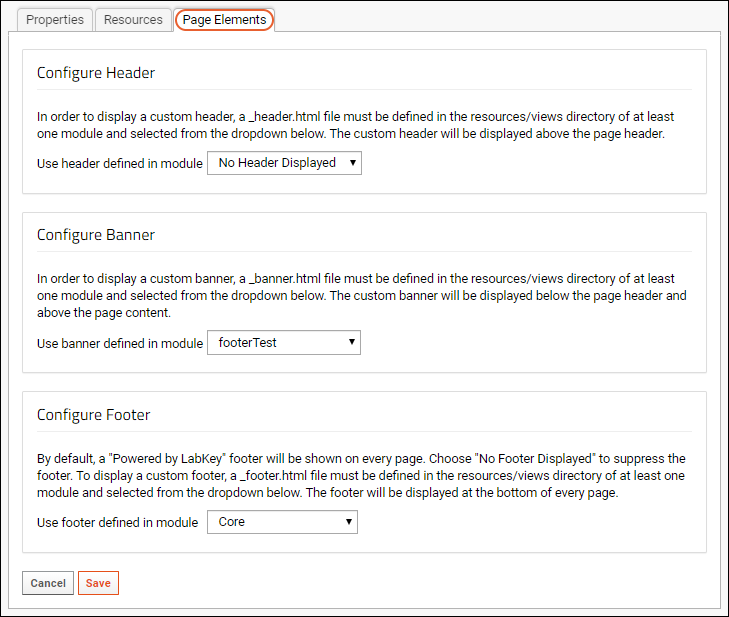
- Click the Page Elements tab.

Define Custom Page Elements
A custom page element is written in HTML and placed in the resources/views directory of a module deployed on your server. Details about defining and deploying custom elements, as well as simple examples, can be found in the developer documentation:
Configure Header
- On the Page Elements tab, use the dropdown to configure the header. Options listed will include:
- Inherit from site settings ([Site setting shown here]): Shown only at the project-level. This is the default for projects.
- No Header Displayed: Suppress any header that is defined.
- [moduleNames]: Any module including a resources/views/_header.html file will be listed.

Configure Banner
When you use a custom banner, it replaces the page title (typically the folder name) between the menu bar and your page contents web parts. Banners can be used site wide, or within a given project. In the project case, you have the option to use the banner throughout all child folder or only in the project folder itself.
- On the Page Elements panel, use the dropdown to configure the banner. Options listed will include:
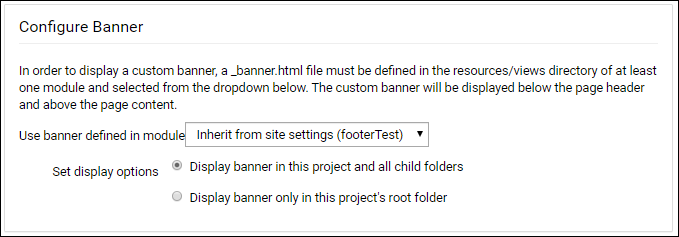
- Inherit from site settings ([Site setting shown here]): Shown only at the project-level. This is the default for projects.
- No Banner Displayed: Suppress any banner that is defined. This is the site default.
- [moduleNames]: Any module including a resources/views/_banner.html file will be listed in this example, a module named "footerTest" has a custom header defined within it.
- Set Display Options: Use the radio buttons to specify one of the options:
- Display banner in this project and all child folders
- Display banner only in this project's root folder.

Configure Footer
By default, every page on LabKey Server displays a footer "Powered By LabKey". An administrator can replace it with a custom footer or remove it entirely.
- On the Page Elements tab, use the dropdown to configure the footer. Options listed will include:
- Inherit from site settings ([Site setting shown here]): Shown only at the project-level. This is the default for projects.
- No Footer Displayed: Do not show any footer.
- Core: Use the default "Powered by LabKey" footer.
- [moduleNames]: Any module including a resources/views/_footer.html file will be listed.

Related Topics

