LabKey Server's
provenance module is available with Premium Editions of LabKey Server, but is not currently included in all distributions. Please
contact LabKey to inquire about obtaining and using the Run Builder feature described here.
Overview
The run builder captures experiment processes by linking together 1) a set of inputs, 2) a process or "run", and 3) a set of outputs. This user-friendly tool prompts the user for information about the run: the inputs (samples and/or files), metadata on the run that was performed, and the output (samples and/or files). Any combination of samples and files can be linked to a run, either as inputs or outputs, making this a flexible tool that can be applied to many use cases.
The run builder can be useful for capturing "at the bench" experimental information. For example, a lab technician might use the run builder to record that a process has happened, where samples were the input and files were the output. The run builder lets you form relationships between individual input samples/files (or any other LSID record) with individual outputs. In the run depicted below, a blood sample is the input to the experiment and two CSV files form the output:
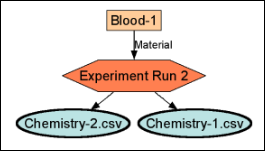
Samples and files may be selected from those already loaded onto the server, or created during the run building process. Run inputs and outputs create lineage/parentage relationships, which are reflected in the lineage views as parents (inputs) and children (outputs).
Once they are related within a run, the files and samples cannot be deleted without first deleting the run.
Note that the "runs" referred to here are experiment runs, not be confused with Assay runs.
Enable Run Builder
To enable the run builder, you must enable both the
provenance and
experiment modules within the container where you plan to use it.
- Select > Folder > Management.
- Click the Folder Type tab.
- Check the boxes for Experiment and Provenance.
- Click Update Folder.
Create Runs
You can use the Run Builder to create runs from within the experiment module, from a sample grid, from the file browsers, or directly using the URL.
Access Run Builder from Experiment Runs
You can access the run builder from the
Experiment Runs menu bar. If your folder does not already include this web part,
add "Experiment Runs" to your page, or select
> Go To Module > Experiment.
Create Runs from Samples
Viewing the list of samples in a Sample Type, you can also select the desired samples and use
Create Run > Input Samples or Output Samples depending on how you want the samples included in the run you build:
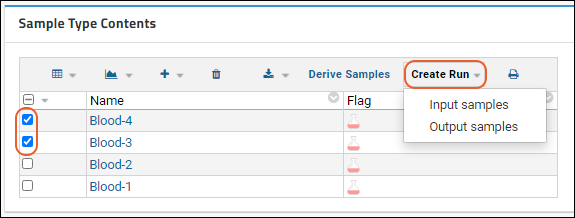
When the run builder opens, it will be prepopulated with the samples you selected, in either the Inputs or Outputs section. You can add additional samples and files before saving the run.
Create Runs from Files
When the provenance module is enabled, the file browser includes a
Create Run button. Access it via the
Files web part or
> Go To Module > FileContent.
Select the file of interest using the checkbox and click
Create Run. In the popup, select either
Inputs or Outputs depending on which section should include the chosen file(s). Click
Create Run.
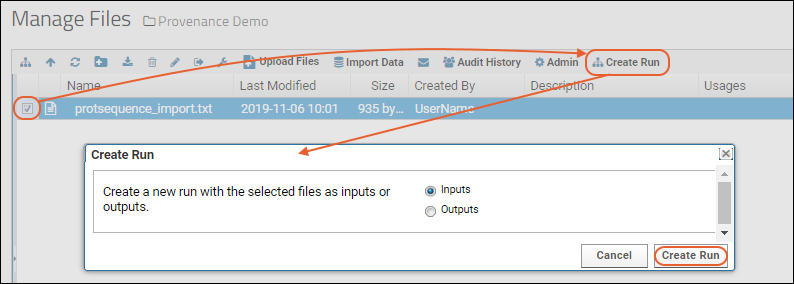
The run builder will open with the chosen files prepopulated in the selected section. You can add additional files and samples to the run before saving.
Access Run Builder via URL
The run builder can also be accessed directly via the URL. Navigate to the desired container and replace the end of the URL with:
provenance-runBuilder.view?
Define Properties
In the
Properties section, give your run a name, enter a description, and add any
Vocabulary Properties with values that you need. These values will be applied to the run as a whole, not to individual inputs or outputs.
Under
Inputs and
Outputs,
add the samples and files required.
You can
Save while building the run, and click
Save & Finish when finished.

Add Samples
To add samples, either to the
Inputs or
Outputs section of the run builder, click the
Add Samples button.
You can add samples in two ways:
- Use the Copy/Paste Samples tab to select samples by pasting a list of sample names into the box. Names can be separated by tabs, newlines, commas, or spaces. Clicking Add # Samples will add the samples to the run.
- Select Find Samples to choose samples from a grid, as shown below:
Select the sample type and the selection panel and grid below will populate.
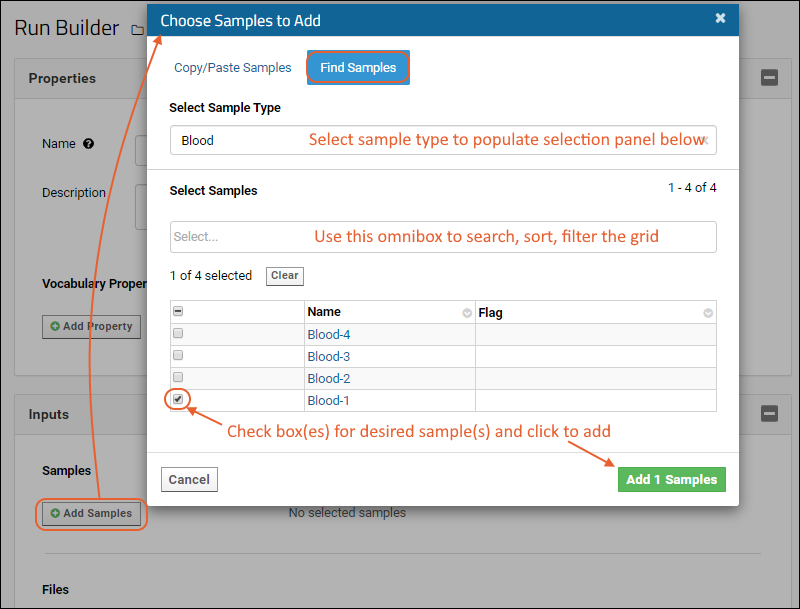
You can filter, sort, or search to locate the samples you want to include. Click in the box to use it to locate your samples of interest.
Check the boxes for the desired samples and click
Add Samples. The samples you added will now appear in a grid in the run builder:
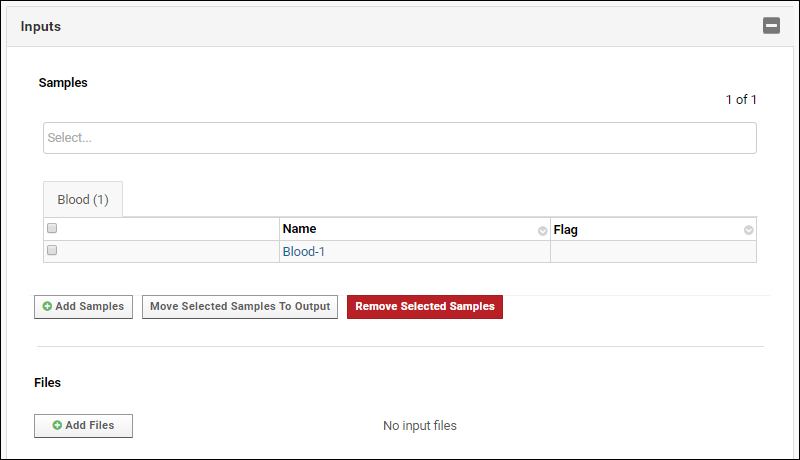
You can now click
Add Samples to add more,
Move Selected Samples to Output or if necessary, select and
Remove Selected Samples.
You can
Save work in progress while building the run, and click
Save & Finish when finished.
Add Files
Click
Add Files to choose files to add to either the input or output sections. Use the
File Select tab to browse the file root for files already uploaded. Use the checkboxes to select one or more files to add to the run you are building.
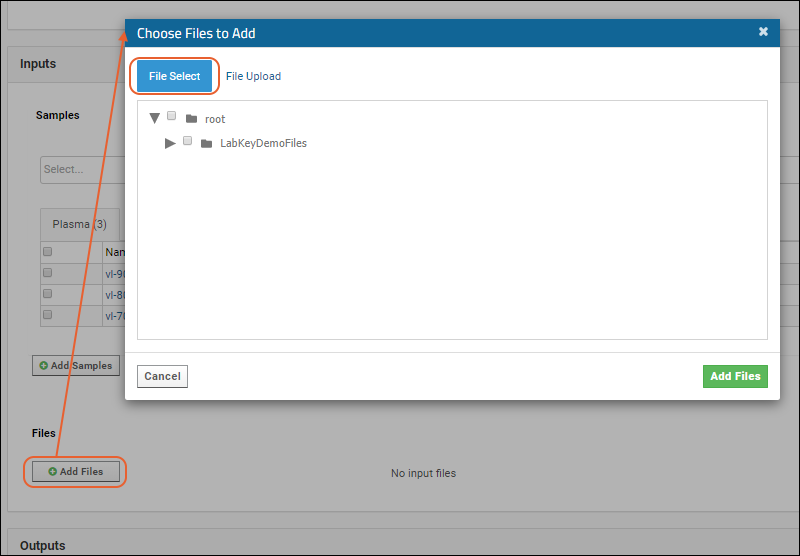
Click the
File Upload tab to switch to a drag-and-drop interface for uploading new files.
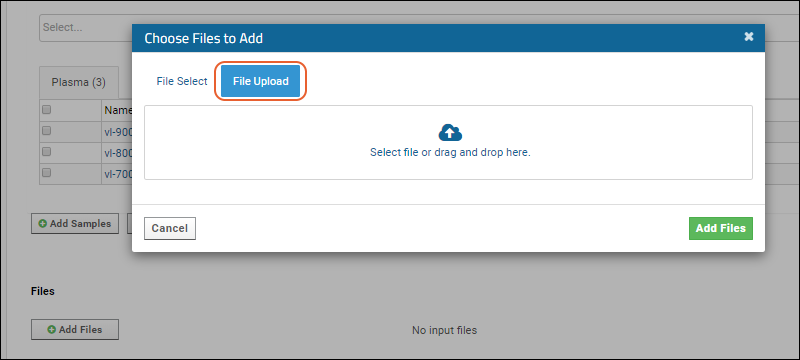
Click
Add Files when ready.

The files you've added will be listed, each with a
for deleting. Click
Add Files to add more as needed.
You can
Save work in progress while building the run, and click
Save & Finish when finished.
Experiment Runs Web Part
Runs created by the run builder are available on the
Experiment Runs web part. Click the name to see run details; click the graph icon to the left of the run name to go directly to the lineage graph for this run. Learn more in this topic:

Edit Run
To edit a run, you can reopen the Run Builder interface by clicking
Edit Run from the run details page.
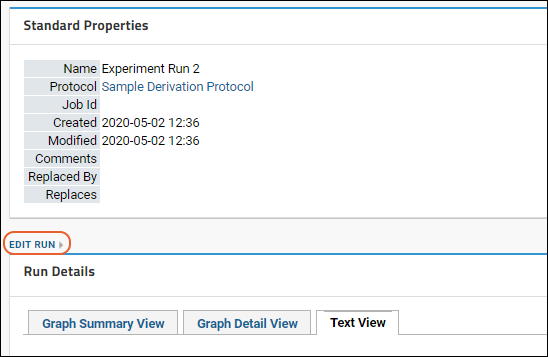
Make the necessary changes and click
Save & Finish.
Related Topics
 Samples and files may be selected from those already loaded onto the server, or created during the run building process. Run inputs and outputs create lineage/parentage relationships, which are reflected in the lineage views as parents (inputs) and children (outputs).Once they are related within a run, the files and samples cannot be deleted without first deleting the run.Note that the "runs" referred to here are experiment runs, not be confused with Assay runs.
 Proceed to define properties, inputs, and outputs for your run.

