Premium Feature — Available with LabKey Biologics LIMS. Learn more or contact LabKey.

Assay data is captured in LabKey Biologics using Assay Designs. Each Assay Design includes fields for capturing experimental results and metadata about them. Once a design has been created, many runs of data matching that format can be imported with the same design. This topic describes how administrators create and manage the Assay Designs available in the system.

Overview

Each field has a name and data type. For example, the following Assay Design captures data from a Titration experiment.

SampleIDExpression RunSampleDateInjVolVialCal CurveIDDilutionResultIDMAb
2016_01_22-C3-12-B9-01ER-0052016-01-23302:A,19461881.0000478360.2000
2016_04_21-C7-73-B6-02ER-0052016-04-22302:B,19461881.0000478350.2300
2015_07_12-C5-39-B4-02ER-0042015-07-13302:C,19461881.0000478340.3000

The fields in an Assay Design are grouped into categories:

  • Run Fields: These are metadata fields that apply to one complete cycle of the experimental instrument or procedure. Example run-level metadata fields might be: Operator (the lab technician who executed the experiment) or Instrument (the name of the lab instrument in which the experiment was performed).
  • Results (Data) Fields: These fields capture the main results of your experiment, for example, see above.
  • Other Categories: In some cases, there will be additional sets, such as Cell- or Analyte-level fields.

Assay Dashboard

Under Assays on the main menu, you will see a listing of designs already created in your system. Click Assays to open the dashboard.

The dashboard lists the assay design names and types. If your server includes any shared assays, you will also see them listed here. To create a shared or project scoped assay design, use the LabKey Server interface.

Click the name of an existing design to see the assay properties and a grid of runs imported using it. Use the Manage menu to:

  • Edit Assay Design
  • Copy Assay Design
  • Export Assay Design
  • Delete Assay Design
  • View Audit History

Create a New Assay Design

To create a new assay design in LabKey Biologics, follow this process. Make sure to start from the container where you want to define the assay.

  • From the main menu, click Assays, then click Create Assay Design.
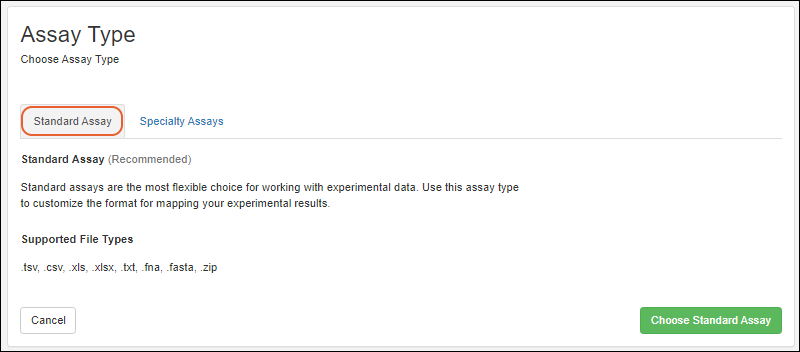
  • Select the Assay Type. For most cases, leave the Standard Assay tab selected.
  • Click Choose Standard Assay.
  • In the Standard Assay Designer, enter Basic Properties:
    • Name: this should reflect something about the nature of the assay and what is primarily being measured, for example, "Titer", "Immune Score", or "Cell Properties". This name must be unique.
    • Active: When this box is unchecked, the design is archived and hidden in certain views.
    • Other fields are described in more detail in tooltips and in the topic: Assay Design Properties.
  • Click to open the Run Fields panel. Add run-level metadata fields as desired.
  • Click to open the Results Fields panel.
    • If there are no result fields defined yet, you will have the options to infer them from an example data spreadsheet (the supported formats are listed), import a prepared JSON file as for run fields, or click Manually Define Fields and add them individually.
  • Click Add Field to add new fields. Provide their Name and Data Type.
  • Keep adding fields until your data can be adequately captured.
  • To create a link between the assay data and the original samples, we recommend adding a SampleID field of type "Sample". See below for details.
  • Click Save.

Linking Assay Data to Samples

To link assay data to the originating samples, you can add a field with the data type Sample to your assay design.

  • In your Assay Design, add a field, typically in the Run or Results Fields section. This field can be of any name, such as SampleID or SpecimenID. Use whatever name best matches your result data.
  • In the Data Type column, choose the field type Sample.
  • Expand the field details.
  • Under Sample Options, select the desired Sample Type.
  • To link to all samples across any Sample Type, select All Samples from the "Sample lookup to" dropdown.
  • Click Finish Creating Assay Design to confirm the changes.
To learn about connecting assay results to other kinds of entities, review this topic: Biologics Admin: Assay Integration

Review or Edit Assay Design

To review the details or edit a design, select it from the main menu and select Manage > Edit Assay Design.

You will see all the fields and properties set up when the design was created.

  • If changes are needed, make them using the same method as for the creation of a new design.
  • You can change the assay name if necessary, though ensure that it remains unique. It is best to time such renaming for when there are unlikely to be other users importing data or viewing results, as they may encounter errors and need to refresh their browser to pick up the name change.
  • Click Finish Updating [Assay Name] to save changes.

Archive Assay Design

Assay Designs can be hidden from certain views by unchecking the Active checkbox in the Assay Properties. Archived, or inactive, designs are not shown on the main menu or available for new data entry through the Biologics application interface, but existing data is retained for reference. Note that you could still import new data for an archived assay in the LabKey Server interface if necessary.

Using the archive option can be helpful when a design evolves over time. Making the older versions "inactive" will ensure that users see the latest versions. An assay design may be reactivated at any time by returning to edit the design and checking the Active box again.

When viewing all assay data for a sample, both the active and archived assays will be shown if there is any data for that sample.

On the main Assays dashboard, you will be able to find inactive assays by switching to the All tab.

Related Topics

Was this content helpful?

Log in or register an account to provide feedback


previousnext
 
expand allcollapse all