You can interconnect lists with each other by constructing "lookups", then use those connections to present joined grids of data within the user interface.
Connect Lists with a Lookup
- Click the Technicians list from the Lists web part.
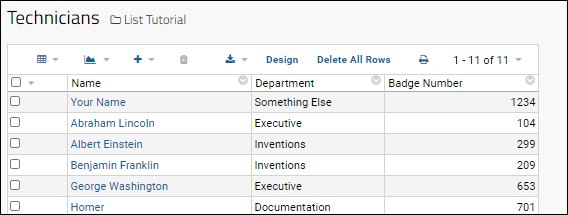
The grid shows the list of technicians and departments, including yourself. You can see the Department column displays a text name, but is currently unlinked. We can connect it to the "Departments" list uploaded in the archive. Don't worry that the department you typed is probably not on that list.
- Click Design to open the list design for editing.
- Click the Fields section to open it.
- For the Department field, click the Text selector and choose the Data Type Lookup.
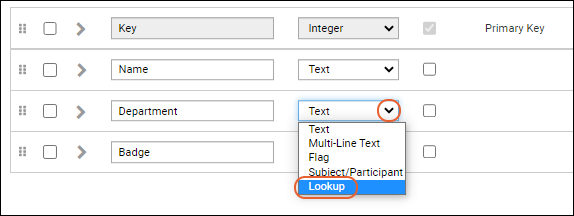
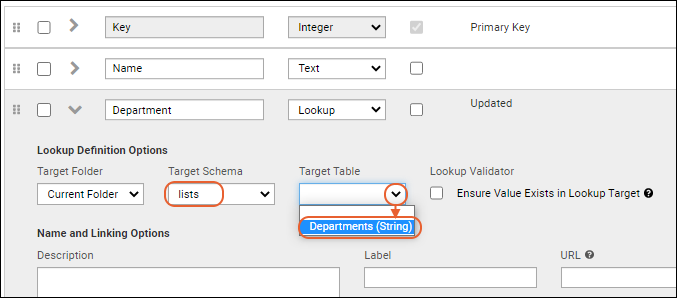
- The details panel for the field will expand. Under Lookup Definition Options:
- Leave the Target Folder set to the current folder.
- Set the Target Schema to "lists".
- On the Target Table dropdown, select "Departments (String)".
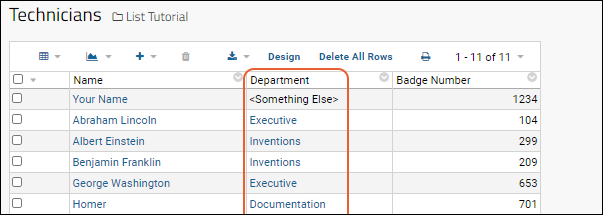
Now the list shows the values in the
Department column as links. If you entered something not on the list, it will not be linked, but instead be plain text surrounded by brackets.
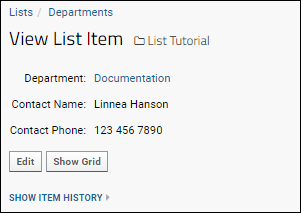
Click one of the links to see the "looked up" value from the Departments list. Here you will see the fields from the "Departments" list: The contact name and phone number.
You may have noticed that while there are several lists in this folder now, you did not see them all on the dropdown for setting the lookup target. The field was previously a "Text" type field, containing some text values, so only lists with a primary key of that "Text" type are eligible to be the target when we change it to be a lookup.
Create a Joined Grid
What if you want to present the details without your user having to click through? You can easily "join" these two lists as follows.
- Select > Manage Lists.
- Click Technicians.
- Select (Grid Views) > Customize Grid.
- In the Available Fields panel, notice the field Department now shows an (expansion) icon. Click it.
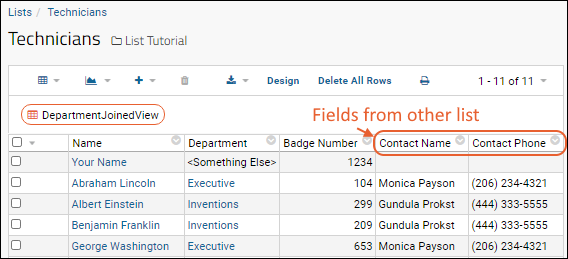
- Place checkmarks next to the Contact Name and Contact Phone fields (to add them to the Selected Fields panel).
- Click View Grid.
- Now you see two additional columns in the grid view.
- Above the grid, click Save.
- In the Save Custom Grid View popup menu, select Named and name this view DepartmentJoinedView.
- Click Save in the popup.
You can switch between the default view of the Technicians list and this new joined grid on the
(Grid Views) menu.
Use the Lookup to Assist Input
Another reason you might use a lookup field is to help your users enter data.
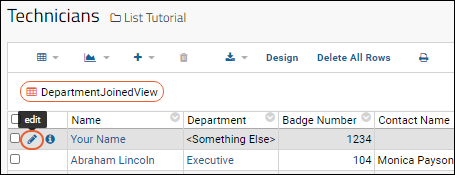
- Hover over the row you created first (with your own name).
- Click the (pencil) icon that will appear.
- Notice that instead of the original text box, the entry for "Department" is now done with a dropdown.
- You may also notice that you are only editing fields for the local list - while the grid showed contact fields from the department list, you cannot edit those here.
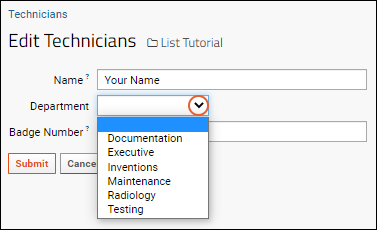
- Select a value and click Submit.
Now you will see the lookup also "brought along" the contact information to be shown in your row.
In the next step, we'll explore using the URL attribute of list fields to make more connections.

